2017 FIAT TIPO 5DOORS STATION WAGON steering
[x] Cancel search: steeringPage 89 of 264
LOAD LIMITERS
75)
36)
To increase safety in the event of an
accident, the front seat belt retractors
contain a load limiter which controls the
force acting on the chest and shoulders
during the belt restraining action in the
event of a head-on collision.
GENERAL
INSTRUCTIONS FOR
USING THE SEAT BELTS
76) 77) 78)
Seat belts must also be worn by
pregnant women: the risk of injury in the
event of an accident is reduced for
them and the unborn child if they are
wearing a seat belt.
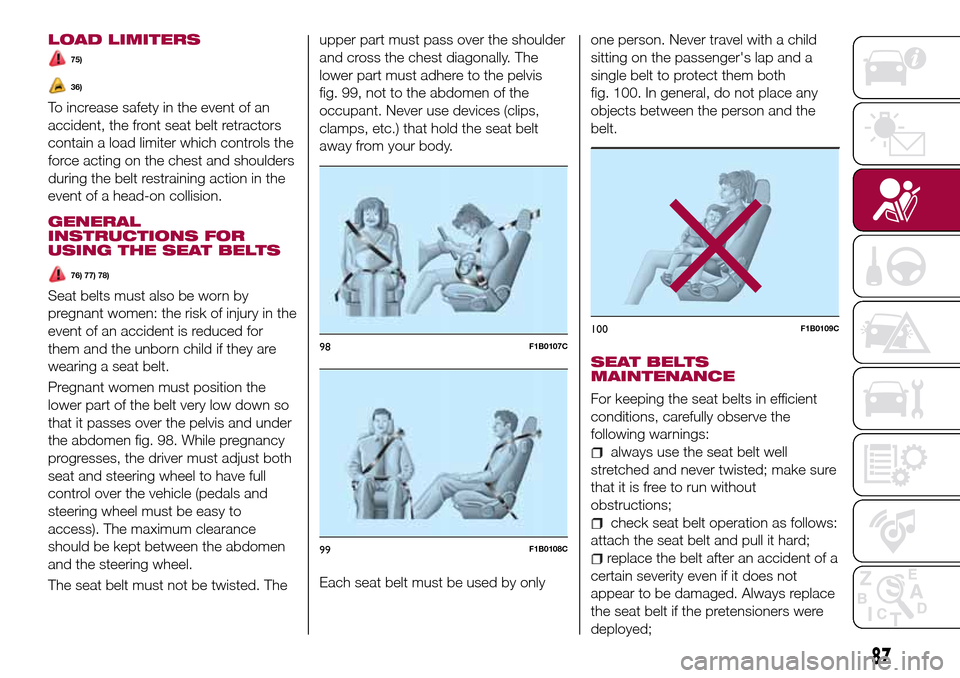
Pregnant women must position the
lower part of the belt very low down so
that it passes over the pelvis and under
the abdomen fig. 98. While pregnancy
progresses, the driver must adjust both
seat and steering wheel to have full
control over the vehicle (pedals and
steering wheel must be easy to
access). The maximum clearance
should be kept between the abdomen
and the steering wheel.
The seat belt must not be twisted. Theupper part must pass over the shoulder
and cross the chest diagonally. The
lower part must adhere to the pelvis
fig. 99, not to the abdomen of the
occupant. Never use devices (clips,
clamps, etc.) that hold the seat belt
away from your body.
Each seat belt must be used by onlyone person. Never travel with a child
sitting on the passenger's lap and a
single belt to protect them both
fig. 100. In general, do not place any
objects between the person and the
belt.
SEAT BELTS
MAINTENANCE
For keeping the seat belts in efficient
conditions, carefully observe the
following warnings:
always use the seat belt well
stretched and never twisted; make sure
that it is free to run without
obstructions;
check seat belt operation as follows:
attach the seat belt and pull it hard;
replace the belt after an accident of a
certain severity even if it does not
appear to be damaged. Always replace
the seat belt if the pretensioners were
deployed;
98F1B0107C
99F1B0108C
100F1B0109C
87
Page 103 of 264
85)After installing a child restraint system,
do not move the seat: always remove the
child restraint system before making any
adjustment.
86)Always make sure that the diagonal
section of the seat belt does not pass
under the arms or behind the back of the
child. In the event of an accident the seat
belt will not be able to secure the child,
with the risk of injury, including fatal injury.
Therefore the child must always wear the
seat belt correctly.
87)Do not use the same lower anchorage
to install more than one child restraint
system.
88)If a Universal ISOFIX child seat system
is not fixed to all three anchorages, it will
not be able to protect the child correctly. In
a crash, the child could be seriously or
fatally injured.
89)Fit the child restraint system when the
car is stationary. The child restraint system
is correctly fixed to the brackets when you
hear the click. Follow the instructions for
assembly, disassembly and positioning that
the Manufacturer must supply with the
child restraint system.SUPPLEMENTARY
RESTRAINT SYSTEM
(SRS) - AIRBAG
The vehicle is equipped with:
front driver airbag;
front passenger airbag;
driver and passenger front side bags
for pelvis, chest and shoulder
protection (Side bags);
side bags for head protection of front
seat passengers and rear side seat
passengers (window bag).
The location of the airbags on the
vehicle is marked by the word
"AIRBAG" in the middle of the steering
wheel, on the dashboard, on the side
trim or on a label placed next to the
airbag deployment area.
FRONT AIRBAGS
The front (driver and passenger) airbags
protect the front seat occupants in the
event of head-on crashes of
medium-high severity, by placing the
cushion between the occupant and the
steering wheel or dashboard.
Therefore non-activation of airbags in
other types of collisions (side impacts,
rear shunts, roll-overs, etc.) does not
indicate a system malfunction.
Driver and passenger front airbags are
not a replacement of but
complementary to the seat belts, whichshould always be worn, as specified by
law in Europe and most non-European
countries.
In the event of impact, those not
wearing a seat belt are projected
forwards and may come into contact
with the bag which is still inflating. The
protection offered by the bag is
compromised in these circumstances.
Front airbags may not activate in the
following situations:
frontal impacts against highly
deformable objects not involving the
front surface of the vehicle (e.g. wing
collision against guard rail, etc.);
vehicle wedging under other
vehicles or protective barriers (e.g.
trucks or guard rails).
Failure to activate in the conditions
described above is due to the fact that
they may not provide any additional
protection compared with seat belts, so
their activation would be inappropriate.
In these cases, non-deployment does
not indicate a system malfunction.
The driver's and passenger's front
airbags have been designed and
calibrated to protect front seat
occupants wearing seat belts. At their
maximum inflation, their volume fills
most of the space between the steering
wheel and the driver and between the
dashboard and the passenger.
101
Page 104 of 264
The airbags are not deployed in the
event of minor frontal impacts (for which
the restraining action of the seat belts is
sufficient).
Seat belts must always be worn. In the
event of frontal impacts they guarantee
correct positioning of the passenger.
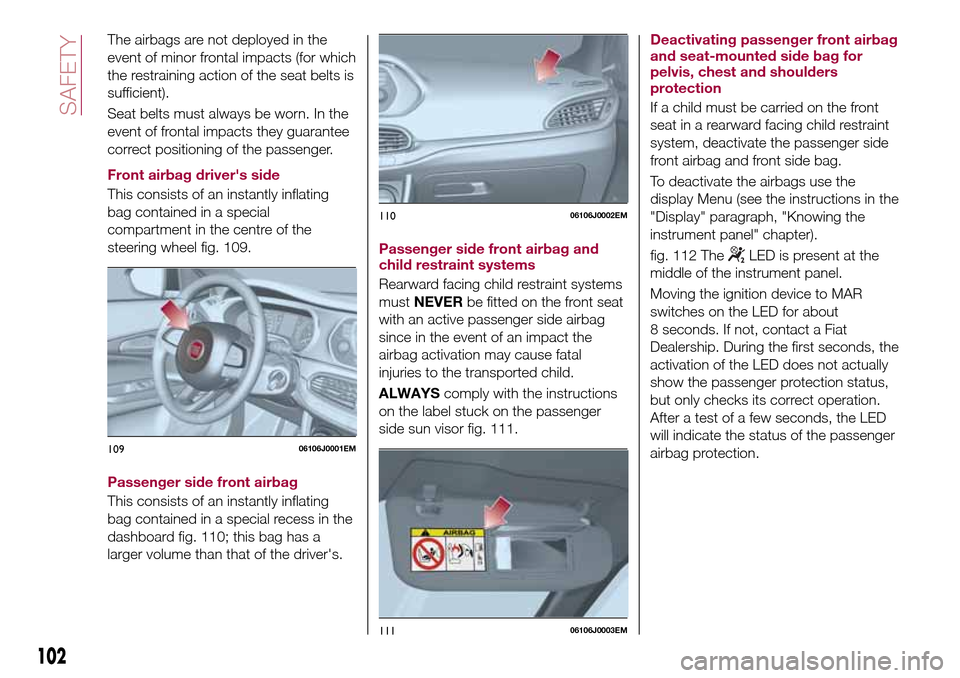
Front airbag driver's side
This consists of an instantly inflating
bag contained in a special
compartment in the centre of the
steering wheel fig. 109.
Passenger side front airbag
This consists of an instantly inflating
bag contained in a special recess in the
dashboard fig. 110; this bag has a
larger volume than that of the driver's.Passenger side front airbag and
child restraint systems
Rearward facing child restraint systems
mustNEVERbe fitted on the front seat
with an active passenger side airbag
since in the event of an impact the
airbag activation may cause fatal
injuries to the transported child.
ALWAYScomply with the instructions
on the label stuck on the passenger
side sun visor fig. 111.Deactivating passenger front airbag
and seat-mounted side bag for
pelvis, chest and shoulders
protection
If a child must be carried on the front
seat in a rearward facing child restraint
system, deactivate the passenger side
front airbag and front side bag.
To deactivate the airbags use the
display Menu (see the instructions in the
"Display" paragraph, "Knowing the
instrument panel" chapter).
fig. 112 The
LED is present at the
middle of the instrument panel.
Moving the ignition device to MAR
switches on the LED for about
8 seconds. If not, contact a Fiat
Dealership. During the first seconds, the
activation of the LED does not actually
show the passenger protection status,
but only checks its correct operation.
After a test of a few seconds, the LED
will indicate the status of the passenger
airbag protection.
10906106J0001EM
11006106J0002EM
11106106J0003EM
102
SAFETY
Page 107 of 264
SIDE BAGS
To help increase occupants protection
in the event of side impact collisions,
the vehicle is equipped with front side
bags and window bags.
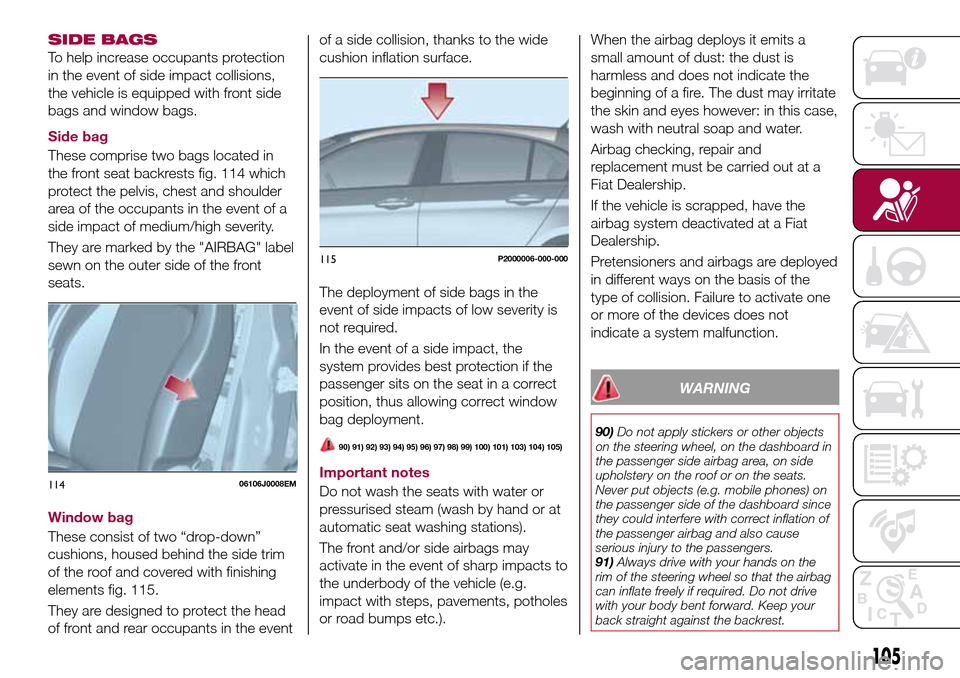
Side bag
These comprise two bags located in
the front seat backrests fig. 114 which
protect the pelvis, chest and shoulder
area of the occupants in the event of a
side impact of medium/high severity.
They are marked by the "AIRBAG" label
sewn on the outer side of the front
seats.
Window bag
These consist of two “drop-down”
cushions, housed behind the side trim
of the roof and covered with finishing
elements fig. 115.
They are designed to protect the head
of front and rear occupants in the eventof a side collision, thanks to the wide
cushion inflation surface.
The deployment of side bags in the
event of side impacts of low severity is
not required.
In the event of a side impact, the
system provides best protection if the
passenger sits on the seat in a correct
position, thus allowing correct window
bag deployment.
90) 91) 92) 93) 94) 95) 96) 97) 98) 99) 100) 101) 103) 104) 105)
Important notes
Do not wash the seats with water or
pressurised steam (wash by hand or at
automatic seat washing stations).
The front and/or side airbags may
activate in the event of sharp impacts to
the underbody of the vehicle (e.g.
impact with steps, pavements, potholes
or road bumps etc.).When the airbag deploys it emits a
small amount of dust: the dust is
harmless and does not indicate the
beginning of a fire. The dust may irritate
the skin and eyes however: in this case,
wash with neutral soap and water.
Airbag checking, repair and
replacement must be carried out at a
Fiat Dealership.
If the vehicle is scrapped, have the
airbag system deactivated at a Fiat
Dealership.
Pretensioners and airbags are deployed
in different ways on the basis of the
type of collision. Failure to activate one
or more of the devices does not
indicate a system malfunction.
WARNING
90)Do not apply stickers or other objects
on the steering wheel, on the dashboard in
the passenger side airbag area, on side
upholstery on the roof or on the seats.
Never put objects (e.g. mobile phones) on
the passenger side of the dashboard since
they could interfere with correct inflation of
the passenger airbag and also cause
serious injury to the passengers.
91)Always drive with your hands on the
rim of the steering wheel so that the airbag
can inflate freely if required. Do not drive
with your body bent forward. Keep your
back straight against the backrest.
11406106J0008EM
115P2000006-000-000
105
Page 115 of 264
WARNING
113)If the battery needs to be replaced,
always contact a Fiat Dealership. Replace
the battery with a new one of the same
type and specifications.
IMPORTANT
42)If the climate comfort is to be favoured,
the Start&Stop system can be deactivated,
for a continuous operation of the climate
control system.
SPEED LIMITER
DESCRIPTION
This device allows the speed of the
vehicle to be limited to values which
can be set by the driver.
The maximum speed can be set both
with vehicle stationary and in motion.
The minimum speed that can be set is
30 km/h.
When the device is active, the vehicle
speed depends on the pressure at the
accelerator pedal, until the
programmed speed limit is reached
(see "Speed limit programming"
paragraph).
ACTIVATING THE DEVICE
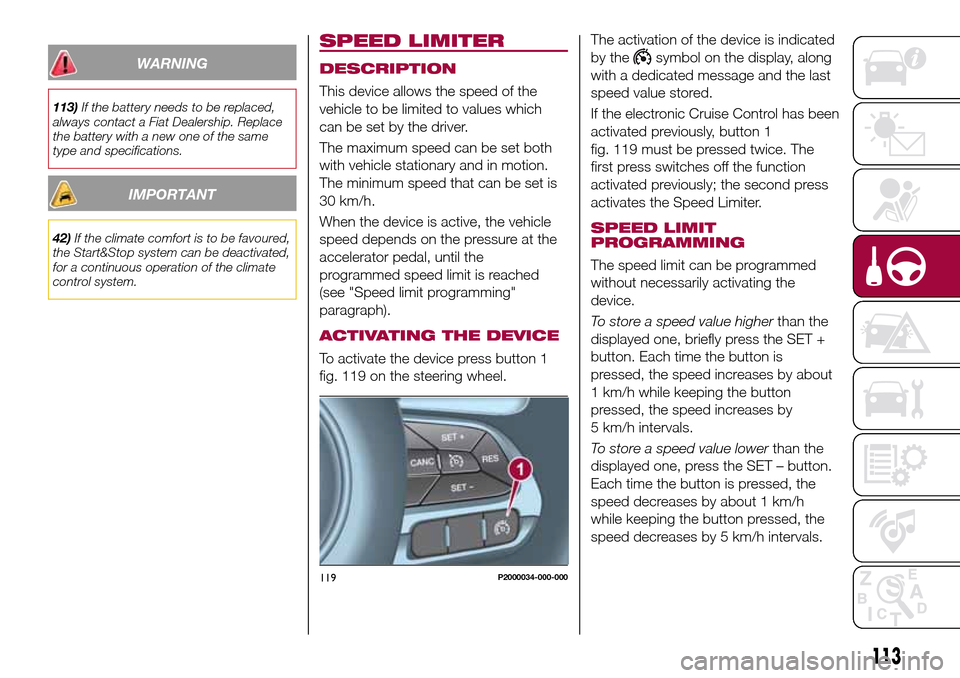
To activate the device press button 1
fig. 119 on the steering wheel.The activation of the device is indicated
by the
symbol on the display, along
with a dedicated message and the last
speed value stored.
If the electronic Cruise Control has been
activated previously, button 1
fig. 119 must be pressed twice. The
first press switches off the function
activated previously; the second press
activates the Speed Limiter.
SPEED LIMIT
PROGRAMMING
The speed limit can be programmed
without necessarily activating the
device.
To store a speed value higherthan the
displayed one, briefly press the SET +
button. Each time the button is
pressed, the speed increases by about
1 km/h while keeping the button
pressed, the speed increases by
5 km/h intervals.
To store a speed value lowerthan the
displayed one, press the SET – button.
Each time the button is pressed, the
speed decreases by about 1 km/h
while keeping the button pressed, the
speed decreases by 5 km/h intervals.
119P2000034-000-000
113
Page 119 of 264
“Adaptive Cruise Control” mode
to hold an appropriate distance
between vehicles (a dedicated message
is shown on the instrument panel
display);
electronic “Cruise Control” mode
to hold the vehicle at a constant
preset speed.
To change the operation mode, use the
button on the steering wheel (see that
described on the following pages).
The "electronic Cruise Control" does
not vary the speed according to the
presence or not of vehicles ahead.
Always adjust the speed according to
traffic conditions.
ADAPTIVE CRUISE
CONTROL ACTIVATION/
DEACTIVATION
Activation
To activate the device, press and
release the button
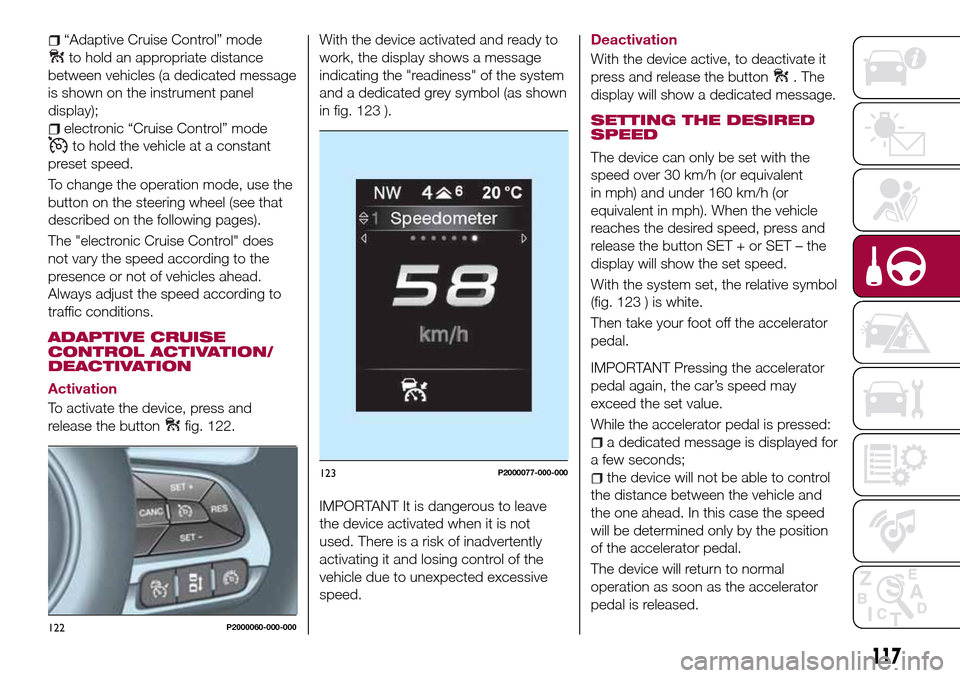
fig. 122.With the device activated and ready to
work, the display shows a message
indicating the "readiness" of the system
and a dedicated grey symbol (as shown
in fig. 123 ).
IMPORTANT It is dangerous to leave
the device activated when it is not
used. There is a risk of inadvertently
activating it and losing control of the
vehicle due to unexpected excessive
speed.
Deactivation
With the device active, to deactivate it
press and release the button
. The
display will show a dedicated message.
SETTING THE DESIRED
SPEED
The device can only be set with the
speed over 30 km/h (or equivalent
in mph) and under 160 km/h (or
equivalent in mph). When the vehicle
reaches the desired speed, press and
release the button SET + or SET – the
display will show the set speed.
With the system set, the relative symbol
(fig. 123 ) is white.
Then take your foot off the accelerator
pedal.
IMPORTANT Pressing the accelerator
pedal again, the car’s speed may
exceed the set value.
While the accelerator pedal is pressed:
a dedicated message is displayed for
a few seconds;
the device will not be able to control
the distance between the vehicle and
the one ahead. In this case the speed
will be determined only by the position
of the accelerator pedal.
The device will return to normal
operation as soon as the accelerator
pedal is released.
122P2000060-000-000
123P2000077-000-000
117
Page 123 of 264
PRECAUTIONS WHILE
DRIVING
The device may not work correctly in
some driving conditions (see below):
the driver must control the vehicle at all
times.
Towing a trailer
Use of the device is not recommended
while towing a trailer.
Vehicle not aligned
The device may not detect a vehicle
travelling on the same lane but which is
not aligned along the same direction of
travel or a vehicle which is cutting in
from a side lane. Sufficient distance
from the vehicles ahead may not be
guaranteed in these cases.
The non-aligned vehicle can weave in
and out of the driving direction causing
the vehicle to brake or accelerate
unexpectedly.
Steering and curves
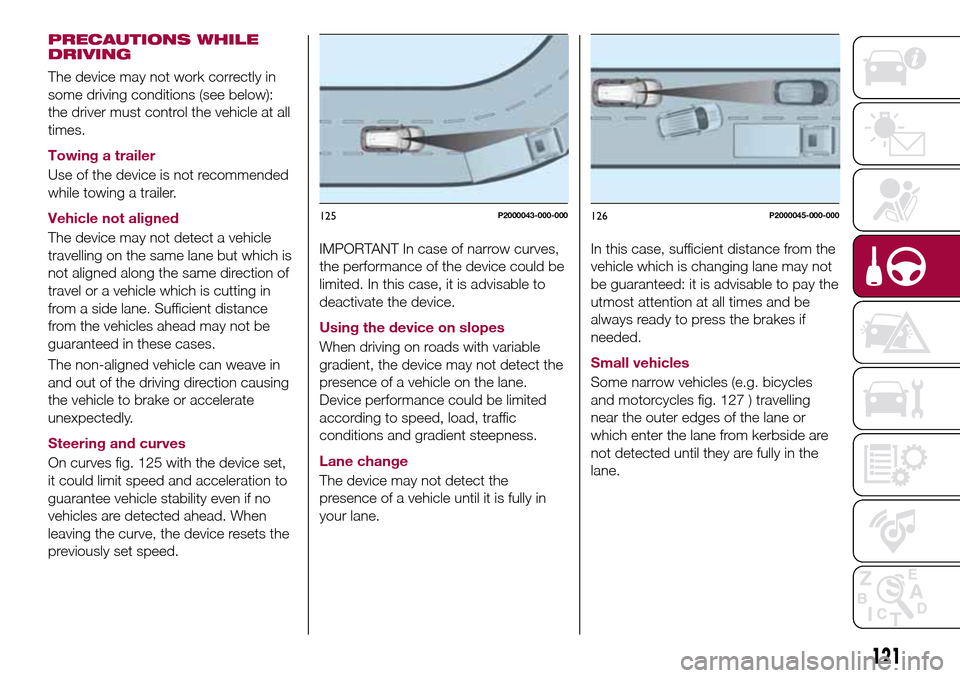
On curves fig. 125 with the device set,
it could limit speed and acceleration to
guarantee vehicle stability even if no
vehicles are detected ahead. When
leaving the curve, the device resets the
previously set speed.
IMPORTANT In case of narrow curves,
the performance of the device could be
limited. In this case, it is advisable to
deactivate the device.
Using the device on slopes
When driving on roads with variable
gradient, the device may not detect the
presence of a vehicle on the lane.
Device performance could be limited
according to speed, load, traffic
conditions and gradient steepness.
Lane change
The device may not detect the
presence of a vehicle until it is fully in
your lane.In this case, sufficient distance from the
vehicle which is changing lane may not
be guaranteed: it is advisable to pay the
utmost attention at all times and be
always ready to press the brakes if
needed.
Small vehicles
Some narrow vehicles (e.g. bicycles
and motorcycles fig. 127 ) travelling
near the outer edges of the lane or
which enter the lane from kerbside are
not detected until they are fully in the
lane.
125P2000043-000-000126P2000045-000-000
121
Page 128 of 264
SYMBOLS AND MESSAGES ON THE DISPLAY
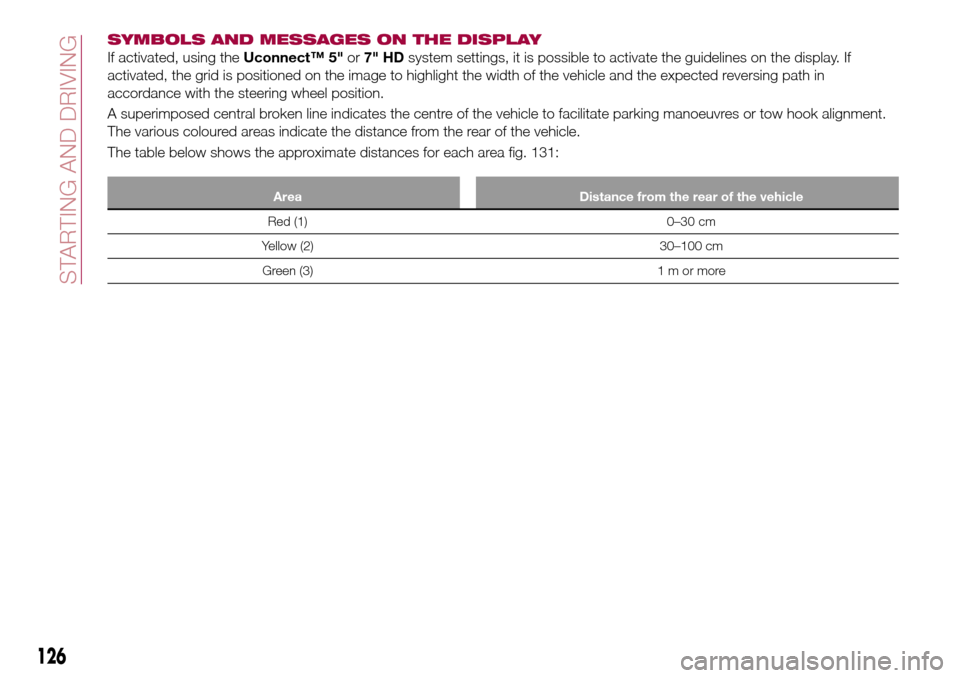
If activated, using theUconnect™ 5"or7" HDsystem settings, it is possible to activate the guidelines on the display. If
activated, the grid is positioned on the image to highlight the width of the vehicle and the expected reversing path in
accordance with the steering wheel position.
A superimposed central broken line indicates the centre of the vehicle to facilitate parking manoeuvres or tow hook alignment.
The various coloured areas indicate the distance from the rear of the vehicle.
The table below shows the approximate distances for each area fig. 131:
Area Distance from the rear of the vehicle
Red (1) 0–30 cm
Yellow (2) 30–100 cm
Green (3) 1 m or more
126
STARTING AND DRIVING