2017 FIAT TIPO 5DOORS STATION WAGON reset
[x] Cancel search: resetPage 64 of 264

Warning light What it means
iTPMS
iTPMS failure/iTPMS temporarily deactivated
The warning light flashes for about 75 seconds and then stays on constantly (together with a message on
the display) to indicate that the system is temporarily deactivated or faulty. The system will go back to
normal operation when the operating conditions will allow it. If this is not the case, carry out the “Reset”
procedure after restoring the normal operating conditions.
If the malfunction warning persists, contact a Fiat Dealership as soon as possible.
Tyre pressure low
The warning light switches on constantly to indicate that the pressure of one or more tyres is lower than
the recommended value and/or that slow pressure loss is occurring. In these cases, optimal tyre duration
and fuel consumption may not be guaranteed. It is advisable to restore the correct pressure value (see the
"Wheels" paragraph in the "Technical specifications" section). Once the normal operating conditions of
the vehicle are restored, carry out the "Reset" procedure.
WARNING Do not continue driving with one or more flat tyres as the car handling may be compromised.
Stop the vehicle, avoiding sharp braking and steering.
ABS FAILURE
The warning light switches on to indicate an ABS fault. In this case the braking system maintains its
efficiency unaltered but without the advantage of the ABS system. Drive carefully and contact a Fiat
Dealership as soon as possible.
ESC SYSTEM
ESC system activation
Intervention by the system is indicated by the flashing of the warning light: it indicates that the car is in
critical stability and grip conditions.
ESC system failure
If the warning light does not switch off, or if it stays on with the engine running, a failure was found on the
ESC system. Contact a Fiat Dealership as soon as possible.
Hill Hold Control system failure
The warning light turns on to indicate a Hill Holder Control system failure. Contact a Fiat Dealership as soon
as possible.
62
KNOWING THE INSTRUMENT PANEL
Page 66 of 264
Warning light What it means
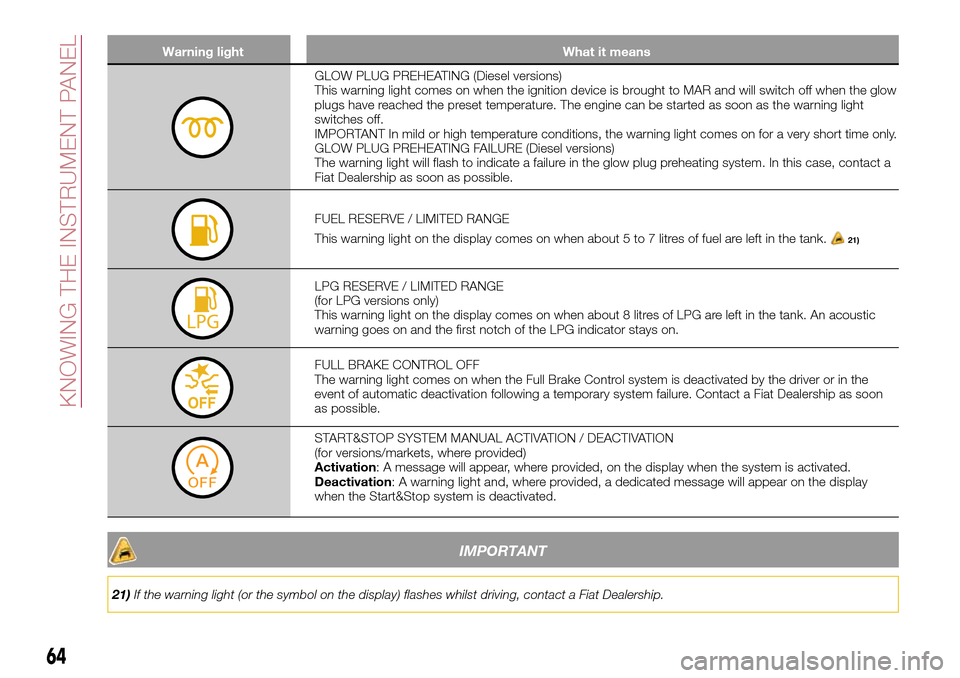
GLOW PLUG PREHEATING (Diesel versions)
This warning light comes on when the ignition device is brought to MAR and will switch off when the glow
plugs have reached the preset temperature. The engine can be started as soon as the warning light
switches off.
IMPORTANT In mild or high temperature conditions, the warning light comes on for a very short time only.
GLOW PLUG PREHEATING FAILURE (Diesel versions)
The warning light will flash to indicate a failure in the glow plug preheating system. In this case, contact a
Fiat Dealership as soon as possible.
FUEL RESERVE / LIMITED RANGE
This warning light on the display comes on when about 5 to 7 litres of fuel are left in the tank.
21)
LPG RESERVE / LIMITED RANGE
(for LPG versions only)
This warning light on the display comes on when about 8 litres of LPG are left in the tank. An acoustic
warning goes on and the first notch of the LPG indicator stays on.
FULL BRAKE CONTROL OFF
The warning light comes on when the Full Brake Control system is deactivated by the driver or in the
event of automatic deactivation following a temporary system failure. Contact a Fiat Dealership as soon
as possible.
START&STOP SYSTEM MANUAL ACTIVATION / DEACTIVATION
(for versions/markets, where provided)
Activation: A message will appear, where provided, on the display when the system is activated.
Deactivation: A warning light and, where provided, a dedicated message will appear on the display
when the Start&Stop system is deactivated.
IMPORTANT
21)If the warning light (or the symbol on the display) flashes whilst driving, contact a Fiat Dealership.
64
KNOWING THE INSTRUMENT PANEL
Page 72 of 264
Symbol What it means
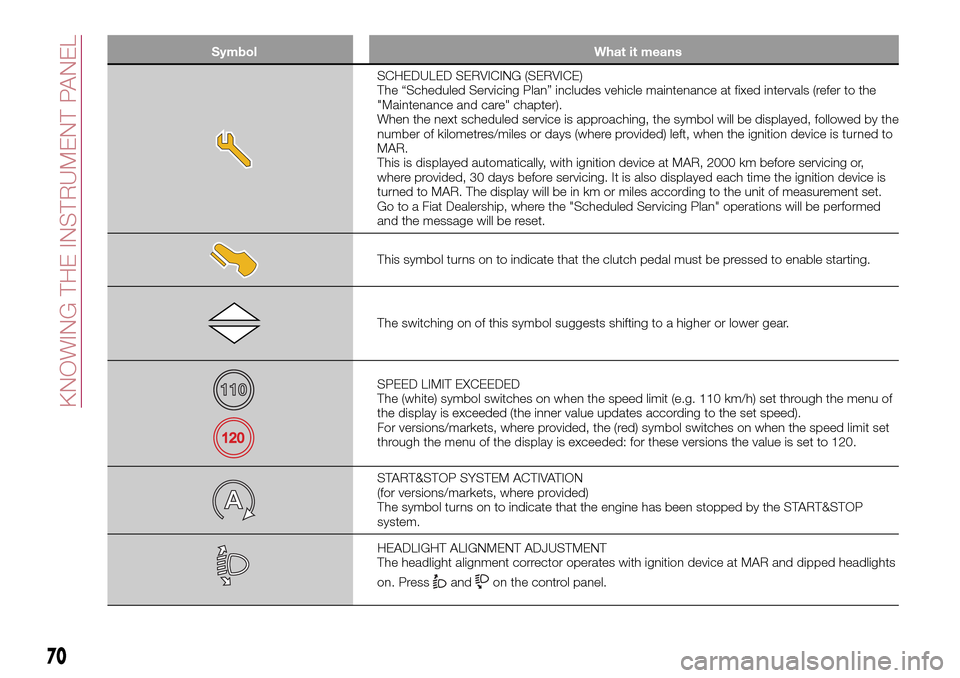
SCHEDULED SERVICING (SERVICE)
The “Scheduled Servicing Plan” includes vehicle maintenance at fixed intervals (refer to the
"Maintenance and care" chapter).
When the next scheduled service is approaching, the symbol will be displayed, followed by the
number of kilometres/miles or days (where provided) left, when the ignition device is turned to
MAR.
This is displayed automatically, with ignition device at MAR, 2000 km before servicing or,
where provided, 30 days before servicing. It is also displayed each time the ignition device is
turned to MAR. The display will be in km or miles according to the unit of measurement set.
Go to a Fiat Dealership, where the "Scheduled Servicing Plan" operations will be performed
and the message will be reset.
This symbol turns on to indicate that the clutch pedal must be pressed to enable starting.
The switching on of this symbol suggests shifting to a higher or lower gear.
SPEED LIMIT EXCEEDED
The (white) symbol switches on when the speed limit (e.g. 110 km/h) set through the menu of
the display is exceeded (the inner value updates according to the set speed).
For versions/markets, where provided, the (red) symbol switches on when the speed limit set
through the menu of the display is exceeded: for these versions the value is set to 120.
START&STOP SYSTEM ACTIVATION
(for versions/markets, where provided)
The symbol turns on to indicate that the engine has been stopped by the START&STOP
system.
HEADLIGHT ALIGNMENT ADJUSTMENT
The headlight alignment corrector operates with ignition device at MAR and dipped headlights
on. Press
andon the control panel.
70
KNOWING THE INSTRUMENT PANEL
Page 82 of 264
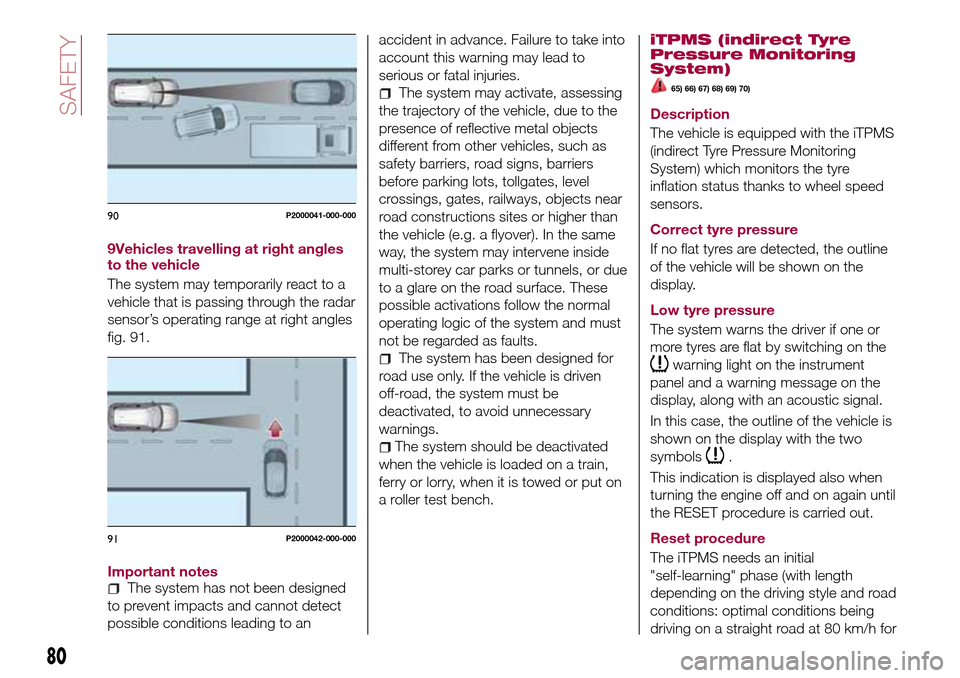
9Vehicles travelling at right angles
to the vehicle
The system may temporarily react to a
vehicle that is passing through the radar
sensor’s operating range at right angles
fig. 91.
Important notes
The system has not been designed
to prevent impacts and cannot detect
possible conditions leading to anaccident in advance. Failure to take into
account this warning may lead to
serious or fatal injuries.
The system may activate, assessing
the trajectory of the vehicle, due to the
presence of reflective metal objects
different from other vehicles, such as
safety barriers, road signs, barriers
before parking lots, tollgates, level
crossings, gates, railways, objects near
road constructions sites or higher than
the vehicle (e.g. a flyover). In the same
way, the system may intervene inside
multi-storey car parks or tunnels, or due
to a glare on the road surface. These
possible activations follow the normal
operating logic of the system and must
not be regarded as faults.
The system has been designed for
road use only. If the vehicle is driven
off-road, the system must be
deactivated, to avoid unnecessary
warnings.
The system should be deactivated
when the vehicle is loaded on a train,
ferry or lorry, when it is towed or put on
a roller test bench.
iTPMS (indirect Tyre
Pressure Monitoring
System)
65) 66) 67) 68) 69) 70)
Description
The vehicle is equipped with the iTPMS
(indirect Tyre Pressure Monitoring
System) which monitors the tyre
inflation status thanks to wheel speed
sensors.
Correct tyre pressure
If no flat tyres are detected, the outline
of the vehicle will be shown on the
display.
Low tyre pressure
The system warns the driver if one or
more tyres are flat by switching on the
warning light on the instrument
panel and a warning message on the
display, along with an acoustic signal.
In this case, the outline of the vehicle is
shown on the display with the two
symbols
.
This indication is displayed also when
turning the engine off and on again until
the RESET procedure is carried out.
Reset procedure
The iTPMS needs an initial
"self-learning" phase (with length
depending on the driving style and road
conditions: optimal conditions being
driving on a straight road at 80 km/h for
90P2000041-000-000
91P2000042-000-000
80
SAFETY
Page 83 of 264

at least 20 minutes) which starts when
the RESET procedure is carried out.
The RESET procedure must be carried
out:
each time tyre pressure is modified;
when even only one tyre is changed;
when tyres are rotated/inverted;
when the space-saver wheel is fitted.
Before carrying out the RESET
procedure, inflate the tyres to the rated
pressure values specified in the inflation
pressure table (see "Wheels" paragraph
in the "Technical specifications"
chapter).
If the RESET is not carried out, in all
above cases, the
warning light may
give false indications on one or more
tyres.
To carry out the RESET, with the vehicle
stationary and the engine on, hold
down the Reset button
located on
the left control panel fig. 92 for at least
2 seconds.
When the RESET procedure has been
carried out, and depending on the type
of instrument panel, either only a buzzer
will be heard or the message "Reset
saved" will appear together with the
buzzer to indicate that self-learning has
started.Operating conditions
The system is active for speeds above
15 km/h.
In a few situations such as sporty
driving, particular conditions of the road
surface (e.g. icy, snowy, unsurfaced
roads) the signalling may be delayed or
partial in detecting the contemporary
deflation of more than one tyre.
Under special conditions (e.g. vehicle
loaded asymmetrically on one side,
towing a trailer, damaged or worn tyre,
fitting the space-saver wheel, use of the
"Fix&Go Automatic" tyre repair kit, fitting
snow chains, fitting different tyres on
the axles) the system may provide false
indications or be temporarily
deactivated.
If the system is temporarily deactivated
the
warning light flashes for about
75 seconds and then is continuouslyon; at the same time, the display shows
a warning message.
This indication is displayed also after
the engine has been switched off and
then on again if the correct operating
conditions are not restored.
In the case of abnormal signals, it is
recommended to perform the RESET
procedure. If the signals reappear once
the RESET procedure has started,
check that the type of tyres used are
the same on all four wheels and that the
tyres are not damaged; if the
space-saver wheel is being used, refit
the wheel with a tire with normal
dimensions instead of the space-saver
wheel as soon as possible; if possible
remove the snow chains; make sure
that the load is distributed correctly and
repeat the RESET procedure, driving on
a clean and surfaced road. If the signals
persist, contact a Fiat Dealership.
WARNING
61)The system is an aid for the driver, who
must always pay full attention while driving.
The responsibility always rests with the
driver, who must take into account the
traffic conditions in order to drive in
complete safety. The driver must always
maintain a safe distance from the vehicle in
front.
9206056J0001EM
81
Page 86 of 264

ADJUSTING THE FRONT
SEAT BELT HEIGHT
73) 74)
Four different adjustments in height are
possible.
To carry out window height adjustment,
from the top to the bottom, button 1
fig. 95 must be pressed, and the handle
must be slid downwards.
To carry out window height adjustment,
from the top to the bottom, the handle
must be slid (without pressing
anything).Always adjust the height of the seat
belts to fit the person wearing it: this
precaution could greatly reduce the risk
of injury in the event of collision.
Correct adjustment is obtained when
the belt passes approximately half way
between the shoulder and the neck.
WARNING
71)Never press button 3 when travelling.
72)Remember that, in the event of an
accident, the rear seat passengers not
wearing seat belts are exposed to a very
serious risk and also represent a serious
danger for the front seat occupants.
73)Make height adjustment of the seat
belts when the car is stationary.74)After the height adjustment, always
check that the grip is locked in one of the
preset positions. To do this, with button
1 released, exert further pressure
downwards to allow the locking device to
click if the grip has not been released in
one of the possible positions.
94P103FI84-000-0009506056J0003EM
84
SAFETY
Page 118 of 264
116)The electronic Cruise Control can be
dangerous if the system cannot keep a
constant speed. In specific conditions
speed may be excessive, resulting in the
risk of losing control of the vehicle and
causing accidents. Do not use the device
in heavy traffic or on winding, icy, snowy or
slippery roads.ADAPTIVE CRUISE
CONTROL (ACC)
(where provided)
117) 118) 119) 120) 121) 122)
43) 44) 45) 47) 47) 48) 49)
DESCRIPTION
The Adaptive Cruise Control (ACC) is a
driver assist device which combines the
Cruise Control functions with one for
controlling the distance from the vehicle
ahead.
The device allows to hold the vehicle at
the desired speed without needing to
press the accelerator. It also allows to
hold a given distance from the vehicle
ahead (the distance can be set by the
driver).
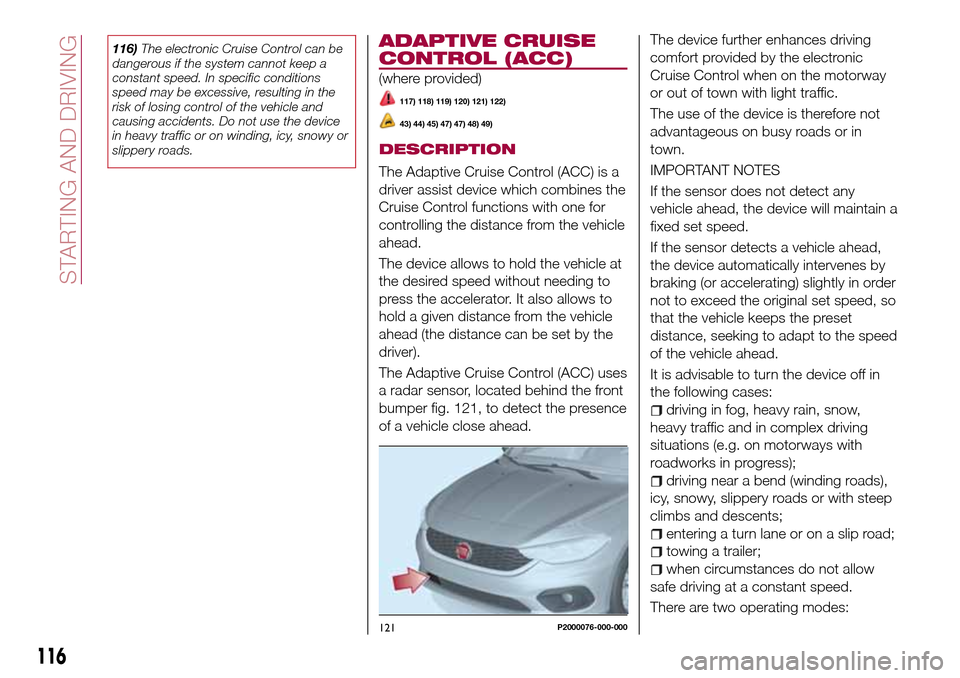
The Adaptive Cruise Control (ACC) uses
a radar sensor, located behind the front
bumper fig. 121, to detect the presence
of a vehicle close ahead.The device further enhances driving
comfort provided by the electronic
Cruise Control when on the motorway
or out of town with light traffic.
The use of the device is therefore not
advantageous on busy roads or in
town.
IMPORTANT NOTES
If the sensor does not detect any
vehicle ahead, the device will maintain a
fixed set speed.
If the sensor detects a vehicle ahead,
the device automatically intervenes by
braking (or accelerating) slightly in order
not to exceed the original set speed, so
that the vehicle keeps the preset
distance, seeking to adapt to the speed
of the vehicle ahead.
It is advisable to turn the device off in
the following cases:
driving in fog, heavy rain, snow,
heavy traffic and in complex driving
situations (e.g. on motorways with
roadworks in progress);
driving near a bend (winding roads),
icy, snowy, slippery roads or with steep
climbs and descents;
entering a turn lane or on a slip road;
towing a trailer;
when circumstances do not allow
safe driving at a constant speed.
There are two operating modes:
121P2000076-000-000
116
STARTING AND DRIVING
Page 119 of 264
“Adaptive Cruise Control” mode
to hold an appropriate distance
between vehicles (a dedicated message
is shown on the instrument panel
display);
electronic “Cruise Control” mode
to hold the vehicle at a constant
preset speed.
To change the operation mode, use the
button on the steering wheel (see that
described on the following pages).
The "electronic Cruise Control" does
not vary the speed according to the
presence or not of vehicles ahead.
Always adjust the speed according to
traffic conditions.
ADAPTIVE CRUISE
CONTROL ACTIVATION/
DEACTIVATION
Activation
To activate the device, press and
release the button
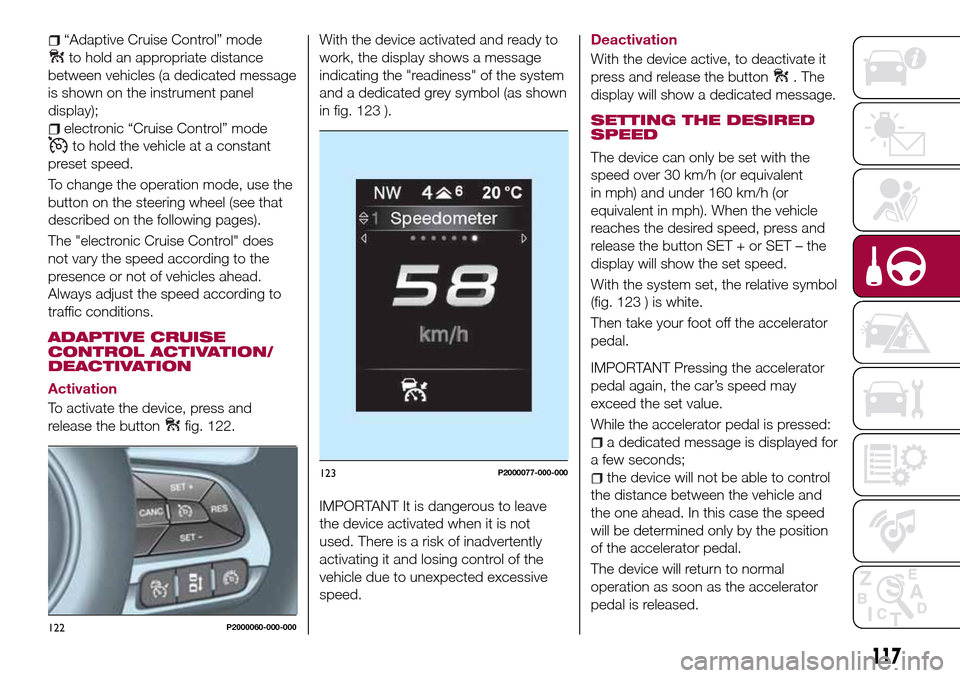
fig. 122.With the device activated and ready to
work, the display shows a message
indicating the "readiness" of the system
and a dedicated grey symbol (as shown
in fig. 123 ).
IMPORTANT It is dangerous to leave
the device activated when it is not
used. There is a risk of inadvertently
activating it and losing control of the
vehicle due to unexpected excessive
speed.
Deactivation
With the device active, to deactivate it
press and release the button
. The
display will show a dedicated message.
SETTING THE DESIRED
SPEED
The device can only be set with the
speed over 30 km/h (or equivalent
in mph) and under 160 km/h (or
equivalent in mph). When the vehicle
reaches the desired speed, press and
release the button SET + or SET – the
display will show the set speed.
With the system set, the relative symbol
(fig. 123 ) is white.
Then take your foot off the accelerator
pedal.
IMPORTANT Pressing the accelerator
pedal again, the car’s speed may
exceed the set value.
While the accelerator pedal is pressed:
a dedicated message is displayed for
a few seconds;
the device will not be able to control
the distance between the vehicle and
the one ahead. In this case the speed
will be determined only by the position
of the accelerator pedal.
The device will return to normal
operation as soon as the accelerator
pedal is released.
122P2000060-000-000
123P2000077-000-000
117