Page 16 of 240

To restore the starting condition of the
door locks (only if battery charge
restored) press the
button on the
remote control or the
button on the
dashboard or introduce the metal insert
of the ignition key in the driver's side
front door pawl and pull the door inner
handle.
WARNING
8)If the child lock was engaged and the
previously described locking procedure
carried out, operating the internal opening
handle will not open the door: in this case,
to open the door, the outside handle must
be used. The door central locking/
unlocking button is not disabled by the
engagement of the emergency lock.
9)NEVER leave children unattended inside
the car, let alone leave the car with the
doors unlocked in a place that children can
access easily. Children may seriously, or
even fatally, injure themselves. Also ensure
that children do not inadvertently operate
the parking brake, the brake pedal or the
automatic transmission lever (where
present).
10)Always use this device when carrying
children. After engaging the child lock on
both rear doors, check for effective
engagement by trying to open a door with
the internal handle.
IMPORTANT
2)Make sure to take the key with you once
a door or the tailgate is locked, to prevent
locking the same key inside the vehicle. If
the key has been locked in, it can only be
recovered using the second provided key.
3)If the child lock was engaged and the
previously described locking procedure
carried out, operating the internal opening
handle will not open the door: in this case,
to open the door, the outside handle must
be used. The central locking/unlocking
button is not disabled by the engagement
of the emergency lock.
SEATS
FRONT SEATS WITH
MANUAL ADJUSTMENT
11)
4)
Longitudinal adjustment
Lift lever 1 fig. 8 and push the seat
forwards or backwards.
12)
IMPORTANT Carry out the adjustment
while sitting on the seat involved (driver
side or passenger side).
Height adjustment
(where provided)
Move lever 2 upwards or downwards to
achieve the required height.
8P2000013-000-000
14
KNOWING YOUR CAR
Page 19 of 240

HEADRESTS
FRONT HEAD
RESTRAINTS
16)
Adjustment
They can be adjusted to 4 height
positions (completely raised /
2 intermediate positions / completely
lowered).
Upward adjustment: raise the head
restraint until it clicks into place.
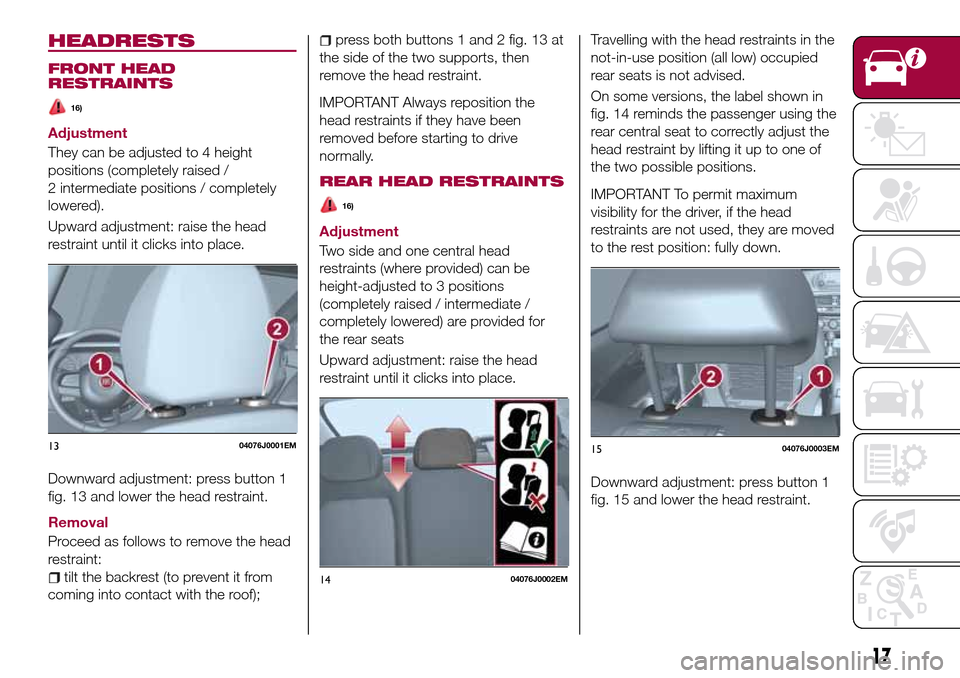
Downward adjustment: press button 1
fig. 13 and lower the head restraint.
Removal
Proceed as follows to remove the head
restraint:
tilt the backrest (to prevent it from
coming into contact with the roof);
press both buttons 1 and 2 fig. 13 at
the side of the two supports, then
remove the head restraint.
IMPORTANT Always reposition the
head restraints if they have been
removed before starting to drive
normally.
REAR HEAD RESTRAINTS
16)
Adjustment
Two side and one central head
restraints (where provided) can be
height-adjusted to 3 positions
(completely raised / intermediate /
completely lowered) are provided for
the rear seats
Upward adjustment: raise the head
restraint until it clicks into place.Travelling with the head restraints in the
not-in-use position (all low) occupied
rear seats is not advised.
On some versions, the label shown in
fig. 14 reminds the passenger using the
rear central seat to correctly adjust the
head restraint by lifting it up to one of
the two possible positions.
IMPORTANT To permit maximum
visibility for the driver, if the head
restraints are not used, they are moved
to the rest position: fully down.
Downward adjustment: press button 1
fig. 15 and lower the head restraint.
1304076J0001EM
1404076J0002EM
1504076J0003EM
17
Page 20 of 240

Removal
Proceed as follows to remove the head
restraint:
raise the head restraint to its
maximum height;
press buttons 1 and 2 fig. 15 at the
side of the two supports, then remove
the head restraint.
For versions with folding rear backrests,
use the release device to fold the
backrests approx. 45 degrees to make
it easier to remove the head restraints.
IMPORTANT Always reposition the
head restraints if they have been
removed before starting to drive
normally.
WARNING
16)Head restraints must be adjusted so
that the head, rather than the neck, rests
on them. Only in this case they can protect
your head correctly. Any removed head
restraints must be repositioned correctly, in
order to protect the occupants in the event
of impact: follow the instructions above.
STEERING WHEEL
17) 18)
ADJUSTMENTS
The steering wheel can be adjusted
both in height and axially.
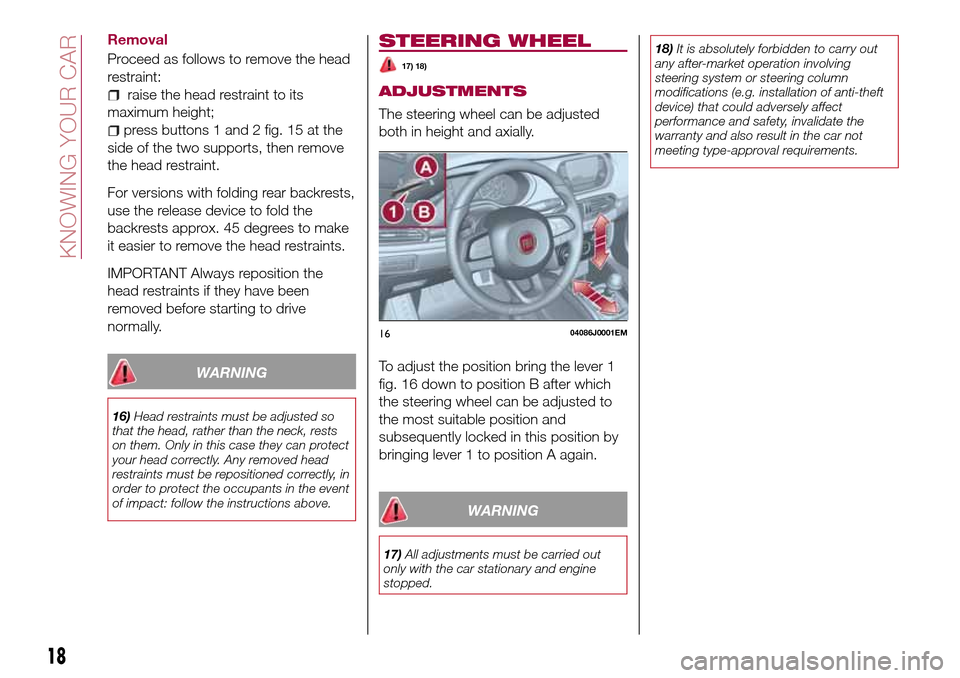
To adjust the position bring the lever 1
fig. 16 down to position B after which
the steering wheel can be adjusted to
the most suitable position and
subsequently locked in this position by
bringing lever 1 to position A again.
WARNING
17)All adjustments must be carried out
only with the car stationary and engine
stopped.18)It is absolutely forbidden to carry out
any after-market operation involving
steering system or steering column
modifications (e.g. installation of anti-theft
device) that could adversely affect
performance and safety, invalidate the
warranty and also result in the car not
meeting type-approval requirements.
1604086J0001EM
18
KNOWING YOUR CAR
Page 82 of 240

ADJUSTING THE SEAT
BELT HEIGHT
72) 73)
Four different adjustments in height are
possible.
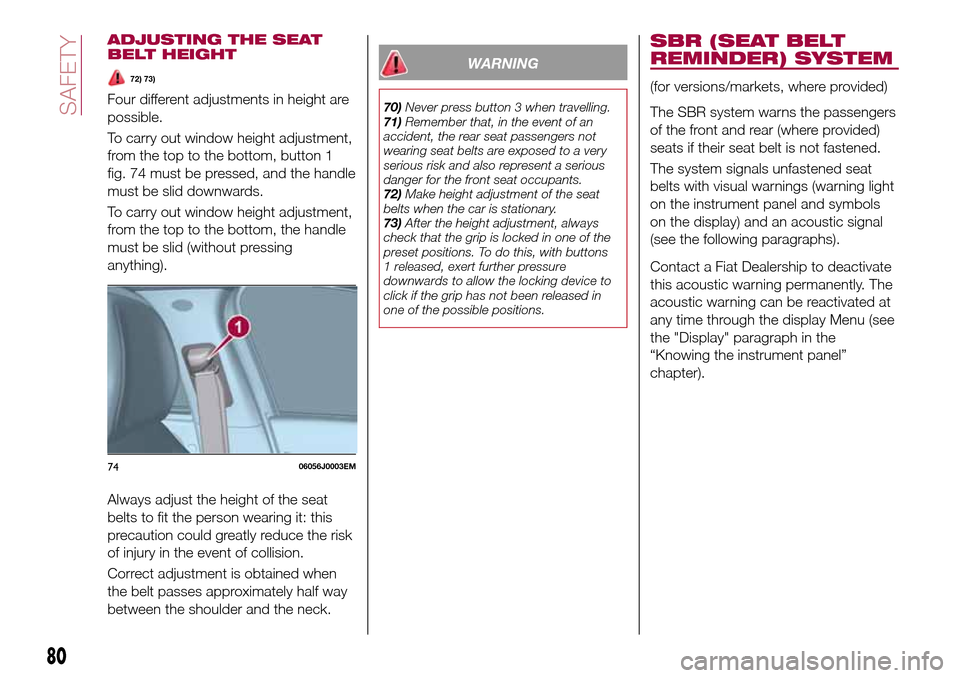
To carry out window height adjustment,
from the top to the bottom, button 1
fig. 74 must be pressed, and the handle
must be slid downwards.
To carry out window height adjustment,
from the top to the bottom, the handle
must be slid (without pressing
anything).
Always adjust the height of the seat
belts to fit the person wearing it: this
precaution could greatly reduce the risk
of injury in the event of collision.
Correct adjustment is obtained when
the belt passes approximately half way
between the shoulder and the neck.
WARNING
70)Never press button 3 when travelling.
71)Remember that, in the event of an
accident, the rear seat passengers not
wearing seat belts are exposed to a very
serious risk and also represent a serious
danger for the front seat occupants.
72)Make height adjustment of the seat
belts when the car is stationary.
73)After the height adjustment, always
check that the grip is locked in one of the
preset positions. To do this, with buttons
1 released, exert further pressure
downwards to allow the locking device to
click if the grip has not been released in
one of the possible positions.
SBR (SEAT BELT
REMINDER) SYSTEM
(for versions/markets, where provided)
The SBR system warns the passengers
of the front and rear (where provided)
seats if their seat belt is not fastened.
The system signals unfastened seat
belts with visual warnings (warning light
on the instrument panel and symbols
on the display) and an acoustic signal
(see the following paragraphs).
Contact a Fiat Dealership to deactivate
this acoustic warning permanently. The
acoustic warning can be reactivated at
any time through the display Menu (see
the "Display" paragraph in the
“Knowing the instrument panel”
chapter).
7406056J0003EM
80
SAFETY