Page 137 of 240

CHANGING A WHEEL
JACK
Please note that:
the jack weight is 2.15 kg;
the jack cannot be repaired and in
the event of a fault it must be replaced
by another genuine one;
No tool other than its cranking device
may be fitted on the jack.
Maintenance
Prevent any dirt from depositing on
the "worm screw";
Keep the "worm screw" lubricated;
Never modify the jack.
Conditions for non-use
Temperatures below −40°C;
On sandy or muddy ground;
On uneven ground;
On steep roads;
In extreme weather conditions:
thunderstorms, typhoons, hurricanes,
blizzards, storms, etc.
In direct contact with the engine or
for repairs under the vehicle;
On boats.
CHANGING PROCEDURE
134) 135) 136) 137) 138) 139)
52) 53)
Proceed as follows:
stop the car in a position that is not
dangerous for oncoming traffic where
you can change the wheel safely. The
ground must be flat and sufficiently
compact;
stop the engine, engage the hazard
warning lights and the parking brake;
engage first gear or reverse or, for
versions with automatic transmission (if
present), move the lever to position P
(Park);
wear the reflective safety jacket
before getting out of the car (anyway
comply with the laws in force in the
country you are driving in);
open the luggage compartment and
lift up the mat;
using the wrench 4 located in the
toolbox, undo the blocking ring 1
fig. 136;
take out the toolbox 3 and bring it
next to the wheel to be replaced;
take the spare wheel 2;
take the chock 1 fig. 137 and fold it
out as shown in the diagram;
13608046J0002EM
13708046J0007EM
135
Page 138 of 240
 to prevent the
vehicle from moving irregularly when it
is lifted from the ground;
for versions with steel rim:")
place the chock 1 on the wheel
diagonally opposite the one to be
replaced (see fig. 138 ) to prevent the
vehicle from moving irregularly when it
is lifted from the ground;
for versions with steel rim: remove
the hub cap 1 fig. 139 using the
specific tool 2 fig. 140, located in the
tool container: grip the tool with two
fingers, insert the tongue between tyre
and hub cap and pull towards yourself
perpendicular to the wheel;
loosen the bolt of the wheel to be
replaced by about one turn with the
wrench provided 1 fig. 141; rock the car
to make it easier to separate the rim
from the wheel hub;
operate the device 1 fig. 142 to
extend the jack until the top of the jack
2 fits correctly into the side member
3 of the vehicle, next to the
symbol
on the side member;
alert any bystander that the car is
about to be raised; all persons should
be kept away from the car and nobody
must touch it until it has been lowered;
13808046J0004EM13908046J0012EM
14008046J0013EM
14108046J0005EM
14208046J0006EM
136
IN AN EMERGENCY
Page 139 of 240
 to operate the jack
and raise the car until the wheel is
raised a few centimetres above the
ground.
loosen the stud bolts completely and
remove the punct")
operate the jack handle 1
fig. 142 (clockwise) to operate the jack
and raise the car until the wheel is
raised a few centimetres above the
ground.
loosen the stud bolts completely and
remove the punctured wheel;
make sure the contact surfaces
between spare wheel and hub are clean
so that the fastening bolts will not come
loose;
fit the spare wheel by inserting the
first bolt for two threads into the hole
closest to the inflation valve and
proceed in the same manner with the
other bolts;
tighten the retaining bolts well using
wrench 1 fig. 141;
turn the jack handle 1
fig. 142 (anticlockwise) to lower the car
and remove the jack;
use the wrench provided to fasten
the bolts completely in a criss-cross
fashion as shown in fig. 144;
for versions with steel rim: make the
groove 1 fig. 145 provided on the hub
cap and highlighted by symbol
2 coincide with the inflation valve;
place the inner part of the hub cap
on the wheel rim;
engage the hub cap by applying an
axial force in several points as shown in
fig. 146 to allow the correct coupling
between hub cap and wheel.
At the end of the operation
stow the spare wheel in the space
provided in the boot;
insert the partially open jack into
container 3 fig. 136 and force it slightly
into its housing so that it does not
vibrate when the car is moving;
put the tools back into their places in
the container;
stow the container 3, complete with
tools, inside the spare wheel;
tighten the tool container locking
device 1 fig. 136;
reposition the mat in the boot.
14308046J0001EM
144F1B0225C
14508046J0010EM
14608046J0011EM
137
Page 140 of 240
If left in the passenger compartment,
the punctured w")
NOTE If replacing a wheel with alloy
rim, stove it temporarily into the spare
wheel compartment with the cosmetic
side facing upwards.
WARNING
134)If left in the passenger compartment,
the punctured wheel and jack constitute a
serious risk to the safety of occupants in
the event of accidents or sharp braking.
Therefore, always place both the jack and
punctured wheel in the dedicated housing
in the boot.
135)It is extremely dangerous to attempt
to change a wheel on the side of the
vehicle next to the driving lane: make sure
that the vehicle is at a sufficient distance
from the road, to avoid being run over.
136)Alert other drivers that the car is
stationary in compliance with local
regulations: hazard warning lights, warning
triangle, etc. Any passengers on board
should leave the car, especially if it is
heavily laden. Passengers should stay
away from on-coming traffic while the
wheel is being changed. For safety
reasons, always block the wheels with the
chocks provided.137)The jack is a tool developed and
designed only for changing a wheel, if a
tyre gets punctured or damaged, on the
vehicle with which it is supplied or on other
vehicles of the same model. Any other use,
e.g. to jack up other vehicle models or
different things, is strictly prohibited. Never
use it to carry out maintenance or repairs
under the vehicle or to change
summer/winter wheels and vice versa: we
advise you to contact a Fiat Dealership.
Never go under the raised vehicle: use it
only in the positions indicated. Do not use
the jack for loads higher than the one
shown on its label. Never start the engine
with vehicle raised. If the vehicle is raised
more than necessary, everything can
become more unstable, with the risk of the
vehicle dropping violently. Thus, lift the car
only as needed in order to access the
spare wheel.
138)Never tamper with the inflation valve.
Never introduce tools of any kind between
the rim and the tyre. Check tyre and
space-saver wheel pressures regularly,
complying with the values given in the
"Technical specifications" chapter.139)A 16” spare wheel is provided with
17" tyres. This spare wheel must be used
only in an emergency. Never use it for more
than strictly necessary and never exceed
80 km/h. On the wheel there is an orange
sticker, summarising the main warnings
regarding wheel usage restrictions. Never
remove or cover the label. The label
contains the following indications in four
languages: "Warning! For temporary use
only! 80 km/h max! Replace with standard
wheel as soon as possible. Never cover
this indication." Never apply a wheel cap
on the wheel. The driving characteristics of
the car will be modified with the wheel
fitted. Avoid violent acceleration and
braking, abrupt steering and fast cornering.
Have the wheel repaired and refitted as
soon as possible. Using two or more spare
wheels at the same time is forbidden. Do
not apply grease to the bolt threads before
fitting: they could come unscrewed.
IMPORTANT
52)When turning the jack handle make
sure that it can turn freely without scraping
your hand against the ground. The moving
components of the jack ("worm screw" and
joints) can also cause injuries: avoid
touching them. If you come into contact
with lubricating grease, clean yourself
thoroughly.
53)Contact a Fiat Dealership as soon as
possible to have the correct tightening of
the wheel bolts checked.
138
IN AN EMERGENCY
Page 141 of 240

DESCRIPTION
140)
54) 55)
The Fix&Go automatic kit fig. 147 is
located in the boot, inside a dedicated
container.
The container is also equipped with a
screwdriver")
FIX&GO AUTOMATIC
KIT
(where provided)
DESCRIPTION
140)
54) 55)
The Fix&Go automatic kit fig. 147 is
located in the boot, inside a dedicated
container.
The container is also equipped with a
screwdriver, the tow hook and the
refuelling adaptor.
To access the Fix&Go automatic, open
the rear flap and lift the mat. For more
detailed information, refer to previous
paragraph "Changing a wheel".
The Fix&Go automatic kit also includes:
one tank 1 fig. 147 containing the
sealing fluid, provided with: filler tube
2 and adhesive label 3 with the writing
"Max. 80 km/h”, to be attached in a
position easily visible to the driver (eg.
on the dashboard) after repairing the
tyre;
compressor 4 complete with
pressure gauge and connectors;
an instruction leaflet, to refer to for
prompt and correct use and that must
be then given to the personnel dealing
with the tyre treated with sealant;
a pair of gloves located in the side
compartment of the compressor;
some adaptors, for inflating different
elements.
TYRE REPAIRING AND
PRESSURE RESTORING
PROCEDURE
140)
54) 55)
Proceed as follows:
place the vehicle in a safe and
suitable area, engaging the parking
brake. Take the kit from the specific
compartment.Remove the adhesive label of speed 3
fig. 147 and apply it ina visible position.
Wear the protective gloves provided.
Remove the cap from the valve of the
punctured tyre and connect and firmly
tighten the transparent tube of the
sealing fluid 1 fig. 148;
ensure that the on-off button is in0
(OFF) position. If provided, open the
cover of the compressor 4 fig. 147 and
insert the electrical connector in the
12V socket of the vehicle fig. 149,
switch on the vehicle engine;
activate the compressor moving
on-off button toI(ON) position. When
the pressure gauge shows the car’s
required pressure (see section “Wheels”
under “Technical data” chapter), switch
off the compressor moving on-off
button to0position.
14708056J0003EM
14808056J0004EM
139
Page 142 of 240

If after 5 minutes from the compressor
ignition, the pressure gauge indicates a
pressureless than 1.8 bar / 26 psi,
switch off the compressor, disconnect
the sealing fluid tube from the tyre
valve, re-screw the valve cap and move
the vehicle about 10 meters to allow the
distribution of sealing fluid in the tyre.
Securely stop the vehicle and repeat
the operation above until reaching the
required pressure. If after other 5 min.
from the compressor ignition, the
pressure gauge still indicates a pressure
lower than 1.8 bar / 26 psi, the TYRE IS
TOO DAMAGED AND CANNOT BE
REPAIRED. Remove and place the kit in
the specific compartment and contact a
Fiat Dealership;
if the required pressure is reached,
restart driving. Do not exceed 80 km/h.
Avoid sudden acceleration or braking.After driving for about 8 km / 5 miles,
place the vehicle in a safe and suitable
area, engaging the parking brake. Pick
up the kit, ensure the on-off button is in
0position, insert the electrical
connector in the car’s 12V socket.
Remove the cap from the valve of
repaired tyre, disconnect and pull out
the black inflation tube 1 fig. 150,
connect and block it with the stack to
the valve. Inspect the pressure gauge to
check the tyre pressure;
if the pressure is lower than 1.8 bar /
26 psi, the TYRE IS TOO DAMAGED
AND CANNOT BE REPAIRED. Remove
and place the kit in the specific
compartment and contact a Fiat
Dealership;
if the pressure is equal to or higher
than 1.8 bar / 26 psi, switch on the
compressor and reach the required
pressure.Disconnect and replace the kit in the
specific compartment. Carefully drive
and reach the Fiat Dealership as soon
as possible;WARNING
140)The information required by the
applicable regulation is indicated on the
Fix&Go kit package label. Compliance with
the indications on the label is an essential
condition to ensure the safety and the
effectiveness of the Fix&Go kit. Carefully
read the label before use, avoid improper
use. Fix&Go is subject to expiration and
must be replaced periodically. The kit
should be used by adults and cannot be
used by children.
14908056J0002EM
15008056J0006EM
140
IN AN EMERGENCY
Page 143 of 240
Show the package and the label to the
personnel charged with handling the tyre
treated with the tyre repair kit.
55)Fix&Go provides a temporary repair,
therefore the tyre must be examined")
IMPORTANT
54)Show the package and the label to the
personnel charged with handling the tyre
treated with the tyre repair kit.
55)Fix&Go provides a temporary repair,
therefore the tyre must be examined and
repaired by a specialist as soon as
possible. The sealing fluid is effective at
temperatures between -40°C and +50°C. It
is possible to repair tyres which have been
damaged on tread up to a diameter of
4mm; however, tyres damaged on their
side cannot be repaired. Before using
Fix&Go kit, ensure that the tyre isn't
excessively damaged and that the rim is in
good condition, otherwise do not use it and
contact a Fiat Dealership. Do not remove
foreign bodies from the tyre. Do not let the
compressor turned on for more than
20 consecutive minutes - overheating
hazard.
EMERGENCY
STARTING
If the battery is flat, a jump starting can
be performed using the battery and the
cables of another vehicle, or using an
auxiliary battery. In all cases, the battery
used must have a capacity equal to or
a little higher than the flat one.
56)
IMPORTANT NOTES
Do not use an auxiliary battery or any
other source of external supply with a
voltage above 12 V: the battery, the
starter, the alternator and the electrical
system of the vehicle could be
damaged.
Do not attempt jump starting if the
battery is frozen. The battery could
break and explode!
PREPARATION TO JUMP
STARTING
The vehicle battery is located in the
engine compartment, behind the left
light cluster.
141) 142) 143) 144)
IMPORTANT The positive terminal (+) of
the battery is shielded by a protective
element. Raise it to access the terminal.
Proceed as follows:
operate the parking brake, move the
lever to P (Park), for versions equipped
with automatic transmission (if present),
or neutral, for versions with manual
gearbox, then set the ignition device to
STOP;
switch off all the other electrical
devices in the vehicle;
should you be using the battery of
another vehicle, park the other vehicle
within the range of the cables used for
the connection, operate the parking
brake and ensure that its ignition is off.
IMPORTANT Never connect the
negative terminals of the two batteries
directly! If the auxiliary battery is
installed on another vehicle, check that
there is no accidental contact of metal
parts between the two vehicles, since
an earth connection may result, with
the risk of serious injury to any people
who may be nearby.
IMPORTANT If the procedure below is
carried out incorrectly, it can cause
severe injury to people or damage the
recharging system of one or both
vehicles. Carefully follow the
instructions given below.
141
Page 144 of 240

Proceed as follows to carry out a jump
starting fig. 151:
connect one end of the cable used
for positive (+) to the positive terminal
(+) of the vehicle with flat battery;
connect")
Cable connection
57)
Proceed as follows to carry out a jump
starting fig. 151:
connect one end of the cable used
for positive (+) to the positive terminal
(+) of the vehicle with flat battery;
connect the other end of the cable
used for positive (+) to the positive
terminal (+) of the auxiliary battery;
connect one end of the cable used
for negative (–) to the negative terminal
(–) of the auxiliary battery;
connect the other end of the cable
used for negative (–) to an engine earth
(a visible metal part of the engine or
gearbox/transmission of the vehicle
with flat battery) away from the battery
and the fuel injection system;
start the vehicle engine with the
auxiliary battery, let it run for a few
minutes at idling. Start the engine of the
vehicle with flat battery.
Cable disconnection
Once the engine is started, remove the
leads, reversing the order above.
If after a few attempts the engine does
not start, do not persist but contact a
Fiat Dealership.
If it is often necessary to perform a
jump starting, have the vehicle battery
and the recharging system checked by
a Fiat Dealership.
WARNING
141)Before opening the bonnet, make
sure that the engine is off and that the
ignition key is in the STOP position. Follow
the indications on the plate underneath the
bonnet. We recommend that you remove
the key from the ignition if other people
remain in the vehicle. The vehicle should
always be left after the key has been
removed or turned to the STOP position.
During refuelling, make sure that the engine
is off (and that the ignition key is in the
STOP position).
142)Do not get too close to the radiator
cooling fan: the electric fan may start;
danger of injury. Scarves, ties and other
loose clothing might be pulled by moving
parts.143)Remove any metal objects (e.g. rings,
watches, bracelets), that might cause an
accidental electrical contact and cause
serious injury.
144)The batteries contain acid that can
burn skin or eyes. Batteries produce
hydrogen, which is easily flammable and
explosive. Therefore, keep away flames or
devices which may cause sparks.
IMPORTANT
56)Never use a fast battery-charger to
start the engine as this could damage the
electronic systems of your vehicle,
particularly the ignition and engine fuel
supply control units.
57)Do not connect the cable to the
negative terminal (–) of the flat battery. The
following spark could lead to battery
explosion and cause serious harm. Only
use the specific earth point; do not use any
other exposed metallic part.
15108066J0003EM
142
IN AN EMERGENCY
 1
1 2
2 3
3 4
4 5
5 6
6 7
7 8
8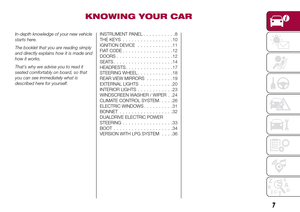 9
9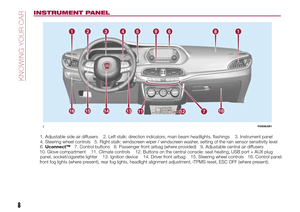 10
10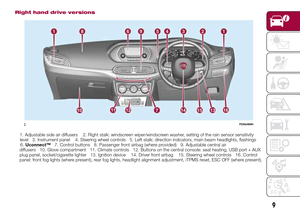 11
11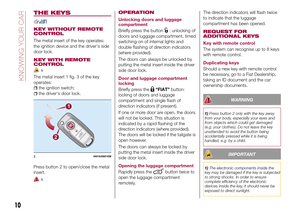 12
12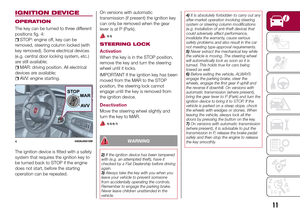 13
13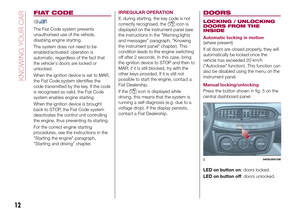 14
14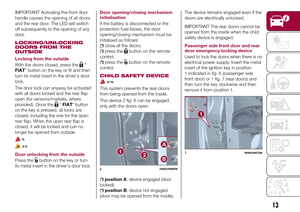 15
15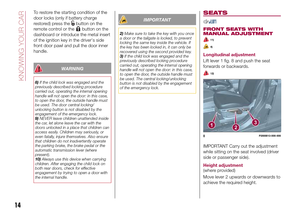 16
16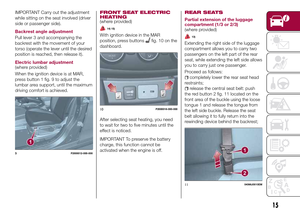 17
17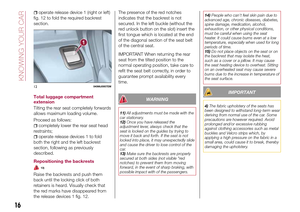 18
18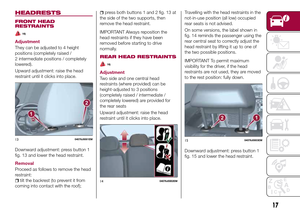 19
19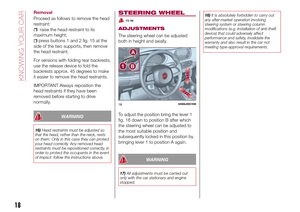 20
20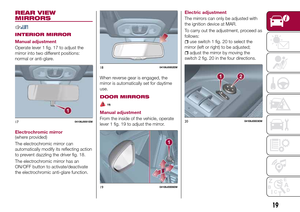 21
21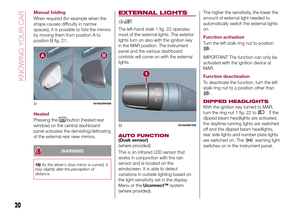 22
22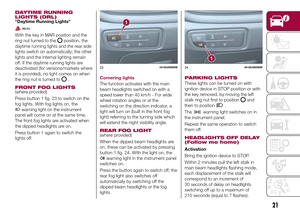 23
23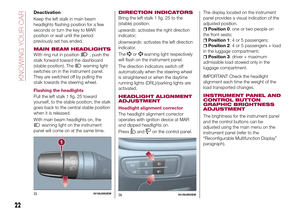 24
24 25
25 26
26 27
27 28
28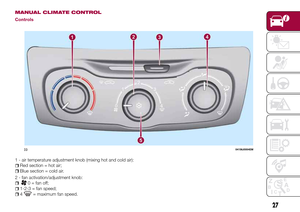 29
29 30
30 31
31 32
32 33
33 34
34 35
35 36
36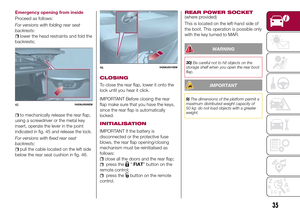 37
37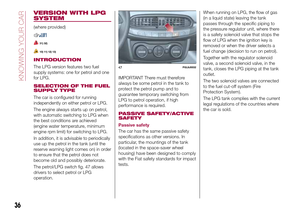 38
38 39
39 40
40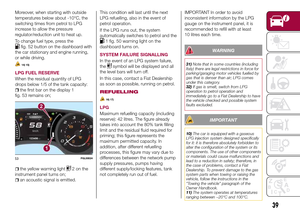 41
41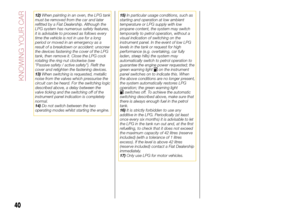 42
42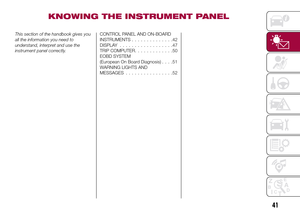 43
43 44
44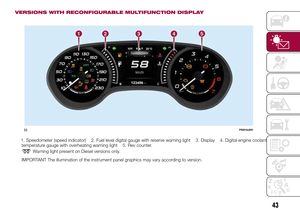 45
45 46
46 47
47 48
48 49
49 50
50 51
51 52
52 53
53 54
54 55
55 56
56 57
57 58
58 59
59 60
60 61
61 62
62 63
63 64
64 65
65 66
66 67
67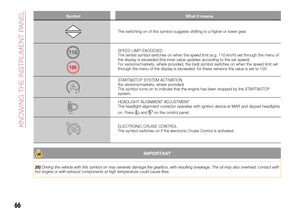 68
68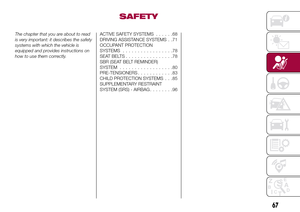 69
69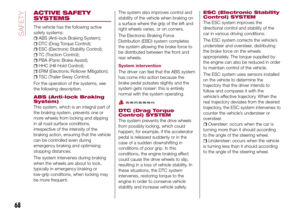 70
70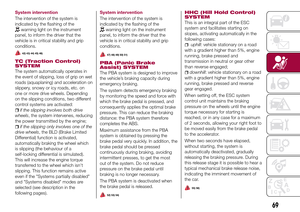 71
71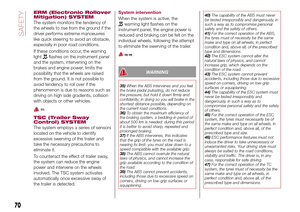 72
72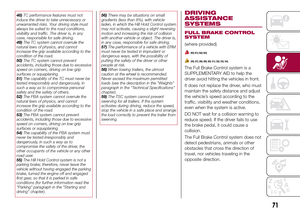 73
73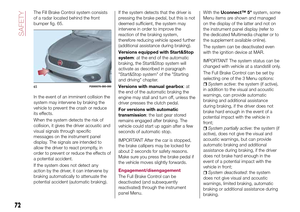 74
74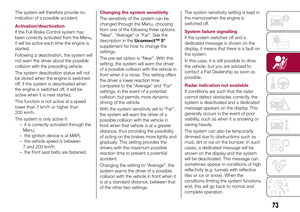 75
75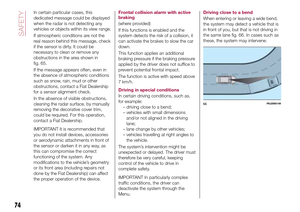 76
76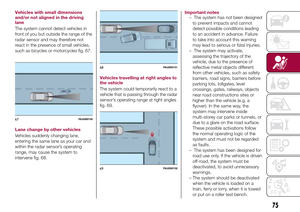 77
77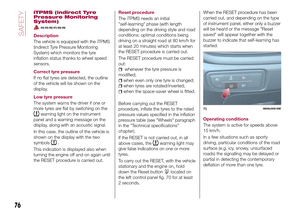 78
78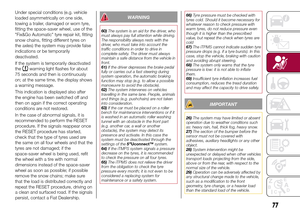 79
79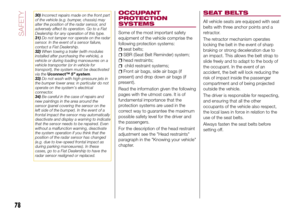 80
80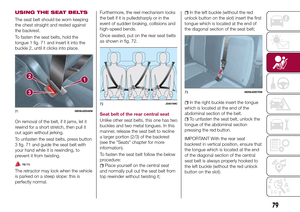 81
81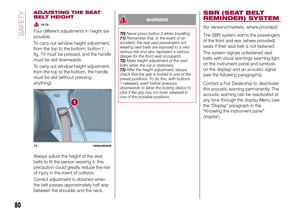 82
82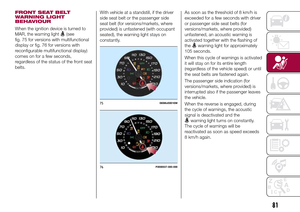 83
83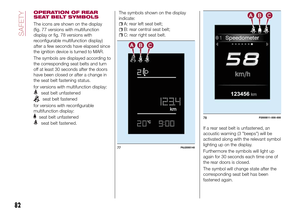 84
84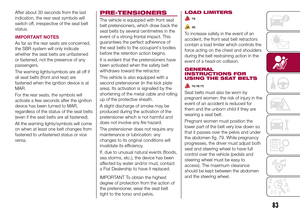 85
85 86
86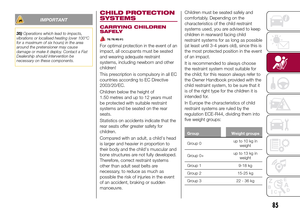 87
87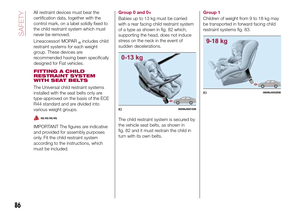 88
88 89
89 90
90 91
91 92
92 93
93 94
94 95
95 96
96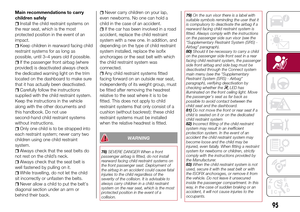 97
97 98
98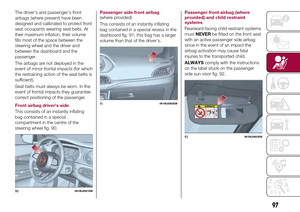 99
99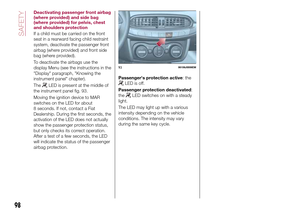 100
100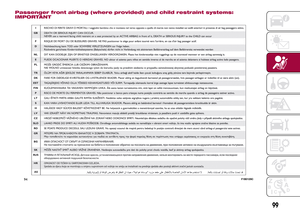 101
101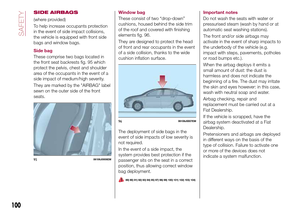 102
102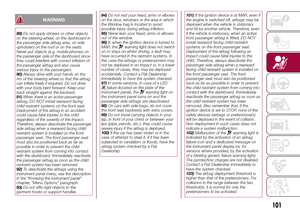 103
103 104
104 105
105 106
106 107
107 108
108 109
109 110
110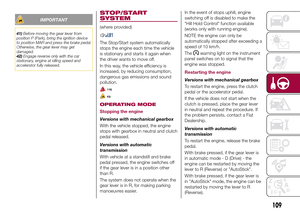 111
111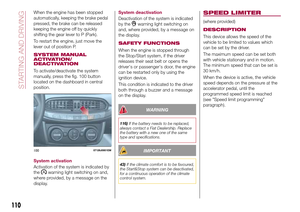 112
112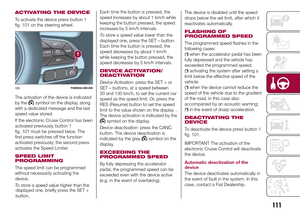 113
113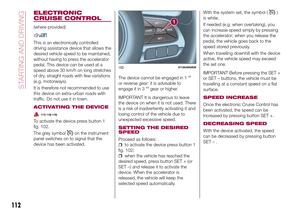 114
114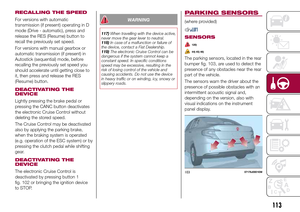 115
115 116
116 117
117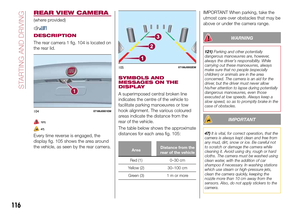 118
118 119
119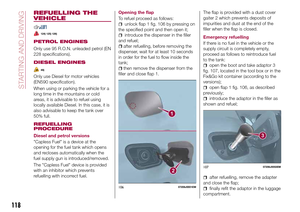 120
120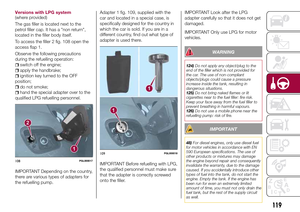 121
121 122
122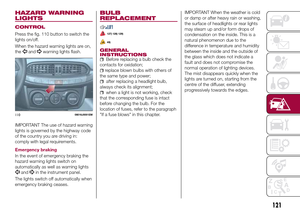 123
123 124
124 125
125 126
126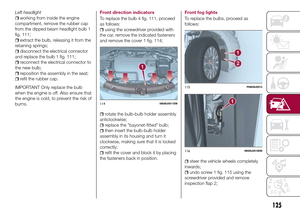 127
127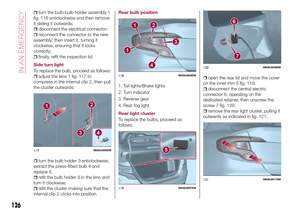 128
128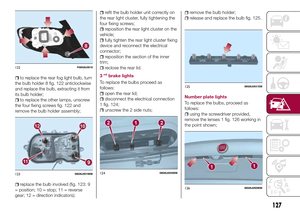 129
129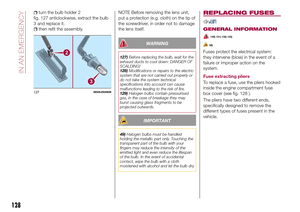 130
130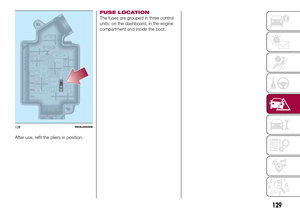 131
131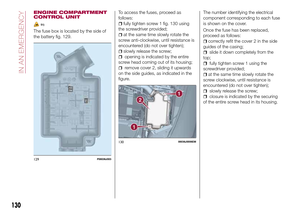 132
132 133
133 134
134 135
135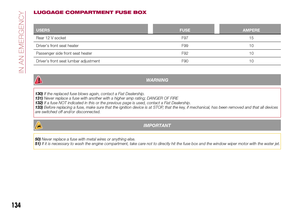 136
136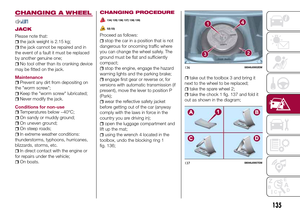 137
137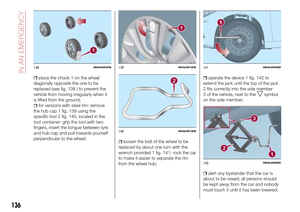 138
138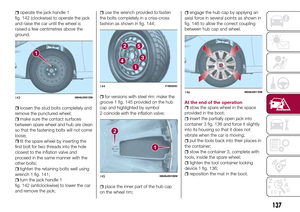 139
139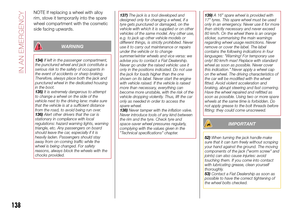 140
140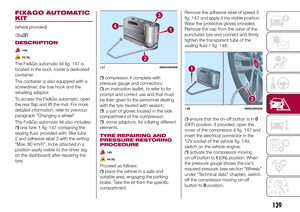 141
141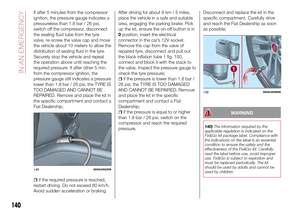 142
142 143
143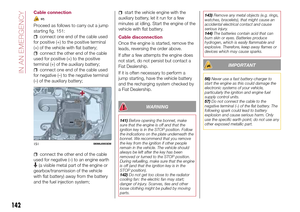 144
144 145
145 146
146 147
147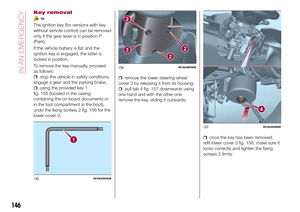 148
148 149
149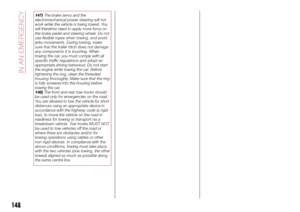 150
150 151
151 152
152 153
153 154
154 155
155 156
156 157
157 158
158 159
159 160
160 161
161 162
162 163
163 164
164 165
165 166
166 167
167 168
168 169
169 170
170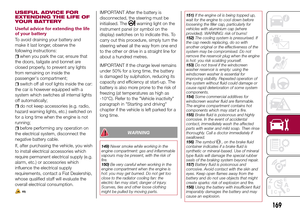 171
171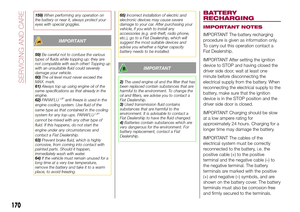 172
172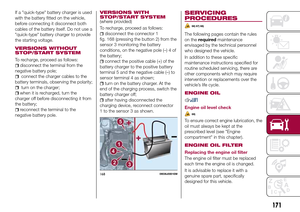 173
173 174
174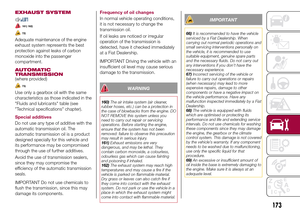 175
175 176
176 177
177 178
178 179
179 180
180 181
181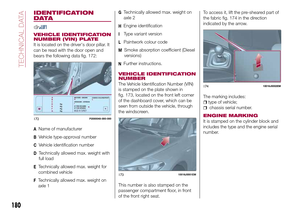 182
182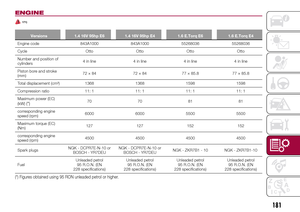 183
183 184
184 185
185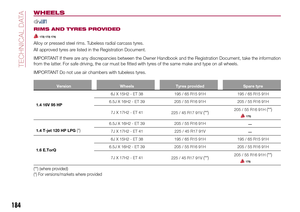 186
186 187
187 188
188 189
189 190
190 191
191 192
192 193
193 194
194 195
195 196
196 197
197 198
198 199
199 200
200 201
201 202
202 203
203 204
204 205
205 206
206 207
207 208
208 209
209 210
210 211
211 212
212 213
213 214
214 215
215 216
216 217
217 218
218 219
219 220
220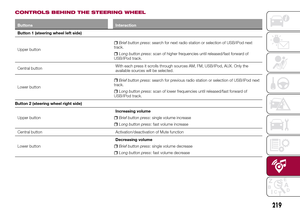 221
221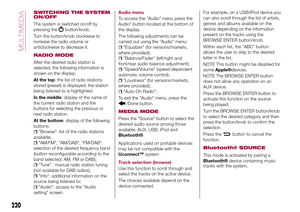 222
222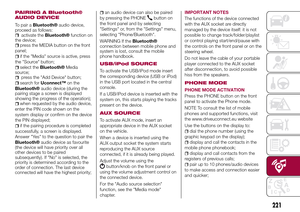 223
223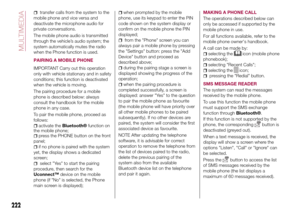 224
224 225
225 226
226 227
227 228
228 229
229 230
230 231
231 232
232 233
233 234
234 235
235 236
236 237
237 238
238 239
239