2017 FIAT 500L LIVING instrument panel
[x] Cancel search: instrument panelPage 9 of 240
DASHBOARD
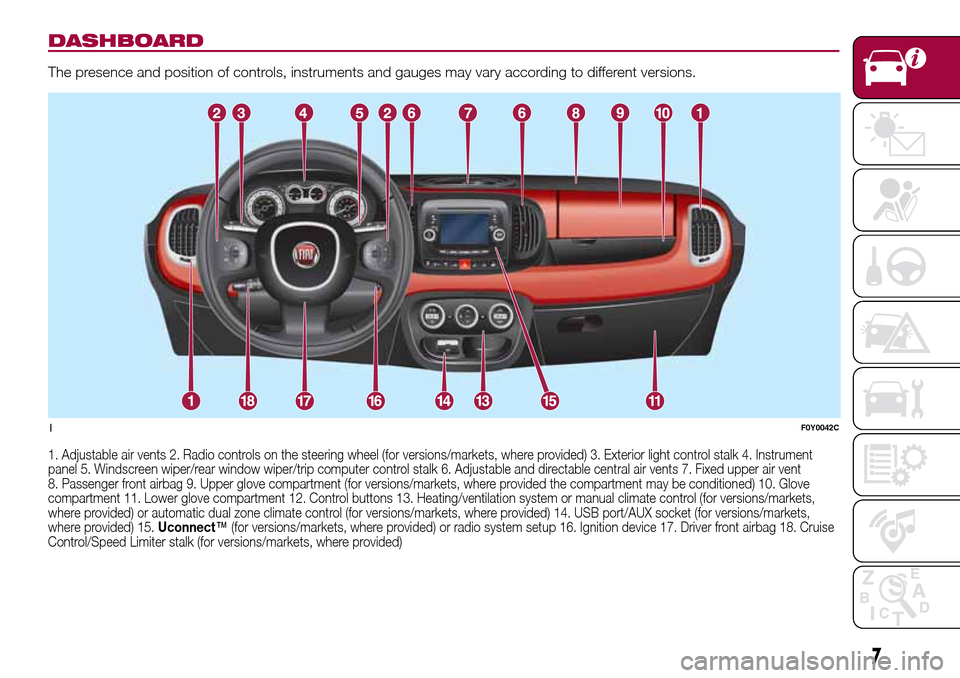
The presence and position of controls, instruments and gauges may vary according to different versions.
1. Adjustable air vents 2. Radio controls on the steering wheel (for versions/markets, where provided) 3. Exterior light control stalk 4. Instrument
panel 5. Windscreen wiper/rear window wiper/trip computer control stalk 6. Adjustable and directable central air vents 7. Fixed upper air vent
8. Passenger front airbag 9. Upper glove compartment (for versions/markets, where provided the compartment may be conditioned) 10. Glove
compartment 11. Lower glove compartment 12. Control buttons 13. Heating/ventilation system or manual climate control (for versions/markets,
where provided) or automatic dual zone climate control (for versions/markets, where provided) 14. USB port/AUX socket (for versions/markets,
where provided) 15.Uconnect™(for versions/markets, where provided) or radio system setup 16. Ignition device 17. Driver front airbag 18. Cruise
Control/Speed Limiter stalk (for versions/markets, where provided)
1F0Y0042C
7
Page 10 of 240
THE FIAT CODE
SYSTEM
This is an electronic engine locking
system which increases protection
against attempted thefts of the vehicle.
It is automatically activated when the
ignition key is removed.
There is an electronic device in each
key which can identify the signal
emitted, when the engine is started,
from an aerial built into the ignition
switch. The signal is the "password",
different every time the vehicle is
started, through which the control unit
recognises the key and enables
starting.
OPERATION
Each time the vehicle is started by
turning the ignition key to MAR, the Fiat
CODE system control unit sends a
recognition code to the Powertrain
Control Module to deactivate the
immobiliser.
The code is sent only if the Fiat CODE
system control unit has acknowledged
the code received from the key.Each time the ignition key is turned to
STOP, the Fiat CODE system
deactivates the functions of the
Powertrain Control Module. If, during
starting, the code is not correctly
recognised, the
warning light
switches on in the instrument panel. In
this case, turn the key to STOP and
then to MAR; if it is still locked, try again
with the other keys that come with the
vehicle. Contact a Fiat Dealership if
you still cannot start the engine.
Activation of warning light while
driving
If thewarning light switches on, this
means that the system is running a
self-diagnosis (for example due to
a voltage drop). Should the fault persist,
contact a Fiat Dealership.
THE KEYS
1)1)1)
KEY WITHOUT REMOTE
CONTROL
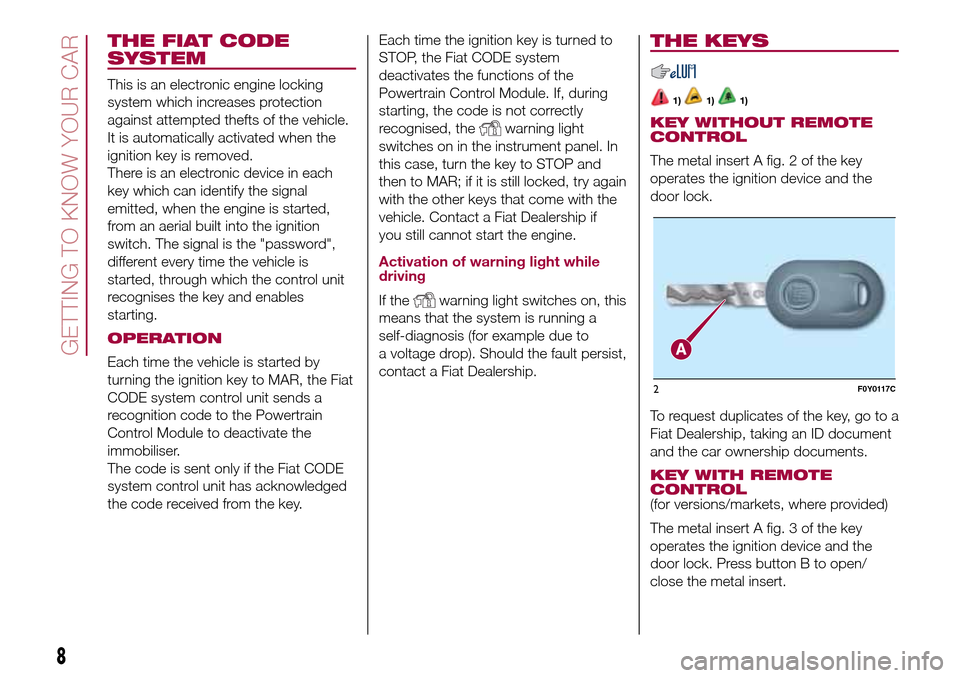
The metal insert A fig. 2 of the key
operates the ignition device and the
door lock.
To request duplicates of the key, go to a
Fiat Dealership, taking an ID document
and the car ownership documents.
KEY WITH REMOTE
CONTROL
(for versions/markets, where provided)
The metal insert A fig. 3 of the key
operates the ignition device and the
door lock. Press button B to open/
close the metal insert.
2F0Y0117C
8
GETTING TO KNOW YOUR CAR
Page 22 of 240
SIDE LIGHTS AND
DIPPED BEAM
HEADLIGHTS
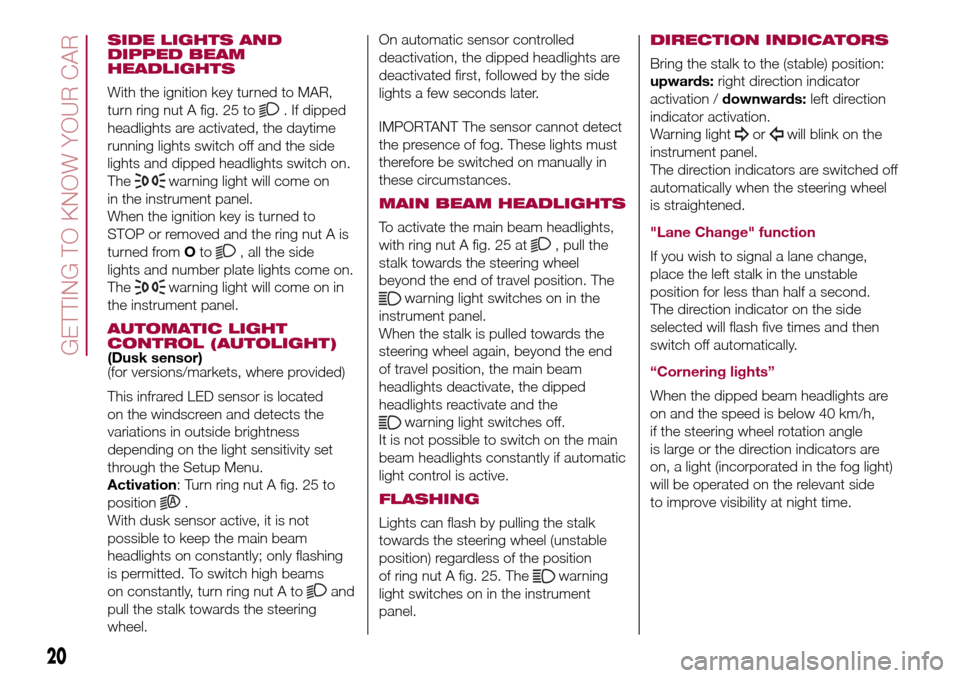
With the ignition key turned to MAR,
turn ring nut A fig. 25 to
. If dipped
headlights are activated, the daytime
running lights switch off and the side
lights and dipped headlights switch on.
The
warning light will come on
in the instrument panel.
When the ignition key is turned to
STOP or removed and the ring nut A is
turned fromOto
, all the side
lights and number plate lights come on.
The
warning light will come on in
the instrument panel.
AUTOMATIC LIGHT
CONTROL (AUTOLIGHT)
(Dusk sensor)
(for versions/markets, where provided)
This infrared LED sensor is located
on the windscreen and detects the
variations in outside brightness
depending on the light sensitivity set
through the Setup Menu.
Activation: Turn ring nut A fig. 25 to
position
.
With dusk sensor active, it is not
possible to keep the main beam
headlights on constantly; only flashing
is permitted. To switch high beams
on constantly, turn ring nut A to
and
pull the stalk towards the steering
wheel.On automatic sensor controlled
deactivation, the dipped headlights are
deactivated first, followed by the side
lights a few seconds later.
IMPORTANT The sensor cannot detect
the presence of fog. These lights must
therefore be switched on manually in
these circumstances.
MAIN BEAM HEADLIGHTS
To activate the main beam headlights,
with ring nut A fig. 25 at
, pull the
stalk towards the steering wheel
beyond the end of travel position. The
warning light switches on in the
instrument panel.
When the stalk is pulled towards the
steering wheel again, beyond the end
of travel position, the main beam
headlights deactivate, the dipped
headlights reactivate and the
warning light switches off.
It is not possible to switch on the main
beam headlights constantly if automatic
light control is active.
FLASHING
Lights can flash by pulling the stalk
towards the steering wheel (unstable
position) regardless of the position
of ring nut A fig. 25. The
warning
light switches on in the instrument
panel.
DIRECTION INDICATORS
Bring the stalk to the (stable) position:
upwards:right direction indicator
activation /downwards:left direction
indicator activation.
Warning light
orwill blink on the
instrument panel.
The direction indicators are switched off
automatically when the steering wheel
is straightened.
"Lane Change" function
If you wish to signal a lane change,
place the left stalk in the unstable
position for less than half a second.
The direction indicator on the side
selected will flash five times and then
switch off automatically.
“Cornering lights”
When the dipped beam headlights are
on and the speed is below 40 km/h,
if the steering wheel rotation angle
is large or the direction indicators are
on, a light (incorporated in the fog light)
will be operated on the relevant side
to improve visibility at night time.
20
GETTING TO KNOW YOUR CAR
Page 23 of 240
"FOLLOW ME HOME"
DEVICE
This allows the space in front of the
vehicle to be lit for a set time.
Activation
The lights turning on time is adjustable
and programmable interacting via
the Setup Menu of the instrument
panel.
It is possible to choose between 0, 30,
60 up to 90 seconds. The device is
activated automatically after turning off
the car and having rotated the ring
nut A fig. 25 to positionO.
It is also possible (if the program
described above is set to "0" seconds)
to set the headlights start time by
pulling the left stalk toward you once or
more times (same procedure to activate
the main beam lights). In this case it is
possible to choose between 0, 30,
60, 90 up to a maximum of 210
seconds.
Each time the stalk is operated, the
warning light
on the instrument
panel switches on. The display shows a
message and the time set for the
function. The
warning light comes
on when the stalk is first moved and
stays on until the function is
automatically deactivated.
Deactivation
This function is deactivated by
switching on the headlights, the side
lights or bringing the ignition device to
MAR.
WARNING
20)The daytime running lights are an
alternative to the dipped beam headlights
for driving in countries where it is
compulsory to have lights on during the
day; where it is not compulsory, the use of
daytime running lights is permitted.
21)Daytime running lights cannot replace
dipped beam headlights when driving at
night or through tunnels. The use of
daytime running lights is governed by the
highway code of the country in which
you are driving. Comply with legal
requirements.
WINDOW CLEANING
WINDSCREEN
WIPER/WASHER
6) 7)This operates only with the ignition key
turned to MAR.
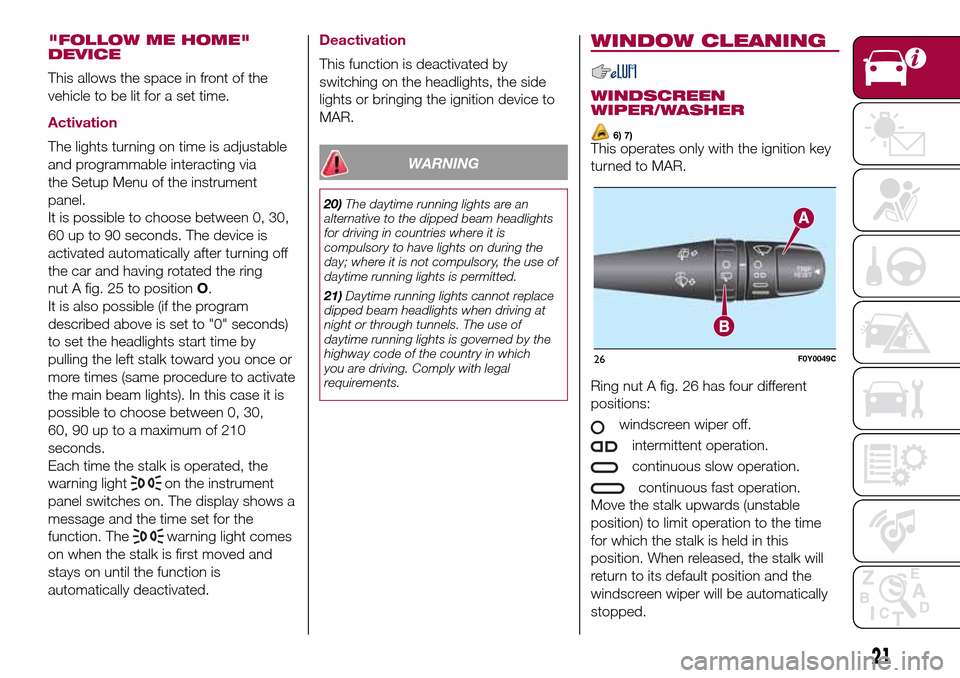
Ring nut A fig. 26 has four different
positions:
windscreen wiper off.
intermittent operation.
continuous slow operation.
continuous fast operation.
Move the stalk upwards (unstable
position) to limit operation to the time
for which the stalk is held in this
position. When released, the stalk will
return to its default position and the
windscreen wiper will be automatically
stopped.
26F0Y0049C
21
Page 29 of 240
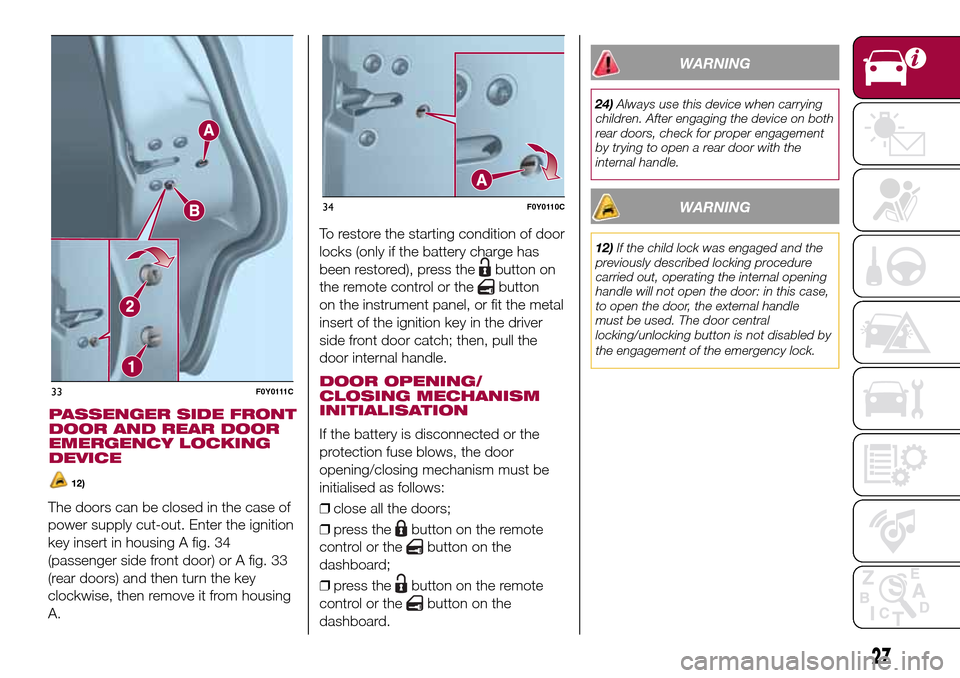
The doors can be closed in the case of
power supply cut-out. Enter the ignition
key insert in housing A fig. 34
(passenger side front door) or A fig. 33
(rear doors) and then turn the key
clockwise, then remove it from housing
A.To restore the starting condition of door
locks (only if the battery charge has
been restored), press the
button on
the remote control or the
button
on the instrument panel, or fit the metal
insert of the ignition key in the driver
side front door catch; then, pull the
door internal handle.
DOOR OPENING/
CLOSING MECHANISM
INITIALISATION
If the battery is disconnected or the
protection fuse blows, the door
opening/closing mechanism must be
initialised as follows:
❒close all the doors;
❒press the
button on the remote
control or the
button on the
dashboard;
❒press the
button on the remote
control or the
button on the
dashboard.
WARNING
24)Always use this device when carrying
children. After engaging the device on both
rear doors, check for proper engagement
by trying to open a rear door with the
internal handle.
WARNING
12)If the child lock was engaged and the
previously described locking procedure
carried out, operating the internal opening
handle will not open the door: in this case,
to open the door, the external handle
must be used. The door central
locking/unlocking button is not disabled by
the engagement of the emergency lock.
.33F0Y0111C
34F0Y0110C
27
PASSENGER SIDE FRONT
DOOR AND REAR DOOR
EMERGENCY LOCKING
DEVICE
12)
Page 35 of 240
IMPORTANT The Dualdrive electric
power steering has an electronic
damping effect while approaching the
end of stroke. In some manoeuvring
conditions, the steering wheel might
rotate a bit before touching its
mechanical stop. This behaviour is
standard as it takes place to prevent
strong impacts on the mechanical
components inside the device.
POWER STEERING
ACTIVATION/
DEACTIVATION
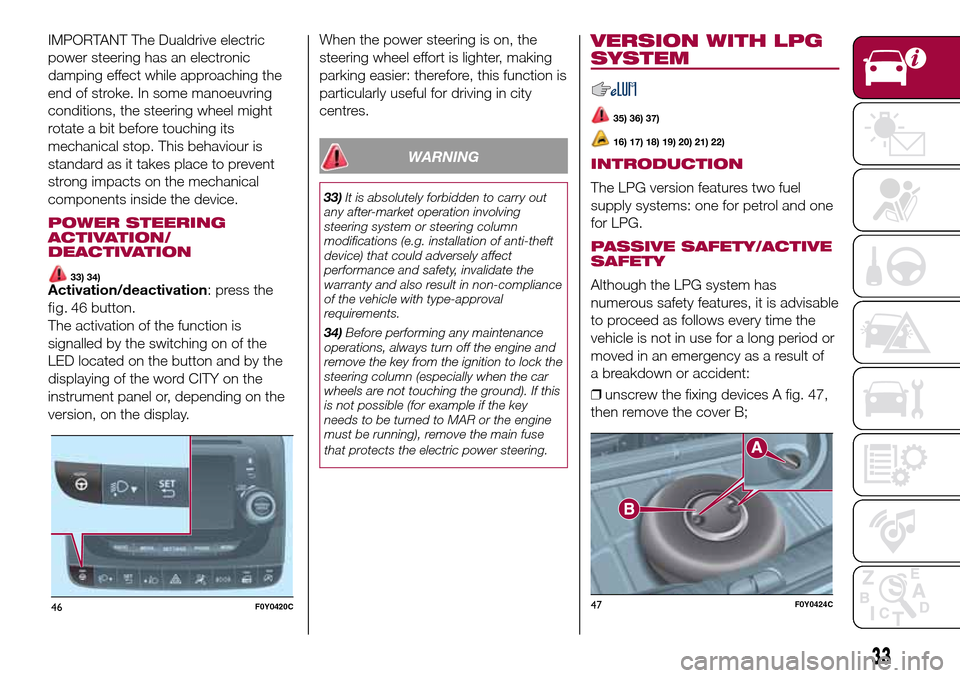
33) 34)Activation/deactivation: press the
The activation of the function is
signalled by the switching on of the
LED located on the button and by the
displaying of the word CITY on the
instrument panel or, depending on the
version, on the display.When the power steering is on, the
steering wheel effort is lighter, making
parking easier: therefore, this function is
particularly useful for driving in city
centres.
WARNING
33)It is absolutely forbidden to carry out
any after-market operation involving
steering system or steering column
modifications (e.g. installation of anti-theft
device) that could adversely affect
performance and safety, invalidate the
warranty and also result in non-compliance
of the vehicle with type-approval
requirements.
34)Before performing any maintenance
operations, always turn off the engine and
remove the key from the ignition to lock the
steering column (especially when the car
wheels are not touching the ground). If this
is not possible (for example if the key
needs to be turned to MAR or the engine
must be running), remove the main fuse
that protects the electric power steering.
VERSION WITH LPG
SYSTEM
35) 36) 37)
16) 17) 18) 19) 20) 21) 22)
INTRODUCTION
The LPG version features two fuel
supply systems: one for petrol and one
for LPG.
PASSIVE SAFETY/ACTIVE
SAFETY
Although the LPG system has
numerous safety features, it is advisable
to proceed as follows every time the
vehicle is not in use for a long period or
moved in an emergency as a result of
a breakdown or accident:
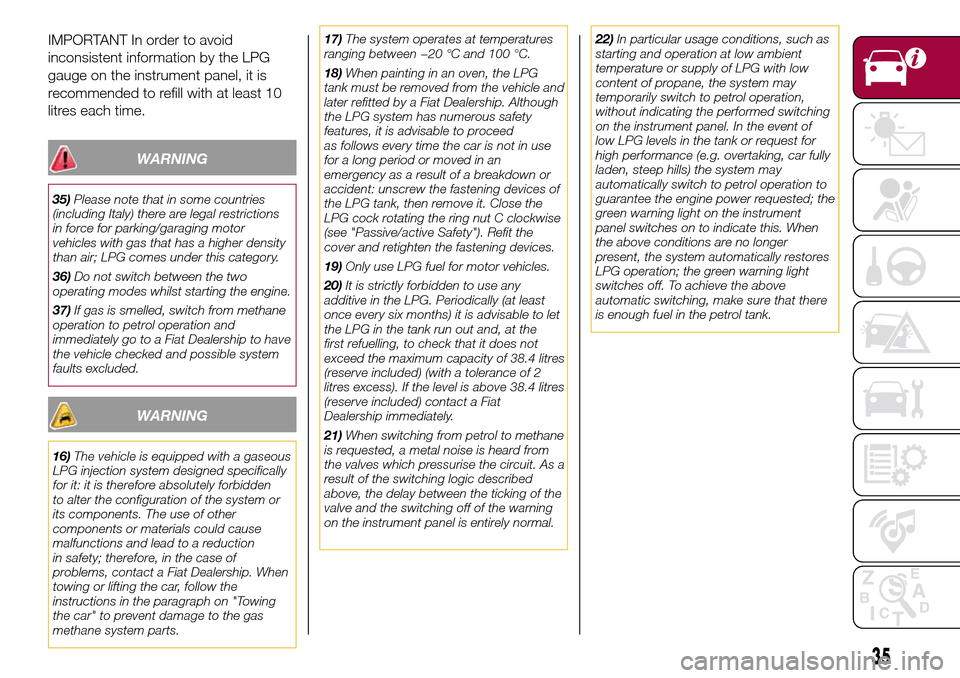
❒unscrew the fixing devices A fig. 47,
then remove the cover B;
46F0Y0420C
33
fig. 46button.
47F0Y0424C
Page 37 of 240
IMPORTANT In order to avoid
inconsistent information by the LPG
gauge on the instrument panel, it is
recommended to refill with at least 10
litres each time.
WARNING
35)Please note that in some countries
(including Italy) there are legal restrictions
in force for parking/garaging motor
vehicles with gas that has a higher density
than air; LPG comes under this category.
36)Do not switch between the two
operating modes whilst starting the engine.
37)If gas is smelled, switch from methane
operation to petrol operation and
immediately go to a Fiat Dealership to have
the vehicle checked and possible system
faults excluded.
WARNING
16)The vehicle is equipped with a gaseous
LPG injection system designed specifically
for it: it is therefore absolutely forbidden
to alter the configuration of the system or
its components. The use of other
components or materials could cause
malfunctions and lead to a reduction
in safety; therefore, in the case of
problems, contact a Fiat Dealership. When
towing or lifting the car, follow the
instructions in the paragraph on "Towing
the car" to prevent damage to the gas
methane system parts.17)The system operates at temperatures
ranging between −20 °C and 100 °C.
18)When painting in an oven, the LPG
tank must be removed from the vehicle and
later refitted by a Fiat Dealership. Although
the LPG system has numerous safety
features, it is advisable to proceed
as follows every time the car is not in use
for a long period or moved in an
emergency as a result of a breakdown or
accident: unscrew the fastening devices of
the LPG tank, then remove it. Close the
LPG cock rotating the ring nut C clockwise
(see "Passive/active Safety"). Refit the
cover and retighten the fastening devices.
19)Only use LPG fuel for motor vehicles.
20)It is strictly forbidden to use any
additive in the LPG. Periodically (at least
once every six months) it is advisable to let
the LPG in the tank run out and, at the
first refuelling, to check that it does not
exceed the maximum capacity of 38.4 litres
(reserve included) (with a tolerance of 2
litres excess). If the level is above 38.4 litres
(reserve included) contact a Fiat
Dealership immediately.
21)When switching from petrol to methane
is requested, a metal noise is heard from
the valves which pressurise the circuit. As a
result of the switching logic described
above, the delay between the ticking of the
valve and the switching off of the warning
on the instrument panel is entirely normal.22)In particular usage conditions, such as
starting and operation at low ambient
temperature or supply of LPG with low
content of propane, the system may
temporarily switch to petrol operation,
without indicating the performed switching
on the instrument panel. In the event of
low LPG levels in the tank or request for
high performance (e.g. overtaking, car fully
laden, steep hills) the system may
automatically switch to petrol operation to
guarantee the engine power requested; the
green warning light on the instrument
panel switches on to indicate this. When
the above conditions are no longer
present, the system automatically restores
LPG operation; the green warning light
switches off. To achieve the above
automatic switching, make sure that there
is enough fuel in the petrol tank.
35
Page 38 of 240
VERSION WITH
METHANE SYSTEM
(Natural Power)
38) 39) 40) 41)
23) 24) 25) 26) 27)
INTRODUCTION
The "Natural Power" version features
two fuel systems, one for petrol and
one for natural gas (methane).
METHANE CYLINDERS
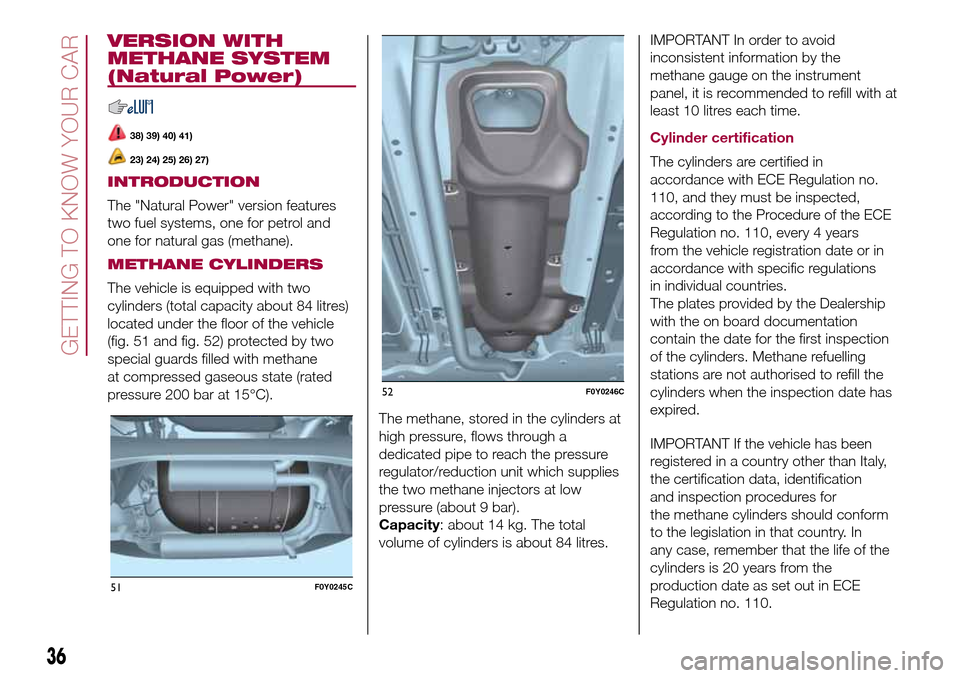
The vehicle is equipped with two
cylinders (total capacity about 84 litres)
located under the floor of the vehicle
(fig. 51 and fig. 52) protected by two
special guards filled with methane
at compressed gaseous state (rated
pressure 200 bar at 15°C).
The methane, stored in the cylinders at
high pressure, flows through a
dedicated pipe to reach the pressure
regulator/reduction unit which supplies
the two methane injectors at low
pressure (about 9 bar).
Capacity: about 14 kg. The total
volume of cylinders is about 84 litres.IMPORTANT In order to avoid
inconsistent information by the
methane gauge on the instrument
panel, it is recommended to refill with at
least 10 litres each time.
Cylinder certification
The cylinders are certified in
accordance with ECE Regulation no.
110, and they must be inspected,
according to the Procedure of the ECE
Regulation no. 110, every 4 years
from the vehicle registration date or in
accordance with specific regulations
in individual countries.
The plates provided by the Dealership
with the on board documentation
contain the date for the first inspection
of the cylinders. Methane refuelling
stations are not authorised to refill the
cylinders when the inspection date has
expired.
IMPORTANT If the vehicle has been
registered in a country other than Italy,
the certification data, identification
and inspection procedures for
the methane cylinders should conform
to the legislation in that country. In
any case, remember that the life of the
cylinders is 20 years from the
production date as set out in ECE
Regulation no. 110.
51F0Y0245C
52F0Y0246C
36
GETTING TO KNOW YOUR CAR