2017 FIAT 500L LIVING turn signal
[x] Cancel search: turn signalPage 10 of 240
THE FIAT CODE
SYSTEM
This is an electronic engine locking
system which increases protection
against attempted thefts of the vehicle.
It is automatically activated when the
ignition key is removed.
There is an electronic device in each
key which can identify the signal
emitted, when the engine is started,
from an aerial built into the ignition
switch. The signal is the "password",
different every time the vehicle is
started, through which the control unit
recognises the key and enables
starting.
OPERATION
Each time the vehicle is started by
turning the ignition key to MAR, the Fiat
CODE system control unit sends a
recognition code to the Powertrain
Control Module to deactivate the
immobiliser.
The code is sent only if the Fiat CODE
system control unit has acknowledged
the code received from the key.Each time the ignition key is turned to
STOP, the Fiat CODE system
deactivates the functions of the
Powertrain Control Module. If, during
starting, the code is not correctly
recognised, the
warning light
switches on in the instrument panel. In
this case, turn the key to STOP and
then to MAR; if it is still locked, try again
with the other keys that come with the
vehicle. Contact a Fiat Dealership if
you still cannot start the engine.
Activation of warning light while
driving
If thewarning light switches on, this
means that the system is running a
self-diagnosis (for example due to
a voltage drop). Should the fault persist,
contact a Fiat Dealership.
THE KEYS
1)1)1)
KEY WITHOUT REMOTE
CONTROL
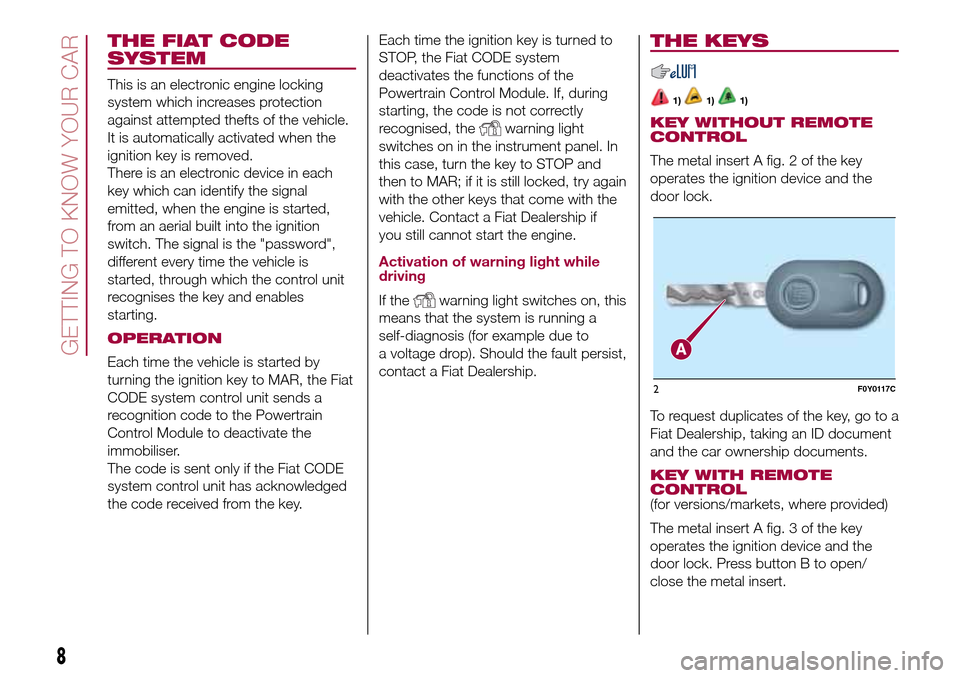
The metal insert A fig. 2 of the key
operates the ignition device and the
door lock.
To request duplicates of the key, go to a
Fiat Dealership, taking an ID document
and the car ownership documents.
KEY WITH REMOTE
CONTROL
(for versions/markets, where provided)
The metal insert A fig. 3 of the key
operates the ignition device and the
door lock. Press button B to open/
close the metal insert.
2F0Y0117C
8
GETTING TO KNOW YOUR CAR
Page 22 of 240
SIDE LIGHTS AND
DIPPED BEAM
HEADLIGHTS
With the ignition key turned to MAR,
turn ring nut A fig. 25 to
. If dipped
headlights are activated, the daytime
running lights switch off and the side
lights and dipped headlights switch on.
The
warning light will come on
in the instrument panel.
When the ignition key is turned to
STOP or removed and the ring nut A is
turned fromOto
, all the side
lights and number plate lights come on.
The
warning light will come on in
the instrument panel.
AUTOMATIC LIGHT
CONTROL (AUTOLIGHT)
(Dusk sensor)
(for versions/markets, where provided)
This infrared LED sensor is located
on the windscreen and detects the
variations in outside brightness
depending on the light sensitivity set
through the Setup Menu.
Activation: Turn ring nut A fig. 25 to
position
.
With dusk sensor active, it is not
possible to keep the main beam
headlights on constantly; only flashing
is permitted. To switch high beams
on constantly, turn ring nut A to
and
pull the stalk towards the steering
wheel.On automatic sensor controlled
deactivation, the dipped headlights are
deactivated first, followed by the side
lights a few seconds later.
IMPORTANT The sensor cannot detect
the presence of fog. These lights must
therefore be switched on manually in
these circumstances.
MAIN BEAM HEADLIGHTS
To activate the main beam headlights,
with ring nut A fig. 25 at
, pull the
stalk towards the steering wheel
beyond the end of travel position. The
warning light switches on in the
instrument panel.
When the stalk is pulled towards the
steering wheel again, beyond the end
of travel position, the main beam
headlights deactivate, the dipped
headlights reactivate and the
warning light switches off.
It is not possible to switch on the main
beam headlights constantly if automatic
light control is active.
FLASHING
Lights can flash by pulling the stalk
towards the steering wheel (unstable
position) regardless of the position
of ring nut A fig. 25. The
warning
light switches on in the instrument
panel.
DIRECTION INDICATORS
Bring the stalk to the (stable) position:
upwards:right direction indicator
activation /downwards:left direction
indicator activation.
Warning light
orwill blink on the
instrument panel.
The direction indicators are switched off
automatically when the steering wheel
is straightened.
"Lane Change" function
If you wish to signal a lane change,
place the left stalk in the unstable
position for less than half a second.
The direction indicator on the side
selected will flash five times and then
switch off automatically.
“Cornering lights”
When the dipped beam headlights are
on and the speed is below 40 km/h,
if the steering wheel rotation angle
is large or the direction indicators are
on, a light (incorporated in the fog light)
will be operated on the relevant side
to improve visibility at night time.
20
GETTING TO KNOW YOUR CAR
Page 24 of 240
With ring nut A in position, the
windscreen wiper will automatically
adapt its operating speed to the speed
of the vehicle.
With the windscreen wipers
operational, if reverse gear is engaged,
the rear window wiper is automatically
activated.
"Smart washing" function
Pull the lever towards the steering
wheel (unstable position) to activate the
windscreen washer.
Keeping the stalk pulled for more than
half a second, with just one movement
it is possible to operate the washer
jet and the wiper at the same time.
The wiper stops working three strokes
after the stalk is released.
On some versions, a further stroke after
approximately 6 seconds completes
the cycle.
RAIN SENSOR(for versions/markets, where provided)
22)8) 9)This is located behind the interior rear
view mirror, in contact with the
windscreen and can detect the
presence of rain and, consequently,
manage the cleaning of the windscreen
in accordance with the amount of
water on the screen.Activation: rotate the ring nut A fig. 26
to position
: the windscreen wiper
stroke frequency is thus adjusted in
accordance with the amount of water
on the windscreen. The activation of the
sensor is signalled by a "stroke" to
show that the command has been
acquired.
Deactivation: move the stalk ring nut
away from the position
or turn
the ignition key to STOP. If the ignition
key is turned to the STOP position
leaving the ring nut A in position
,
no wiping cycle is performed at the next
startup (ignition key to the MAR
position) even in the case of rain.
REAR WINDOW
WIPER/WASHER
10)This operates only with the ignition key
turned to MAR.
Activation: turn the ring nut B fig. 26
from position
to positionto
activate the rear window wiper
as follows:
❒in intermittent mode when the
windscreen wiper is not operating;
❒in synchronous mode (at half the
speed of the windscreen wiper) when
the windscreen wiper is operating;
❒in continuous mode with reverse
engaged.With the windscreen wiper on and
reverse gear engaged, rear window
wiping will be continuous in the same
way.
Pushing the stalk towards the
dashboard (unstable position) the rear
window washer jet will activate. Keep
the stalk pushed for more than half
a second to activate the rear window
wiper as well. Releasing the stalk will
activate the smart washing function, as
described for the windscreen wiper.
Deactivation: release the lever.
WARNING
22)Make sure the device is switched off
whenever the windscreen must be
cleaned.
WARNING
6)Do not use the screen wiper to remove
layers of snow or ice from the windscreen.
In such conditions, the windscreen wiper
may be subjected to excessive stress
and the motor cut-out switch, which
prevents operation for a few seconds, may
intervene. If operation is not restored
(even after turning the key and restarting
the vehicle engine), contact a Fiat
Dealership.
7)Do not operate the windscreen wiper
with blades lifted from the windscreen.
22
GETTING TO KNOW YOUR CAR
Page 35 of 240
IMPORTANT The Dualdrive electric
power steering has an electronic
damping effect while approaching the
end of stroke. In some manoeuvring
conditions, the steering wheel might
rotate a bit before touching its
mechanical stop. This behaviour is
standard as it takes place to prevent
strong impacts on the mechanical
components inside the device.
POWER STEERING
ACTIVATION/
DEACTIVATION
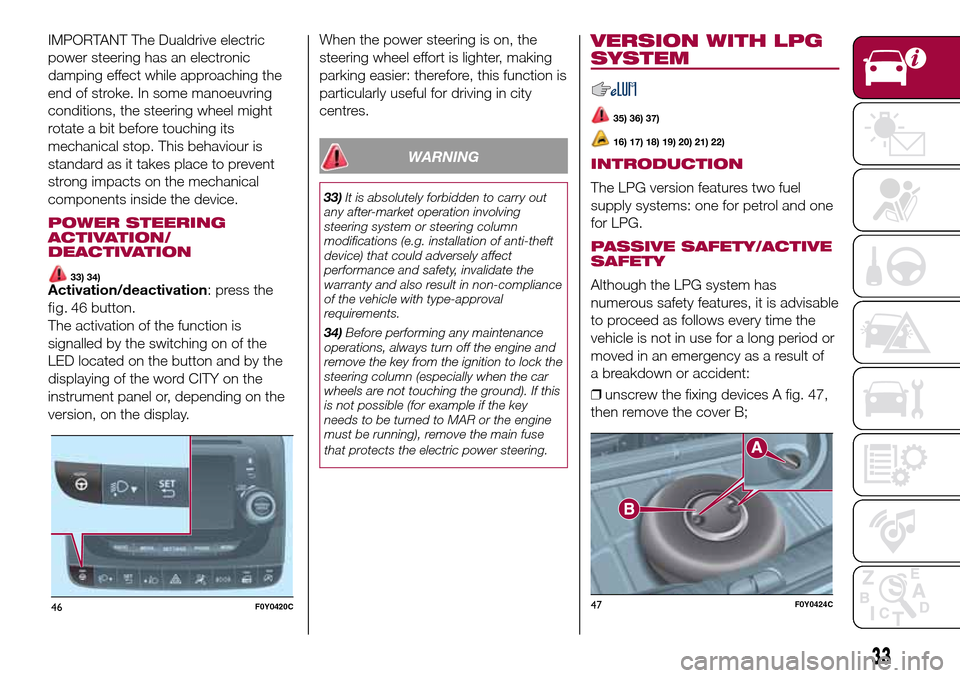
33) 34)Activation/deactivation: press the
The activation of the function is
signalled by the switching on of the
LED located on the button and by the
displaying of the word CITY on the
instrument panel or, depending on the
version, on the display.When the power steering is on, the
steering wheel effort is lighter, making
parking easier: therefore, this function is
particularly useful for driving in city
centres.
WARNING
33)It is absolutely forbidden to carry out
any after-market operation involving
steering system or steering column
modifications (e.g. installation of anti-theft
device) that could adversely affect
performance and safety, invalidate the
warranty and also result in non-compliance
of the vehicle with type-approval
requirements.
34)Before performing any maintenance
operations, always turn off the engine and
remove the key from the ignition to lock the
steering column (especially when the car
wheels are not touching the ground). If this
is not possible (for example if the key
needs to be turned to MAR or the engine
must be running), remove the main fuse
that protects the electric power steering.
VERSION WITH LPG
SYSTEM
35) 36) 37)
16) 17) 18) 19) 20) 21) 22)
INTRODUCTION
The LPG version features two fuel
supply systems: one for petrol and one
for LPG.
PASSIVE SAFETY/ACTIVE
SAFETY
Although the LPG system has
numerous safety features, it is advisable
to proceed as follows every time the
vehicle is not in use for a long period or
moved in an emergency as a result of
a breakdown or accident:
❒unscrew the fixing devices A fig. 47,
then remove the cover B;
46F0Y0420C
33
fig. 46button.
47F0Y0424C
Page 56 of 240
Warning light What it means
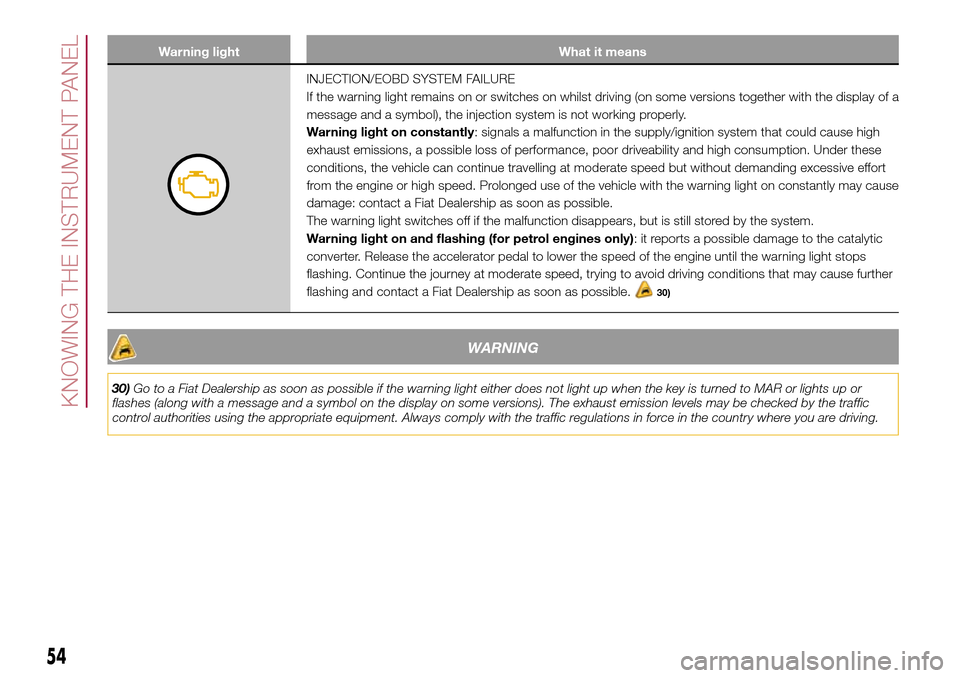
INJECTION/EOBD SYSTEM FAILURE
If the warning light remains on or switches on whilst driving (on some versions together with the display of a
message and a symbol), the injection system is not working properly.
Warning light on constantly: signals a malfunction in the supply/ignition system that could cause high
exhaust emissions, a possible loss of performance, poor driveability and high consumption. Under these
conditions, the vehicle can continue travelling at moderate speed but without demanding excessive effort
from the engine or high speed. Prolonged use of the vehicle with the warning light on constantly may cause
damage: contact a Fiat Dealership as soon as possible.
The warning light switches off if the malfunction disappears, but is still stored by the system.
Warning light on and flashing (for petrol engines only): it reports a possible damage to the catalytic
converter. Release the accelerator pedal to lower the speed of the engine until the warning light stops
flashing. Continue the journey at moderate speed, trying to avoid driving conditions that may cause further
flashing and contact a Fiat Dealership as soon as possible.
30)
WARNING
30)Go to a Fiat Dealership as soon as possible if the warning light either does not light up when the key is turned to MAR or lights up or
flashes (along with a message and a symbol on the display on some versions). The exhaust emission levels may be checked by the traffic
control authorities using the appropriate equipment. Always comply with the traffic regulations in force in the country where you are driving.
54
KNOWING THE INSTRUMENT PANEL
Page 61 of 240
Warning light What it means
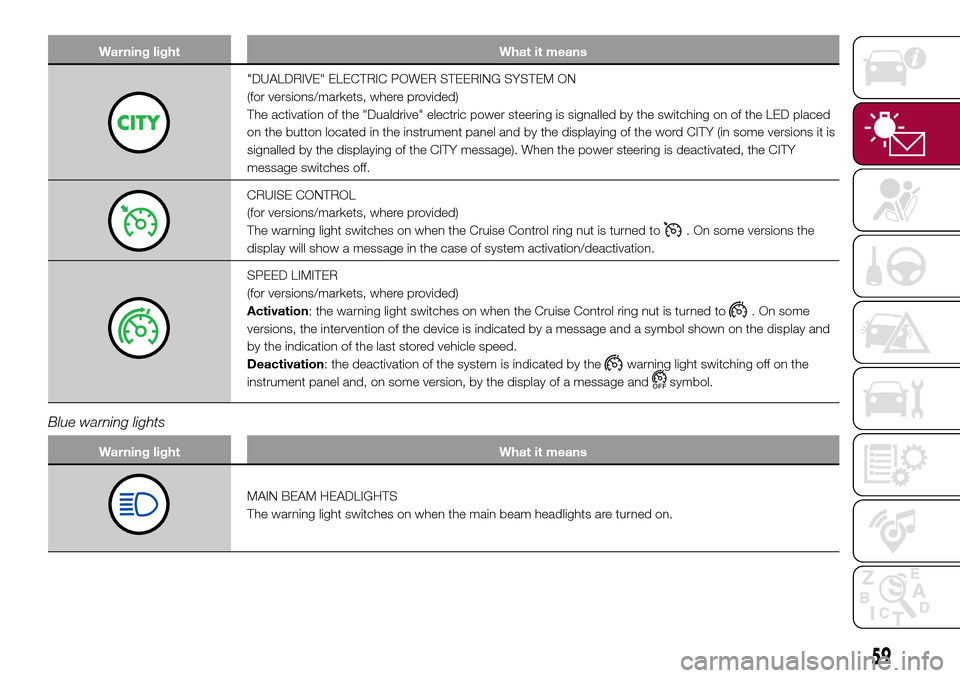
"DUALDRIVE" ELECTRIC POWER STEERING SYSTEM ON
(for versions/markets, where provided)
The activation of the "Dualdrive" electric power steering is signalled by the switching on of the LED placed
on the button located in the instrument panel and by the displaying of the word CITY (in some versions it is
signalled by the displaying of the CITY message). When the power steering is deactivated, the CITY
message switches off.
CRUISE CONTROL
(for versions/markets, where provided)
The warning light switches on when the Cruise Control ring nut is turned to
. On some versions the
display will show a message in the case of system activation/deactivation.
SPEED LIMITER
(for versions/markets, where provided)
Activation: the warning light switches on when the Cruise Control ring nut is turned to
. On some
versions, the intervention of the device is indicated by a message and a symbol shown on the display and
by the indication of the last stored vehicle speed.
Deactivation: the deactivation of the system is indicated by the
warning light switching off on the
instrument panel and, on some version, by the display of a message and
symbol.
Blue warning lights
Warning light What it means
MAIN BEAM HEADLIGHTS
The warning light switches on when the main beam headlights are turned on.
59
Page 64 of 240
Message on display
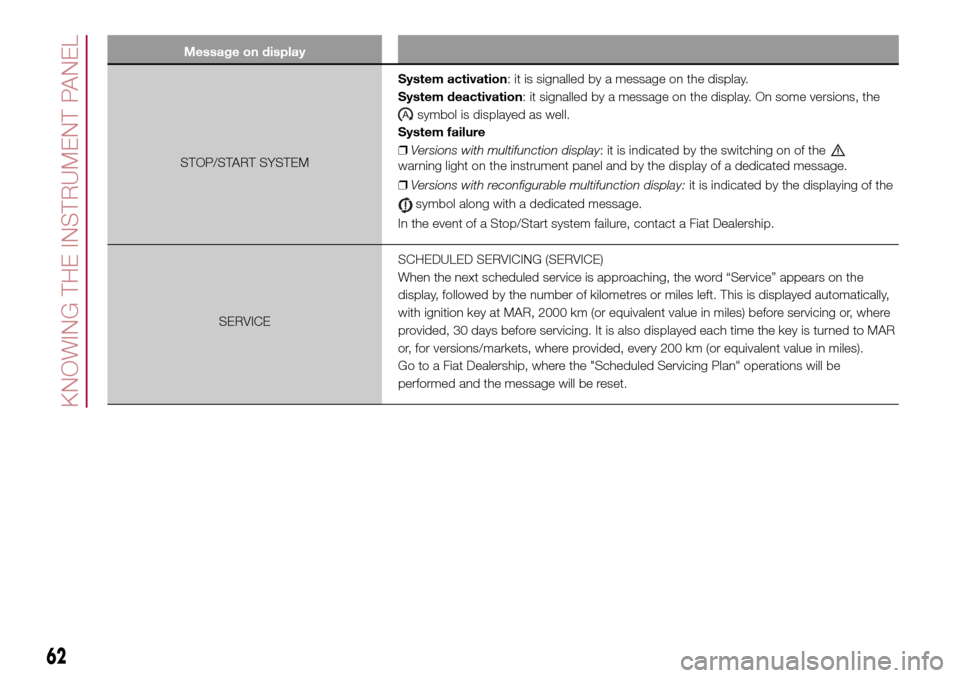
STOP/START SYSTEMSystem activation: it is signalled by a message on the display.
System deactivation: it signalled by a message on the display. On some versions, the
symbol is displayed as well.
System failure
❒Versions with multifunction display: it is indicated by the switching on of the
warning light on the instrument panel and by the display of a dedicated message.
❒Versions with reconfigurable multifunction display:it is indicated by the displaying of the
symbol along with a dedicated message.
In the event of a Stop/Start system failure, contact a Fiat Dealership.
SERVICESCHEDULED SERVICING (SERVICE)
When the next scheduled service is approaching, the word “Service” appears on the
display, followed by the number of kilometres or miles left. This is displayed automatically,
with ignition key at MAR, 2000 km (or equivalent value in miles) before servicing or, where
provided, 30 days before servicing. It is also displayed each time the key is turned to MAR
or, for versions/markets, where provided, every 200 km (or equivalent value in miles).
Go to a Fiat Dealership, where the "Scheduled Servicing Plan" operations will be
performed and the message will be reset.
62
KNOWING THE INSTRUMENT PANEL
Page 71 of 240

Driving in special conditions
In certain driving conditions, such as,
for example: driving around a bend (see
fig. 63) / small vehicles and/or vehicles
not aligned with the driving lane (see fig.
64) / lane change by other vehicles
(see fig. 65) the system operation might
be unexpected or delayed. Pay the
utmost attention, keeping control of the
vehicle to drive in complete safety.
iTPMS (indirect Tyre
Pressure Monitoring
System)
(for versions/markets, where provided)
44) 45) 46) 47) 48) 49)
The iTPMS can monitor the tyre inflation
status through the wheel speed
sensors. The system warns the driver if
one or more tyres are flat by switching
on the warning light
on the
instrument panel and a warning
message on the display, along with an
acoustic signal.
If one tyre only is flat, the system can
indicate its position: it is in any case
recommended to check the pressure
on all four tyres.
This indication is displayed also when
turning the engine off and on again until
the "Reset" procedure is carried out.
"Reset" procedure
The iTPMS needs an initial "self-
learning" phase (with length dependingon the driving style and road conditions:
optimal conditions being driven on a
straight road at 80 km/h for at least 20
minutes) which starts when the "Reset"
procedure is carried out.
The "Reset" procedure must be carried
out:
❒each time tyre pressure is modified;
❒when even only one tyre is changed;
❒when tyres are rotated/inverted;
❒when the space-saver wheel is fitted.
Before carrying out the "Reset"
procedure, inflate the tyres to the rated
pressure values specified in the inflation
pressure table (see the "Wheels"
paragraph in the "Technical
specifications" chapter).
If the "Reset" procedure is not carried
out, in all above cases, the
warning
light may give false indications on
one or more tyres.
To carry out the "Reset" procedure,
with the vehicle stopped and the
ignition device at MAR, use the Setup
Menu as follows:
❒briefly press the
button fig. 65a:
the display will show "Reset";
❒press the
button or the
button to select ("Yes" or "No");
63F0Y0320C
64F0Y0321C
65F0Y0322C
69
❒briefly press thebutton: the
display will show "Confirm";
❒press the
button or the
button to select ("Yes" to "Reset"
or "No" to exit the screen);