2017 FIAT 124 SPIDER brake
[x] Cancel search: brakePage 180 of 300

Improper weight distributions can have
an adverse effect on the way your
vehicle steers and handles and the way
the brakes operate.
Caution!
Do not load your vehicle any heavier than
the GVWR or the maximum front and rear
GAWR. If you do, parts on your vehicle can
break, or it can change the way your
vehicle handles. This could cause you to
lose control. Also overloading can shorten
the life of your vehicle.
TOWING TRAILERS
Trailer Towing
Your car is not designed for towing.
Recreational Towing
An example of "recreational towing" is
towing your vehicle behind a
motorhome.
The transmission is not designed for
towing this vehicle on all four wheels.
Caution!
DO NOT flat tow this vehicle. Damage
to the drivetrain will result. If this vehicle
requires towing, make sure the drive
wheels are OFF the ground.
Ensure that the Parking Brake is
released, and remains released, while
being towed.
Towing this vehicle in violation of the
above requirements can cause severe
transmission damage. Damage from
improper towing is not covered under the
New Vehicle Limited Warranty.
DRIVING TIPS
Engine Break-In
Recommendation
No special break-in is necessary, but a
few precautions in the first 620 miles
(1000 km) may add to the performance,
economy, and life of the vehicle:
Do not race the engine.
Do not maintain one constant speed,
either slow or fast, for a long period of
time.
Do not drive constantly at full-throttle
or high engine rpm for extended
periods of time.
Avoid unnecessary hard stops.
Avoid full-throttle starts.
Saving Fuel And
Protection Of The
Environment
How you operate your vehicle
determines how far it will travel on a
tank of fuel.
Use these suggestions to help save fuel
andreduceCO
2:
Avoid long warm-ups. Once the
engine runs smoothly, begin driving.
Avoid fast starts.
Drive at lower speeds.
Anticipate when to apply the brakes
(avoid sudden braking).
178
STARTING AND OPERATING
Page 181 of 300

Follow the maintenance schedule
and contact your Authorized Dealer.
Use the air conditioner only when
necessary.
Slow down on rough roads.
Keep the tires properly inflated.
Do not carry unnecessary weight.
Do not rest your foot on the brake
pedal while driving.
Keep the wheels in correct
alignment.
Keep windows closed at high
speeds.
Slow down when driving in
crosswinds and headwinds.
Hazardous Driving
When driving on ice or in water, snow,
mud, sand, or similar hazards:
Be cautious and allow extra distance
for braking.
Avoid sudden braking and sudden
maneuvering.
Do not pump the brakes. Continue to
press down on the brake pedal.
If you get stuck, select a lower gear
and accelerate slowly. Do not spin the
rear wheels.
For more traction in starting on
slippery surfaces such as ice or packed
snow, use sand, rock salt, chains,
carpeting, or other nonslip material
under the rear wheels.
Note: Usesnowchainsonlyonthe
rear wheels.
Floor Mat Safety
Information
Always use floor mats designed to fit
the footwell of your vehicle. Use only
floor mats that leave the pedal area
unobstructed and that are firmly
secured so that they cannot slip out of
position and interfere with the pedals or
impair safe operation of your vehicle in
other ways.
Warning!
An improperly attached, damaged, folded,
or stacked floor mat, or damaged floor mat
fasteners may cause your floor mat to
interfere with the accelerator, brake, or
clutch pedals and cause a loss of vehicle
control. To prevent SERIOUS INJURY or
DEATH:
ALWAYS securely attachyour floor
mat using the floor mat fasteners. DO NOT
install your floor mat upside down or turn
your floor mat over. Lightly pull to confirm
mat is secured using the floor mat
fasteners on a regular basis.
ALWAYS REMOVE THE EXISTING
FLOOR MAT FROM THE VEHICLE
before installing any other floor mat.
NEVER install or stack an additional floor
mat on top of an existing floor mat.
ONLY install floor mats designed to fit
your vehicle. NEVER install a floor mat that
cannot be properly attached and secured
to your vehicle. If a floor mat needs to be
replaced, only use a FCA approved floor
mat for the specific make, model, and year
of your vehicle.
04090400-USA-001Floor Mat Retention Post Location
179
Page 182 of 300

ONLY use the driver’s side floor mat on
the driver’s side floor area. To check for
interference, with the vehicle properly
parked with the engine off, fully depress the
accelerator, the brake, and the clutch pedal
(if present) to check for interference. If your
floor mat interferes with the operation of
any pedal, or is not secure to the floor,
remove the floor mat from the vehicle and
place the floor mat in your trunk.
ONLY use the passenger’s side floor
mat on the passenger’s side floor area.
ALWAYS make sure objects cannot fall
or slide into the driver’s side floor area
when the vehicle is moving. Objects can
become trapped under accelerator, brake,
or clutch pedals and could cause a loss of
vehicle control.
NEVER place any objects under the
floor mat (e.g., towels, keys, etc.). These
objects could change the position of the
floor mat and may cause interference with
the accelerator, brake, or clutch pedals.
If the vehicle carpet has been removed
and re-installed, always properly attach
carpet to the floor and check the floor mat
fasteners are secure to the vehicle carpet.
Fully depress each pedal to check for
interference with the accelerator, brake, or
clutch pedals then re-install the floor mats.
It is recommended to only use mild soap
and water to clean your floor mats. After
cleaning, always check your floor mat has
been properly installed and is secured to
your vehicle using the floor mat fasteners
by lightly pulling mat.
Rocking The Vehicle
Note: Too much rocking may cause
engine overheating, transmission failure,
and tire damage.
If you must rock the vehicle to free it
from snow, sand or mud, depress the
accelerator slightly and slowly move the
gear selector from 1 (D) to R.
Warning!
Fast spinning tires can be dangerous.
Forces generated by excessive wheel
speeds may cause damage, or even
failure, of the axle and tires. A tire could
explode and injure someone. Do not spin
your vehicle's wheels faster than 30 mph
(48 km/h) or for longer than 30 seconds
continuously without stopping when you
are stuck and do not let anyone near a
spinning wheel, no matter what the speed.
Caution!
When “rocking” a stuck vehicle by
shifting between DRIVE and REVERSE, do
not spin the wheels faster than 15 mph
(24 km/h), or drivetrain damage may result.
Revving the engine or spinning the
wheels too fast may lead to transmission
overheating and failure. It can also damage
the tires. Do not spin the wheels above
30 mph (48 km/h) while in gear (no
transmission shifting occurring).
Winter Driving
Carry emergency gear, including tire
chains, window scraper, flares, a small
shovel, jumper leads, and a small bag
of sand or salt.
Contact an Authorized Dealer to check
the following:
Have the proper ratio of antifreeze in
the radiator.
Inspect the battery and its leads.
Cold reduces battery capacity.
Use an engine oil appropriate for the
lowest ambient temperatures that the
vehicle will be driven in.
Inspect the ignition system for
damage and loose connections.
Use winter windshield washer fluid
that will not freeze.
180
STARTING AND OPERATING
Page 183 of 300

Note:
Remove snow before driving. Snow
left on the windshield is dangerous as
it could obstruct vision.
Drive slowly. Braking performance
can be adversely affected if snow or
ice adheres to the brake components.
If this situation occurs, drive the vehicle
slowly, releasing the accelerator pedal
and lightly applying the brakes several
times until the brake performance
returns to normal.
Do not open or close the soft top when
the temperature is 41 °F (5 °C) or less.
The material of the soft top could be
damaged by freezing.
Do not apply excessive force to a
window scraper when removing ice or
frozen snow on the mirror glass and
windshield.
Never use warm or hot water for
removing snow or ice from windows
and mirrors as it could result in the
glass cracking.
Snow Tires
If your vehicle is equipped with the tire
pressure monitoring system (vehicle
with run-flat tires), the system may not
function correctly when using tires with
steel wire reinforcement in the
sidewalls. Use Snow Tires on all Four Wheels
:
Do not exceed the maximum
permissible speed for your snow tires or
legal speed limits.
When snow tires are used, select the
specified size and pressure.
Tire Chains
Check local regulations before using tire
chains.
If your vehicle is equipped with the
TPMS system, the system may not
function correctly when using tire
chains.
Install the chains on the rear tires only.
Do not use chains on the front tires.
Note:
Chains may affect handling.
Do not go faster than 30 mph
(50 km/h) or the chain manufacturer's
recommended limit, whichever is lower.
Drive carefully and avoid bumps,
holes, and sharp turns.
Avoid locked-wheel braking.
Do not use chains on roads that are
free of snow or ice. The tires and
chains could be damaged.
Chains may scratch or chip
aluminium wheels.
Warning!
Using tires of different size and type (M+S,
Snow) between front and rear axles can
cause unpredictable handling. You could
lose control and have a collision.
Caution!
To avoid damage to your vehicle or tires,
observe the following precautions:
Because of restricted traction device
clearance between tires and other
suspension components, it is important
that only traction devices in good condition
are used. Broken devices can cause
serious damage. Stop the vehicle
immediately if noise occurs that could
indicate device breakage. Remove the
damaged parts of the device before further
use.
Install device as tightly as possible and
then retighten after driving about ½ mile
(0.8 km).
Do not exceed 30 mph (48 km/h).
Drive cautiously and avoid severe turns
and large bumps, especially with a loaded
vehicle.
Do not drive for a prolonged period on
dry pavement.
181
Page 184 of 300

Observe the traction device
manufacturer’s instructions on the method
of installation, operating speed, and
conditions for use. Always use the
suggested operating speed of the device
manufacturer’s if it is less than 30 mph
(48 km/h).
Do not use traction devices on a
compact spare tire.
Driving In Flooded Area
Note: Do not drive the vehicle on
flooded roads as it could cause short
circuit of electrical/electronic parts, or
water enters the engine and causes it
to lock up (hydro-lock) and stall. If the
vehicle has been immersed in water
contact your Authorized Dealer.
Although your vehicle is capable of
driving through shallow standing water,
consider the following Cautions and
Warnings before doing so.
Warning!
Driving through standing water limits
your vehicle’s traction capabilities. Do not
exceed 5 mph (8 km/h) when driving
through standing water.
Driving through standing water limits
your vehicle’s braking capabilities, which
increases stopping distances. Therefore,
after driving through standing water, drive
slowly and lightly press on the brake pedal
several times to dry the brakes.
Failure to follow these warnings may
result in injuries that are serious or fatal to
you, your passengers, and others around
you.
Caution!
Always check the depth of the standing
water before driving through it. Never drive
through standing water that is deeper than
the bottom of the tire rims mounted on the
vehicle.
Determine the condition of the road or
the path that is under water and if there are
any obstacles in the way before driving
through the standing water.
Do not exceed 5 mph (8 km/h) when
driving through standing water. This will
minimize wave effects.
Driving through standing water may
cause damage to your vehicle’s drivetrain
components. Always inspect your vehicle’s
fluids (i.e., engine oil, transmission, axle,
etc.) for signs of contamination (i.e., fluid
that is milky or foamy in appearance) after
driving through standing water. Do not
continue to operate the vehicle if any fluid
appears contaminated, as this may result in
further damage. Such damage is not
covered by the New Vehicle Limited
Warranty.
Getting water inside your vehicle’s
engine can cause it to lock up and stall out,
and cause serious internal damage to the
engine. Such damage is not covered by
the New Vehicle Limited Warranty.
Overloading
Note: Be careful not to overload your
vehicle. The gross axle weight rating
(GAWR) and the gross vehicle weight
rating (GVWR) of the vehicle are on the
Motor Vehicle Safety Standard Label on
the driver's door frame. Exceeding
these ratings can cause an accident or
vehicle damage. You can estimate the
weight of the load by weighing the
items (or people) before putting them in
the vehicle.
182
STARTING AND OPERATING
Page 187 of 300

HAZARD WARNING
LIGHTS
Control
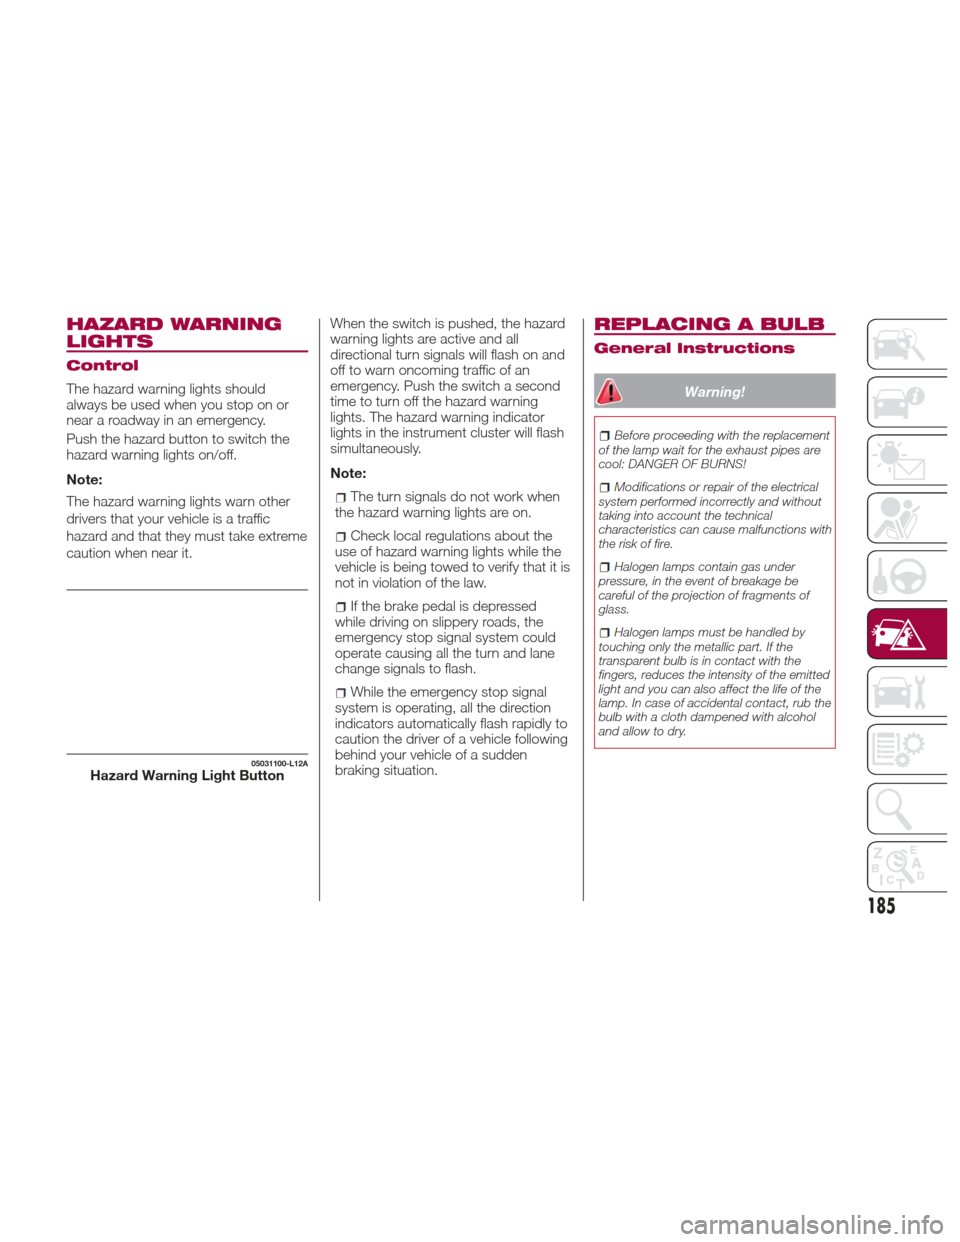
The hazard warning lights should
alwaysbeusedwhenyoustoponor
near a roadway in an emergency.
Push the hazard button to switch the
hazard warning lights on/off.
Note:
The hazard warning lights warn other
drivers that your vehicle is a traffic
hazard and that they must take extreme
caution when near it.When the switch is pushed, the hazard
warning lights are active and all
directional turn signals will flash on and
off to warn oncoming traffic of an
emergency. Push the switch a second
time to turn off the hazard warning
lights. The hazard warning indicator
lights in the instrument cluster will flash
simultaneously.
Note:
The turn signals do not work when
the hazard warning lights are on.
Check local regulations about the
use of hazard warning lights while the
vehicle is being towed to verify that it is
not in violation of the law.
If the brake pedal is depressed
while driving on slippery roads, the
emergency stop signal system could
operate causing all the turn and lane
change signals to flash.
While the emergency stop signal
system is operating, all the direction
indicators automatically flash rapidly to
caution the driver of a vehicle following
behind your vehicle of a sudden
braking situation.
REPLACING A BULB
General Instructions
Warning!
Before proceeding with the replacement
of the lamp wait for the exhaust pipes are
cool: DANGER OF BURNS!
Modifications or repair of the electrical
system performed incorrectly and without
taking into account the technical
characteristics can cause malfunctions with
the risk of fire.
Halogen lamps contain gas under
pressure, in the event of breakage be
careful of the projection of fragments of
glass.
Halogen lamps must be handled by
touching only the metallic part. If the
transparent bulb is in contact with the
fingers, reduces the intensity of the emitted
light and you can also affect the life of the
lamp. In case of accidental contact, rub the
bulb with a cloth dampened with alcohol
and allow to dry.
05031100-L12AHazard Warning Light Button
185
Page 192 of 300

5. Turn the socket and bulb assembly
counterclockwise and remove it.
6. Disconnect the bulb from the
socket.7. Install the new bulb in the reverse
order of the removal procedure.
Fog Lights
Proceed as follows:
1. If you are changing the right bulb,
start the engine, turn the steering wheel
all the way to the right, and turn off
engine. If you are changing the left bulb,
turn the steering wheel to the left.
2. Make sure the ignition is switched
off, and the headlight switch is off.
3. Remove the fasteners in the five
locations and partially peel back the
mud guard.
4. Disconnect the connector from the
unit by pressing the tab on the
connector with your finger and pulling
the connector.
5. Turn the socket and bulb assembly
counterclockwise, extract the bulb and
remove it;
6. Disconnect the bulb from the
socket.
7. Install the new bulb in the reverse
order of the removal procedure.Brake lights / Tail lights
Go to your authorized dealer when the
replacement of this lights is necessary.
Side Direction Indicator Lights
Proceed as follows:
1. Make sure the ignition is placed in
the OFF mode, and the headlight
switch is off.
2. If you are changing the right bulb,
start the engine, turn the steering wheel
all the way to the right, and turn off
engine. If you are changing the left bulb,
turn the steering wheel to the left.
3. Remove the fasteners in the five
locations and partially peel back the
mud guard.
4. Disconnect the electrical connector
from the bulb by pressing the tab on
the connector with your finger and
pulling the connector.
5. Remove the lens assembly by
pressing the tab on the unit with your
finger and pulling the unit forward to
compress in the internal catch, then pull
the cluster outwards.
6. Lift up the lens assembly, and then
remove the cluster and install the new
side direction indicator lens assembly in
the reverse order of the removal
procedure.
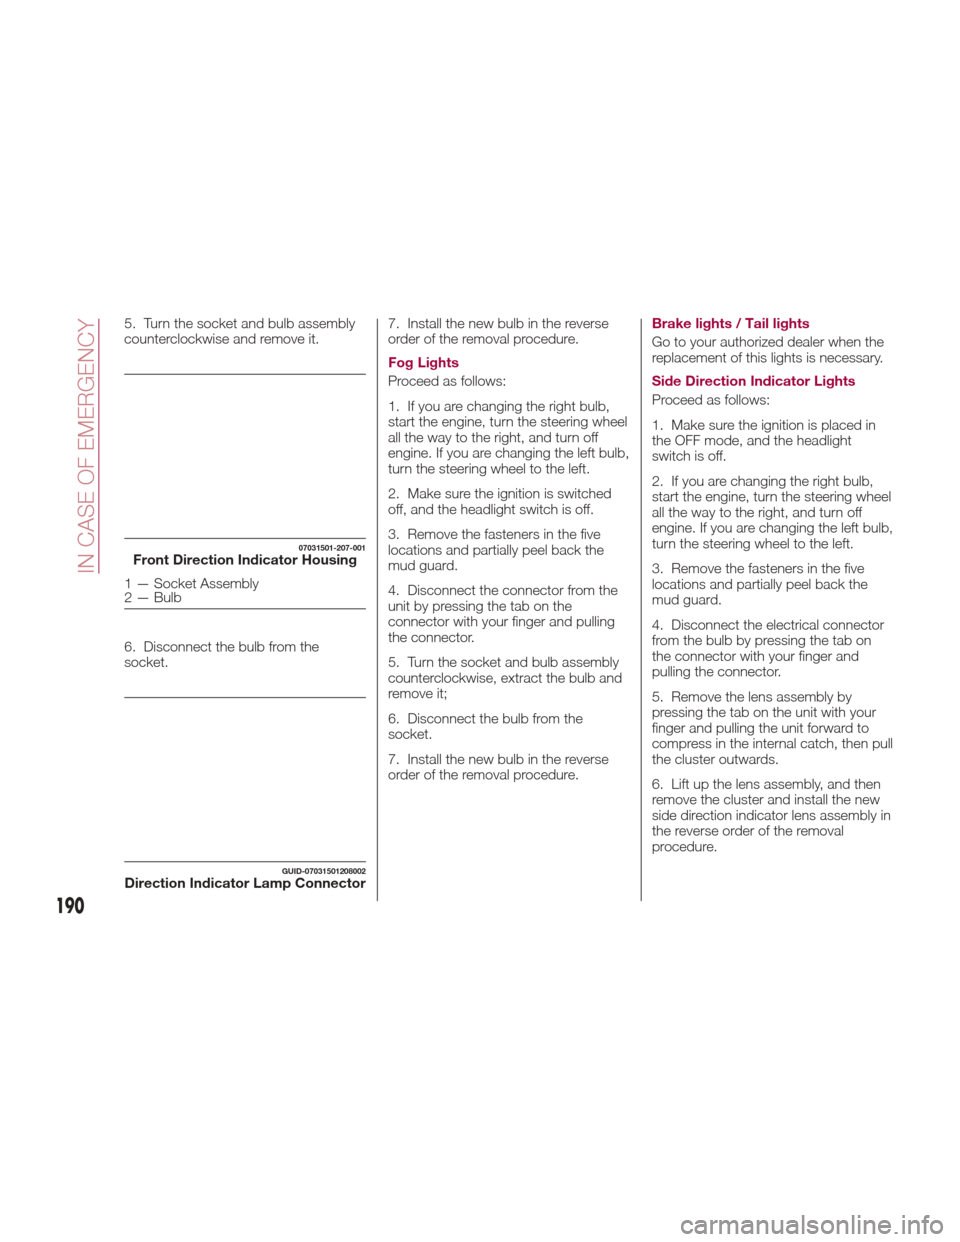
07031501-207-001Front Direction Indicator Housing
1 — Socket Assembly
2 — Bulb
GUID-07031501208002Direction Indicator Lamp Connector
190
IN CASE OF EMERGENCY
Page 207 of 300

To Secure The Jack
Proceed as follows:
1. Insert the wing bolt into the jack with
the jack screw pointing back, and turn
the wing bolt clockwise to temporarily
tighten it.
2. Turn the jack screw clockwise.
3. Turn the wing bolt completely to
secure the jack.
4. Insert the cover tabs and install the
cover.
Warning!
A loose tire or jack thrown forward in a
collision or hard stop could endanger the
occupants of the vehicle. Always stow the
jack parts and the spare tire in the places
provided. Have the deflated (flat) tire
repaired or replaced immediately.
Maintenance
Always keep the jack clean.
Make sure the moving parts are kept
free from dirt or rust.
Make sure the screw thread is
adequately lubricated. Conditions Of Non-Use
Temperatures below -40°F (−40°C)
On sandy or muddy ground
On uneven ground
On steep roads
In extreme weather conditions
In direct contact with the engine or
for repairs under the vehicle
On boats
Changing Procedure
Note: Make sure the jack is well
lubricated before using it.
Warning!
Do not attempt to change a tire on the side
of the vehicle close to moving traffic, pull
far enough off the road to avoid being hit
when operating the jack or changing the
wheel.
Proceed as follows:
1. Stop the vehicle in a position that
does not cause any danger to traffic
and lets you change the tire in safety, as
far as possible from the edge of the
driving lane. The ground must be flat
and sufficiently compact. 2. Turn on the hazard warning lights
and engage the parking brake.
3. For vehicles with automatic
transmission, place the gear selector in
Park (P). For vehicles with manual
transmission, place gear selector in
Reverse (R) and turn off the engine.
4. Stop the engine. The motor must be
kept off as long as the vehicle is lifted
off the ground.
5. Remove the jack and tools.
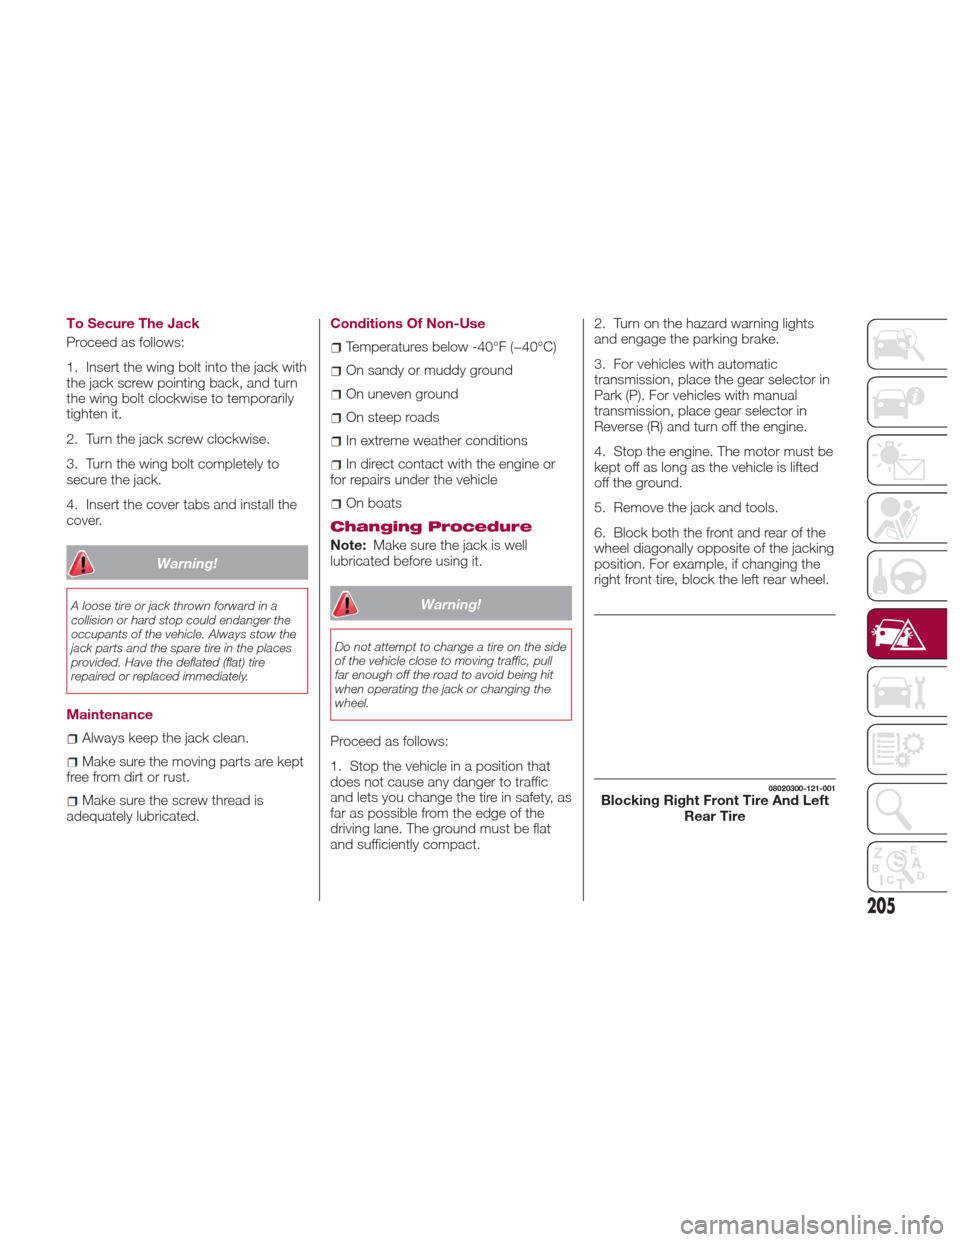
6. Block both the front and rear of the
wheel diagonally opposite of the jacking
position. For example, if changing the
right front tire, block the left rear wheel.
08020300-121-001Blocking Right Front Tire And Left
Rear Tire
205