2017 FIAT 124 SPIDER tow
[x] Cancel search: towPage 224 of 300
Caution!
The tow eye must be used exclusively
for roadside assistance operations. Only
use the tow eye with an appropriate device
in accordance with the highway code (a
rigid bar or rope) to flat tow the vehicle for
a short distance to the nearest service
location.
Tow eyes MUST NOT be used to tow
vehicles off the road or where there are
obstacles.
In compliance with the above
conditions, towing with a tow eye must
take place with two vehicles (one towing,
the other towed) aligned as much as
possible along the same center line.
Damage to your vehicle may occur if these
guidelines are not followed.
When towing, only use a facility that can
tow vehicles with low ground clearances as
extensive damage can result by using a
standard tow truck platform.
Proceed as follows:
1. Remove the towing eyelet and the
lug wrench from the luggage
compartment.
2. Wrap a flathead screwdriver or
similar tool with a soft cloth to prevent
damage to a painted bumper, and open
the cap located on the front or rear
bumper.
Note:Do not use excessive force as it
may damage the cap or scratch the
painted bumper surface. Remove the
cap completely and store it so as not to
lose it.
3. Securely install the tow eye in front
or rear using the lug wrench or
equivalent.
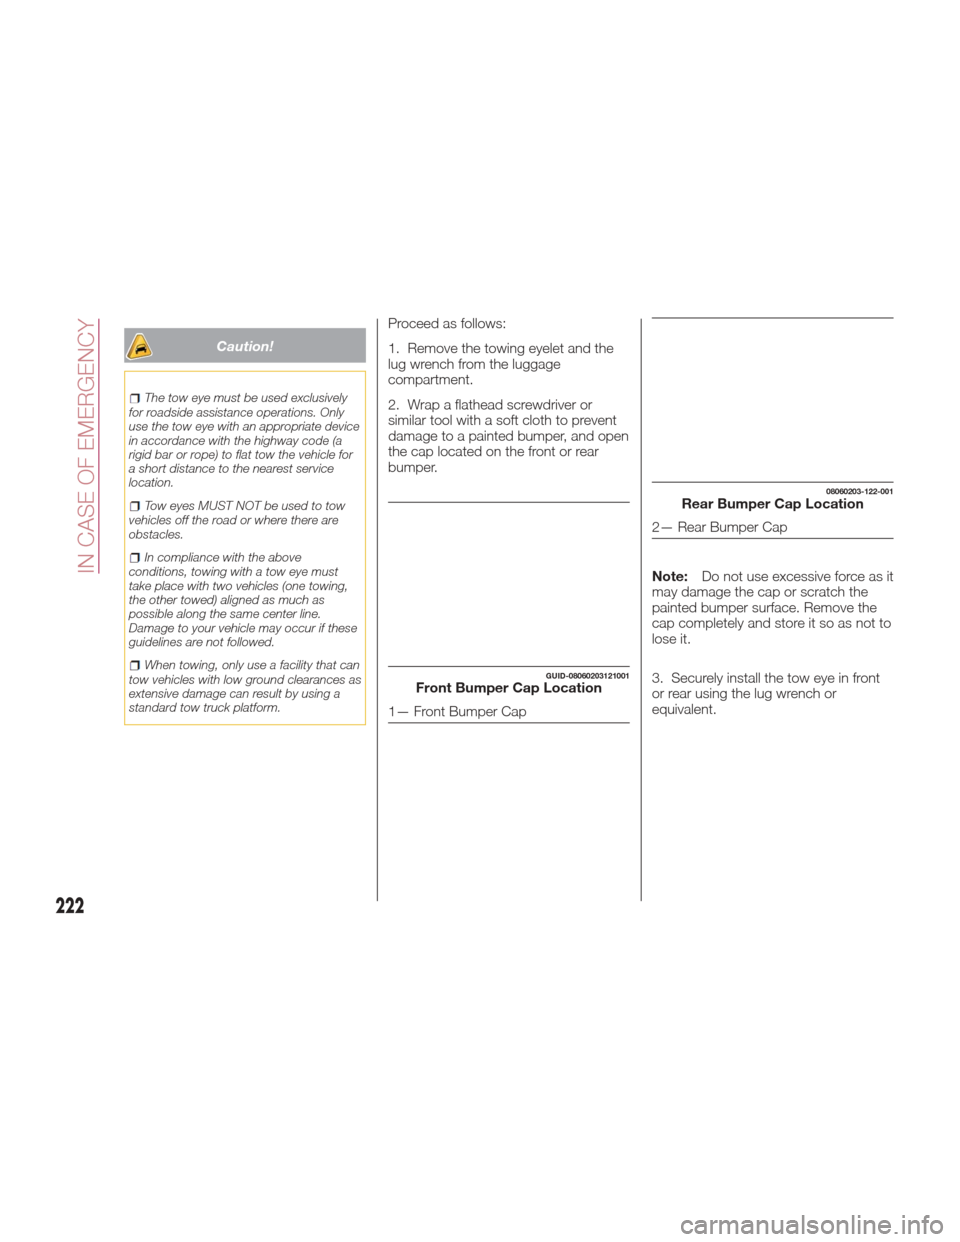
GUID-08060203121001Front Bumper Cap Location
1— Front Bumper Cap
08060203-122-001Rear Bumper Cap Location
2— Rear Bumper Cap
222
IN CASE OF EMERGENCY
Page 225 of 300
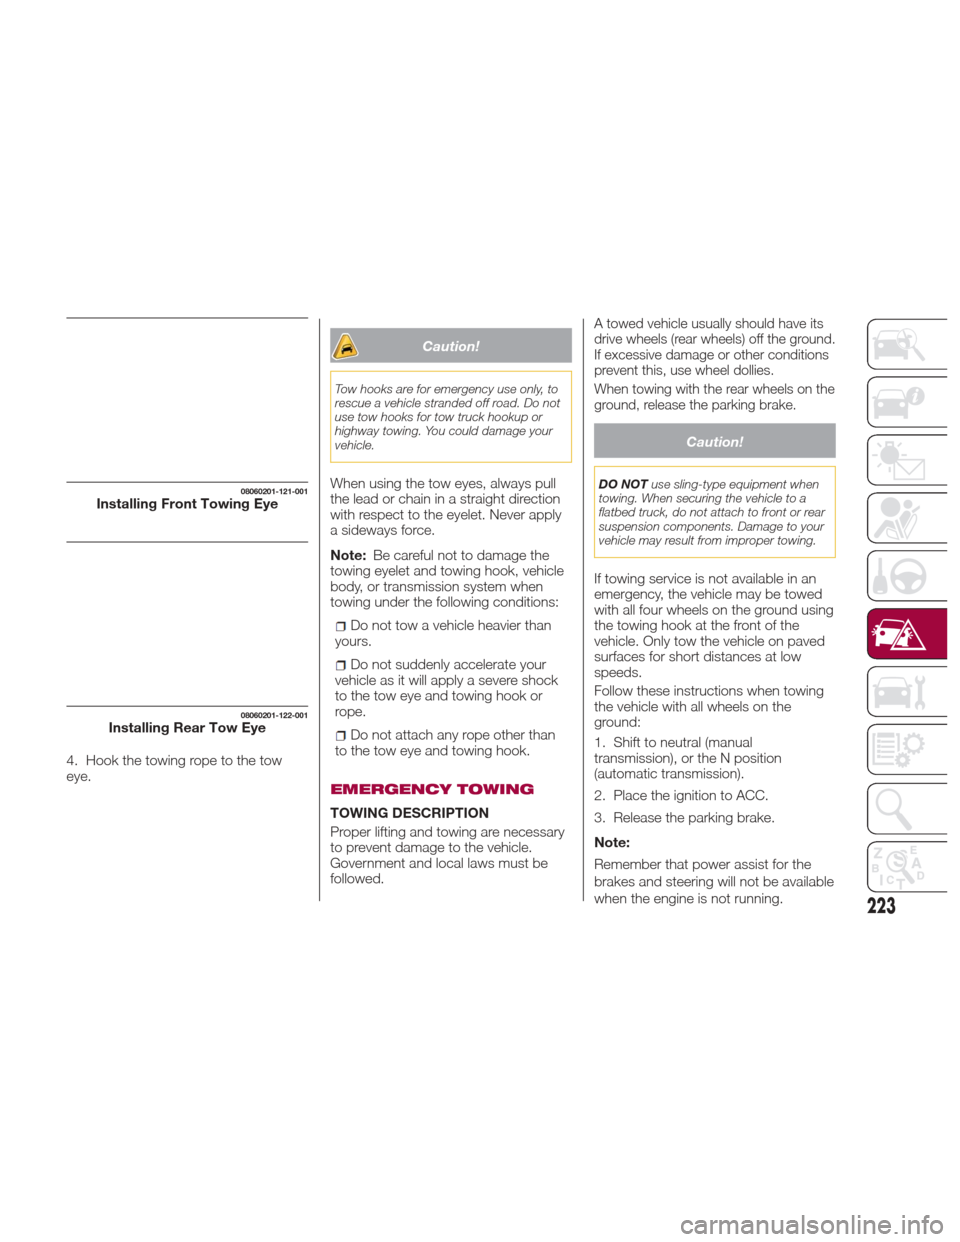
4. Hook the towing rope to the tow
eye.
Caution!
Tow hooks are for emergency use only, to
rescue a vehicle stranded off road. Do not
use tow hooks for tow truck hookup or
highway towing. You could damage your
vehicle.
When using the tow eyes, always pull
the lead or chain in a straight direction
with respect to the eyelet. Never apply
a sideways force.
Note:Be careful not to damage the
towing eyelet and towing hook, vehicle
body, or transmission system when
towing under the following conditions:
Do not tow a vehicle heavier than
yours.
Do not suddenly accelerate your
vehicle as it will apply a severe shock
to the tow eye and towing hook or
rope.
Do not attach any rope other than
to the tow eye and towing hook.
EMERGENCY TOWING
TOWING DESCRIPTION
Proper lifting and towing are necessary
to prevent damage to the vehicle.
Government and local laws must be
followed.
A towed vehicle usually should have its
drive wheels (rear wheels) off the ground.
If excessive damage or other conditions
prevent this, use wheel dollies.
When towing with the rear wheels on the
ground, release the parking brake.
Caution!
DO NOT use sling-type equipment when
towing. When securing the vehicle to a
flatbed truck, do not attach to front or rear
suspension components. Damage to your
vehicle may result from improper towing.
If towing service is not available in an
emergency, the vehicle may be towed
with all four wheels on the ground using
the towing hook at the front of the
vehicle. Only tow the vehicle on paved
surfaces for short distances at low
speeds.
Follow these instructions when towing
the vehicle with all wheels on the
ground:
1. Shift to neutral (manual
transmission), or the N position
(automatic transmission).
2. Place the ignition to ACC.
3. Release the parking brake.
Note:
Remember that power assist for the
brakes and steering will not be available
when the engine is not running.
08060201-121-001Installing Front Towing Eye
08060201-122-001Installing Rear Tow Eye
223
Page 243 of 300
Tire Loading And Tire Pressure
Note:
The proper cold tire inflation pressure is
listed on the driver’s side B-Pillar or the
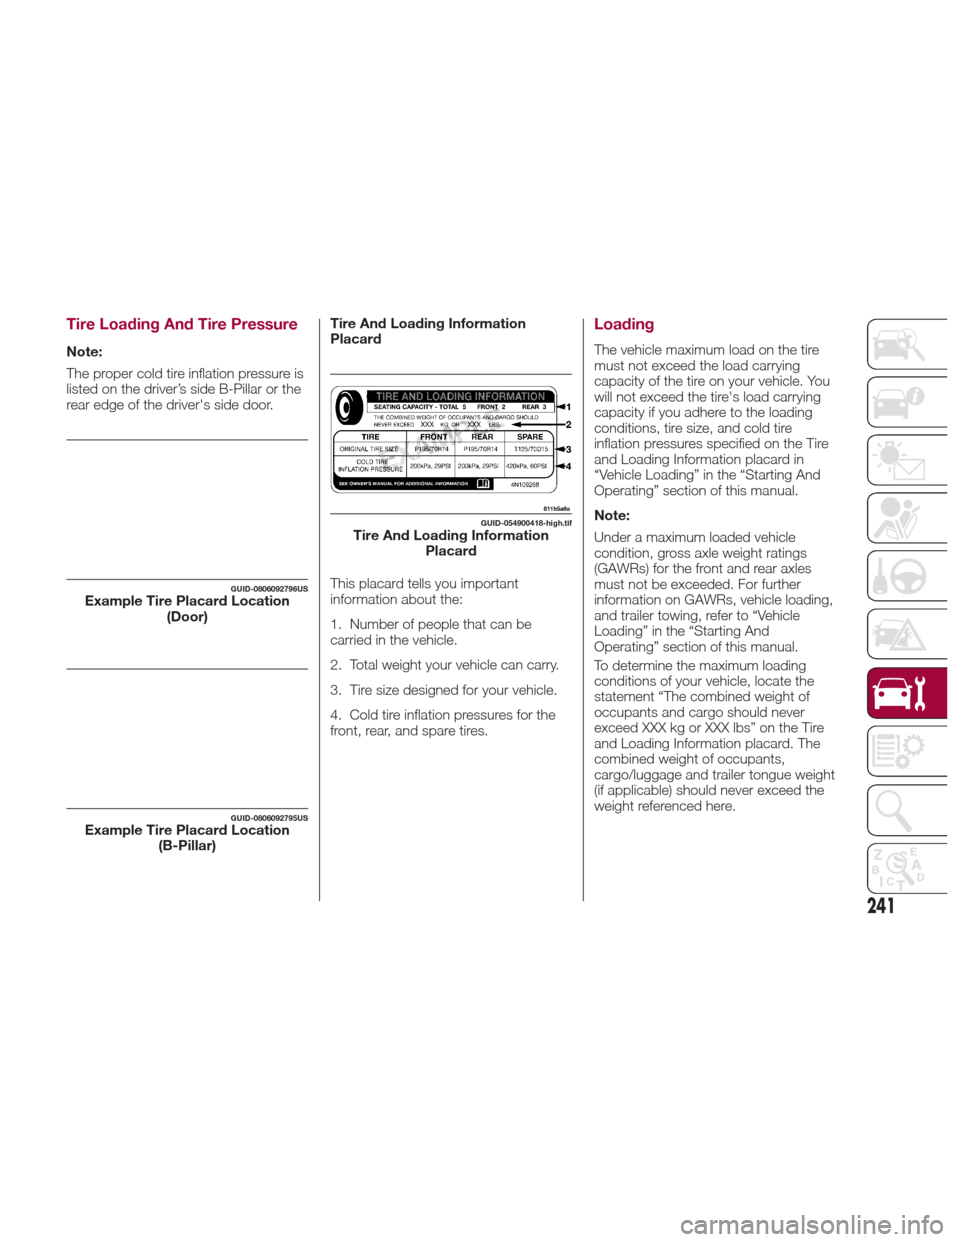
rear edge of the driver's side door.Tire And Loading Information
Placard
This placard tells you important
information about the:
1. Number of people that can be
carried in the vehicle.
2. Total weight your vehicle can carry.
3. Tire size designed for your vehicle.
4. Cold tire inflation pressures for the
front, rear, and spare tires.
Loading
The vehicle maximum load on the tire
must not exceed the load carrying
capacity of the tire on your vehicle. You
will not exceed the tire's load carrying
capacity if you adhere to the loading
conditions, tire size, and cold tire
inflation pressures specified on the Tire
and Loading Information placard in
“Vehicle Loading” in the “Starting And
Operating” section of this manual.
Note:
Under a maximum loaded vehicle
condition, gross axle weight ratings
(GAWRs) for the front and rear axles
must not be exceeded. For further
information on GAWRs, vehicle loading,
and trailer towing, refer to “Vehicle
Loading” in the “Starting And
Operating” section of this manual.
To determine the maximum loading
conditions of your vehicle, locate the
statement “The combined weight of
occupants and cargo should never
exceed XXX kg or XXX lbs” on the Tire
and Loading Information placard. The
combined weight of occupants,
cargo/luggage and trailer tongue weight
(if applicable) should never exceed the
weight referenced here.
GUID-0806092796USExample Tire Placard Location
(Door)
GUID-0806092795USExample Tire Placard Location(B-Pillar)
GUID-054900418-high.tifTire And Loading InformationPlacard
241
Page 244 of 300
Steps For Determining Correct
Load Limit—
(1) Locate the statement “The
combined weight of occupants and
cargo should never exceed XXX kg
or XXX lbs.” on your vehicle's
placard.
(2) Determine the combined weight
of the driver and passengers that
will be riding in your vehicle.
(3) Subtract the combined weight of
the driver and passengers from
XXX kg or XXX lbs.
(4) The resulting figure equals the
available amount of cargo and
luggage load capacity. For
example, if “XXX” amount equals
1400 lbs. and there will be five
150 lb passengers in your vehicle,
the amount of available cargo and
luggage load capacity is 650 lbs.
(1400-750 (5x150) = 650 lbs.)(5) Determine the combined weight
of luggage and cargo being loaded
on the vehicle. That weight may not
safely exceed the available cargo
and luggage load capacity
calculated in Step 4.
(6) If your vehicle will be towing a
trailer, load from your trailer will be
transferred to your vehicle. Consult
this manual to determine how this
reduces the available cargo and
luggage load capacity of your
vehicle.
Metric Example For Load Limit
For example, if “XXX” amount equals
635 kg and there will be five 68 kg
passengers in your vehicle, the amount
of available cargo and luggage load
capacity is 295 kg (635-340 (5x68) =
295 kg) as shown in step 4.
Note:
If your vehicle will be towing a trailer,
load from your trailer will be transferred
to your vehicle. The following table
shows examples on how to calculate
total load, cargo/luggage, and towing
capacities of your vehicle with varying
seating configurations and number and
size of occupants. This table is for
illustration purposes only and may not
be accurate for the seating and load
carry capacity of your vehicle.
For the following example, the
combined weight of occupants and
cargo should never exceed 865 lbs
(392 kg).
242
SERVICING AND MAINTENANCE
Page 248 of 300
Run Flat Tires — If Equipped
Run Flat tires allow you the capability to
drive 50 miles (80 km) at 50 mph
(80 km/h) after a rapid loss of inflation
pressure. This rapid loss of inflation is
referred to as the Run Flat mode. A Run
Flat mode occurs when the tire inflation
pressure is of/or below 14 psi (96 kPa).
Once a Run Flat tire reaches the run flat
mode it has limited driving capabilities
and needs to be replaced immediately.
A Run Flat tire is not repairable.
It is not recommended driving a vehicle
loaded at full capacity or to tow a trailer
while a tire is in the run flat mode.
See the tire pressure monitoring section
for more information.
Tire Spinning
When stuck in mud, sand, snow, or ice
conditions, do not spin your vehicle's
wheels above 30 mph (48 km/h) or for
longer than 30 seconds continuously
without stopping.
Refer to “Freeing A Stuck Vehicle” in “In
Case Of Emergency” for further
information.
Warning!
Fast spinning tires can be dangerous.
Forces generated by excessive wheel
speeds may cause tire damage or failure.
A tire could explode and injure someone.
Do not spin your vehicle's wheels faster
than 30 mph (48 km/h) for more than
30 seconds continuously when you are
stuck, and do not let anyone near a
spinning wheel, no matter what the speed.
Tread Wear Indicators
Tread wear indicators are in the original
equipment tires to help you in
determining when your tires should be
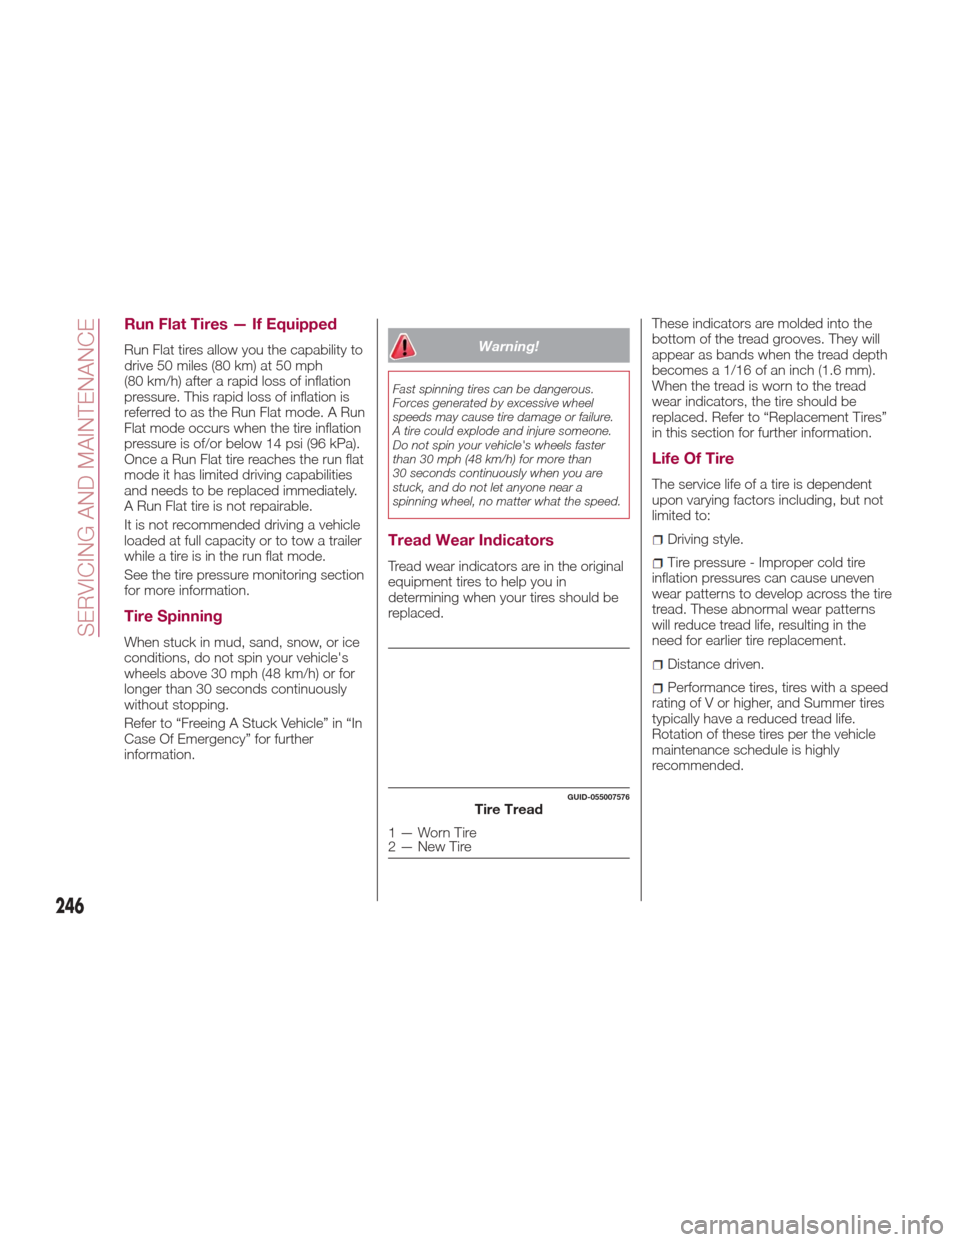
replaced.These indicators are molded into the
bottom of the tread grooves. They will
appear as bands when the tread depth
becomes a 1/16 of an inch (1.6 mm).
When the tread is worn to the tread
wear indicators, the tire should be
replaced. Refer to “Replacement Tires”
in this section for further information.
Life Of Tire
The service life of a tire is dependent
upon varying factors including, but not
limited to:
Driving style.
Tire pressure - Improper cold tire
inflation pressures can cause uneven
wear patterns to develop across the tire
tread. These abnormal wear patterns
will reduce tread life, resulting in the
need for earlier tire replacement.
Distance driven.
Performance tires, tires with a speed
rating of V or higher, and Summer tires
typically have a reduced tread life.
Rotation of these tires per the vehicle
maintenance schedule is highly
recommended.
GUID-055007576Tire Tread
1—WornTire
2—NewTire
246
SERVICING AND MAINTENANCE
Page 263 of 300
Plastic And Coated
Parts
Clean interior plastic parts with a damp
cloth (if possible made from microfiber),
and a solution of water and neutral,
non-abrasive detergent.
To clean oily or persistent stains, use
specific products free from solvents and
designed to maintain the original
appearance and color of the
components.
Remove any dust using a microfiber
cloth, if necessary moistened with
water. The use of paper tissues is not
recommended as these may leave
residues.
Instrument panel precautions
Prevent caustic solutions such as
perfume and cosmetic oils from
contacting the instrument panel. They
will damage and discolor the instrument
panel. If these solutions get on the
instrument panel, wipe them off
immediately.
Note:Never use alcohol, gasoline and
derivatives to clean the instrument
panel lens.
Caution!
Do not use glazing agents. Glazing agents
contain ingredients which may cause
discoloration, wrinkling, cracks and peeling.
Instrument Panel Top
When cleaning, it is recommended that
you use a clean towel dampened in a
mild detergent to remove debris.
Caution!
If the surface is rubbed harshly, it could
result in the surface being damaged leaving
white scratch marks.
Window Interiors
If the windows become covered with an
oily, greasy, or waxy film, clean them
with glass cleaner. Follow the directions
on the container.
Note: Do not scrape or scratch the
inside of the window glass. It could
damage the thermal filaments.
Caution!
When washing the inside of the window
glass, use a soft cloth dampened in
lukewarm water, gently wiping the thermal
filaments. Use of glass cleaning products
could damage the thermal filaments.
Leather Parts(If — Equipped)
Caution!
Do not use Alcohol and Alcohol-based
and/or Keton based cleaning products to
clean leather seats, as damage to the seat
may result.
Remove dust and sand first using a
vacuum cleaner or other means, then
wipe dirt off using a soft cloth with a
leather cleaner or a soft cloth soaked in
mild soap.
Wipe off the remaining cleaner or soap
using a cloth soaked in clean water and
wrung out well.
261
Page 288 of 300
INDEX
About Your Brakes...........150
ABS system ............... .112
Active Adaptive Shift (AAS) ......155
Adaptive Front Lighting System (AFS) ...................42
Additives, Fuel ..............174
Advanced Keyless Entry System Key Left In Trunk ............22
Key left In Vehicle ...........22
Locking Doors .............22
Passive Entry ..............22
Request Switch ............22
Unlocking Doors ............22
AirBag............... .133,137
Advance Front Air Bag . . . .133,137
Air Bag Warning Light .......147
Event Data Recorder (EDR) . . . .146
FrontAirBag ............ .147
Maintaining Your Air Bag
System ............... .145
Air Bag Maintenance ..........145
Air Pressure, Tires ............244
Alarm Vehicle Security Alarm ......24,25
Alarm (Security Alarm) ........24,25
Aluminium wheel maintenance . . . .257
Automatic Dimming Mirror ........37
Automatic Headlights ...........40Automatic Temperature Control
(ATC) ...................52
Automatic Transmission ........153
Auxiliary Power Outlet ..........63
B-Pillar Location.............241
Battery (maintenance) ..........235
Battery charging procedure ......236
Battery recharging ............236
Blind Spot Monitoring ..........114
Body and underbody warranty . . . .253
Body lubrication .............236
Bodywork (care and maintenance). .253
Boot, Convertible Top Lowering ....70
Boot, Convertible Top Precautions . .73
Boot, Convertible Top Raising .....72
Brake System ...............150
Brake/clutch fluid (level check) . . . .234
Brakes ............... .150,269
Bright-metal maintenance .......257
Camera, Rear..............167
Carbon Monoxide Warning ......175
Center Seat Storage Compartment. .61
Certification Label ............177
Changing A Flat Tire .....204,205,238
Checking levels ..............232
Child Restraint ..............129
Child Restraints Child Restraints ...........129
Clean Air Gasoline ............173 Climate Control
..............44
Close The Hood ..............69
Compact Spare Tire ...........249
Contract, Service ............282
Convertible Top ..............70
Convertible top maintenance .....257
Cooling Air Conditioning ............50
Cupholders .................64
Customer Assistance ..........281
Data Recorder, Event.........146
Daytime Running Lights .........40
Diagnostic System, Onboard ......77
Dimensions ............... .272
Disabled Vehicle Towing .....221,223
Driver's Seat Back Tilt ..........33
Driving in flooded area .........182
Driving tips ............... .178
Electric power steering.........74
Electric Remote Mirrors .........38
Electromagnetic Compatibility . . . .278
Electronic Brake Control System Traction Control System ......112
Electronic Speed Control (Cruise Control) ................ .158
Electronic Vehicle Information Center (EVIC)
Electronic Vehicle Information
Center (EVIC) ..............78
INDEX
Page 289 of 300

Electronic Vehicle Information
Center (EVIC) Setup Menu.....78
EVIC Display ..............78
Emergency flap opening ........176
Emergency Key ..............19
Emergency, In Case Of .........209
Hazard Warning Flasher ......185
Jacking ..........204,205,238
Jump Starting .........218,219
Overheating .............220
Towing ............. .221,223
Emission control system .........74
Engine .................. .267
Exhaust Gas Caution ........175
Fails To Start .............220
Flooded, Starting ..........220
Jump Starting .........218,219
Overheating .............220
Starting ..............21,220
Engine compartment ..........232
Engine coolant (level check) ......233
Engine oil (level check) .........233
Environment protection systems ....74
Essential information ............3
Ethanol .................. .173
Event Data Recorder ..........146
Exhaust Gas Caution ..........175
Exterior Lights ...............38Flash-To-Pass...............40
Flashers Hazard Warning ...........185
Turn Signal ...............41
Flooded Engine Starting ........220
Fluid And Lubricants ..........275
Fluid Capacities .............274
Fog Lights ..................41
Follow Me Home .............41
Front lights (light bulbs) .........188
Front Wipers Wiper Operation ...........42
Fuel Additives ...............174
Clean Air ...............173
Ethanol ............... .173
Materials Added ...........174
Methanol ...............173
Fuel Consumption Display ........88
Fuel Economy Monitor ..........88
Fuel filler cap ...............175
Fuel filler door ...............175
Fuse block (engine compartment) . .198
Fuse block (interior) ...........202
Fuses (interior) ..............196
Fuses (underhood) ............197
Gasoline, Clean Air...........173
Gasoline, Reformulated ........173Gear selector positions
.........154
GVWR .................. .177
Hazard Warning Flasher........185
Hazardous driving ............179
Head Restraints ............34,35
Headlight ..................38
Headlights
Adjusting The Headlight Abroad. .42
High Beam ...............40
Passing .................40
Heavy-duty use of the vehicle (scheduled servicing) ........226
HomeLink (Garage Door Opener) . . .58
Hood Release ...............69
How to use this manual ..........3
Identification Data............264
Inside Rearview Mirror ..........36
Instrument Cluster Display DID Menu Items . . . .79,80,82,83,84
EVIC Menu Items . . .79,80,82,83,84
Interior Lights ................62
Interiors ................. .259
Internal Equipment ............61
Jack Location..............204
Jack Operation ........204,205,238
Jump Starting ............218,219
Key Fob..................14
Emergency Key ............14