Page 318 of 530
To enter a new language code, activate the DVD Setup
Menu. To enter DVD Setup Menu stop the DVD, enter
radio disc mode, then DVD setup and follow these addi-
tional instructions:
•Using the remote control Up and Down cursor buttons,
highlight the Language item you want to edit, and then
push the remote control ENTER/OK button.
• Using the remote control Down cursor button, select the
�Other� setting, then push the remote control’s Right
cursor button to begin editing the setting.
• Using the remote control Up and Down cursor buttons,
select a digit for the current position. After selecting the
digit, push the remote control’s Right cursor button to
select the next digit. Repeat this digit selection sequence
for all four digits.
• When the entire four-digit code is entered, push the
remote control’s ENTER/OK button. If the language
code is not valid, the numbers all change back to ���.If
the digits are visible after this step, then the language
code is valid. Here is an abbreviated list of language codes. For more
language codes, please contact the dealer where the vehicle
was purchased.
Language Code Language Code
Dutch 2311 French 1517
German 1304 Italian 1819
Portuguese 2519 Spanish 1418
Rating And Password Setup
The Rating and Password settings work together to control
the types of DVDs that your family watches. Most DVD-
Video discs have a rating (from 1 to 8) assigned to them
where lower numbers are designated for all audiences and
higher numbers are designated for more adult audiences.
When a DVD-Video disc is loaded, its rating is compared to
the setting in the DVD player. If the rating of the disc is
higher than the setting in the player, a Password screen is
displayed. In order to watch the disc, the rear passenger
must enter the correct password using the password entry
method described below.
To play all discs without requiring a password, set the
DVD player ’s rating to Level 8. Setting the rating to Level
1 always requires the password to play any DVD disc. Not
316 UNDERSTANDING YOUR INSTRUMENT PANEL
Page 319 of 530
all DVD discs encode a Rating, so it is still possible that
discs designed for adult audiences can still play without
requiring a password.
The default rating is Level 8 (play all discs without a
password) and the default password is 0000.To set the password, activate the DVD Setup Menu and
follow these additional instructions:
•
Using the remote control Left and Right cursor buttons,
select the Rating tab.
• Highlight �Change Password�, and then push the remote
control’s ENTER/OK button.
• Enter the current password. Select a digit, use the remote
control Up and Down cursor buttons to set the value for
the current digit, and then push the remote control’s
Right cursor button to select the next digit. Repeat this
digit selection sequence for all four digits.
• After the four-digit password is entered, push the re-
mote control’s ENTER/OK button. If the password is
correct, the set password screen is displayed.
• Using the remote control’s Up and Down cursor buttons
to set the value for the current digit and the remote
control’s Right cursor button to select digits, enter the
new password.
• After the four-digit password is entered, push the re-
mote control’s ENTER/OK button to accept the change.
DVD Password Entry
4
UNDERSTANDING YOUR INSTRUMENT PANEL 317
Page 320 of 530
To set the rating, activate the DVD Setup Menu and follow
these additional instructions:
•Using the remote control’s Left and Right cursor but-
tons, select the Rating tab.
• Highlight �Change Rating�, and then push the remote
control’s ENTER/OK button. •
Enter the current password. Select a digit, use the remote
control’s Up and Down cursor buttons to set the value
for the current digit, and then push the remote control’s
Right cursor button to select the next digit. Repeat this
digit selection sequence for all four digits.
• After the four-digit password is entered, push the re-
mote control’s ENTER/OK button. If the password is
correct, the Rating Level menu is displayed.
• Using the remote control’s Up and Down cursor buttons,
select the new rating level, and then push the remote
control’s ENTER/OK button to accept the change.
Product Agreement
Software
This product contains software licensed under GNU Gen-
eral Public License (GPL) or GNU Lesser General Public
License (LGPL), etc. You have the right of acquisition,
modification, and distribution of the source code of the
GPL/LGPL software. You may download Source Code
from the following website at no charge.
http://www.embedded-carmultimedia.jp/linux/oss/
download/MP_632_34W821
DVD Player Level Menu
318 UNDERSTANDING YOUR INSTRUMENT PANEL
Page 329 of 530
NOTE:There is a difference in temperature (in any condi-
tions other than full cold or full hot), between the upper
and lower outlets for added comfort. The warmer air goes
to the floor outlets. This feature gives improved comfort
during sunny but cool conditions.
13. Panel Mode Button
Air is directed through the outlets in the instrument
panel. These outlets can be adjusted for direction,
and turned on or off to control airflow.
NOTE: For maximum airflow to the rear, the center instru-
ment panel outlets can be directed toward the rear seat
passengers.
Economy Mode
If ECONOMY mode is desired, push the A/C button to
turn off the indicator light and the A/C compressor. Rotate
the temperature control knob to the desired temperature.
Also, make sure to select only Panel, Bi-Level or Floor
modes.
Max A/C
For maximum cooling use the A/C and Recirculation
mode buttons at the same time.
Rear Manual Climate Control — If Equipped
The Rear Manual Climate Control system has floor air
outlets at the rear of the right side sliding door, and
overhead outlets at each outboard rear seating position.
The unit provides warm or cool air through the floor and
upper outlets.
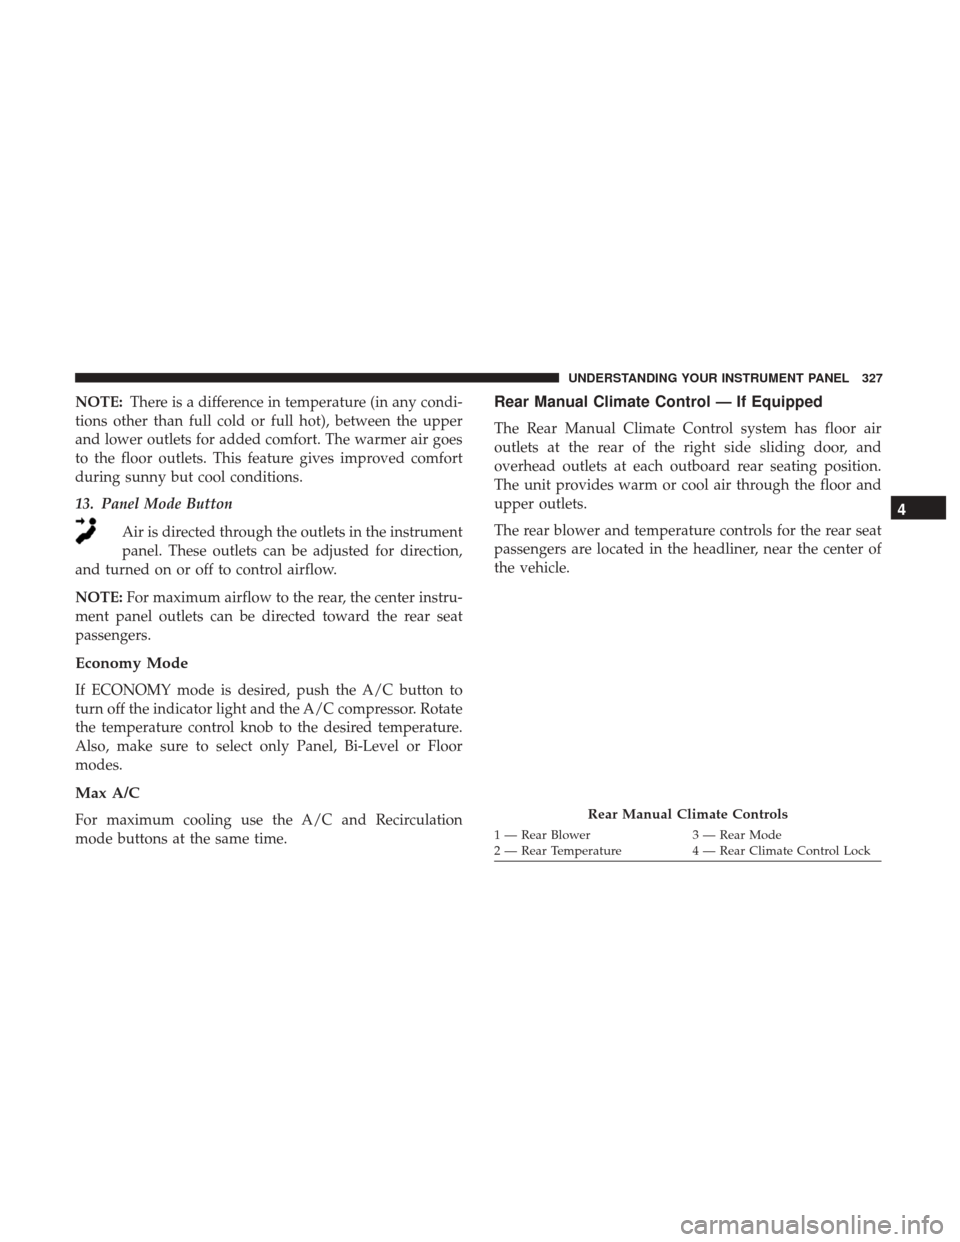
The rear blower and temperature controls for the rear seat
passengers are located in the headliner, near the center of
the vehicle.
Rear Manual Climate Controls
1 — Rear Blower 3 — Rear Mode
2 — Rear Temperature 4 — Rear Climate Control Lock
4
UNDERSTANDING YOUR INSTRUMENT PANEL 327
Page 331 of 530
Floor ModeAir comes from the floor outlets.
Automatic Temperature Control (ATC) — If
Equipped
•Front Three-Zone ATC allows both driver and front
passenger seat occupant, and rear seat occupants to
select individual comfort settings.
• When occupants in the vehicle select the AUTO mode
operation, a comfort temperature can be set by using the
temperature up and down buttons, and the auto blower
operation will be set automatically.
• The system can be controlled manually, if desired.
• SYNC feature links the controls for all three zones,
allowing one comfort setting (driver setting) for the
cabin, if desired.
The Three-Zone ATC system automatically maintains the
interior comfort level desired by the driver and all passen-
gers. The system automatically adjusts the air temperature,
the airflow volume, amount of outside air recirculation and
the airflow direction. This maintains a comfortable tem-
perature, even under changing conditions. 1. Air Conditioning (A/C) Button
Push and release to change the current Air Conditioning
(A/C) setting, the indicator illuminates when A/C is ON.
Performing this function will cause the ATC to switch into
manual mode.
2. Blower Control Display
This display shows the current Blower speed selection.
3. Left Front Seat Occupant Temperature Display
This display shows the temperature setting for the left front
seat occupant.
Front ATC Panel
4
UNDERSTANDING YOUR INSTRUMENT PANEL 329