2017 DODGE GRAND CARAVAN flat tire
[x] Cancel search: flat tirePage 430 of 530
5. Uncoil the Power Plug (8) and insert the plug into thevehicle’s 12 Volt power outlet.
NOTE: Do not remove foreign objects (e.g., screws or nails)
from the tire.
(C) Injecting Tire Service Kit Sealant Into The
Deflated Tire:
• Always start the engine before turning ON the Tire
Service Kit.
NOTE: Manual transmission vehicles must have the park-
ing brake engaged and the gear selector in NEUTRAL.
• After pushing the Power Button (4), the sealant (white
fluid) will flow from the Sealant Bottle (1) through the
Sealant Hose (6) and into the tire.
NOTE: Sealant may leak out through the puncture in the
tire.
If the sealant (white fluid) does not flow within0–10
seconds through the Sealant Hose (6):
1. Push the Power Button (4) to turn Off the Tire Service Kit. Disconnect the Sealant Hose (6) from the valve stem.
Make sure the valve stem is free of debris. Reconnect the
Sealant Hose (6) to the valve stem. Check that the Mode Select Knob (5) is in the Sealant Mode position and not
Air Mode. Push the Power Button (4) to turn On the Tire
Service Kit.
2. Connect the Power Plug (8) to a different 12 Volt power outlet in your vehicle or another vehicle, if available.
Make sure the engine is running before turning ON the
Tire Service Kit.
3. The Sealant Bottle (1) may be empty due to previous use. Call for assistance.
NOTE: If the Mode Select Knob (5) is on Air Mode and the
pump is operating, air will dispense from the Air Pump
Hose (7) only, not the Sealant Hose (6).
If the sealant (white fluid) does flow through the Sealant
Hose (6):
1. Continue to operate the pump until sealant is no longer flowing through hose (typically takes 30 - 70 seconds).
As the sealant flows through the Sealant Hose (6), the
Pressure Gauge (3) can read as high as 70 psi (4.8 Bar).
The Pressure Gauge (3) will decrease quickly from
approximately 70 psi (4.8 Bar) to the actual tire pressure
when the Sealant Bottle (1) is empty.
428 WHAT TO DO IN EMERGENCIES
Page 431 of 530
2. The pump will start to inject air into the tire immedi-ately after the Sealant Bottle (1) is empty. Continue to
operate the pump and inflate the tire to the pressure
indicated on the tire pressure label on the driver-side
latch pillar (recommended pressure). Check the tire
pressure by looking at the Pressure Gauge (3).
If the tire does not inflate to at least 26 psi (1.8 Bar)
pressure within 15 minutes:
• The tire is too badly damaged. Do not attempt to drive
the vehicle further. Call for assistance.
NOTE: If the tire becomes over-inflated, push the Defla-
tion Button to reduce the tire pressure to the recommended
inflation pressure before continuing.
If the tire inflates to the recommended pressure or is at
least 26 psi (1.8 Bar) pressure within 15 minutes:
1. Push the Power Button (4) to turn off the Tire Service Kit.
2. Remove the Speed Limit sticker from the top of the Sealant Bottle (1) and place the sticker on the instrument
panel. 3. Immediately disconnect the Sealant Hose (6) from the
valve stem, reinstall the cap on the fitting at the end of
the hose, and place the Tire Service Kit in the vehicle
storage location. Quickly proceed to (D) “Drive Ve-
hicle.”
CAUTION!
•The metal end fitting from Power Plug (8) may get
hot after use, so it should be handled carefully.
• Failure to reinstall the cap on the fitting at the end of
the Sealant Hose (6) can result in sealant contacting
your skin, clothing, and the vehicle’s interior. It can
also result in sealant contacting internal Tire Service
Kit components which may cause permanent damage
to the kit.
(D) Drive Vehicle:
Immediately after injecting sealant and inflating the tire,
drive the vehicle 5 miles (8 km) or 10 minutes to ensure
distribution of the Tire Service Kit Sealant within the tire.
Do not exceed 55 mph (90 km/h).
6
WHAT TO DO IN EMERGENCIES 429
Page 432 of 530
WARNING!
Tire Service Kit is not a permanent flat tire repair. Have
the tire inspected and repaired or replaced after using
Tire Service Kit. Do not exceed 55 mph (90 km/h) until
the tire is repaired or replaced. Failure to follow this
warning can result in injuries that are serious or fatal
to you, your passengers, and others around you.
(E) After Driving:
Pull over to a safe location. Refer to “Whenever You Stop to
Use Tire Service Kit” before continuing.
1. Push in the Mode Select Knob (5) and turn to the AirMode position.
2. Uncoil the power plug and insert the plug into the vehicle’s 12 Volt power outlet.
3. Uncoil the Air Pump Hose (7) (black in color) and screw the fitting at the end of hose (7) onto the valve stem.
4. Check the pressure in the tire by reading the Pressure Gauge (3). If tire pressure is less than 19 psi (1.3 Bar):
The tire is too badly damaged. Do not attempt to drive the
vehicle further. Call for assistance.
If the tire pressure is 19 psi (1.3 Bar) or higher:
1. Push the Power Button (4) to turn on Tire Service Kit
and inflate the tire to the pressure indicated on the tire
and loading information label on the driver-side door
opening.
NOTE: If the tire becomes over-inflated, push the Deflation
Button to reduce the tire pressure to the recommended
inflation pressure before continuing.
2. Disconnect the Tire Service Kit from the valve stem, reinstall the cap on the valve stem and unplug from 12
Volt outlet.
3. Place the Tire Service Kit in its proper storage area in the vehicle.
4. Have the tire inspected and repaired or replaced at the earliest opportunity at an Authorized Dealer or tire
service center.
5. Remove the Speed Limit sticker from the instrument panel after the tire has been repaired.
430 WHAT TO DO IN EMERGENCIES
Page 440 of 530
NOTE:If either front tire is flat it may be necessary to jack
up the vehicle to remove the compact spare tire/cover
assembly from under the vehicle.
4. Stand the tire/cover assembly upright and remove the wheel spacer by squeezing the winch retaining tabs
together. Push the retainer through the spare tire to
release it from the wheel.Preparations For Jacking
1. Park the vehicle on a firm, level surface. Avoid ice orslippery areas.
WARNING!
Do not attempt to change a tire on the side of the
vehicle close to moving traffic, pull far enough off the
road to avoid being hit when operating the jack or
changing the wheel.
2. Turn on the Hazard Warning flasher.
3. Set the parking brake.
4. Place the gear selector into PARK.
5. Turn OFF the ignition.
6. Block both the front and rear of the wheel diagonally opposite of the jacking position. For example, if chang-
ing the right front tire, block the left rear wheel.
NOTE:Passengers should not remain in the
vehicle when the vehicle is being jacked.
Removing Wheel Spacer
438 WHAT TO DO IN EMERGENCIES
Page 441 of 530
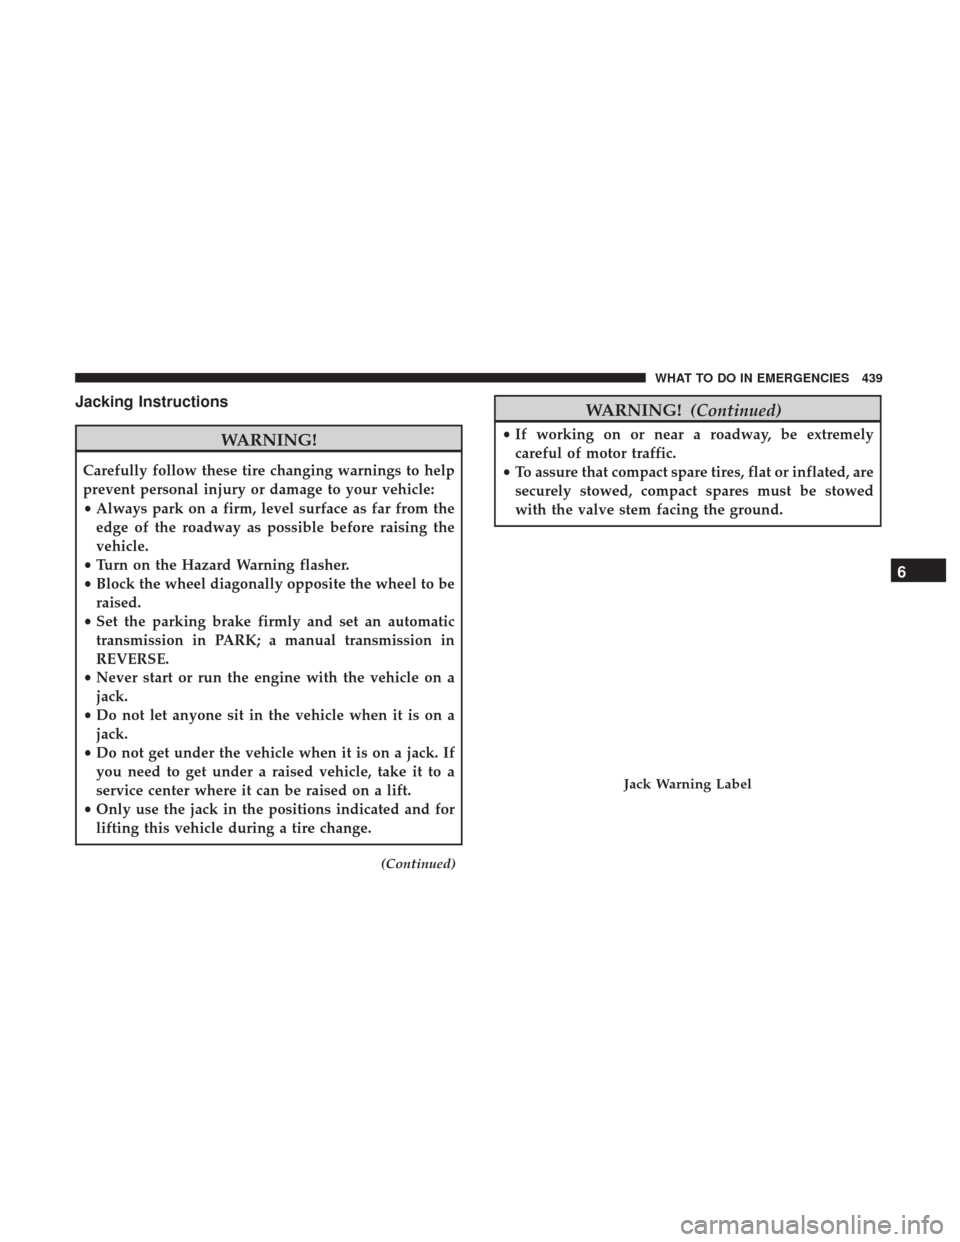
Jacking Instructions
WARNING!
Carefully follow these tire changing warnings to help
prevent personal injury or damage to your vehicle:
•Always park on a firm, level surface as far from the
edge of the roadway as possible before raising the
vehicle.
• Turn on the Hazard Warning flasher.
• Block the wheel diagonally opposite the wheel to be
raised.
• Set the parking brake firmly and set an automatic
transmission in PARK; a manual transmission in
REVERSE.
• Never start or run the engine with the vehicle on a
jack.
• Do not let anyone sit in the vehicle when it is on a
jack.
• Do not get under the vehicle when it is on a jack. If
you need to get under a raised vehicle, take it to a
service center where it can be raised on a lift.
• Only use the jack in the positions indicated and for
lifting this vehicle during a tire change.
(Continued)
WARNING! (Continued)
•If working on or near a roadway, be extremely
careful of motor traffic.
• To assure that compact spare tires, flat or inflated, are
securely stowed, compact spares must be stowed
with the valve stem facing the ground.
Jack Warning Label
6
WHAT TO DO IN EMERGENCIES 439
Page 446 of 530

WARNING!
To avoid the risk of forcing the vehicle off the jack, do
not tighten the wheel nuts fully until the vehicle has
been lowered. Failure to follow this warning may
result in serious injury.
NOTE: Do not install the wheel cover on the compact
spare.
7. Lower the vehicle by turning the jack screw to the left.
8. Finish tightening the lug nuts. Push down on the wrench while at the end of the handle for increased
leverage. Tighten the lug nuts in a star pattern until each
nut has been tightened twice. For correct lug nut torque
refer to Torque Specifications in this section. If in doubt
about the correct tightness, have them checked with a
torque wrench by your Authorized Dealer or at a service
station.
9. Lower the jack to its fully-closed position.
WARNING!
A loose tire or jack thrown forward in a collision or
hard stop could endanger the occupants of the vehicle.
Always stow the jack parts and the spare tire in the
places provided. Have the deflated (flat) tire repaired
or replaced immediately.
10. Place the deflated (flat) tire and compact spare tire cover assembly in the rear cargo area. Do not stow the
deflated tire in the compact spare tire location. Have
the full-sized tire repaired or replaced, as soon as
possible.
11. Stow the cable and wheel spacer before driving the vehicle. Reassemble the winch handle extensions to
form a “T” and fit the winch T-handle over the drive
nut. Rotate the nut to the right until the winch mecha-
nism clicks at least three times.
NOTE: Refer to the “Spare Tire Tools” section for instruc-
tions on assembling the T-handle.
12. Stow the jack, jack handle and winch handle tools back in the stowage compartment.
444 WHAT TO DO IN EMERGENCIES
Page 448 of 530
CAUTION!(Continued)
this cover could drastically reduce the life of the
compact spare tire.
4. Using the winch T-handle, rotate the drive nut to the right until the compact spare tire/cover assembly is
drawn into place against the underside of the vehicle.
5. Continue to rotate the nut to the right until you hear the winch mechanism click three times. It cannot be over-
tightened. Check under the vehicle to ensure the com-
pact spare tire/cover assembly is positioned correctly
against the underside of the vehicle.
CAUTION!
The winch mechanism is designed specifically to stow
a compact spare tire only. Do not attempt to use the
winch to stow the full size deflated tire, or any other
full-size tire, as the tire may not be held securely.
Vehicle damage may result.
Road Tire Installation
Vehicles Equipped With Wheel Covers
1. Mount the road tire on the axle. 2. To ease the installation process for steel wheels with
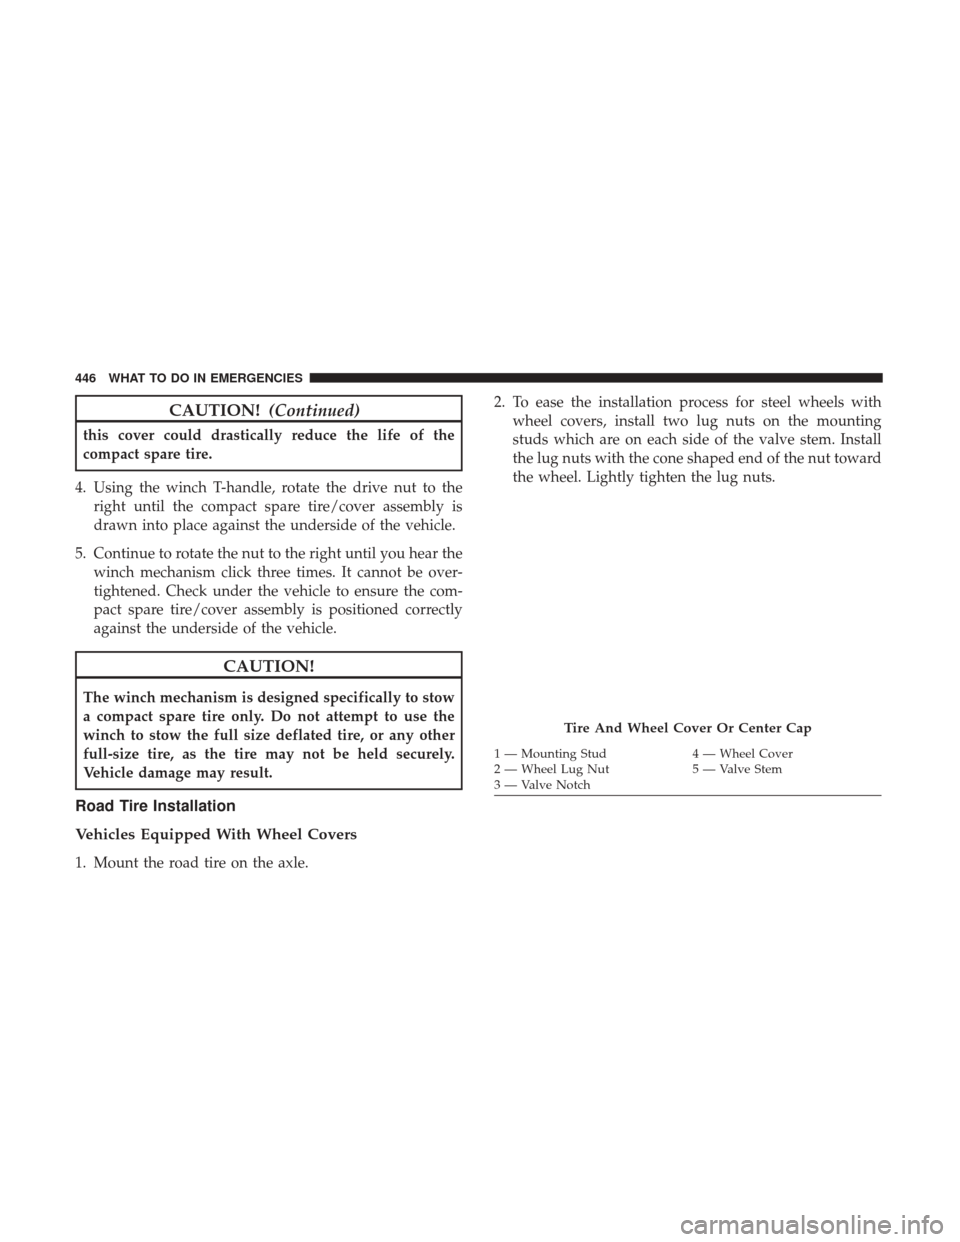
wheel covers, install two lug nuts on the mounting
studs which are on each side of the valve stem. Install
the lug nuts with the cone shaped end of the nut toward
the wheel. Lightly tighten the lug nuts.
Tire And Wheel Cover Or Center Cap
1 — Mounting Stud 4 — Wheel Cover
2 — Wheel Lug Nut 5 — Valve Stem
3 — Valve Notch
446 WHAT TO DO IN EMERGENCIES
Page 515 of 530

Fluid And Filter Changes...................479
Fluid Change .......................... .479
Fluid Level Check ........................479
Fluid Type ..........................478, 498
Gear Ranges ............................348
Special Additives ........................ .478
Torque Converter ........................353
Auto Up Power Windows .....................31
Battery ...............................244, 468
Charging System Light ....................244
Jump Starting .......................... .448
Keyless Key Fob Replacement ................21
Saving Feature (Protection) ..................177
Belts, Seat .................................93
Body Mechanism Lubrication ..................470
B-Pillar Location .......................... .374
Brake Assist System ........................ .361
Brake Control System, Electronic ................359
Brake Fluid ...............................498
Brake System ..........................359, 476
Anti-Lock (ABS) ........................ .359
Fluid Check ............................477
Parking ...............................357
Warning Light .......................... .243Brake/Transmission Interlock
..................346
Bulb Replacement ..........................492
Bulbs, Light ............................95, 491
Calibration, Compass ........................267
Camera, Rear ............................ .192
Capacities, Fluid .......................... .495
Caps, Filler Fuel ................................. .404
Power Steering ..........................356
Radiator (Coolant Pressure) .................475
Carbon Monoxide Warning .................93, 402
Cargo Compartment Luggage Carrier ........................ .225
Car go
(Vehicle Loading) ..................... .219
Car Washes ...............................480
Center High Mounted Stop Light ...............494
Certification Label ..........................406
Chains, Tire ............................. .388
Changing A Flat Tire ........................433
Chart, Tire Sizing .......................... .370
Check Engine Light (Malfunction Indicator Light). . . .461
Checking Your Vehicle For Safety ................92
Checks, Safety .............................92
Child Restraint .............................71
10
INDEX 513