Page 358 of 450

84
3
4
5
6
7
1
19
Audio and Telematics
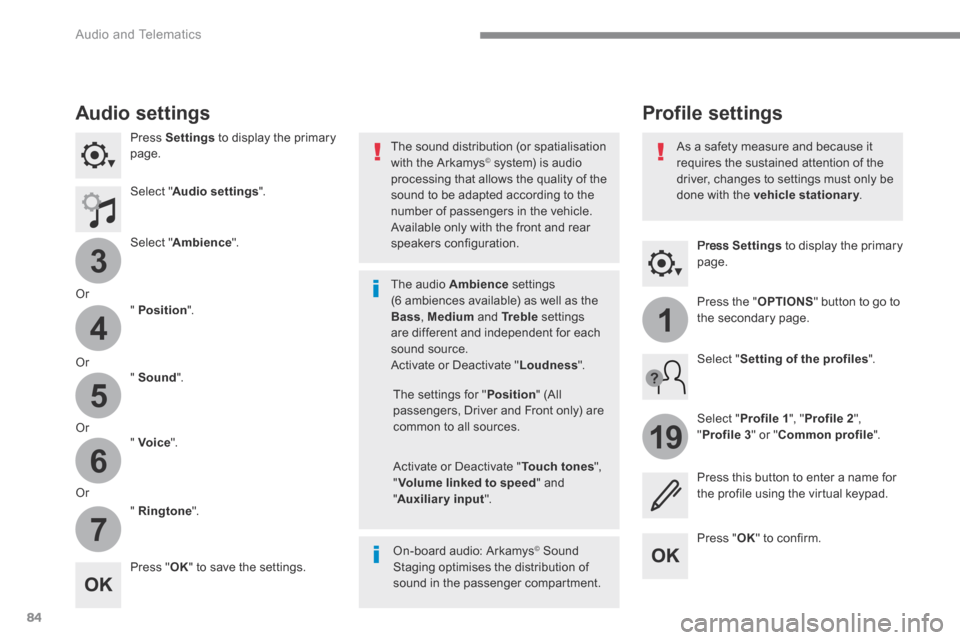
Press Settings to display the primary page.
Profile settings Audio settings
Press Settings to display the primary page.
Select " Audio settings ".
Select " Ambience ".
Or
" Position ".
Or " Sound ".
Or " Voice ".
Or
" Ringtone ".
On-board audio: Arkamys © Sound © Sound ©
Staging optimises the distribution of sound in the passenger compartment.
The settings for " Position " (All passengers, Driver and Front only) are common to all sources.
Activate or Deactivate " Touch tones ", " Volume linked to speed " and " Auxiliary input ".
The sound distribution (or spatialisation with the Arkamys © system) is audio © system) is audio ©
processing that allows the quality of the sound to be adapted according to the number of passengers in the vehicle.
Available only with the front and rear speakers configuration.
The audio Ambience settings (6 ambiences available) as well as the Bass , Medium and Tr e b l e settings are different and independent for each sound source. Activate or Deactivate " Loudness ".
Press " OK " to save the settings.
Press " OK " to confirm.
Press the " OPTIONS " button to go to the secondary page.
Select " Profile 1 ", " Profile 2 ",
" Profile 3 " or " Common profile ".
Select " Setting of the profiles ".
Press this button to enter a name for the profile using the virtual keypad.
As a safety measure and because it requires the sustained attention of the driver, changes to settings must only be done with the vehicle stationary . vehicle stationary . vehicle stationary
Page 361 of 450

87
.
1
17
18
Audio and Telematics
Press Settings to display the primary page.
Press the " OPTIONS " button to go to the secondary page.
Select " Date ".
Select " Time ".
Select " Setting the time- date ".
Adjustment of the time and date is only available if "GPS synchronisation" is deactivated. The change between winter and summer time is done by changing the time zone.
The system does not automatically manage the change between winter and summer time (depending on c ountr y).
Setting the time
Press this button to define the date.
Press this button to adjust the time using the virtual keypad.
Press " OK " to confirm.
Press " OK " to confirm.
Press " OK " to confirm.
Press this button to define the time z o n e .
Select the display format of the date.
Select the display format for the time (12h / 24h).
Activate or deactivate synchronisation with the satellites (UTC).
Every time the color scheme is changed, the system restarts, temporarily displaying a black screen.
As a safety measure, the procedure for changing the color scheme is only possible with the vehicle stationary.
Press Settings to display the primary page.
Select " Color schemes ".
Select a color scheme in the list then press " OK " to confirm.
Color schemes
Page 381 of 450
107
.
1
2
3
4
5
Audio and Telematics
Transversal-Citroen_en_Chap02_RCC-2-2-0_ed01-2016
Level 1Level 2Comments
Radio Media
SOURCES
Radio
Select change of source.
Bluetooth
CD
AUX
USB
iPod
Radio Media
FrequencyFM / DAB / AM Display the current radio station.
Radio Media
List
Update the list according to the stations received.
Preset Make a short press to preset the station.
Radio Media
Preset Select a preset station or preset a station.
Radio Media
OPTIONS
AM band / DAB band / FM band Press the Band button to change waveband.
Audio settings Configure the audio settings.
News
Activate or deactivate the options. TA
RDS
FM-DAB Follow-up
Radio Media
8 7. 5 M H z
Enter a frequency of the FM and AM bands on the virtual keypad.
Page 386 of 450

112
4
5
Audio and Telematics
Transversal-Citroen_en_Chap02_RCC-2-2-0_ed01-2016
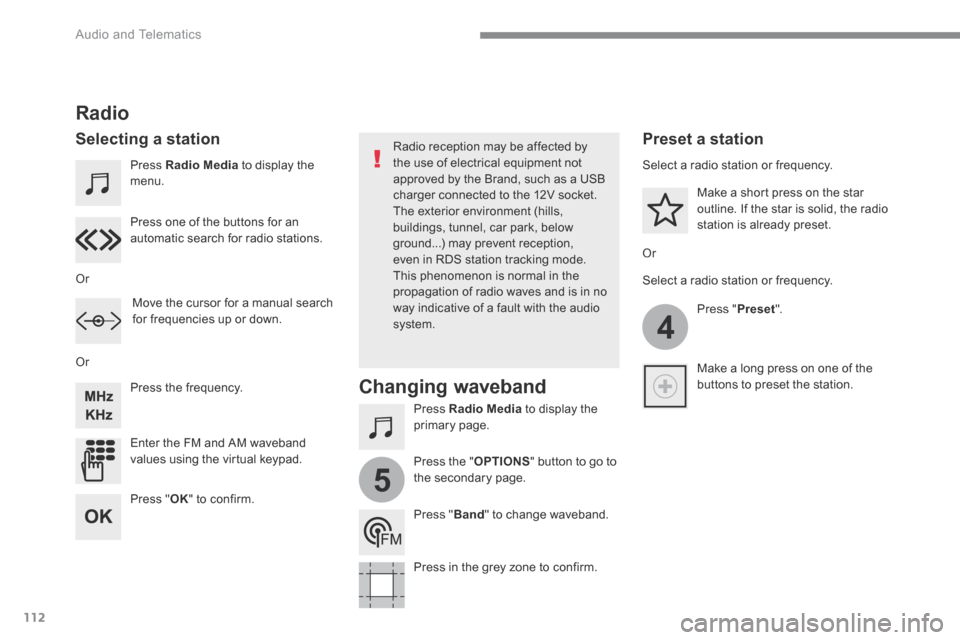
Press Radio Media to display the menu.
Press Radio Media to display the primary page.
Press the frequency.
Enter the FM and AM waveband values using the virtual keypad.
Press one of the buttons for an automatic search for radio stations.
Radio
Selecting a station Radio reception may be affected by the use of electrical equipment not approved by the Brand, such as a USB charger connected to the 12V socket. The exterior environment (hills,
buildings, tunnel, car park, below ground...) may prevent reception, even in RDS station tracking mode. This phenomenon is normal in the propagation of radio waves and is in no way indicative of a fault with the audio system.
Or
Or
Or
Move the cursor for a manual search for frequencies up or down.
Select a radio station or frequency.
Select a radio station or frequency.
Press " Preset ".
Press the " OPTIONS " button to go to the secondary page.
Make a short press on the star outline. If the star is solid, the radio station is already preset.
Make a long press on one of the buttons to preset the station.
Press " Band " to change waveband.
Press in the grey zone to confirm.
Preset a station
Changing waveband
Press " OK " to confirm.
Page 393 of 450
119
.
1
2
3
4
Audio and Telematics
Transversal-Citroen_en_Chap02_RCC-2-2-0_ed01-2016
Level 1Level 2Level 3Comments
Telephone
Bluetooth search
PHONE
Bluetooth connection
Search Start the search for a device to be connected.
Delete Delete one or more devices.
MirrorLink Open the MirrorLink function.
CarPlay Open the CarPlay function.
Telephone
Bluetooth search
Keypad
Enter a telephone number.
Telephone
Bluetooth search
Recent calls
All
View the calls according to the presentation selected. Select a contact to make the call.
Outgoing
Missed
Incoming
Telephone
Bluetooth search
Contacts
SearchConfirm Search for a contact in the contacts directory.
Telephone Go to the details of the contact sheet.
Page 404 of 450

130
1
Audio and Telematics
Transversal-Citroen_en_Chap02_RCC-2-2-0_ed01-2016
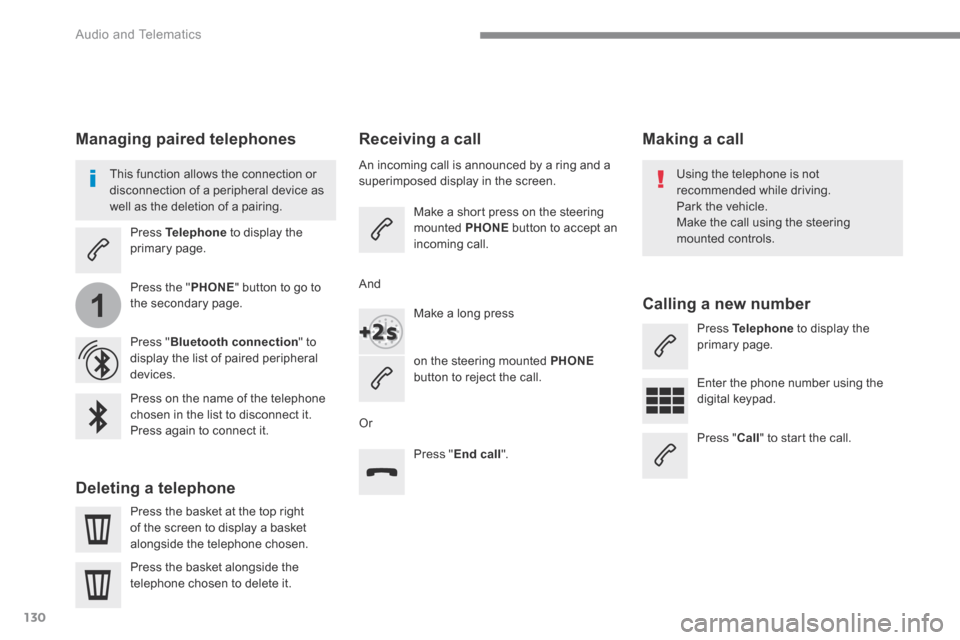
Receiving a call
An incoming call is announced by a ring and a superimposed display in the screen.
Make a short press on the steering mounted PHONE button to accept an incoming call.
Make a long press
on the steering mounted PHONEbutton to reject the call.
Or
And
Press " End call ".
Press on the name of the telephone chosen in the list to disconnect it. Press again to connect it.
Press the basket at the top right of the screen to display a basket
alongside the telephone chosen.
Press the basket alongside the telephone chosen to delete it.
Managing paired telephones
This function allows the connection or disconnection of a peripheral device as well as the deletion of a pairing.
Press Telephone to display the primary page.
Press the " PHONE " button to go to the secondary page.
Press " Bluetooth connection " to display the list of paired peripheral devices.
Deleting a telephone
Using the telephone is not recommended while driving. Park the vehicle. Make the call using the steering
mounted controls.
Making a call
Calling a new number
Press Telephone to display the primary page.
Enter the phone number using the digital keypad.
Press " Call " to start the call.
Page 414 of 450
140
1
Audio and Telematics
Transversal-Citroen_en_Chap02_RCC-2-2-0_ed01-2016
Press Settings to display the primary page.
Profile settings Adjust the brightness
Press " OK " to save.
Select " Profile 1 " or " Profile 2 " or " Profile 3 " or " Common profile ".
Press " Profiles ".
Press this button to enter a name for the profile using the virtual keypad
As a safety measure and because it requires the sustained attention of the driver, changes to settings must only be done with the vehicle stationary . vehicle stationary . vehicle stationary
Press this button to activate the profile.
Press this button to initialise the profile selected.
Press Settings to display the primary page.
Move the cursor to adjust the brightness of the screen and/or of the instrument panel (according to version).
Press Brightness .
Press in the grey zone to confirm.
Press the back arrow to confirm.
Press the back arrow again to confirm.
Page 416 of 450

142
15
14
Audio and Telematics
Transversal-Citroen_en_Chap02_RCC-2-2-0_ed01-2016
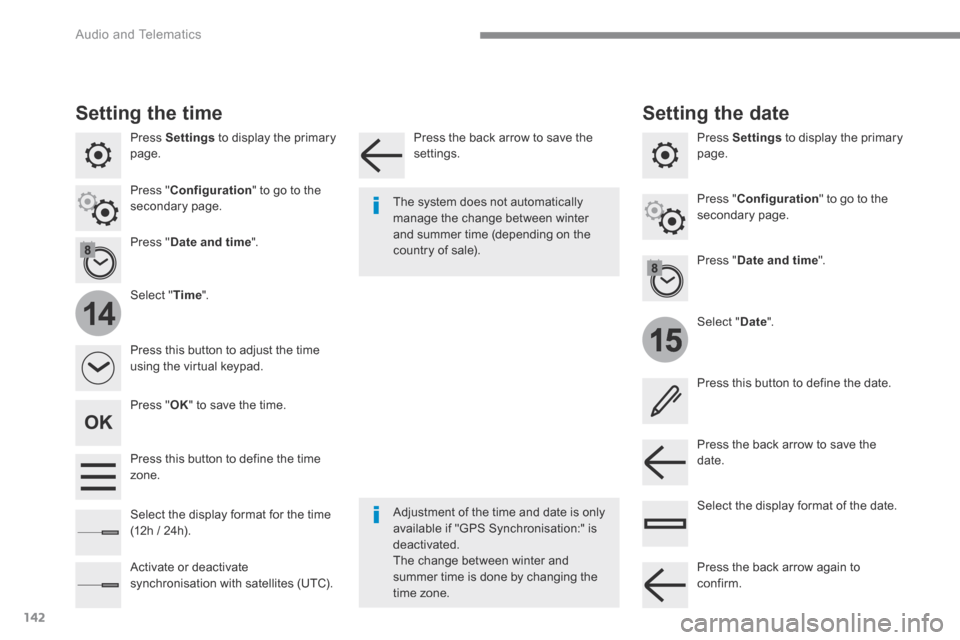
Press Settings to display the primary page.
Select " Date ".
Select " Time ".
Press " Date and time ".
Adjustment of the time and date is only available if "GPS Synchronisation:" is deactivated. The change between winter and summer time is done by changing the
time zone.
The system does not automatically manage the change between winter and summer time (depending on the country of sale).
Setting the time
Press this button to define the date.
Press this button to adjust the time using the virtual keypad.
Press the back arrow to save the date. Press this button to define the time z o n e .
Select the display format of the date. Select the display format for the time (12h / 24h).
Activate or deactivate synchronisation with satellites (UTC).
Press Settings to display the primary page.
Press " Date and time ".
Setting the date
Press " Configuration " to go to the secondary page. Press " Configuration " to go to the secondary page.
Press " OK " to save the time.
Press the back arrow to save the settings.
Press the back arrow again to confirm.