2017 CHEVROLET ORLANDO wiper fluid
[x] Cancel search: wiper fluidPage 18 of 372
Black plate (12,1)Chevrolet Orlando Owner Manual - 2013 - CRC - 6/5/12
1-12 In Brief
Windshield Wiper/Washer
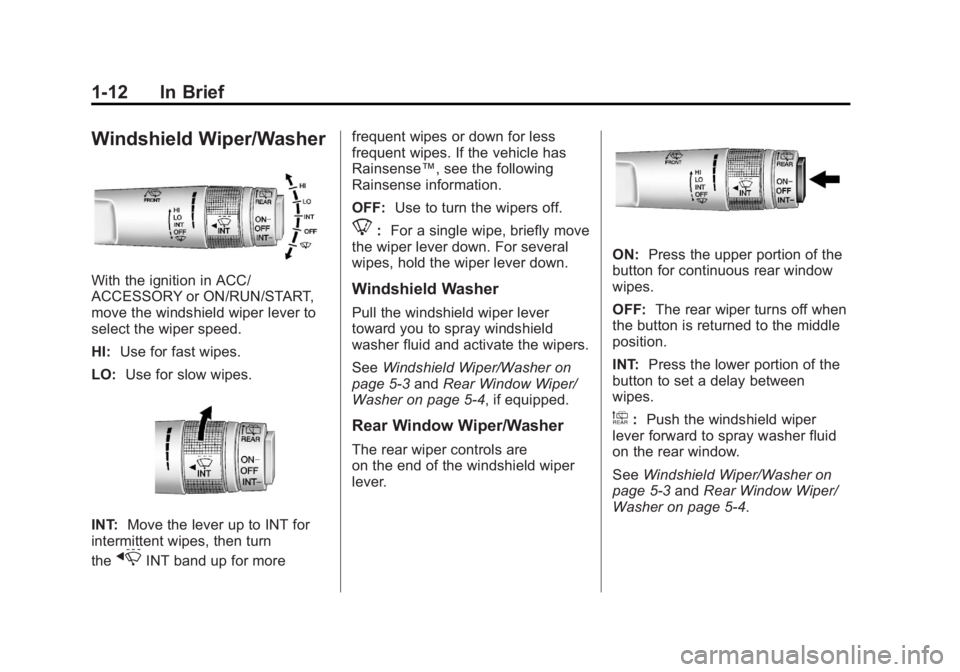
With the ignition in ACC/
ACCESSORY or ON/RUN/START,
move the windshield wiper lever to
select the wiper speed.
HI:Use for fast wipes.
LO: Use for slow wipes.
INT: Move the lever up to INT for
intermittent wipes, then turn
the
xINT band up for more frequent wipes or down for less
frequent wipes. If the vehicle has
Rainsense™, see the following
Rainsense information.
OFF:
Use to turn the wipers off.
8:For a single wipe, briefly move
the wiper lever down. For several
wipes, hold the wiper lever down.
Windshield Washer
Pull the windshield wiper lever
toward you to spray windshield
washer fluid and activate the wipers.
See Windshield Wiper/Washer on
page 5‑3 andRear Window Wiper/
Washer on page 5‑4, if equipped.
Rear Window Wiper/Washer
The rear wiper controls are
on the end of the windshield wiper
lever.
ON: Press the upper portion of the
button for continuous rear window
wipes.
OFF: The rear wiper turns off when
the button is returned to the middle
position.
INT: Press the lower portion of the
button to set a delay between
wipes.
a: Push the windshield wiper
lever forward to spray washer fluid
on the rear window.
See Windshield Wiper/Washer on
page 5‑3 andRear Window Wiper/
Washer on page 5‑4.
Page 104 of 372

Black plate (4,1)Chevrolet Orlando Owner Manual - 2013 - CRC - 6/5/12
5-4 Instruments and Controls
INT(Intermittent Wipes):Move the
lever up to INT for intermittent
wipes, then turn the
xINT band
up for more frequent wipes or down
for less frequent wipes.
OFF: Use to turn the wipers off.
8(Mist): For a single wipe, briefly
move the wiper lever down. For
several wipes, hold the wiper
lever down.
Clear snow and ice from the wiper
blades before using them. If frozen
to the windshield, carefully loosen or
thaw them. Damaged blades should
be replaced. See Wiper Blade
Replacement on page 10‑23.
Heavy snow or ice can overload the
wiper motor. Wipe Parking
If the ignition is changed to
LOCK/OFF mode while the wipers
are on LO, HI, or INT, they will
immediately stop.
If the windshield wiper lever is then
moved to off before the driver door
is opened or within 10 minutes, the
wipers will restart and move to the
base of the windshield.
If the ignition is changed to LOCK/
OFF while the wipers are performing
wipes due to windshield washing,
the wipers continue to run until they
reach the base of the windshield.
Windshield Washer
Pull the windshield wiper lever
toward you to spray windshield
washer fluid and activate the wipers.
The wipers will continue until the
lever is released or the maximum
wash time is reached. When the
windshield wiper lever is released,
additional wipes may occur
depending on how long the
windshield washer had beenactivated. See
Washer Fluid on
page 10‑18 for information on filling
the windshield washer fluid
reservoir.
{WARNING
In freezing weather, do not use
the washer until the windshield is
warmed. Otherwise the washer
fluid can form ice on the
windshield, blocking your vision.
Rear Window Wiper/
Washer
The rear wiper controls are on the
end of the windshield wiper lever.
Page 105 of 372
Black plate (5,1)Chevrolet Orlando Owner Manual - 2013 - CRC - 6/5/12
Instruments and Controls 5-5
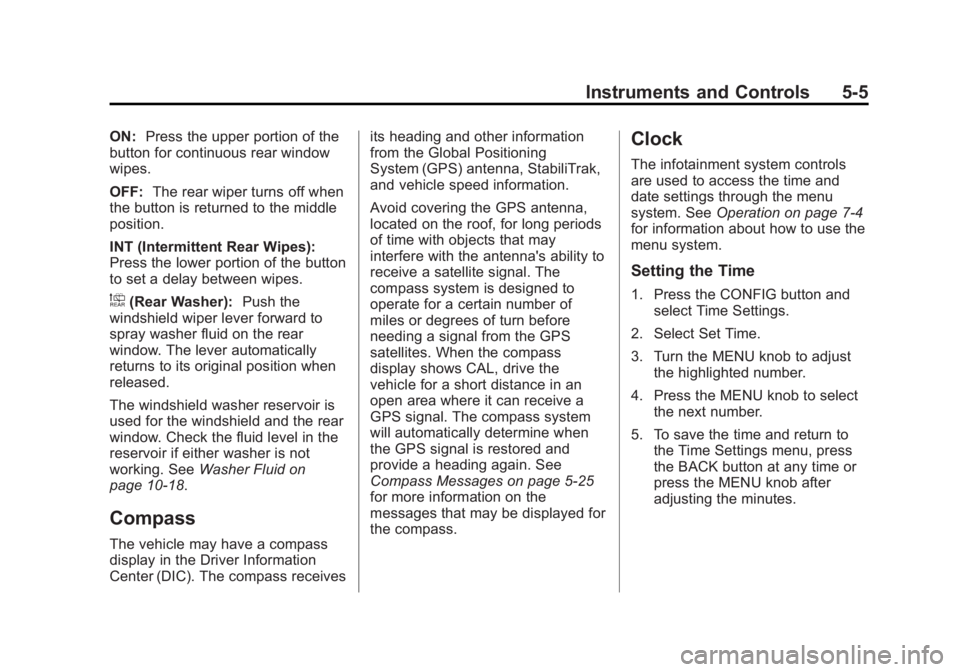
ON:Press the upper portion of the
button for continuous rear window
wipes.
OFF: The rear wiper turns off when
the button is returned to the middle
position.
INT (Intermittent Rear Wipes):
Press the lower portion of the button
to set a delay between wipes.
a(Rear Washer): Push the
windshield wiper lever forward to
spray washer fluid on the rear
window. The lever automatically
returns to its original position when
released.
The windshield washer reservoir is
used for the windshield and the rear
window. Check the fluid level in the
reservoir if either washer is not
working. See Washer Fluid on
page 10‑18.
Compass
The vehicle may have a compass
display in the Driver Information
Center (DIC). The compass receives its heading and other information
from the Global Positioning
System (GPS) antenna, StabiliTrak,
and vehicle speed information.
Avoid covering the GPS antenna,
located on the roof, for long periods
of time with objects that may
interfere with the antenna's ability to
receive a satellite signal. The
compass system is designed to
operate for a certain number of
miles or degrees of turn before
needing a signal from the GPS
satellites. When the compass
display shows CAL, drive the
vehicle for a short distance in an
open area where it can receive a
GPS signal. The compass system
will automatically determine when
the GPS signal is restored and
provide a heading again. See
Compass Messages on page 5‑25
for more information on the
messages that may be displayed for
the compass.
Clock
The infotainment system controls
are used to access the time and
date settings through the menu
system. See
Operation on page 7‑4
for information about how to use the
menu system.
Setting the Time
1. Press the CONFIG button and select Time Settings.
2. Select Set Time.
3. Turn the MENU knob to adjust the highlighted number.
4. Press the MENU knob to select the next number.
5. To save the time and return to the Time Settings menu, press
the BACK button at any time or
press the MENU knob after
adjusting the minutes.
Page 229 of 372
Black plate (1,1)Chevrolet Orlando Owner Manual - 2013 - CRC - 6/5/12
Vehicle Care 10-1
Vehicle Care
General Information
General Information . . . . . . . . . . 10-2
California Proposition65 Warning . . . . . . . . . . . . . . . . . 10-3
California Perchlorate Materials Requirements . . . . 10-3
Accessories and Modifications . . . . . . . . . . . . . . . 10-3
Vehicle Checks
Doing Your OwnService Work . . . . . . . . . . . . . . . 10-4
Hood . . . . . . . . . . . . . . . . . . . . . . . . 10-4
Engine Compartment Overview . . . . . . . . . . . . . . . . . . . 10-6
Engine Oil . . . . . . . . . . . . . . . . . . . 10-7
Engine Oil Life System . . . . . . 10-9
Automatic Transmission Fluid . . . . . . . . . . . . . . . . . . . . . . 10-10
Manual Transmission Fluid . . . . . . . . . . . . . . . . . . . . . . 10-11
Hydraulic Clutch . . . . . . . . . . . . 10-11
Engine Air Cleaner/Filter . . . . 10-11
Cooling System . . . . . . . . . . . . 10-13
Engine Coolant . . . . . . . . . . . . . 10-13
Engine Overheating . . . . . . . . 10-17 Washer Fluid . . . . . . . . . . . . . . . 10-18
Brakes . . . . . . . . . . . . . . . . . . . . . 10-19
Brake Fluid . . . . . . . . . . . . . . . . . 10-20
Battery . . . . . . . . . . . . . . . . . . . . . 10-21
Starter Switch Check . . . . . . . 10-22
Automatic Transmission Shift
Lock Control Function
Check . . . . . . . . . . . . . . . . . . . . . 10-22
Ignition Transmission Lock Check . . . . . . . . . . . . . . . . . . . . . 10-23
Park Brake and P (Park) Mechanism Check . . . . . . . . 10-23
Wiper Blade Replacement . . . . . . . . . . . . . . 10-23
Headlamp Aiming
Headlamp Aiming . . . . . . . . . . 10-25
Bulb Replacement
Bulb Replacement . . . . . . . . . . 10-25
Halogen Bulbs . . . . . . . . . . . . . . 10-25
Headlamps, Front TurnSignal, Sidemarker, and
Parking Lamps . . . . . . . . . . . . 10-25
Fog Lamps . . . . . . . . . . . . . . . . . 10-27
Taillamps, Turn Signal, Sidemarker, and
Stoplamps . . . . . . . . . . . . . . . . 10-27 Back-Up Lamps . . . . . . . . . . . . 10-29
License Plate Lamp . . . . . . . . 10-29
Replacement Bulbs . . . . . . . . . 10-30
Electrical System
Electrical System
Overload . . . . . . . . . . . . . . . . . . 10-30
Fuses and Circuit Breakers . . . . . . . . . . . . . . . . . . 10-31
Engine Compartment Fuse Block . . . . . . . . . . . . . . . . . . . . . 10-31
Instrument Panel Fuse Block . . . . . . . . . . . . . . . . . . . . . 10-34
Wheels and Tires
Tires . . . . . . . . . . . . . . . . . . . . . . . . 10-37
All-Season Tires . . . . . . . . . . . . 10-37
Winter Tires . . . . . . . . . . . . . . . . 10-38
Summer Tires . . . . . . . . . . . . . . 10-38
Tire Sidewall Labeling . . . . . . 10-38
Tire Designations . . . . . . . . . . . 10-40
Tire Terminology andDefinitions . . . . . . . . . . . . . . . . 10-40
Tire Pressure . . . . . . . . . . . . . . . 10-43
Tire Pressure Monitor System . . . . . . . . . . . . . . . . . . . 10-44
Tire Pressure Monitor Operation . . . . . . . . . . . . . . . . . 10-45
Tire Inspection . . . . . . . . . . . . . . 10-48
Page 308 of 372
Black plate (80,1)Chevrolet Orlando Owner Manual - 2013 - CRC - 6/5/12
10-80 Vehicle Care
Shutter System
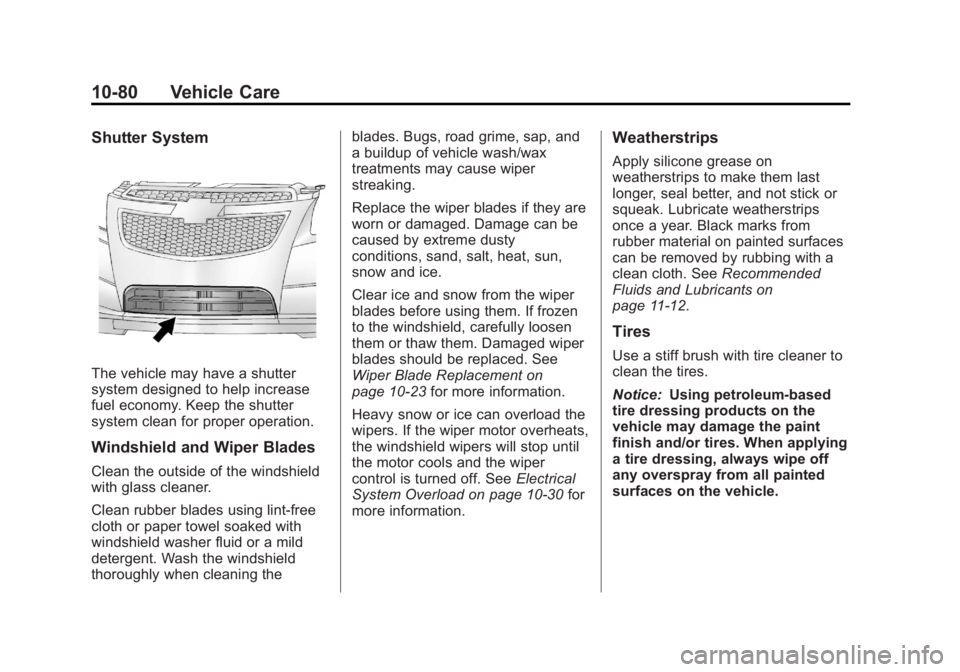
The vehicle may have a shutter
system designed to help increase
fuel economy. Keep the shutter
system clean for proper operation.
Windshield and Wiper Blades
Clean the outside of the windshield
with glass cleaner.
Clean rubber blades using lint-free
cloth or paper towel soaked with
windshield washer fluid or a mild
detergent. Wash the windshield
thoroughly when cleaning theblades. Bugs, road grime, sap, and
a buildup of vehicle wash/wax
treatments may cause wiper
streaking.
Replace the wiper blades if they are
worn or damaged. Damage can be
caused by extreme dusty
conditions, sand, salt, heat, sun,
snow and ice.
Clear ice and snow from the wiper
blades before using them. If frozen
to the windshield, carefully loosen
them or thaw them. Damaged wiper
blades should be replaced. See
Wiper Blade Replacement on
page 10‑23
for more information.
Heavy snow or ice can overload the
wipers. If the wiper motor overheats,
the windshield wipers will stop until
the motor cools and the wiper
control is turned off. See Electrical
System Overload on page 10‑30 for
more information.
Weatherstrips
Apply silicone grease on
weatherstrips to make them last
longer, seal better, and not stick or
squeak. Lubricate weatherstrips
once a year. Black marks from
rubber material on painted surfaces
can be removed by rubbing with a
clean cloth. See Recommended
Fluids and Lubricants on
page 11‑12.
Tires
Use a stiff brush with tire cleaner to
clean the tires.
Notice: Using petroleum-based
tire dressing products on the
vehicle may damage the paint
finish and/or tires. When applying
a tire dressing, always wipe off
any overspray from all painted
surfaces on the vehicle.
Page 315 of 372
Black plate (1,1)Chevrolet Orlando Owner Manual - 2013 - CRC - 6/5/12
Service and Maintenance 11-1
Service and
Maintenance
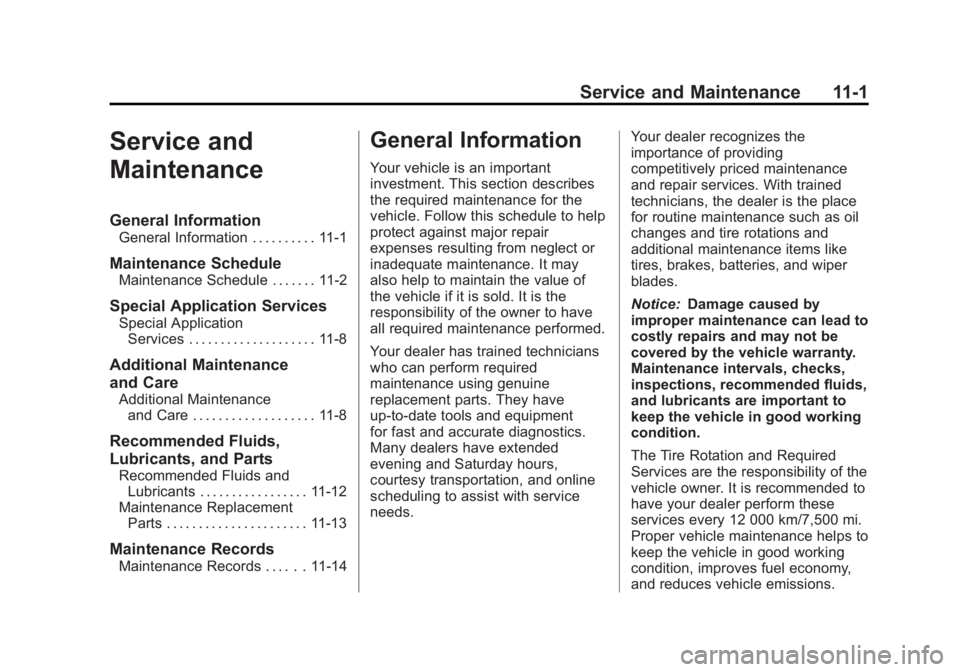
General Information
General Information . . . . . . . . . . 11-1
Maintenance Schedule
Maintenance Schedule . . . . . . . 11-2
Special Application Services
Special ApplicationServices . . . . . . . . . . . . . . . . . . . . 11-8
Additional Maintenance
and Care
Additional Maintenanceand Care . . . . . . . . . . . . . . . . . . . 11-8
Recommended Fluids,
Lubricants, and Parts
Recommended Fluids andLubricants . . . . . . . . . . . . . . . . . 11-12
Maintenance Replacement Parts . . . . . . . . . . . . . . . . . . . . . . 11-13
Maintenance Records
Maintenance Records . . . . . . 11-14
General Information
Your vehicle is an important
investment. This section describes
the required maintenance for the
vehicle. Follow this schedule to help
protect against major repair
expenses resulting from neglect or
inadequate maintenance. It may
also help to maintain the value of
the vehicle if it is sold. It is the
responsibility of the owner to have
all required maintenance performed.
Your dealer has trained technicians
who can perform required
maintenance using genuine
replacement parts. They have
up‐to‐date tools and equipment
for fast and accurate diagnostics.
Many dealers have extended
evening and Saturday hours,
courtesy transportation, and online
scheduling to assist with service
needs. Your dealer recognizes the
importance of providing
competitively priced maintenance
and repair services. With trained
technicians, the dealer is the place
for routine maintenance such as oil
changes and tire rotations and
additional maintenance items like
tires, brakes, batteries, and wiper
blades.
Notice:
Damage caused by
improper maintenance can lead to
costly repairs and may not be
covered by the vehicle warranty.
Maintenance intervals, checks,
inspections, recommended fluids,
and lubricants are important to
keep the vehicle in good working
condition.
The Tire Rotation and Required
Services are the responsibility of the
vehicle owner. It is recommended to
have your dealer perform these
services every 12 000 km/7,500 mi.
Proper vehicle maintenance helps to
keep the vehicle in good working
condition, improves fuel economy,
and reduces vehicle emissions.
Page 317 of 372

Black plate (3,1)Chevrolet Orlando Owner Manual - 2013 - CRC - 6/5/12
Service and Maintenance 11-3
indicate the need for vehicle service
for more than a year. The engine oil
and filter must be changed at least
once a year and the oil life system
must be reset. Your trained dealer
technician can perform this work.
If the engine oil life system is reset
accidentally, service the vehicle
within 5 000 km/3,000 mi since the
last service. Reset the oil life
system when the oil is changed.
SeeEngine Oil Life System on
page 10‑9.
Tire Rotation and Required
Services Every 12 000 km/
7,500 mi
Rotate the tires, if recommended for
the vehicle, and perform the
following services. See Tire
Rotation on page 10‑49.
.Check engine oil level and oil
life percentage. If needed,
change engine oil and filter, and
reset oil life system. See Engine
Oil on page 10‑7 andEngine Oil
Life System on page 10‑9.
.Check engine coolant level. See
Engine Coolant on page 10‑13.
.Check windshield washer fluid
level. See Washer Fluid on
page 10‑18.
.Visually inspect windshield wiper
blades for wear, cracking,
or contamination. See Exterior
Care on page 10‑78. Replace
worn or damaged wiper blades.
See Wiper Blade Replacement
on page 10‑23.
.Check tire inflation pressures.
See Tire Pressure on
page 10‑43.
.Inspect tire wear. See Tire
Inspection on page 10‑48.
.Visually check for fluid leaks.
.Inspect engine air cleaner filter.
See Engine Air Cleaner/Filter on
page 10‑11.
.Inspect brake system.
.Visually inspect steering,
suspension, and chassis
components for damaged, loose,
or missing parts or signs of
wear. See Exterior Care on
page 10‑78.
.Check restraint system
components. See Safety System
Check on page 3‑23.
.Visually inspect fuel system for
damage or leaks.
.Visually inspect exhaust system
and nearby heat shields for
loose or damaged parts.
.Lubricate body components. See
Exterior Care on page 10‑78.
.Check starter switch. See Starter
Switch Check on page 10‑22.
.Check automatic transmission
shift lock control function. See
Automatic Transmission Shift
Lock Control Function Check on
page 10‑22.
Page 327 of 372
Black plate (13,1)Chevrolet Orlando Owner Manual - 2013 - CRC - 6/5/12
Service and Maintenance 11-13
UsageFluid/Lubricant
Hood and Door Hinges Multi-Purpose Lubricant, Superlube (GM Part No. 12346241, in Canada 10953474).
Weatherstrip Conditioning Weatherstrip Lubricant (GM Part No. 3634770, in Canada 10953518) or Dielectric Silicone Grease (GM Part No. 12345579, in Canada 10953481).
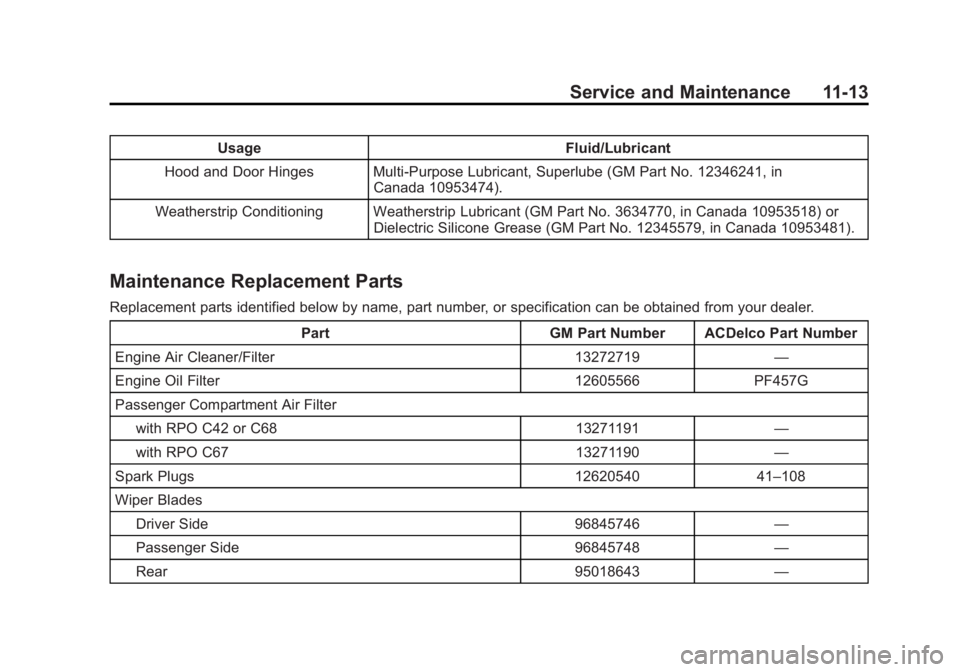
Maintenance Replacement Parts
Replacement parts identified below by name, part number, or specification can be obtained from your dealer.
Part GM Part Number ACDelco Part Number
Engine Air Cleaner/Filter 13272719 —
Engine Oil Filter 12605566 PF457G
Passenger Compartment Air Filter with RPO C42 or C68 13271191 —
with RPO C67 13271190 —
Spark Plugs 12620540 41–108
Wiper Blades Driver Side 96845746 —
Passenger Side 96845748 —
Rear 95018643 —