2017 CHEVROLET ORLANDO trunk
[x] Cancel search: trunkPage 36 of 372
Black plate (8,1)Chevrolet Orlando Owner Manual - 2013 - CRC - 6/5/12
2-8 Keys, Doors, and Windows
The rear door power windows are
also disabled.
Press
o{again to deactivate the
lockout switch.
If a rear door handle is pulled when
the safety lock is deactivated, that
door will remain locked and the
indicator light may flash. Release
the handle, then press the safety
lock twice to deactivate the safety
locks.
Doors
Liftgate
{WARNING
Exhaust gases can enter the
vehicle if it is driven with the
liftgate, trunk/hatch open, or with
any objects that pass through the
seal between the body and the
trunk/hatch or liftgate. Engine
exhaust contains carbon
monoxide (CO) which cannot be
seen or smelled. It can cause
unconsciousness and even death.
If the vehicle must be driven with
the liftgate, or trunk/hatch open:
.Close all of the windows.
.Fully open the air outlets on
or under the instrument
panel.
(Continued)
WARNING (Continued)
.Adjust the Climate Control
system to a setting that
brings in only outside air and
set the fan speed to the
highest setting. See Climate
Control System in the Index.
For more information about
carbon monoxide, see Engine
Exhaust on page 9‑20.
Notice: To avoid damage to the
liftgate or liftgate glass, make
sure the area above and behind
the liftgate is clear before
opening it.
Unlock the vehicle before opening
the liftgate.
Page 37 of 372
Black plate (9,1)Chevrolet Orlando Owner Manual - 2013 - CRC - 6/5/12
Keys, Doors, and Windows 2-9
Press the touch pad located in the
handle of the liftgate, above the
license plate, and lift up to open.
Do not press the touch pad while
closing the liftgate. This will cause
the liftgate to be unlatched.
Always close the liftgate before
driving.Vehicle Security
This vehicle has theft-deterrent
features; however, they do not make
the vehicle impossible to steal.
Vehicle Alarm System
This vehicle has a anti-theft alarm
system.
The LED light, instrument panel
near the windshield, indicates the
status of the system.
Arming the System
1. Close all doors, trunk, andliftgate.
2. Lock the vehicle using the transmitter or the power door
lock button with the door open.
The LED on the instrument
panel should come on and stay
on for about 30 seconds.
3. After 30 seconds, or if the
Q
button on the transmitter is
pressed again, the alarm system will arm, and the LED will begin
to slowly flash indicating the
alarm is operating.
If a door, the hood, or liftgate is
opened without first unlocking with
the transmitter, the turn signals will
flash and the horn will sound for
about 30 seconds. The alarm
system will then re-arm to monitor
for the next unauthorized event.
The theft-deterrent alarm system will
not activate if the doors are locked
with the key.
Disarming the System
To disarm the system, either unlock
the doors using the transmitter,
or start the vehicle.
To avoid setting off the alarm by
accident:
.Lock the vehicle with the
transmitter after all occupants
have left the vehicle and all
doors are closed.
Page 221 of 372
Black plate (41,1)Chevrolet Orlando Owner Manual - 2013 - CRC - 6/5/12
Driving and Operating 9-41
The tethered fuel cap is behind the
fuel door on the vehicle's passenger
side. Turn the fuel cap
counterclockwise to remove. While
refueling, hang the tethered fuel cap
from the disk on the end of the fuel
cap to the mating feature on the fuel
door hinge. Reinstall the cap by
turning it clockwise until it clicks.
Do not top off or overfill the tank.
Wait a few seconds before removing
the nozzle. Clean fuel from painted
surfaces as soon as possible. See
Exterior Care on page 10‑78.
{WARNING
If a fire starts while you are
refueling, do not remove the
nozzle. Shut off the flow of fuel by
shutting off the pump or by
notifying the station attendant.
Leave the area immediately.Notice:
If a new fuel cap is
needed, be sure to get the right
type of cap from your dealer. The
wrong type of fuel cap might not
fit properly, might cause the
malfunction indicator lamp to
light, and could damage the fuel
tank and emissions system. See
Malfunction Indicator Lamp on
page 5‑12.
Filling a Portable Fuel
Container
{WARNING
Filling a portable fuel container
while it is in the vehicle can cause
fuel vapors that can ignite either
by static electricity or other
means. You or others could be
badly burned and the vehicle
could be damaged. Always:
.Use approved fuel
containers.
(Continued)
WARNING (Continued)
.Remove container from
vehicle, trunk, or pickup bed
before filling.
.Place container on the
ground.
.Place the nozzle inside the fill
opening of the container
before dispensing fuel, and
keep it in contact with the fill
opening until filling is
complete.
.Do not smoke while
pumping fuel.
Page 222 of 372
Black plate (42,1)Chevrolet Orlando Owner Manual - 2013 - CRC - 6/5/12
9-42 Driving and Operating
Towing
General Towing
Information
Only use towing equipment that has
been designed for the vehicle.
Contact your dealer or trailering
dealer for assistance with preparing
the vehicle for towing a trailer. Read
the entire section before towing a
trailer.
For towing a disabled vehicle, see
Towing the Vehicle on page 10‑75.
For towing the vehicle behind
another vehicle such as a motor
home, seeRecreational Vehicle
Towing on page 10‑76.
Driving Characteristics
and Towing Tips
Driving with a Trailer
When towing a trailer:
.Become familiar with the state
and local laws that apply
specifically to trailer towing.
.Do not tow a trailer during the
first 800 km (500 mi), to prevent
damage to the engine, axle or
other parts.
.Then, during the first 800 km
(500 mi) trailer towing, do not
drive over 80 km/h (50 mph) and
do not make starts at full throttle.
.Vehicles with automatic
transmissions can tow in D
(Drive) but M (Manual Mode) is
recommended. See Manual
Mode on page 9‑23. Use a lower
gear if the transmission shifts
too often. For vehicles with a
manual transmission, it is better
not to use the highest gear.
{WARNING
When towing a trailer, exhaust
gases may collect at the rear of
the vehicle and enter if the
liftgate, trunk/hatch, or rear-most
window is open.
(Continued)
WARNING (Continued)
When towing a trailer:
.Do not drive with the liftgate,
trunk/hatch, or rear-most
window open.
.Fully open the air outlets on
or under the instrument
panel.
.Also adjust the Climate
Control system to a setting
that brings in only outside air.
See“Climate Control
Systems” in the Index.
For more information about
Carbon Monoxide, see Engine
Exhaust on page 9‑20.
Towing a trailer requires a certain
amount of experience. The
combination you are driving is
longer and not as responsive as the
vehicle itself. Get acquainted with
the handling and braking of the rig
before setting out for the open road.
Page 264 of 372

Black plate (36,1)Chevrolet Orlando Owner Manual - 2013 - CRC - 6/5/12
10-36 Vehicle Care
Circuit
Number Usage
1 OnStar/Hands‐Free Phone
2 DC/DC Converter
3 Body Control Module 5
4 Audio
5 Information Display, Face Plate
6 Front Power Outlet
7 Power Outlet
8 Body Control Module 3
9 Body Control Module 4
10 Body Control Module 8 Circuit
Number Usage
11 Air Conditioning Blower Motor
12 Not Used
13 Power Front Seat, Left Side
14 Dynamic Light Control
15 Airbag
16 Tailgate
17 Air Conditioning System
18 Trailer
19 Battery Sensor
20 Not Used
21 Instrument Cluster Circuit
Number Usage
22 Ignition/Electronic Key System
23 Body Control Module 1
24 Body Control Module 2
25 Steering Column Lock
26 Rear Power Outlet
Relays Usage K1 Trunk Open
K2 Logistic Mode
K3 Retained Accessory Power
Page 331 of 372
Black plate (1,1)Chevrolet Orlando Owner Manual - 2013 - CRC - 6/5/12
Technical Data 12-1
Technical Data
Vehicle Identification
Vehicle IdentificationNumber (VIN) . . . . . . . . . . . . . . 12-1
Service Parts Identification Label . . . . . . . . . . . . . . . . . . . . . . . 12-1
Vehicle Data
Capacities andSpecifications . . . . . . . . . . . . . . 12-2
Engine Drive Belt Routing . . . 12-3
Vehicle Identification
Vehicle Identification
Number (VIN)
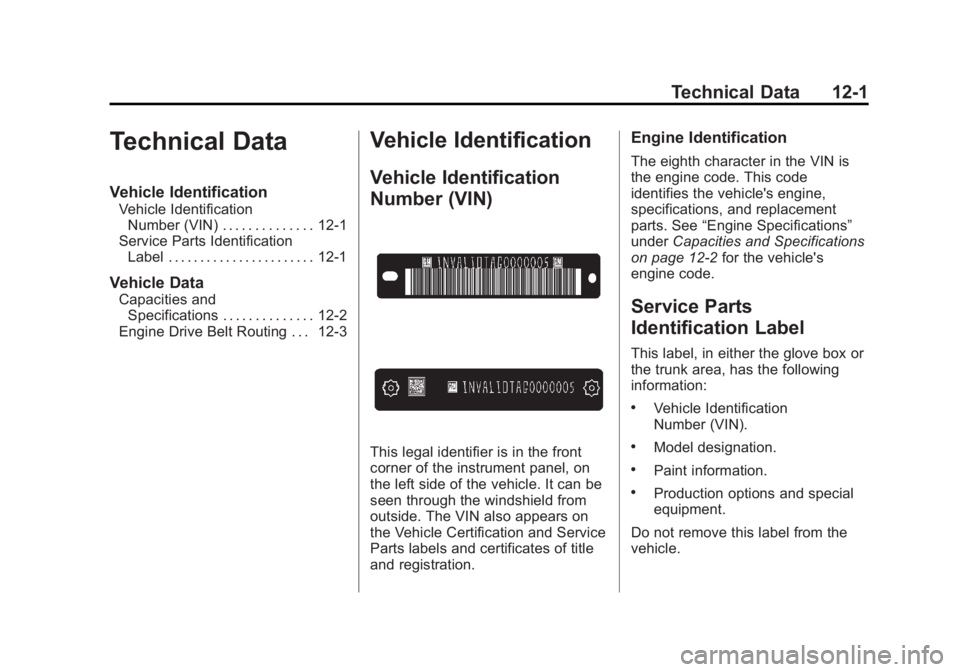
This legal identifier is in the front
corner of the instrument panel, on
the left side of the vehicle. It can be
seen through the windshield from
outside. The VIN also appears on
the Vehicle Certification and Service
Parts labels and certificates of title
and registration.
Engine Identification
The eighth character in the VIN is
the engine code. This code
identifies the vehicle's engine,
specifications, and replacement
parts. See “Engine Specifications”
under Capacities and Specifications
on page 12‑2 for the vehicle's
engine code.
Service Parts
Identification Label
This label, in either the glove box or
the trunk area, has the following
information:
.Vehicle Identification
Number (VIN).
.Model designation.
.Paint information.
.Production options and special
equipment.
Do not remove this label from the
vehicle.