2017 CHEVROLET MALIBU light
[x] Cancel search: lightPage 156 of 419
Chevrolet Malibu Owner Manual (GMNA-Localizing-U.S./Canada/Mexico-10122664) - 2017 - crc - 5/23/16
Instruments and Controls 155
stopping vehicle, and then thatvehicle drives on. SeeAdaptiveCruise Control0245.
Select Off or On.
Lane Change Alert
This allows the feature to be turnedon or off. SeeLane Change Alert(LCA)0264.
Select Off or On.
Comfort and Convenience
Select and the following maydisplay:
.Auto Memory Recall
.Easy Exit Options
.Chime Volume
.Reverse Tilt Mirror
.Extended Hill Start Assist
Auto Memory Recall
This feature automatically recallsthe current driver’spreviouslystored1or2buttonpositionswhentheignition is changed from off to ON/RUN or ACC/ACCESSORY. SeeMemory Seats059.
Select Off or On.
Easy Exit Options
This feature automatically recallsthe current driver’spreviouslystoredexit button position when exiting thevehicle. SeeMemory Seats059.
Select Off or On.
Chime Volume
Select to set the chime volumelevel.
Select Normal or High.
Reverse Tilt Mirror
When on, both the driver andpassenger outside mirrors will tiltdownward when the vehicle isshifted to R (Reverse) to improvevisibility of the ground near the rearwheels. They will return to theirprevious driving position when thevehicle is shifted out of R (Reverse)or the engine is turned off. SeeReverse Tilt Mirrors049.
Select Off, On - Driver andPassenger, On - Driver, or On -Passenger.
Extended Hill Start Assist
This allows the duration of the HillStart Assist to be changed. See“Extended Hill Start Assist (EHSA)”inHill Start Assist (HSA)0240.
Select Extended Hold orStandard Hold.
Lighting
Select and the following maydisplay:
.Vehicle Locator Lights
.Exit Lighting
Vehicle Locator Lights
This feature will flash the exteriorlamps and allows the headlamps,parking lamps, taillamps, and mostof the interior lamps to turn on
briefly whenKon the Remote
Keyless Entry (RKE) transmitter ispressed to locate the vehicle.
Select Off or On.
Page 157 of 419
Chevrolet Malibu Owner Manual (GMNA-Localizing-U.S./Canada/Mexico-10122664) - 2017 - crc - 5/23/16
156 Instruments and Controls
Exit Lighting
This allows the selection of howlong the exterior lamps stay onwhen leaving the vehicle when it isdark outside.
Select Off, 30 Seconds, 60Seconds, or 120 Seconds.
Power Door Locks
Select and the following maydisplay:
.Unlocked Door Anti Lock Out
.Auto Door Unlock
.Delayed Door Lock
Unlocked Door Anti Lock Out
When on, this feature will keep thedriver door from locking when thedoor is open. If this feature is turnedon, the Delayed Door Lock menuwill not be available.
Select Off or On.
Auto Door Unlock
This allows selection of which of thedoors will automatically unlock whenthe vehicle is shifted into P (Park).
Select Off, All Doors, or Driver Door.
Delayed Door Lock
When on, this feature will delay thelocking of the doors. To override thedelay, press the power door lockswitch on the door.
Select Off or On.
Remote Lock, Unlock, Start
Select and the following maydisplay:
.Remote Unlock Light Feedback
.Remote Lock Feedback
.Remote Door Unlock
.Remote Start Auto Cool Seats
.Remote Start Auto Heat Seats
.Passive Door Unlock
.Passive Door Lock
.Remote Left in Vehicle Alert
Remote Unlock Light Feedback
When on, the exterior lamps willflash when unlocking the vehiclewith the RKE transmitter.
Select Off or Flash Lights.
Remote Lock Feedback
This allows selection of what type offeedback is given when locking thevehicle with the RKE transmitter.
Select Off, Lights and Horn, LightsOnly, or Horn Only.
Remote Door Unlock
This allows selection of which doors
will unlock when pressingKon the
RKE transmitter.
Select All Doors or Driver Door.
Remote Start Auto Cool Seats
If equipped and turned on, thisfeature will turn the ventilated seatson when using remote start onwarm days.
Select Off, On-Driver andPassenger, or On-Driver.
Remote Start Auto Heat Seats
If equipped and turned on, thisfeature will turn the heated seats onwhen using remote start oncold days.
Select Off, On-Driver andPassenger, or On-Driver.
Page 161 of 419
Chevrolet Malibu Owner Manual (GMNA-Localizing-U.S./Canada/Mexico-10122664) - 2017 - crc - 5/23/16
160 Instruments and Controls
instructions refer to a garage dooropener, but can be used for otherdevices.
Do not use the Universal Remotesystem with any garage door openerthat does not have the stop andreverse feature. This includes anygarage door opener modelmanufactured before April 1, 1982.
Read these instructions completelybefore programming the UniversalRemote system. It may help to haveanother person assist with theprogramming process.
Keep the original hand-heldtransmitter for use in other vehiclesas well as for future programming.Erase the programming whenvehicle ownership is terminated.See“Erasing Universal RemoteSystem Buttons”later in thissection.
To p r o g r a m a g a r a g e d o o r o p e n e r ,park outside directly in line with andfacing the garage door openerreceiver. Clear all people andobjects near the garage door.
Make sure the hand-held transmitterhas a new battery for quick andaccurate transmission of theradio-frequency signal.
Programming the Universal
Remote System
For questions or help programmingthe Universal Remote system, call1-800-355-3515 or seewww.homelink.com.
Programming involvestime-sensitive actions, and may timeout causing the procedure to berepeated.
To p r o g r a m u p t o t h r e e d e v i c e s :
1. Hold the end of the hand-heldtransmitter about 3 to 8 cm (1to 3 in) away from theUniversal Remote systembuttons with the indicator lightin view. The hand-heldtransmitter was supplied by themanufacturer of the garagedoor opener receiver.
2. At the same time, press andhold both the hand-heldtransmitter button and one ofthe three Universal Remote
system buttons to be used tooperate the garage door. Donot release either button untilthe indicator light changes fromaslowtoarapidflash.Thenrelease both buttons.
Some garage door openersmay require substitution ofStep 2 with the procedureunder“Radio Signals forCanada and Some GateOperators”later in this section.
3. Press and hold the newlyprogrammed Universal Remotesystem button for five secondswhile watching the indicatorlight and garage dooractivation.
.If the indicator light stays oncontinuously or the garagedoor moves when thebutton is pressed, thenprogramming is complete.There is no need tocomplete Steps 4–6.
.If the indicator light doesnot come on or the garagedoor does not move, asecond button press may
Page 162 of 419
Chevrolet Malibu Owner Manual (GMNA-Localizing-U.S./Canada/Mexico-10122664) - 2017 - crc - 5/23/16
Instruments and Controls 161
be required. For a secondtime, press and hold thenewly programmed buttonfor five seconds. If the lightstays on or the garage doormoves, programming iscomplete.
.If the indicator light blinksrapidly for two seconds,then changes to a solid lightand the garage door doesnot move, continue withprogramming Steps 4–6.
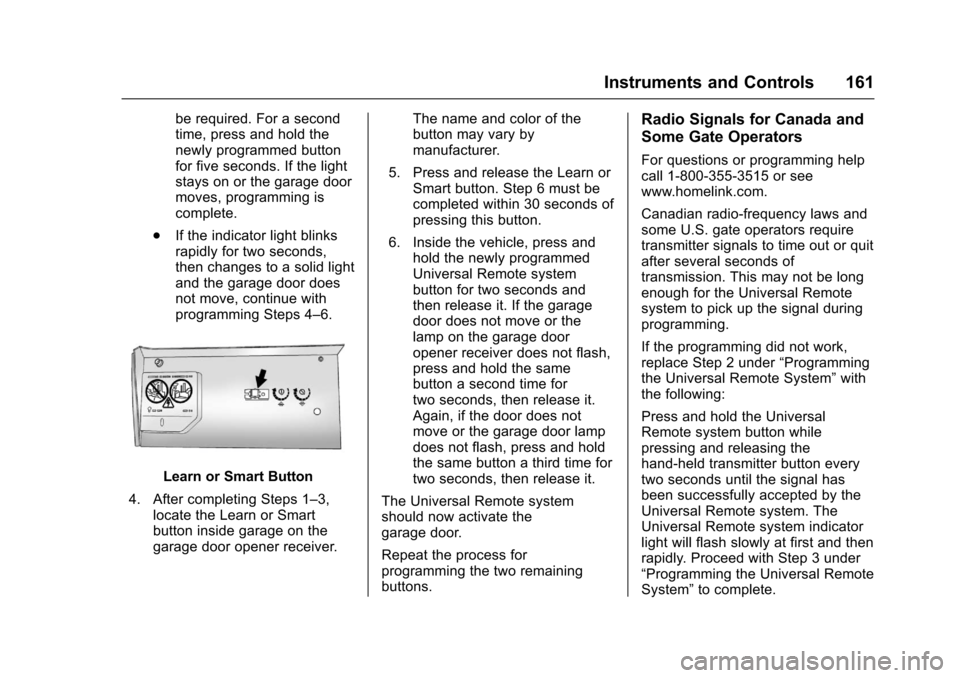
Learn or Smart Button
4. After completing Steps 1–3,locate the Learn or Smartbutton inside garage on thegarage door opener receiver.
The name and color of thebutton may vary bymanufacturer.
5. Press and release the Learn orSmart button. Step 6 must becompleted within 30 seconds ofpressing this button.
6. Inside the vehicle, press andhold the newly programmedUniversal Remote systembutton for two seconds andthen release it. If the garagedoor does not move or thelamp on the garage dooropener receiver does not flash,press and hold the samebutton a second time fortwo seconds, then release it.Again, if the door does notmove or the garage door lampdoes not flash, press and holdthe same button a third time fortwo seconds, then release it.
The Universal Remote systemshould now activate thegarage door.
Repeat the process forprogramming the two remainingbuttons.
Radio Signals for Canada and
Some Gate Operators
For questions or programming helpcall 1-800-355-3515 or seewww.homelink.com.
Canadian radio-frequency laws andsome U.S. gate operators requiretransmitter signals to time out or quitafter several seconds oftransmission. This may not be longenough for the Universal Remotesystem to pick up the signal duringprogramming.
If the programming did not work,replace Step 2 under“Programmingthe Universal Remote System”withthe following:
Press and hold the UniversalRemote system button whilepressing and releasing thehand-held transmitter button everytwo seconds until the signal hasbeen successfully accepted by theUniversal Remote system. TheUniversal Remote system indicatorlight will flash slowly at first and thenrapidly. Proceed with Step 3 under“Programming the Universal RemoteSystem”to complete.
Page 163 of 419
Chevrolet Malibu Owner Manual (GMNA-Localizing-U.S./Canada/Mexico-10122664) - 2017 - crc - 5/23/16
162 Instruments and Controls
Universal Remote System
Operation
Using the Universal Remote
System
Press and hold the appropriateUniversal Remote system button forat least one-half second. Theindicator light will come on while thesignal is being transmitted.
Erasing Universal Remote
System Buttons
Erase all programmed buttons whenvehicle ownership is terminated.
To e r a s e :
1. Press and hold the two outsidebuttons until the indicator lightbegins to flash. This shouldtake about 10 seconds.
2. Release both buttons.
Reprogramming a Single
Universal Remote System
Button
To r e p r o g r a m a n y o f t h e s y s t e mbuttons:
1. Press and hold any one of thebuttons. Do not release thebutton.
2. The indicator light will begin toflash after 20 seconds. Withoutreleasing the button, proceedwith Step 1 under“Programming the UniversalRemote System.”
Page 164 of 419
Chevrolet Malibu Owner Manual (GMNA-Localizing-U.S./Canada/Mexico-10122664) - 2017 - crc - 5/23/16
Lighting 163
Lighting
Exterior Lighting
Exterior Lamp Controls . . . . . . . 163Exterior Lamps OffReminder . . . . . . . . . . . . . . . . . . . 165Headlamp High/Low-BeamChanger . . . . . . . . . . . . . . . . . . . . 165Flash-to-Pass . . . . . . . . . . . . . . . . 165Daytime RunningLamps (DRL) . . . . . . . . . . . . . . . 165Automatic HeadlampSystem . . . . . . . . . . . . . . . . . . . . . . 166Hazard Warning Flashers . . . . . 166Turn and Lane-ChangeSignals . . . . . . . . . . . . . . . . . . . . . . 167
Interior Lighting
Instrument Panel IlluminationControl . . . . . . . . . . . . . . . . . . . . . . 167Courtesy Lamps . . . . . . . . . . . . . . 168Dome Lamps . . . . . . . . . . . . . . . . . 168Reading Lamps . . . . . . . . . . . . . . 168
Lighting Features
Entry Lighting . . . . . . . . . . . . . . . . 169Exit Lighting . . . . . . . . . . . . . . . . . . 169Battery Load Management . . . 169Battery Power Protection . . . . . 170Exterior Lighting BatterySaver . . . . . . . . . . . . . . . . . . . . . . . 170
Exterior Lighting
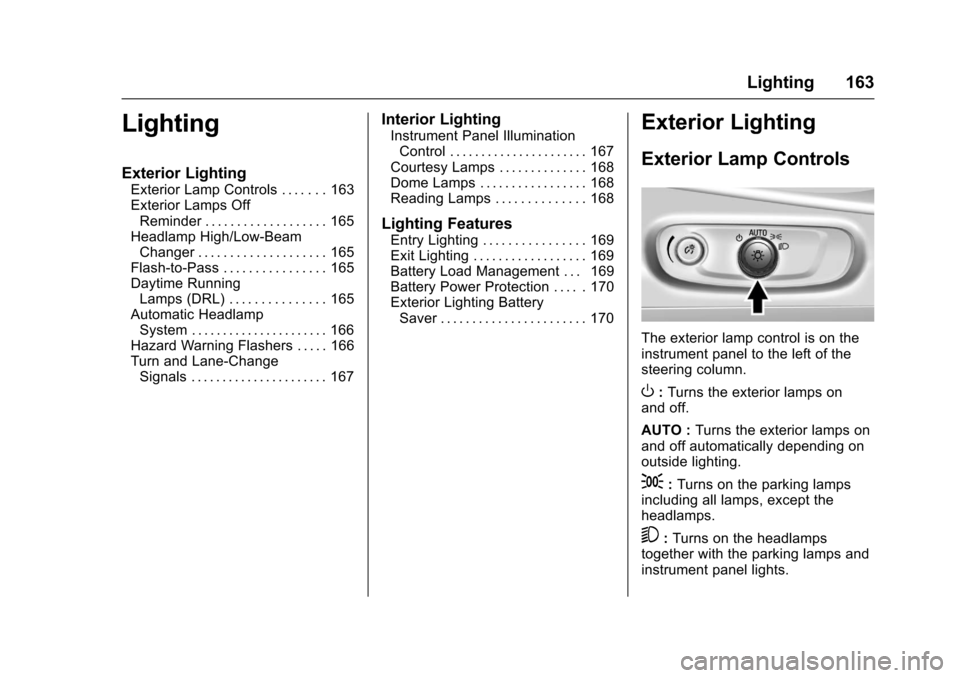
Exterior Lamp Controls
The exterior lamp control is on theinstrument panel to the left of thesteering column.
O:Turns the exterior lamps onand off.
AUTO :Turns the exterior lamps onand off automatically depending onoutside lighting.
;:Turns on the parking lampsincluding all lamps, except theheadlamps.
5:Turns on the headlampstogether with the parking lamps andinstrument panel lights.
Page 165 of 419
Chevrolet Malibu Owner Manual (GMNA-Localizing-U.S./Canada/Mexico-10122664) - 2017 - crc - 5/23/16
164 Lighting
IntelliBeam®System
If equipped, this system turns thevehicle's high-beam headlamps onand off according to surroundingtraffic conditions.
The system turns the high-beamheadlamps on when it is darkenough and there is no other trafficpresent.
This lightbcomes on in the
instrument cluster when theIntelliBeam system is enabled.
Turning On and EnablingIntelliBeam
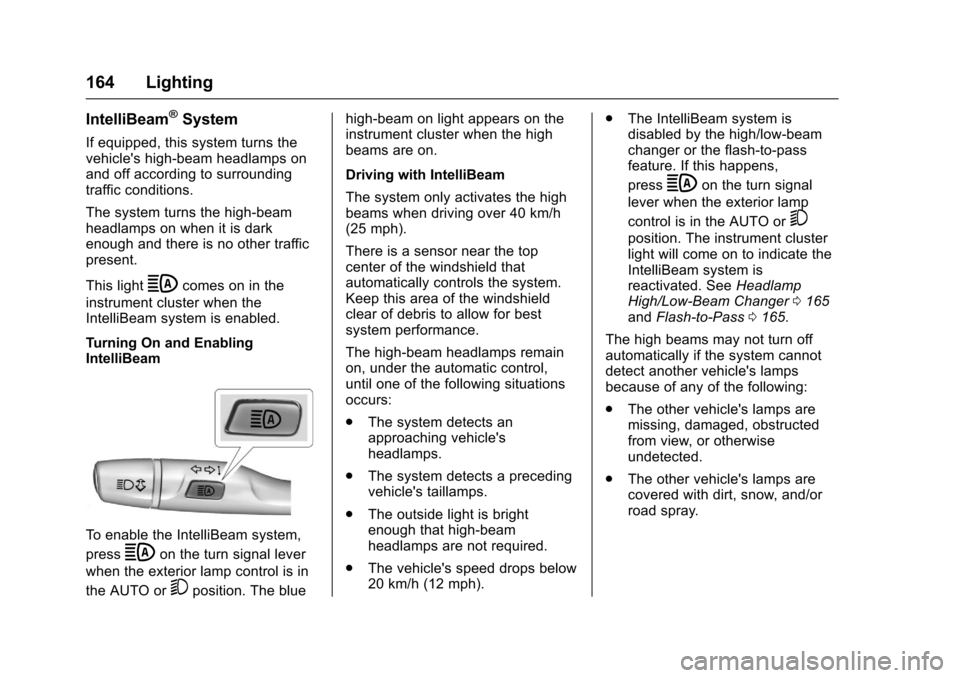
To e n a b l e t h e I n t e l l i B e a m s y s t e m ,
pressbon the turn signal lever
when the exterior lamp control is in
the AUTO or5position. The blue
high-beam on light appears on theinstrument cluster when the highbeams are on.
Driving with IntelliBeam
The system only activates the highbeams when driving over 40 km/h(25 mph).
There is a sensor near the topcenter of the windshield thatautomatically controls the system.Keep this area of the windshieldclear of debris to allow for bestsystem performance.
The high-beam headlamps remainon, under the automatic control,until one of the following situationsoccurs:
.The system detects anapproaching vehicle'sheadlamps.
.The system detects a precedingvehicle's taillamps.
.The outside light is brightenough that high-beamheadlamps are not required.
.The vehicle's speed drops below20 km/h (12 mph).
.The IntelliBeam system isdisabled by the high/low-beamchanger or the flash-to-passfeature. If this happens,
pressbon the turn signal
lever when the exterior lamp
control is in the AUTO or5
position. The instrument clusterlight will come on to indicate theIntelliBeam system isreactivated. SeeHeadlampHigh/Low-Beam Changer0165andFlash-to-Pass0165.
The high beams may not turn offautomatically if the system cannotdetect another vehicle's lampsbecause of any of the following:
.The other vehicle's lamps aremissing, damaged, obstructedfrom view, or otherwiseundetected.
.The other vehicle's lamps arecovered with dirt, snow, and/orroad spray.
Page 166 of 419
Chevrolet Malibu Owner Manual (GMNA-Localizing-U.S./Canada/Mexico-10122664) - 2017 - crc - 5/23/16
Lighting 165
.The other vehicle's lamps cannotbe detected due to denseexhaust, smoke, fog, snow, roadspray, mist, or other airborneobstructions.
.The vehicle's windshield is dirty,cracked, or obstructed bysomething that blocks the viewof the light sensor.
.The vehicle is loaded such thatthe front end points upward,causing the light sensor to aimhigh and not detect headlampsand taillamps.
.Driving on winding or hilly roads.
The IntelliBeam system may need tobe disabled if any of the aboveconditions exist.
Exterior Lamps Off
Reminder
Awarningchimesoundsifthedriverdoor is opened while the ignition isoff and the exterior lamps are on.
Headlamp High/
Low-Beam Changer
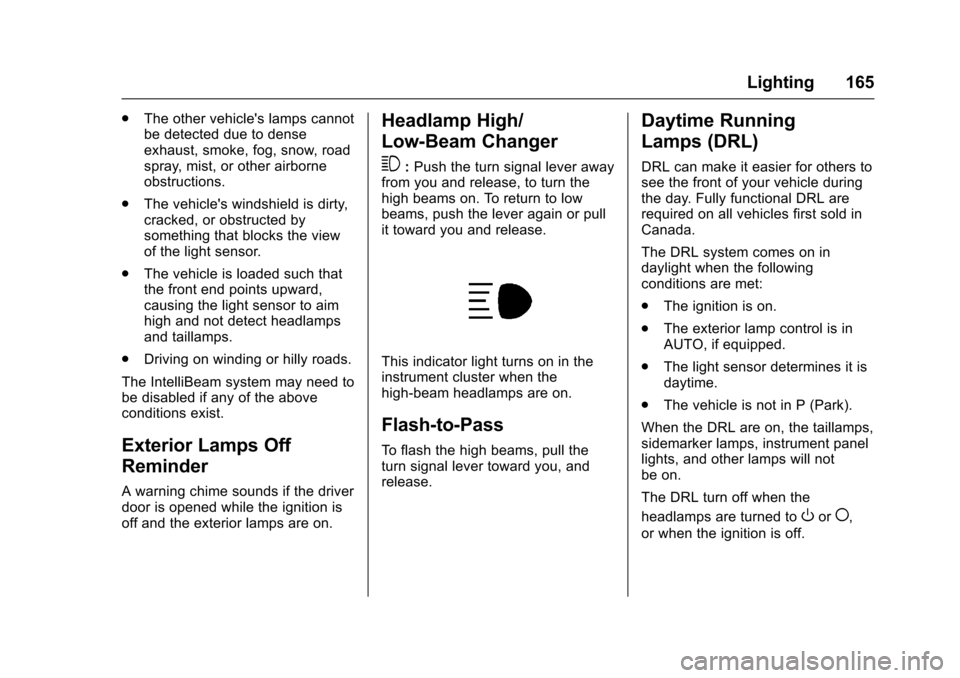
3:Push the turn signal lever awayfrom you and release, to turn thehigh beams on. To return to lowbeams, push the lever again or pullit toward you and release.
This indicator light turns on in theinstrument cluster when thehigh-beam headlamps are on.
Flash-to-Pass
To f l a s h t h e h i g h b e a m s , p u l l t h eturn signal lever toward you, andrelease.
Daytime Running
Lamps (DRL)
DRL can make it easier for others tosee the front of your vehicle duringthe day. Fully functional DRL arerequired on all vehicles first sold inCanada.
The DRL system comes on indaylight when the followingconditions are met:
.The ignition is on.
.The exterior lamp control is inAUTO, if equipped.
.The light sensor determines it isdaytime.
.The vehicle is not in P (Park).
When the DRL are on, the taillamps,sidemarker lamps, instrument panellights, and other lamps will notbe on.
The DRL turn off when the
headlamps are turned toOor(,
or when the ignition is off.