2017 CHEVROLET MALIBU tow
[x] Cancel search: towPage 82 of 419
Chevrolet Malibu Owner Manual (GMNA-Localizing-U.S./Canada/Mexico-10122664) - 2017 - crc - 5/23/16
Seats and Restraints 81
Athicklayerofadditionalmaterial,such as a blanket or cushion,or aftermarket equipment such asseat covers, seat heaters, and seatmassagers can affect how well thepassenger sensing systemoperates. We recommend that younot use seat covers or otheraftermarket equipment except whenapproved by GM for your specificvehicle. SeeAdding Equipment tothe Airbag-Equipped Vehicle081for more information aboutmodifications that can affect howthe system operates.
The on indicator may be lit if anobject, such as a briefcase,handbag, grocery bag, laptop,or other electronic device is put onan unoccupied seat. If this is notdesired remove the object fromthe seat.
{Warning
Stowing of articles under the
passenger seat or between the
passenger seat cushion and
(Continued)
Warning (Continued)
seatback may interfere with the
proper operation of the passenger
sensing system.
Servicing the
Airbag-Equipped Vehicle
Airbags affect how the vehicleshould be serviced. There are partsof the airbag system in severalplaces around the vehicle. Yourdealer and the service manual haveinformation about servicing thevehicle and the airbag system. Topurchase a service manual, seeService Publications OrderingInformation0392.
{Warning
For up to 10 seconds after the
vehicle is turned off and the
battery is disconnected, an airbag
can still inflate during improper
service. You can be injured if you
(Continued)
Warning (Continued)
are close to an airbag when it
inflates. Avoid yellow connectors.
They are probably part of the
airbag system. Be sure to follow
proper service procedures, and
make sure the person performing
work for you is qualified to do so.
Adding Equipment to the
Airbag-Equipped Vehicle
Adding accessories that change thevehicle's frame, bumper system,height, front end, or side sheetmetal, may keep the airbag systemfrom working properly. Theoperation of the airbag system canalso be affected by changing anyparts of the front seats, safety belts,the airbag sensing and diagnosticmodule, steering wheel, instrumentpanel, any of the airbag modules,ceiling or pillar garnish trim, frontsensors, side impact sensors,or airbag wiring.
Page 85 of 419
Chevrolet Malibu Owner Manual (GMNA-Localizing-U.S./Canada/Mexico-10122664) - 2017 - crc - 5/23/16
84 Seats and Restraints
.Can proper safety belt fit bemaintained for the length of thetrip? If yes, continue. If no,return to the booster seat.
Q: What is the proper way towear safety belts?
A:An older child should wear alap-shoulder belt and get theadditional restraint a shoulderbelt can provide. The shoulderbelt should not cross the face orneck. The lap belt should fitsnugly below the hips, justtouching the top of the thighs.This applies belt force to thechild's pelvic bones in a crash.It should never be worn over theabdomen, which could causesevere or even fatal internalinjuries in a crash.
Also see“Rear Safety Belt ComfortGuides”underLap-ShoulderBelt066.
According to accident statistics,children are safer when properlyrestrained in a rear seating position.
In a crash, children who are notbuckled up can strike other peoplewho are buckled up, or can bethrown out of the vehicle. Olderchildren need to use safety beltsproperly.
{Warning
Never allow more than one child
to wear the same safety belt. The
safety belt cannot properly spread
the impact forces. In a crash, they
can be crushed together and
seriously injured. A safety belt
must be used by only one person
at a time.
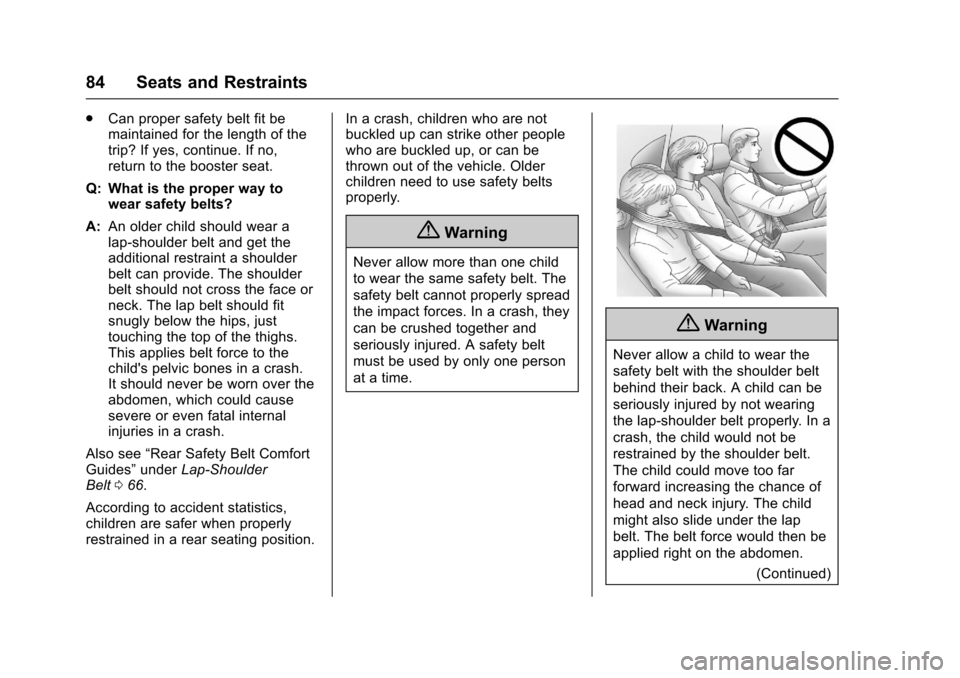
{Warning
Never allow a child to wear the
safety belt with the shoulder belt
behind their back. A child can be
seriously injured by not wearing
the lap-shoulder belt properly. In a
crash, the child would not be
restrained by the shoulder belt.
The child could move too far
forward increasing the chance of
head and neck injury. The child
might also slide under the lap
belt. The belt force would then be
applied right on the abdomen.
(Continued)
Page 95 of 419
Chevrolet Malibu Owner Manual (GMNA-Localizing-U.S./Canada/Mexico-10122664) - 2017 - crc - 5/23/16
94 Seats and Restraints
Caution (Continued)
Do not fold the rear seatback
when the seat is occupied. Do not
fold the empty rear seat with a
safety belt buckled. This could
damage the safety belt or the
seat. Unbuckle and return the
safety belt to its stowed position,
before folding the seat.
If you need to secure more than onechild restraint in the rear seat, seeWhere to Put the Restraint089.
This system is designed to makeinstallation of child restraints easier.When using lower anchors, do notuse the vehicle's safety belts.Instead use the vehicle's anchorsand child restraint attachments tosecure the restraints. Somerestraints also use another vehicleanchor to secure a top tether.
1. Attach and tighten the lowerattachments to the loweranchors. If the child restraintdoes not have lowerattachments or the desired
seating position does not havelower anchors, secure the childrestraint with the top tether andthe safety belts. Refer to thechild restraint manufacturerinstructions and theinstructions in this manual.
1.1. Find the lower anchorsfor the desired seatingposition.
1.2. Put the child restraint onthe seat.
1.3. Attach and tighten thelower attachments on thechild restraint to the loweranchors.
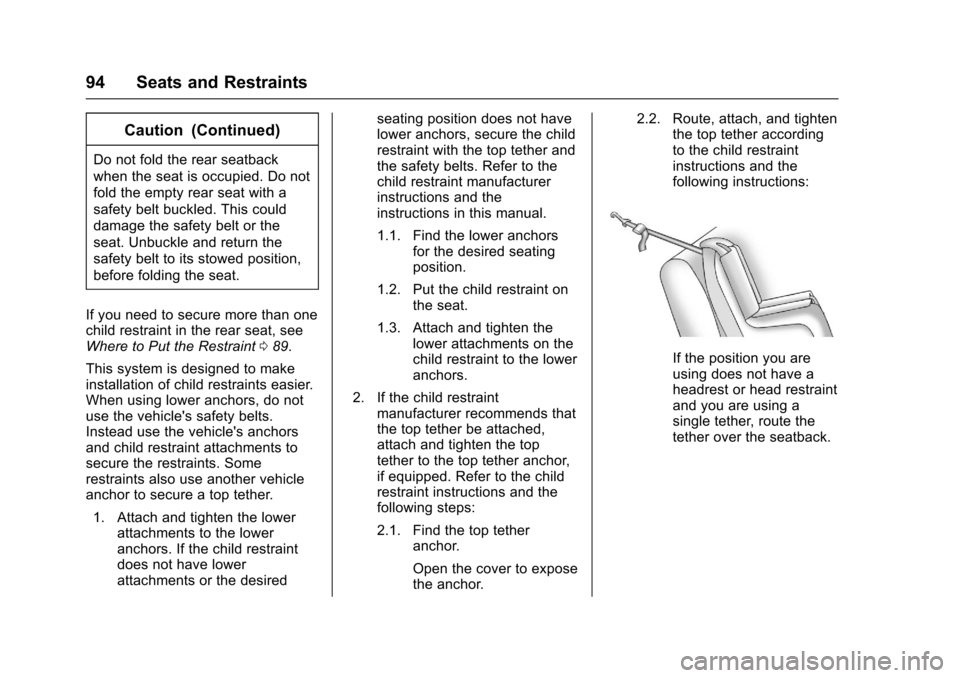
2. If the child restraintmanufacturer recommends thatthe top tether be attached,attach and tighten the toptether to the top tether anchor,if equipped. Refer to the childrestraint instructions and thefollowing steps:
2.1. Find the top tetheranchor.
Open the cover to exposethe anchor.
2.2. Route, attach, and tightenthe top tether accordingto the child restraintinstructions and thefollowing instructions:
If the position you areusing does not have aheadrest or head restraintand you are using asingle tether, route thetether over the seatback.
Page 98 of 419
Chevrolet Malibu Owner Manual (GMNA-Localizing-U.S./Canada/Mexico-10122664) - 2017 - crc - 5/23/16
Seats and Restraints 97
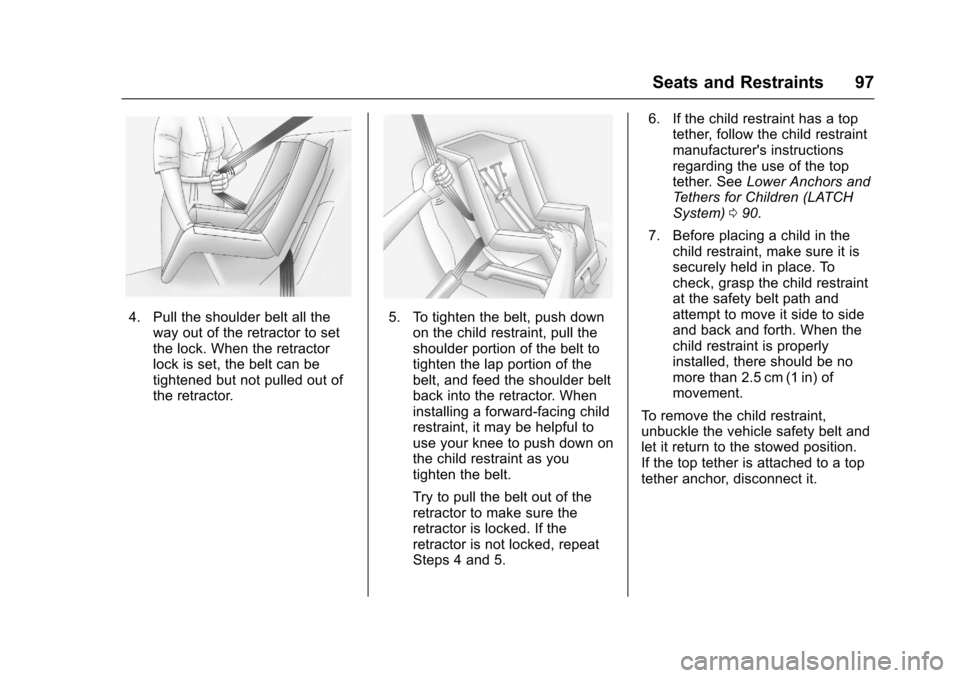
4. Pull the shoulder belt all theway out of the retractor to setthe lock. When the retractorlock is set, the belt can betightened but not pulled out ofthe retractor.
5. To tighten the belt, push downon the child restraint, pull theshoulder portion of the belt totighten the lap portion of thebelt, and feed the shoulder beltback into the retractor. Wheninstalling a forward-facing childrestraint, it may be helpful touse your knee to push down onthe child restraint as youtighten the belt.
Try to pull the belt out of theretractor to make sure theretractor is locked. If theretractor is not locked, repeatSteps 4 and 5.
6. If the child restraint has a toptether, follow the child restraintmanufacturer's instructionsregarding the use of the toptether. SeeLower Anchors andTe t h e r s f o r C h i l d r e n ( L AT C HSystem)090.
7. Before placing a child in thechild restraint, make sure it issecurely held in place. Tocheck, grasp the child restraintat the safety belt path andattempt to move it side to sideand back and forth. When thechild restraint is properlyinstalled, there should be nomore than 2.5 cm (1 in) ofmovement.
To r e m o v e t h e c h i l d r e s t r a i n t ,unbuckle the vehicle safety belt andlet it return to the stowed position.If the top tether is attached to a toptether anchor, disconnect it.
Page 101 of 419
Chevrolet Malibu Owner Manual (GMNA-Localizing-U.S./Canada/Mexico-10122664) - 2017 - crc - 5/23/16
100 Seats and Restraints
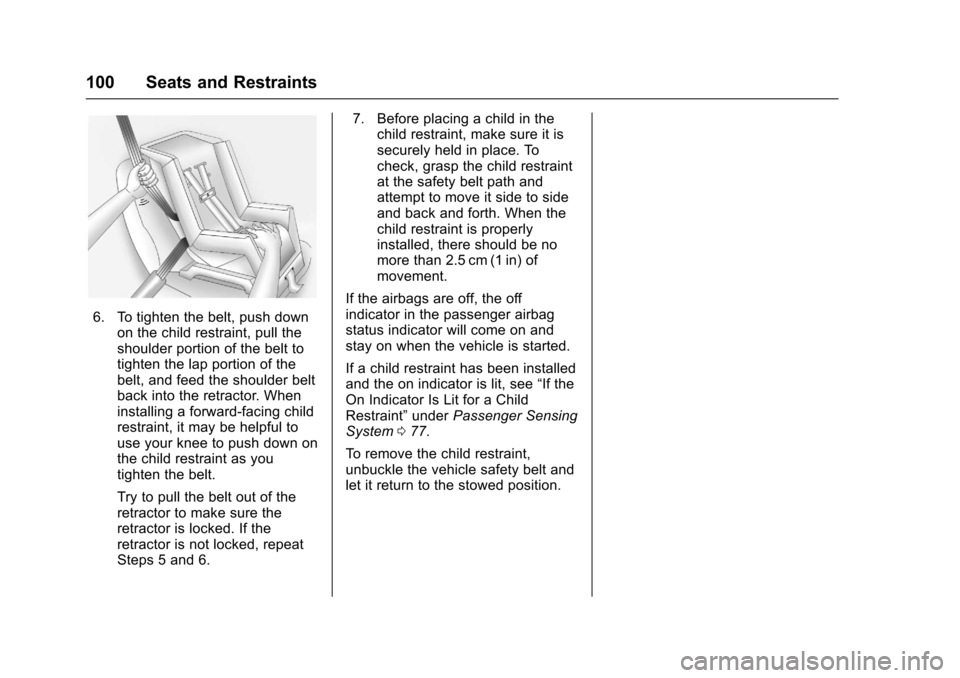
6. To tighten the belt, push downon the child restraint, pull theshoulder portion of the belt totighten the lap portion of thebelt, and feed the shoulder beltback into the retractor. Wheninstalling a forward-facing childrestraint, it may be helpful touse your knee to push down onthe child restraint as youtighten the belt.
Try to pull the belt out of theretractor to make sure theretractor is locked. If theretractor is not locked, repeatSteps 5 and 6.
7. Before placing a child in thechild restraint, make sure it issecurely held in place. Tocheck, grasp the child restraintat the safety belt path andattempt to move it side to sideand back and forth. When thechild restraint is properlyinstalled, there should be nomore than 2.5 cm (1 in) ofmovement.
If the airbags are off, the offindicator in the passenger airbagstatus indicator will come on andstay on when the vehicle is started.
If a child restraint has been installedand the on indicator is lit, see“If theOn Indicator Is Lit for a ChildRestraint”underPassenger SensingSystem077.
To r e m o v e t h e c h i l d r e s t r a i n t ,unbuckle the vehicle safety belt andlet it return to the stowed position.
Page 107 of 419
Chevrolet Malibu Owner Manual (GMNA-Localizing-U.S./Canada/Mexico-10122664) - 2017 - crc - 5/23/16
106 Instruments and Controls
INT :Move the lever up to INT forintermittent wipes, then turn theband up for more frequent wipes ordown for less frequent wipes.
OFF :Use to turn the wipers off.
1X :For a single wipe, briefly movethe lever down. For several wipes,hold the lever down.
Clear snow and ice from the wiperblades and windshield before usingthem. If frozen to the windshield,carefully loosen or thaw them.Damaged blades should bereplaced. SeeWiper BladeReplacement0304.
Heavy snow or ice can overload thewiper motor. If the wiper motoroverheats, the windshield wipers willstop until the motor cools and thewiper control is turned off. SeeElectrical System Overload0310.
Wiper Parking
If the ignition is placed in LOCK/OFF while the wipers are on LO, HI,or INT, they will immediately stop.
If the windshield wiper lever is thenmoved to OFF before the driverdoor is opened or within 10 minutes,the wipers will restart and move tothe base of the windshield.
If the ignition is placed in LOCK/OFF while the wipers are performingwipes due to windshield washing,the wipers continue to run until theyreach the base of the windshield.
f:Pull the windshield wiperlever toward you to spray windshieldwasher fluid and activate the wipers.The wipers will continue until thelever is released or the maximumwash time is reached. When thelever is released, additional wipesmay occur depending on how longthe windshield washer had beenactivated. SeeWasher Fluid0299for information on filling thewindshield washer fluid reservoir.
{Warning
In freezing weather, do not use
the washer until the windshield is
warmed. Otherwise the washer
fluid can form ice on the
windshield, blocking your vision.
Compass
The vehicle may have a compassdisplay on the Driver InformationCenter (DIC). The compass receivesits heading and other informationfrom the Global PositioningSystem (GPS) antenna,StabiliTrak®,andvehiclespeedinformation.
The compass system is designed tooperate for a certain number ofmiles or degrees of turn beforeneeding a signal from the GPSsatellites. When the compassdisplay shows CAL, drive thevehicle for a short distance in anopen area where it can receive aGPS signal. The compass systemwill automatically determine when aGPS signal is restored and provide
Page 120 of 419
Chevrolet Malibu Owner Manual (GMNA-Localizing-U.S./Canada/Mexico-10122664) - 2017 - crc - 5/23/16
Instruments and Controls 119
Power Indicator Gauge
(Hybrid)
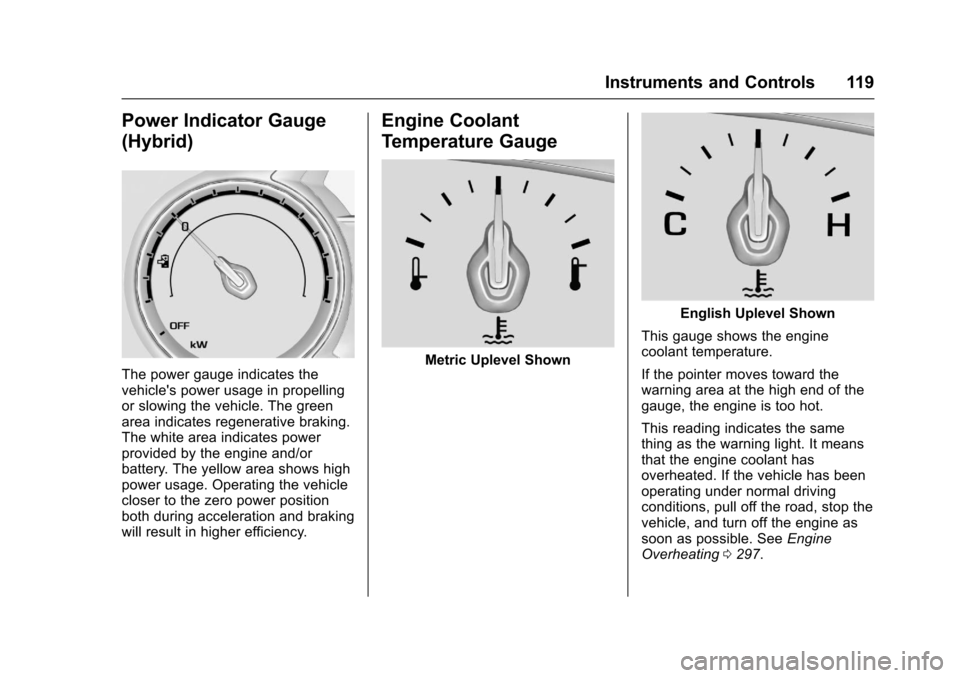
The power gauge indicates thevehicle's power usage in propellingor slowing the vehicle. The greenarea indicates regenerative braking.The white area indicates powerprovided by the engine and/orbattery. The yellow area shows highpower usage. Operating the vehiclecloser to the zero power positionboth during acceleration and brakingwill result in higher efficiency.
Engine Coolant
Temperature Gauge
Metric Uplevel Shown
English Uplevel Shown
This gauge shows the enginecoolant temperature.
If the pointer moves toward thewarning area at the high end of thegauge, the engine is too hot.
This reading indicates the samething as the warning light. It meansthat the engine coolant hasoverheated. If the vehicle has beenoperating under normal drivingconditions, pull off the road, stop thevehicle, and turn off the engine assoon as possible. SeeEngineOverheating0297.
Page 124 of 419
Chevrolet Malibu Owner Manual (GMNA-Localizing-U.S./Canada/Mexico-10122664) - 2017 - crc - 5/23/16
Instruments and Controls 123
Caution (Continued)
costly repairs not covered by the
vehicle warranty. This could also
affect the vehicle’sabilitytopass
an Emissions Inspection/
Maintenance test. See
Accessories and
Modifications0280.
If the light is flashing :Amalfunction has been detected thatcould damage the emission controlsystem and increase vehicleemissions. Diagnosis and servicemay be required.
To h e l p p r e v e n t d a m a g e , r e d u c evehicle speed and avoid hardaccelerations and uphill grades.If towing a trailer, reduce theamount of cargo being hauled assoon as possible.
If the light continues to flash, find asafe place to park. Turn the vehicleoff and wait at least 10 secondsbefore restarting the engine. If thelight is still flashing, follow the
previous guidelines and see yourdealer for service as soon aspossible.
If the light is on steady :Amalfunction has been detected.Diagnosis and service may berequired.
Check the following:
.If fuel has been added to thevehicle using the capless funneladapter, make sure that it hasbeen removed. See“Filling theTa n k w i t h a P o r t a b l e G a s C a n”underFilling the Tank0269.The diagnostic system candetect if the adapter has beenleft installed in the vehicle,allowing fuel to evaporate intothe atmosphere. A few drivingtrips with the adapter removedmay turn off the light.
.Poor fuel quality can causeinefficient engine operation andpoor driveability, which may goaway once the engine is warmedup. If this occurs, change thefuel brand. It may require at
least one full tank of the properfuel to turn the light off. SeeFuel0268.
If the light remains on, see yourdealer.
Emissions Inspection and
Maintenance Programs
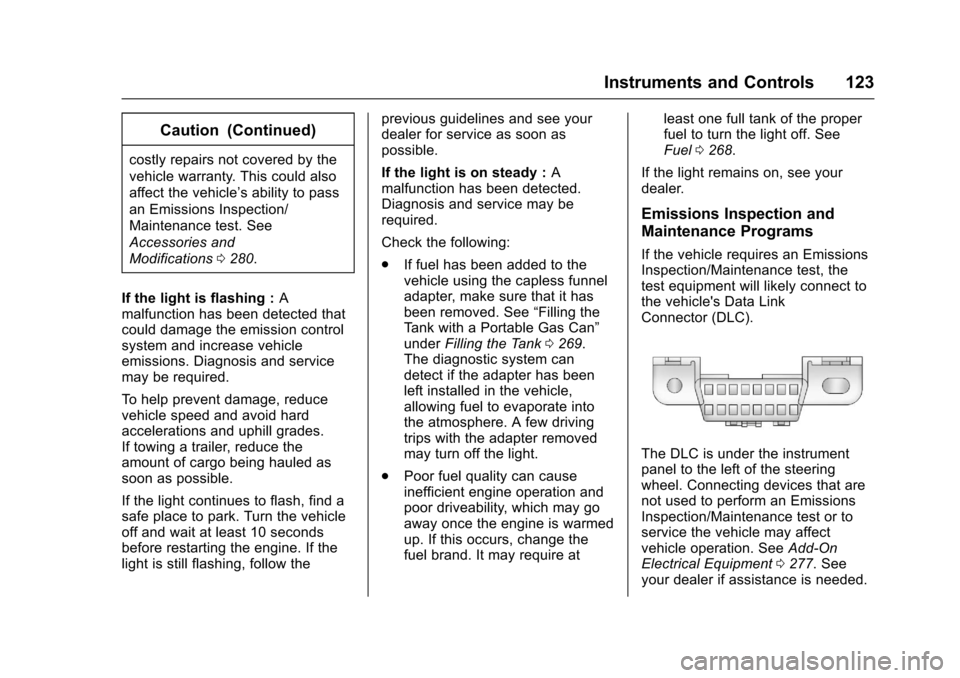
If the vehicle requires an EmissionsInspection/Maintenance test, thetest equipment will likely connect tothe vehicle's Data LinkConnector (DLC).
The DLC is under the instrumentpanel to the left of the steeringwheel. Connecting devices that arenot used to perform an EmissionsInspection/Maintenance test or toservice the vehicle may affectvehicle operation. SeeAdd-OnElectrical Equipment0277.Seeyour dealer if assistance is needed.