2017 CHEVROLET MALIBU radio controls
[x] Cancel search: radio controlsPage 123 of 419
Chevrolet Malibu Owner Manual (GMNA-Localizing-U.S./Canada/Mexico-10122664) - 2017 - crc - 5/23/16
122 Instruments and Controls
Charging System Light
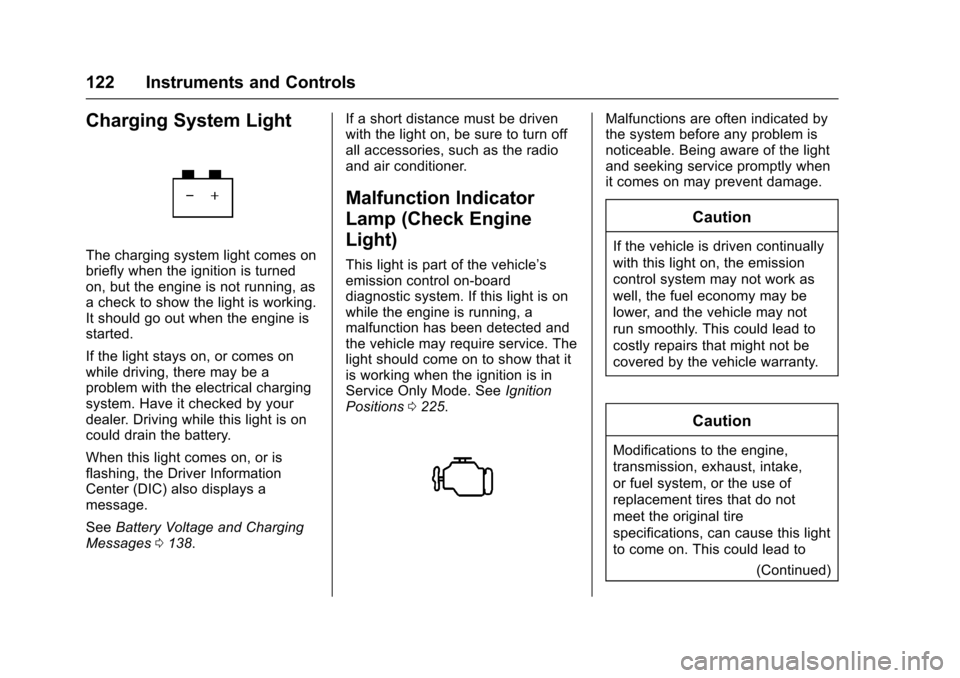
The charging system light comes onbriefly when the ignition is turnedon, but the engine is not running, asachecktoshowthelightisworking.It should go out when the engine isstarted.
If the light stays on, or comes onwhile driving, there may be aproblem with the electrical chargingsystem. Have it checked by yourdealer. Driving while this light is oncould drain the battery.
When this light comes on, or isflashing, the Driver InformationCenter (DIC) also displays amessage.
SeeBattery Voltage and ChargingMessages0138.
If a short distance must be drivenwith the light on, be sure to turn offall accessories, such as the radioand air conditioner.
Malfunction Indicator
Lamp (Check Engine
Light)
This light is part of the vehicle’semission control on-boarddiagnostic system. If this light is onwhile the engine is running, amalfunction has been detected andthe vehicle may require service. Thelight should come on to show that itis working when the ignition is inService Only Mode. SeeIgnitionPositions0225.
Malfunctions are often indicated bythe system before any problem isnoticeable. Being aware of the lightand seeking service promptly whenit comes on may prevent damage.
Caution
If the vehicle is driven continually
with this light on, the emission
control system may not work as
well, the fuel economy may be
lower, and the vehicle may not
run smoothly. This could lead to
costly repairs that might not be
covered by the vehicle warranty.
Caution
Modifications to the engine,
transmission, exhaust, intake,
or fuel system, or the use of
replacement tires that do not
meet the original tire
specifications, can cause this light
to come on. This could lead to
(Continued)
Page 148 of 419
Chevrolet Malibu Owner Manual (GMNA-Localizing-U.S./Canada/Mexico-10122664) - 2017 - crc - 5/23/16
Instruments and Controls 147
SHIFT FROM NEUTRAL
(Hybrid)
This message displays when thevehicle should be shifted fromN(Neutral). If the vehicle is notshifted from N (Neutral) after sometime, the vehicle will shut off andrequire a restart. While inN(Neutral),thevehiclewillnotbeable to charge the high voltagebattery.
SHIFT TO PARK
This message displays when thetransmission needs to be shifted toP(Park). This may appear whenturning the ignition off or removingthe key from the vehicle if thevehicle is not in P (Park).
TRANSMISSION HOT—IDLE
ENGINE
This message displays and a chimesounds if the transmission fluid inthe vehicle gets hot. Driving with thetransmission fluid temperature highcan cause damage to the vehicle.Stop the vehicle and let it idle to
allow the transmission to cool. Thismessage clears when the fluidtemperature reaches a safe level.
Vehicle Reminder
Messages
ICE POSSIBLE DRIVE
WITH CARE
This message displays when iceconditions are possible.
Window Messages
OPEN, THEN CLOSE DRIVER
WINDOW
This message is displayed when thewindow needs to be reprogrammed.If the vehicle's battery has beenrecharged or disconnected, you willneed to reprogram the front windowfor the express-up feature to work.SeePower Windows050.
Vehicle
Personalization
Personalization Menu (Radio
without Touchscreen)
The audio system controls are usedto access the personalizationmenus for customizing vehiclefeatures.
The following are all possiblepersonalization features. Dependingon the vehicle, some may not beavailable.
MENU :Turn to scroll through themenus or setup items. Press toenter the menus and select themenu items.
BACK :Press to exit or return tothe previous screen or menu.
To a c c e s s a m e n u :
1. Press MENU.
2. Turn MENU to thedesired menu.
3. Press MENU to select.
Menus and functions may varydepending on vehicle options.
Page 149 of 419
Chevrolet Malibu Owner Manual (GMNA-Localizing-U.S./Canada/Mexico-10122664) - 2017 - crc - 5/23/16
148 Instruments and Controls
Entering the PersonalizationMenus
Select Settings from the home page.
The following menus may beavailable:
.Phone Connection (MTP Only)
.Time and Date
.To n e S e t t i n g s
.Auto Volume Control
.Maximum Startup Volume
.Vehicle Settings
Phone Connection (MTP Only)
Select and the following maydisplay:
.Charging Only
.Scan Music Folder Only
.Scan All Folders
Charging Only
This feature will charge a MediaTransfer Protocol (MTP) devicewhen connected to the USB port.Bluetooth®audio will beunavailable.
Turn MENU to highlight, then pressto select.
Scan Music Folder Only
This feature will scan and indexmusic folders on an MTP devicewhen connected to the USB port.
Turn MENU to highlight, then pressto select.
Scan All Folders
This feature will scan and index allfolders on an MTP device whenconnected to the USB port.
Turn MENU to highlight, then pressto select.
Time and Date
Select Time and Date to adjust theclock. SeeClock0107.
Tone Settings
Select to set the radio tone. See“To n e S e t t i n g s”under“RadioControls without Touchscreen”inOperation0176.
Auto Volume Control
This feature automatically adjuststhe radio volume based on thespeed of the vehicle.
Select the desired value.
Maximum Startup Volume
When the vehicle is started and theradio volume is greater than this setlevel, the volume is adjusted to thislevel.
Select the desired value.
Vehicle Settings
Select and the following maydisplay:
.Climate and Air Quality
.Comfort and Convenience
.Languages
.Lighting
.Power Door Locks
.Remote Lock, Unlock, Start
.Return to Factory Settings
.Software Information
.Va l e t M o d e
Page 152 of 419
Chevrolet Malibu Owner Manual (GMNA-Localizing-U.S./Canada/Mexico-10122664) - 2017 - crc - 5/23/16
Instruments and Controls 151
Remote Door Unlock
Select to set which doors will unlock
when pressingKon the RKE
transmitter. SeeRemote KeylessEntry (RKE) System Operation032.
Select Driver Door or All Doors.
Remote Start Auto Cool Seats
If equipped and turned on, thisfeature will turn the ventilated seatson when using remote start onwarm days.
Select Off, On-Driver andPassenger, or On-Driver.
Remote Start Auto Heat Seats
Select to enable or disable whichseat will come on when remote startis used. SeeHeated and VentilatedFront Seats060.
Select Off, On-Driver andPassenger, or On-Driver.
Passive Door Unlock
Select to set which doors will unlockwhen the RKE transmitter is withinrange and using the button on the
outside driver door handle to unlockthe vehicle. SeeRemote KeylessEntry (RKE) System Operation032.
Select Driver Door Only or AllDoors.
Passive Door Lock
This allows passive locking to beturned on or off and selectsfeedback. SeeRemote KeylessEntry (RKE) System Operation032.
Select Off, On, or On With HornChirp.
Remote Left in Vehicle Reminder
This feature sounds an alert whenthe RKE transmitter is left in thevehicle. This menu also enablesRemote No Longer Left in Vehiclealert.
Select Off or On.
Return to Factory Settings
Select to return all vehiclepersonalizations to the defaultsettings.
Select Yes or No.
Software Information
Select to view the radio softwareinformation.
Valet Mode (If Equipped)
This will lock the infotainmentsystem and steering wheel controls.It may also limit access to vehiclestorage locations (if equipped).
To e n a b l e v a l e t m o d e :
1. Enter a four-digit code on thekeypad.
2. Select Enter to go to theconfirmation screen.
3. Re-enter the four-digit code.
Select LOCK or UNLOCK to lock orunlock the system. Press BACK togo back to the previous menu.
Personalization Menu (Radio
with Touchscreen)
Settings can be made with theignition on and the vehicle notmoving.
Page 153 of 419
Chevrolet Malibu Owner Manual (GMNA-Localizing-U.S./Canada/Mexico-10122664) - 2017 - crc - 5/23/16
152 Instruments and Controls
The following are all possiblepersonalization features. Dependingon the vehicle, some may not beavailable.
{:Press to access the HomePage Menu.
QorR:To u c h t o s c r o l l t h r o u g h t h emenus or setup items.
0:To u c h t o e x i t o r r e t u r n t o t h eprevious screen or menu.
To a c c e s s t h e m e n u :
1. Press{.
2. Touch Settings.
To u c h t h e m e n u i t e m t o s e l e c t i t .Each of the menus is detailed in thefollowing information.
Settings menus and functions mayvary depending on vehicle options.
The following list of menu items maybe available:
.Time and Date
.Language
.Rear Seat Reminder
.Va l e t M o d e
.Te e n D r i v e r
.Radio
.Vehicle
.Bluetooth
.Apple CarPlay
.Android Auto
.Voice
.USB Auto Launch
.Turn Display Off
.Rear Camera
.Return to Factory Settings
.Software Information
Time and Date
Select Time and Date to adjust theclock. SeeClock0107.
Language
Select, then select from theavailable language(s).
Rear Seat Reminder
This allows for a chime and amessage‘Look in Rear Seat’whenthe rear door has been openedbefore or during operation of thevehicle.
Select Off or On.
Valet Mode (If Equipped)
This will lock the infotainmentsystem and steering wheel controls.It may also limit access to vehiclestorage locations (if equipped).
To e n a b l e v a l e t m o d e :
1. Enter a four-digit code on thekeypad.
2. Touch Enter to go to theconfirmation screen.
3. Re-enter the four-digit code.
To u c h L O C K o r U N L O C K t o l o c k o runlock the system. Touch Back togo back to the previous menu.
Teen Driver
See“Te e n D r i v e r”under“Settings”in the infotainment manual.
Page 154 of 419
Chevrolet Malibu Owner Manual (GMNA-Localizing-U.S./Canada/Mexico-10122664) - 2017 - crc - 5/23/16
Instruments and Controls 153
Radio
Select and the following maydisplay:
.Manage Favorites
.Number of Favorites Shown
.Audible Touch Feedback
.Te x t S c r o l l
.To n e S e t t i n g s
.Auto Volume
.Maximum Startup Volume
.Audio Cue
Manage Favorites
This allows favorites to be edited.See“Manage Favorites”in“RadioSetup”underHome Page (Radiowith Touchscreen)0175or“Manage Favorites”in“Settings”under“Radio”in the infotainmentmanual.
Number of Favorites Shown
Press to set the number of favoritesto display.
Select the desired number or selectAuto and the infotainment systemwill automatically adjust the numberof favorites shown.
Audible Touch Feedback
This allows Audible TouchFeedback to be turned on or off.
Select Off or On.
Text Scroll
Select to see text scroll on thescreen.
Select Off or On.
Tone Settings
Select to adjust the radio tone. SeeOperation0176.
Auto Volume
This feature adjusts the volumebased on vehicle speed andambient noise.
Select Off, Low, Medium-Low,Medium, Medium-High, or High.
Maximum Startup Volume
This feature sets the maximumstartup volume. If the vehicle isstarted and the volume is greaterthan this level, the volume isadjusted to this level. To set themaximum startup volume, press +or✓to increase or decrease.
Audio Cue
If equipped, this feature adjusts thestartup and shutdown sounds. Toadjust the volume, select + or✓toincrease or decrease.
Vehicle
Select and the following maydisplay:
.Climate and Air Quality
.Collision/Detection Systems
.Comfort and Convenience
.Lighting
.Power Door Locks
.Remote Lock, Unlock, Start
Page 160 of 419
Chevrolet Malibu Owner Manual (GMNA-Localizing-U.S./Canada/Mexico-10122664) - 2017 - crc - 5/23/16
Instruments and Controls 159
Guidance Lines
Select to turn Off or On. SeeAssistance Systems for Parking orBacking0253.
Rear Park Assist Symbols
Select to turn Off or On. SeeAssistance Systems for Parking orBacking0253.
Return to Factory Settings
Select and the following maydisplay:
.Restore Vehicle Settings
.Clear All Private Data
.Restore Radio Settings
Restore Vehicle Settings
This allows selection of restoringvehicle settings.
Select Continue or Cancel.
Clear All Private Data
Select to clear all private informationfrom the vehicle.
Select Continue or Cancel.
Restore Radio Settings
This allows selection to restoreradio settings.
Select Continue or Cancel.
Software Information
Select to view the infotainmentsystem current software information.
Universal Remote
System
SeeRadio FrequencyStatement0393.
Universal Remote System
Programming
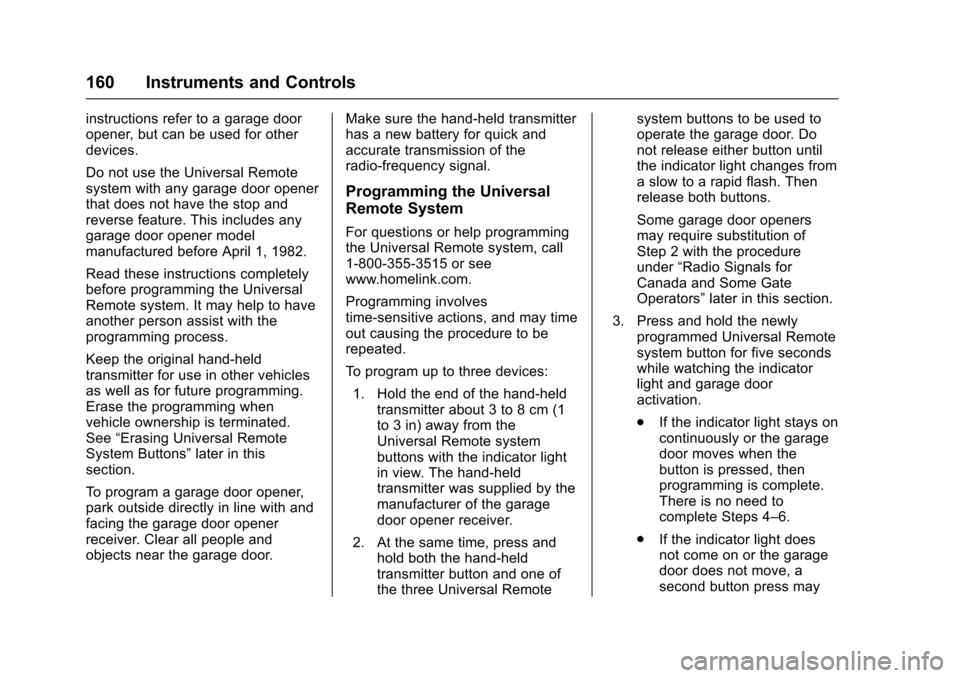
If equipped, these buttons are in theoverhead console.
This system can replace up to threeremote control transmitters used toactivate devices such as garagedoor openers, security systems, andhome automation devices. These
Page 161 of 419
Chevrolet Malibu Owner Manual (GMNA-Localizing-U.S./Canada/Mexico-10122664) - 2017 - crc - 5/23/16
160 Instruments and Controls
instructions refer to a garage dooropener, but can be used for otherdevices.
Do not use the Universal Remotesystem with any garage door openerthat does not have the stop andreverse feature. This includes anygarage door opener modelmanufactured before April 1, 1982.
Read these instructions completelybefore programming the UniversalRemote system. It may help to haveanother person assist with theprogramming process.
Keep the original hand-heldtransmitter for use in other vehiclesas well as for future programming.Erase the programming whenvehicle ownership is terminated.See“Erasing Universal RemoteSystem Buttons”later in thissection.
To p r o g r a m a g a r a g e d o o r o p e n e r ,park outside directly in line with andfacing the garage door openerreceiver. Clear all people andobjects near the garage door.
Make sure the hand-held transmitterhas a new battery for quick andaccurate transmission of theradio-frequency signal.
Programming the Universal
Remote System
For questions or help programmingthe Universal Remote system, call1-800-355-3515 or seewww.homelink.com.
Programming involvestime-sensitive actions, and may timeout causing the procedure to berepeated.
To p r o g r a m u p t o t h r e e d e v i c e s :
1. Hold the end of the hand-heldtransmitter about 3 to 8 cm (1to 3 in) away from theUniversal Remote systembuttons with the indicator lightin view. The hand-heldtransmitter was supplied by themanufacturer of the garagedoor opener receiver.
2. At the same time, press andhold both the hand-heldtransmitter button and one ofthe three Universal Remote
system buttons to be used tooperate the garage door. Donot release either button untilthe indicator light changes fromaslowtoarapidflash.Thenrelease both buttons.
Some garage door openersmay require substitution ofStep 2 with the procedureunder“Radio Signals forCanada and Some GateOperators”later in this section.
3. Press and hold the newlyprogrammed Universal Remotesystem button for five secondswhile watching the indicatorlight and garage dooractivation.
.If the indicator light stays oncontinuously or the garagedoor moves when thebutton is pressed, thenprogramming is complete.There is no need tocomplete Steps 4–6.
.If the indicator light doesnot come on or the garagedoor does not move, asecond button press may