2017 CHEVROLET EXPRESS CARGO VAN jump cable
[x] Cancel search: jump cablePage 237 of 346
Chevrolet Express Owner Manual (GMNA-Localizing-U.S./Canada/Mexico-9967827) - 2017 - crc - 5/2/16
236 Vehicle Care
Battery - North America
The original equipment battery ismaintenance free. Do not removethe cap and do not add fluid.
Refer to the replacement numbershown on the original battery labelwhen a new battery is needed. SeeEngine Compartment Overview0218for battery location.
{Warning
WA R N I N G :Battery posts,
terminals, and related
accessories contain lead and lead
compounds, chemicals known to
the State of California to cause
cancer and birth defects or other
reproductive harm. Batteries also
contain other chemicals known to
the State of California to cause
cancer.WASH HANDS AFTER
HANDLING.
SeeCalifornia Proposition
65 Warning0215.
Vehicle Storage
{Warning
Batteries have acid that can burn
you and gas that can explode.
Yo u c a n b e b a d l y h u r t i f y o u a r e
not careful. SeeJump Starting -
North America0282for tips on
working around a battery without
getting hurt.
Infrequent Usage: Remove theblack, negative (✓)cablefromthebattery to keep the battery fromrunning down.
Extended Storage: Remove theblack, negative (✓)cablefromthebattery or use a battery tricklecharger.
Rear Axle
When to Check Lubricant
It is not necessary to regularlycheck rear axle fluid unless yoususpect there is a leak or you hear
an unusual noise. A fluid loss couldindicate a problem. Have itinspected and repaired.
How to Check Lubricant
To g e t a n a c c u r a t e r e a d i n g , t h evehicle should be on a levelsurface.
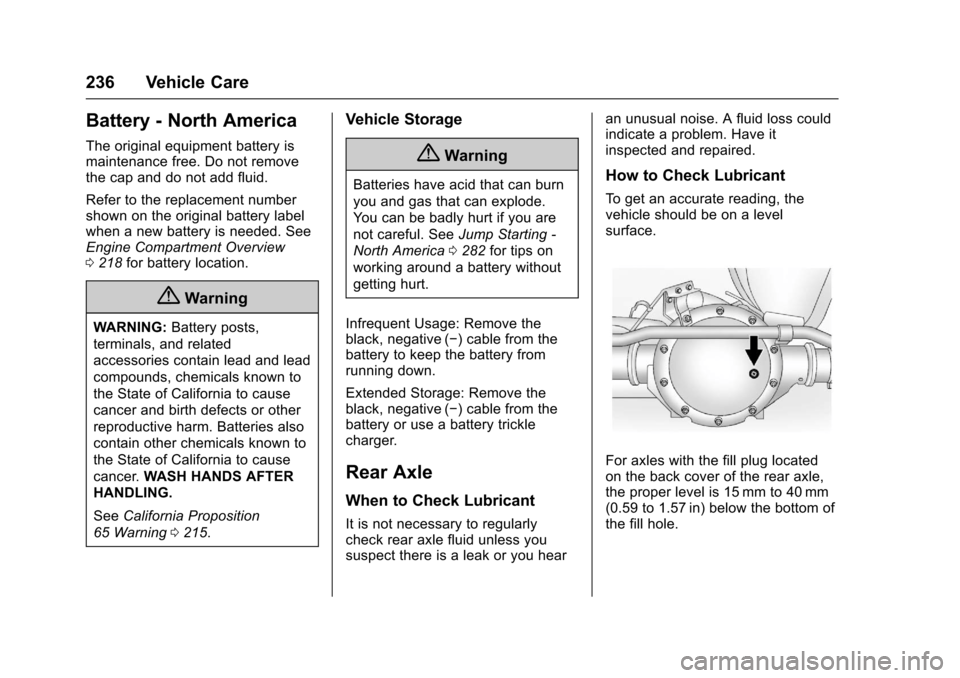
For axles with the fill plug locatedon the back cover of the rear axle,the proper level is 15 mm to 40 mm(0.59 to 1.57 in) below the bottom ofthe fill hole.
Page 283 of 346
Chevrolet Express Owner Manual (GMNA-Localizing-U.S./Canada/Mexico-9967827) - 2017 - crc - 5/2/16
282 Vehicle Care
Full-Size Spare Tire
If this vehicle came with a full-sizespare tire, it was fully inflated whennew, however, it can lose air overtime. Check the inflation pressureregularly. SeeTire Pressure0260andVehicle Load Limits0171.Forinstructions on how to remove,install, or store a spare tire, seeTireChanging0274.
After installing the spare tire on thevehicle, stop as soon as possibleand check that the spare is correctlyinflated. The spare tire is made toperform well at speeds up to11 2 k m / h ( 7 0 m p h ) a t t h erecommended inflation pressure, soyou can finish your trip.
Have the damaged or flat road tirerepaired or replaced back onto thevehicle, as soon as possible, so thespare tire will be available in case itis needed again.
Do not mix tires and wheels ofdifferent sizes, because they will notfit. Keep the spare tire and its wheeltogether.
Jump Starting
Jump Starting - North
America
For more information about thevehicle battery, seeBattery - NorthAmerica0236.
If the vehicle battery has run down,you may want to use anothervehicle and some jumper cables tostart your vehicle. Be sure to usethe following steps to do it safely.
{Warning
WA R N I N G :Battery posts,
terminals, and related
accessories contain lead and lead
compounds, chemicals known to
the State of California to cause
cancer and birth defects or other
reproductive harm. Batteries also
contain other chemicals known to
the State of California to cause
cancer.WASH HANDS AFTER
HANDLING.
(Continued)
Warning (Continued)
SeeCalifornia Proposition
65 Warning0215.
{Warning
Batteries can hurt you. They can
be dangerous because:
.They contain acid that canburn you.
.They contain gas that canexplode or ignite.
.They contain enoughelectricity to burn you.
If you do not follow these steps
exactly, some or all of these
things can hurt you.
Page 284 of 346
Chevrolet Express Owner Manual (GMNA-Localizing-U.S./Canada/Mexico-9967827) - 2017 - crc - 5/2/16
Vehicle Care 283
Caution
Ignoring these steps could result
in costly damage to the vehicle
that would not be covered by the
vehicle warranty. Trying to start
the vehicle by pushing or pulling it
will not work, and it could damage
the vehicle.
1. Check the other vehicle.It must have a 12-volt batterywith a negative ground system.
Caution
If the other vehicle does not have
a12-voltsystemwithanegative
ground, both vehicles can be
damaged. Only use a vehicle that
has a 12-volt system with a
negative ground for jump starting.
2. Get the vehicles close enoughso the jumper cables canreach, but be sure the vehiclesare not touching each other.If they are, it could cause a
ground connection you do notwant. You would not be able tostart your vehicle, and the badgrounding could damage theelectrical systems.
To a v o i d t h e p o s s i b i l i t y o f t h evehicles rolling, set the parkingbrake firmly on both vehiclesinvolved in the jump startprocedure. Put an automatictransmission in P (Park) or amanual transmission in Neutralbefore setting the parkingbrake.
Caution
If any accessories are left on or
plugged in during the jump
starting procedure, they could be
damaged. The repairs would not
be covered by the vehicle
warranty. Whenever possible, turn
off or unplug all accessories on
either vehicle when jump starting.
3. Turn off the ignition on bothvehicles. Unplug unnecessaryaccessories plugged into the
cigarette lighter or theaccessory power outlet. Turnoff the radio and all lamps thatare not needed. This will avoidsparks and help save bothbatteries. And it could save theradio!
4. Open the hoods and locate thepositive (+) and negative (✓)terminal locations of the othervehicle.
On your van, use the unpaintedradio antenna bracket as aremote negative (✓)terminal.
{Warning
Using a match near a battery can
cause battery gas to explode.
People have been hurt doing this,
and some have been blinded.
Use a flashlight if you need more
light.
Battery fluid contains acid that
can burn you. Do not get it on
you. If you accidentally get it in
(Continued)
Page 285 of 346
Chevrolet Express Owner Manual (GMNA-Localizing-U.S./Canada/Mexico-9967827) - 2017 - crc - 5/2/16
284 Vehicle Care
Warning (Continued)
your eyes or on your skin, flush
the place with water and get
medical help immediately.
{Warning
Fans or other moving engine
parts can injure you badly. Keep
your hands away from moving
parts once the engine is running.
5. Check that the jumper cablesdo not have loose or missinginsulation. If they do, you couldget a shock. The vehiclescould be damaged too.
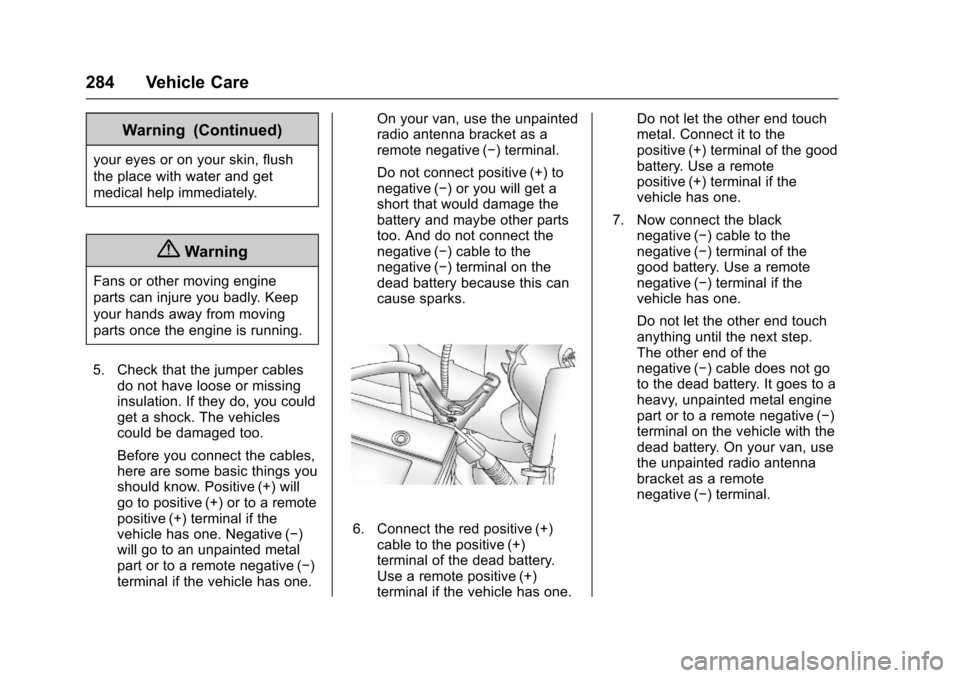
Before you connect the cables,here are some basic things youshould know. Positive (+) willgo to positive (+) or to a remotepositive (+) terminal if thevehicle has one. Negative (✓)will go to an unpainted metalpart or to a remote negative (✓)terminal if the vehicle has one.
On your van, use the unpaintedradio antenna bracket as aremote negative (✓)terminal.
Do not connect positive (+) tonegative (✓)oryouwillgetashort that would damage thebattery and maybe other partstoo. And do not connect thenegative (✓)cabletothenegative (✓)terminalonthedead battery because this cancause sparks.
6. Connect the red positive (+)cable to the positive (+)terminal of the dead battery.Use a remote positive (+)terminal if the vehicle has one.
Do not let the other end touchmetal. Connect it to thepositive (+) terminal of the goodbattery. Use a remotepositive (+) terminal if thevehicle has one.
7. Now connect the blacknegative (✓)cabletothenegative (✓)terminalofthegood battery. Use a remotenegative (✓)terminalifthevehicle has one.
Do not let the other end touchanything until the next step.The other end of thenegative (✓)cabledoesnotgoto the dead battery. It goes to aheavy, unpainted metal enginepart or to a remote negative (✓)terminal on the vehicle with thedead battery. On your van, usethe unpainted radio antennabracket as a remotenegative (✓)terminal.
Page 286 of 346
Chevrolet Express Owner Manual (GMNA-Localizing-U.S./Canada/Mexico-9967827) - 2017 - crc - 5/2/16
Vehicle Care 285
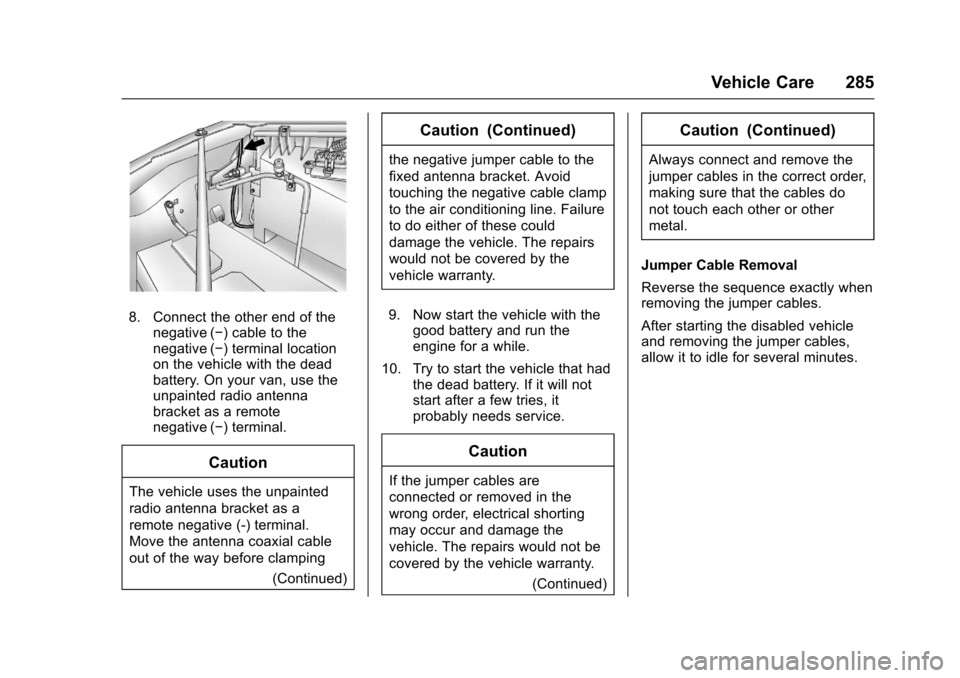
8. Connect the other end of thenegative (✓)cabletothenegative (✓)terminallocationon the vehicle with the deadbattery. On your van, use theunpainted radio antennabracket as a remotenegative (✓)terminal.
Caution
The vehicle uses the unpainted
radio antenna bracket as a
remote negative (-) terminal.
Move the antenna coaxial cable
out of the way before clamping
(Continued)
Caution (Continued)
the negative jumper cable to the
fixed antenna bracket. Avoid
touching the negative cable clamp
to the air conditioning line. Failure
to do either of these could
damage the vehicle. The repairs
would not be covered by the
vehicle warranty.
9. Now start the vehicle with thegood battery and run theengine for a while.
10. Try to start the vehicle that hadthe dead battery. If it will notstart after a few tries, itprobably needs service.
Caution
If the jumper cables are
connected or removed in the
wrong order, electrical shorting
may occur and damage the
vehicle. The repairs would not be
covered by the vehicle warranty.
(Continued)
Caution (Continued)
Always connect and remove the
jumper cables in the correct order,
making sure that the cables do
not touch each other or other
metal.
Jumper Cable Removal
Reverse the sequence exactly whenremoving the jumper cables.
After starting the disabled vehicleand removing the jumper cables,allow it to idle for several minutes.