2017 CHEVROLET EXPRESS CARGO VAN check oil
[x] Cancel search: check oilPage 206 of 346
Chevrolet Express Owner Manual (GMNA-Localizing-U.S./Canada/Mexico-9967827) - 2017 - crc - 5/6/16
Driving and Operating 205
If parking the rig on a hill:
1. Press the brake pedal, but donot shift into P (Park) yet. Turnthe wheels into the curb iffacing downhill or into traffic iffacing uphill.
2. Have someone place chocksunder the trailer wheels.
3. When the wheel chocks are inplace, release the regularbrakes until the chocks absorbthe load.
4. Reapply the brake pedal. Thenapply the parking brake andshift into P (Park).
5. Release the brake pedal.
Leaving After Parking on a Hill
1. Apply and hold the brakepedal.
2. Start the engine.
3. Shift into a gear.
4. Release the parking brake.
5. Let up on the brake pedal.
6. Drive slowly until the trailer isclear of the chocks.
7. Stop and have someone pickup and store the chocks.
Maintenance when Trailer
Towing
The vehicle needs service moreoften when pulling a trailer. SeeMaintenance Schedule0297.Things that are especially importantin trailer operation are automatictransmission fluid, engine oil, axlelubricant, belts, cooling system, andbrake system. It is a good idea toinspect these before and duringthe trip.
Check periodically to see that allhitch nuts and bolts are tight.
Trailer Towing
If the vehicle has a diesel engine,see the Duramax dieselsupplement.
{Warning
The driver can lose control when
pulling a trailer if the correct
equipment is not used or the
vehicle is not driven properly. For
example, if the trailer is too heavy
or the trailer brakes are
inadequate for the load, the
vehicle may not stop as expected.
The driver and passengers could
be seriously injured. The vehicle
may also be damaged; the
resulting repairs would not be
covered by the vehicle warranty.
Pull a trailer only if all the steps in
this section have been followed.
Ask your dealer for advice and
information about towing a trailer
with the vehicle.
Page 215 of 346
Chevrolet Express Owner Manual (GMNA-Localizing-U.S./Canada/Mexico-9967827) - 2017 - crc - 5/2/16
214 Vehicle Care
Vehicle Care
General Information
General Information . . . . . . . . . . 215California Proposition65 Warning . . . . . . . . . . . . . . . . . 215California PerchlorateMaterials Requirements . . . . . 215Accessories andModifications . . . . . . . . . . . . . . . . 216
Vehicle Checks
Doing Your OwnService Work . . . . . . . . . . . . . . . 216Hood . . . . . . . . . . . . . . . . . . . . . . . . . 217Engine CompartmentOverview . . . . . . . . . . . . . . . . . . . . 218Engine Oil . . . . . . . . . . . . . . . . . . . . 219Engine Oil Life System . . . . . . . 221Automatic TransmissionFluid . . . . . . . . . . . . . . . . . . . . . . . . 222Engine Air Cleaner/Filter . . . . . . 225Cooling System . . . . . . . . . . . . . . 226Engine Coolant . . . . . . . . . . . . . . . 227Engine Overheating . . . . . . . . . . 230Engine Fan . . . . . . . . . . . . . . . . . . . 231Power Steering Fluid . . . . . . . . . 232Washer Fluid . . . . . . . . . . . . . . . . . 233Brakes . . . . . . . . . . . . . . . . . . . . . . . 233Brake Fluid . . . . . . . . . . . . . . . . . . . 234
Battery - North America . . . . . . 236Rear Axle . . . . . . . . . . . . . . . . . . . . 236Noise Control System . . . . . . . . 237Starter Switch Check . . . . . . . . . 238Automatic Transmission ShiftLock Control FunctionCheck . . . . . . . . . . . . . . . . . . . . . . . 238Ignition Transmission LockCheck . . . . . . . . . . . . . . . . . . . . . . . 239Park Brake and P (Park)Mechanism Check . . . . . . . . . . 239Wiper Blade Replacement . . . . 239
Headlamp Aiming
Headlamp Aiming . . . . . . . . . . . . 240
Bulb Replacement
Bulb Replacement . . . . . . . . . . . . 240Halogen Bulbs . . . . . . . . . . . . . . . . 240Headlamps . . . . . . . . . . . . . . . . . . . 241Front Turn Signal, Sidemarker,and Parking Lamps . . . . . . . . . 242Ta i l l a m p s . . . . . . . . . . . . . . . . . . . . . 2 4 3Center High-MountedStoplamp (CHMSL) . . . . . . . . . 244License Plate Lamp . . . . . . . . . . 244Replacement Bulbs . . . . . . . . . . . 245
Electrical System
Electrical System Overload . . . 245Fuses and Circuit Breakers . . . 246
Engine Compartment FuseBlock . . . . . . . . . . . . . . . . . . . . . . . . 246Floor Console Fuse Block . . . . 249
Wheels and Tires
Tires . . . . . . . . . . . . . . . . . . . . . . . . . . 252All-Season Tires . . . . . . . . . . . . . . 253Winter Tires . . . . . . . . . . . . . . . . . . 253All-Terrain Tires . . . . . . . . . . . . . . . 253Tire Sidewall Labeling . . . . . . . . 254Tire Designations . . . . . . . . . . . . . 256Tire Terminology andDefinitions . . . . . . . . . . . . . . . . . . 257Tire Pressure . . . . . . . . . . . . . . . . . 260Tire Pressure MonitorSystem . . . . . . . . . . . . . . . . . . . . . . 261Tire Pressure MonitorOperation . . . . . . . . . . . . . . . . . . . 262Tire Inspection . . . . . . . . . . . . . . . . 265Tire Rotation . . . . . . . . . . . . . . . . . 265Dual Tire Rotation . . . . . . . . . . . . 266When It Is Time for NewTires . . . . . . . . . . . . . . . . . . . . . . . . 267Buying New Tires . . . . . . . . . . . . . 268Different Size Tires andWheels . . . . . . . . . . . . . . . . . . . . . . 269Uniform Tire QualityGrading . . . . . . . . . . . . . . . . . . . . . 270Wheel Alignment and TireBalance . . . . . . . . . . . . . . . . . . . . . 271Wheel Replacement . . . . . . . . . . 271
Page 220 of 346
Chevrolet Express Owner Manual (GMNA-Localizing-U.S./Canada/Mexico-9967827) - 2017 - crc - 5/2/16
Vehicle Care 219
1.Battery - North America0236.
2. Radiator Pressure Cap. SeeCooling System0226.
3. Coolant Recovery Tank. SeeCooling System0226.
4. Automatic Transmission FluidDipstick. See“Checking theFluid Level”underAutomaticTr a n s m i s s i o n F l u i d0222.
5. Engine Oil Fill Cap. See“Whento Add Engine Oil”underEngine Oil0219.
6. Engine Oil Dipstick. See“Checking Engine Oil”underEngine Oil0219.
7.Engine Air Cleaner/Filter0225.
8. Power Steering FluidReservoir. SeePower SteeringFluid0232.
9. Brake Master CylinderReservoir. SeeBrakeFluid0234.
10. Windshield Washer FluidReservoir. See“Adding WasherFluid”underWasherFluid0233.
Engine Oil
For diesel engine vehicles, see“Engine Oil”in the Duramax dieselsupplement.
To e n s u r e p r o p e r e n g i n eperformance and long life, carefulattention must be paid to engine oil.Following these simple, butimportant steps will help protectyour investment:
.Use engine oil approved to theproper specification and of theproper viscosity grade. See“Selecting the Right Engine Oil”in this section.
.Check the engine oil levelregularly and maintain theproper oil level. See“CheckingEngine Oil”and“When to AddEngine Oil”in this section.
.Change the engine oil at theappropriate time. SeeEngine OilLife System0221.
.Always dispose of engine oilproperly. See“What to Do withUsed Oil”in this section.
Checking Engine Oil
Check the engine oil level regularly(every 650 km (400 mi), especiallyprior to a long trip. The engine oildipstick handle is a loop. SeeEngine Compartment Overview0218for the location.
{Warning
The engine oil dipstick handle
may be hot; it could burn you.
Use a towel or glove to touch the
dipstick handle.
If a low oil Driver Information Center(DIC) message displays, check theoil level.
Follow these guidelines:
.To g e t a n a c c u r a t e r e a d i n g , p a r kthe vehicle on level ground.Check the engine oil level afterthe engine has been off for atleast two hours. Checking theengine oil level on steep gradesor too soon after engine shutoffcan result in incorrect readings.Accuracy improves when
Page 221 of 346
Chevrolet Express Owner Manual (GMNA-Localizing-U.S./Canada/Mexico-9967827) - 2017 - crc - 5/2/16
220 Vehicle Care
checking a cold engine prior tostarting. Remove the dipstickand check the level.
.If unable to wait two hours, theengine must be off for at least15 minutes if the engine iswarm, or at least 30 minutes ifthe engine is not warm. Pull outthe dipstick, wipe it with a cleanpaper towel or cloth, then push itback in all the way. Remove itagain, keeping the tip down, andcheck the level.
When to Add Engine Oil
If the oil is below the cross-hatchedarea at the tip of the dipstick andthe engine has been off for at least15 minutes, add 1 L (1 qt) of therecommended oil and then recheckthe level. See“Selecting the RightEngine Oil”later in this section foran explanation of what kind of oil to
use. For engine oil crankcasecapacity, seeCapacities andSpecifications0309.
Caution
Do not add too much oil. Oil
levels above or below the
acceptable operating range
shown on the dipstick are harmful
to the engine. If you find that you
have an oil level above the
operating range, i.e., the engine
has so much oil that the oil level
gets above the cross-hatched
area that shows the proper
operating range, the engine could
be damaged. You should drain
out the excess oil or limit driving
of the vehicle and seek a service
professional to remove the
excess amount of oil.
SeeEngine Compartment Overview0218for the location of the engineoil fill cap.
Add enough oil to put the levelsomewhere in the proper operatingrange. Push the dipstick all the wayback in when through.
Selecting the Right Engine Oil
Selecting the right engine oildepends on both the proper oilspecification and viscosity grade.SeeRecommended Fluids andLubricants0305.
Specification
Ask for and use engine oils thatmeet the dexos1™specification.Engine oils that have beenapproved by GM as meeting thedexos1 specification are markedwith the dexos1 approved logo. Seewww.gmdexos.com.
Page 223 of 346
Chevrolet Express Owner Manual (GMNA-Localizing-U.S./Canada/Mexico-9967827) - 2017 - crc - 5/2/16
222 Vehicle Care
system might indicate that an oilchange is not necessary for up to ayear. The engine oil and filter mustbe changed at least once a yearand, at this time, the system mustbe reset. Your dealer has trainedservice people who will perform thiswork and reset the system. It is alsoimportant to check the oil regularlyover the course of an oil draininterval and keep it at the properlevel.
If the system is ever resetaccidentally, the oil must bechanged at 5 000 km (3,000 mi)since the last oil change.Remember to reset the oil lifesystem whenever the oil is changed.
How to Reset the Engine Oil
Life System
Reset the system whenever theengine oil is changed so that thesystem can calculate the nextengine oil change. To reset thesystem:
1. Turn the ignition key to ON/RUN with the engine off.
2. Fully press and release theaccelerator pedal slowly threetimes within five seconds.
3. Turn the key to LOCK/OFF.
If the CHANGE ENGINE OIL SOONmessage comes back on when thevehicle is started, the engine oil lifesystem has not reset. Repeat theprocedure.
Automatic Transmission
Fluid
When to Check and Change
Automatic Transmission Fluid
It is usually not necessary to checkthe transmission fluid level. The onlyreason for fluid loss is atransmission leak or overheatedtransmission. If a small leak issuspected, use the followingprocedures to check the fluid level.However, if there is a large leak, itmay be necessary to have thevehicle towed to a dealer and haveit repaired before driving the vehiclefurther.
Change the fluid and filter at theintervals listed inMaintenanceSchedule0297,andbesuretousethe transmission fluid listed inRecommended Fluids andLubricants0305.
How to Check Automatic
Transmission Fluid
Because this operation can bedifficult, it is recommended to havethis check done at your dealer,which can monitor the transmissiontemperature. The transmission fluidlevel increases with temperature. Toobtain a highly accurate fluid levelcheck, the transmission temperaturemust be measured.
If it is decided to check the fluidlevel, be sure to follow all theinstructions here, or a false readingon the dipstick may occur.
Caution
To o m u c h o r t o o l i t t l e f l u i d c a n
damage the transmission. Too
much can mean that some of the
(Continued)
Page 224 of 346
Chevrolet Express Owner Manual (GMNA-Localizing-U.S./Canada/Mexico-9967827) - 2017 - crc - 5/2/16
Vehicle Care 223
Caution (Continued)
fluid could come out and fall on
hot engine parts or exhaust
system parts, starting a fire. Too
little fluid could cause the
transmission to overheat. Be sure
to get an accurate reading if
checking the transmission fluid.
Wait at least 30 minutes with theengine off, before checking thetransmission fluid level if the vehiclehas been driven:
.In hot weather, when outsidetemperatures are above 32 °C(90 °F).
.The vehicle is heavily loaded.
.At high speed for quite a while inhot weather.
.In heavy traffic and hot weather.
.While pulling a trailer.
After driving under these conditions,ahotcheckcanbeperformed.Thefluid should be hot, which is 71 °C to93 °C (160 °F to 200 °F).
Acoldfluidlevelcheckcanbeperformed after the vehicle hasbeen sitting for eight hours or morewith the engine off, but this is usedonly as a reference. Let the enginerun at idle for five minutes if theoutside temperature is between 15 °Cto32°C(60°Fto90°F).Shouldthe fluid level be low during this coldcheck, the fluid must be checkedwarm or hot before adding fluid.If the outside temperature is colderthan 15 °C (60 °F) or hotter than 32 °C(90°F),acoldcheckcannotbeperformed.
Awarmfluidlevelcheckcanbeperformed by driving the vehicleunder lightly loaded conditions andoutside temperatures between 10 °Cto 27 °C (50 °F to 80 °F). Thevehicle should be driven for at least24 km (15 mi) before performing awarm check. Checking the fluidwarm or hot will give a moreaccurate reading of the fluid levelthan a cold check.
Because the vehicle is equippedwith a high-efficiency air-to-oilcooler, the transmission fluidtemperature may not reach the
required hot fluid level checkingtemperature under normal lightlyloaded driving vehicle conditions.
Checking the Fluid Level
Prepare the vehicle:
1. Park the vehicle on a levelplace. Keep the enginerunning.
2. With the parking brake applied,place the shift lever in P (Park).
3. With a foot on the brake pedal,move the shift lever througheach gear range, pausing forabout three seconds in eachrange. When M is reached,move the selector from M1through M3. Then, position theshift lever in P (Park).
4. Let the engine run at idle fortwo minutes or more.
Then, without shutting off theengine, use the steps that follow.
Page 228 of 346
Chevrolet Express Owner Manual (GMNA-Localizing-U.S./Canada/Mexico-9967827) - 2017 - crc - 5/2/16
Vehicle Care 227
Caution
Using coolant other than
DEX-COOL®can cause
premature engine, heater core,
or radiator corrosion. In addition,
the engine coolant could require
changing sooner. Any repairs
would not be covered by the
vehicle warranty. Always use
DEX-COOL (silicate-free) coolant
in the vehicle.
Engine Coolant
The cooling system in the vehicle isfilled with DEX-COOL®enginecoolant. This coolant is designed toremain in the vehicle for 5 years or240 000 km (150,000 mi), whicheveroccurs first.
The following explains the coolingsystem and how to check and addcoolant when it is low. If there is aproblem with engine overheating,seeEngine Overheating0230.
What to Use
{Warning
Adding only plain water or some
other liquid to the cooling system
can be dangerous. Plain water
and other liquids, can boil before
the proper coolant mixture will.
The coolant warning system is set
for the proper coolant mixture.
With plain water or the wrong
mixture, the engine could get too
hot but you would not get the
overheat warning. The engine
could catch fire and you or others
could be burned. Use a 50/
50 mixture of clean, drinkable
water and DEX-COOL coolant.
Use a 50/50 mixture of clean,drinkable water and DEX-COOLcoolant. If using this mixture,nothing else needs to be added.This mixture:
.Gives freezing protection downto✓37 °C (✓34 °F), outsidetemperature.
.Gives boiling protection up to129 °C (265 °F), enginetemperature.
.Protects against rust andcorrosion.
.Will not damage aluminum parts.
.Helps keep the proper enginetemperature.
Caution
If improper coolant mixture,
inhibitors, or additives are used in
the vehicle cooling system, the
engine could overheat and be
damaged. Too much water in the
mixture can freeze and crack
engine cooling parts. The repairs
would not be covered by the
vehicle warranty. Use only the
proper mixture of engine coolant
for the cooling system. See
Recommended Fluids and
Lubricants0305.
Never dispose of engine coolant byputting it in the trash, pouring it onthe ground, or into sewers, streams,
Page 229 of 346
Chevrolet Express Owner Manual (GMNA-Localizing-U.S./Canada/Mexico-9967827) - 2017 - crc - 5/2/16
228 Vehicle Care
or bodies of water. Have the coolantchanged by an authorized servicecenter, familiar with legalrequirements regarding usedcoolant disposal. This will helpprotect the environment and yourhealth.
Checking Coolant
The vehicle must be on a levelsurface when checking the coolantlevel.
Check to see if coolant is visible inthe coolant recovery tank. If thecoolant inside the coolant recoverytank is boiling, do not do anythingelse until it cools down. If coolant isvisible but the coolant level is not ator above the COLD FILL mark, adda50/50mixtureofclean,drinkablewater and DEX-COOL coolant at thecoolant recovery tank, but be surethe cooling system is cool beforethis is done.
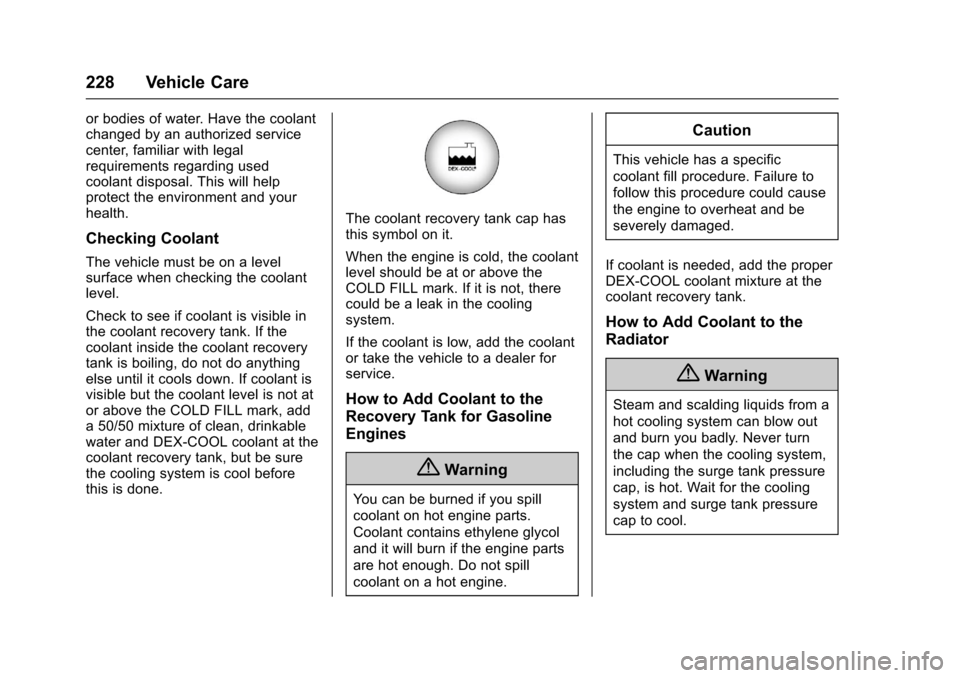
The coolant recovery tank cap hasthis symbol on it.
When the engine is cold, the coolantlevel should be at or above theCOLD FILL mark. If it is not, therecould be a leak in the coolingsystem.
If the coolant is low, add the coolantor take the vehicle to a dealer forservice.
How to Add Coolant to the
Recovery Tank for Gasoline
Engines
{Warning
Yo u c a n b e b u r n e d i f y o u s p i l l
coolant on hot engine parts.
Coolant contains ethylene glycol
and it will burn if the engine parts
are hot enough. Do not spill
coolant on a hot engine.
Caution
This vehicle has a specific
coolant fill procedure. Failure to
follow this procedure could cause
the engine to overheat and be
severely damaged.
If coolant is needed, add the properDEX-COOL coolant mixture at thecoolant recovery tank.
How to Add Coolant to the
Radiator
{Warning
Steam and scalding liquids from a
hot cooling system can blow out
and burn you badly. Never turn
the cap when the cooling system,
including the surge tank pressure
cap, is hot. Wait for the cooling
system and surge tank pressure
cap to cool.