2017 CHEVROLET EXPRESS CARGO VAN battery location
[x] Cancel search: battery locationPage 26 of 346
Chevrolet Express Owner Manual (GMNA-Localizing-U.S./Canada/Mexico-9967827) - 2017 - crc - 5/2/16
Keys, Doors, and Windows 25
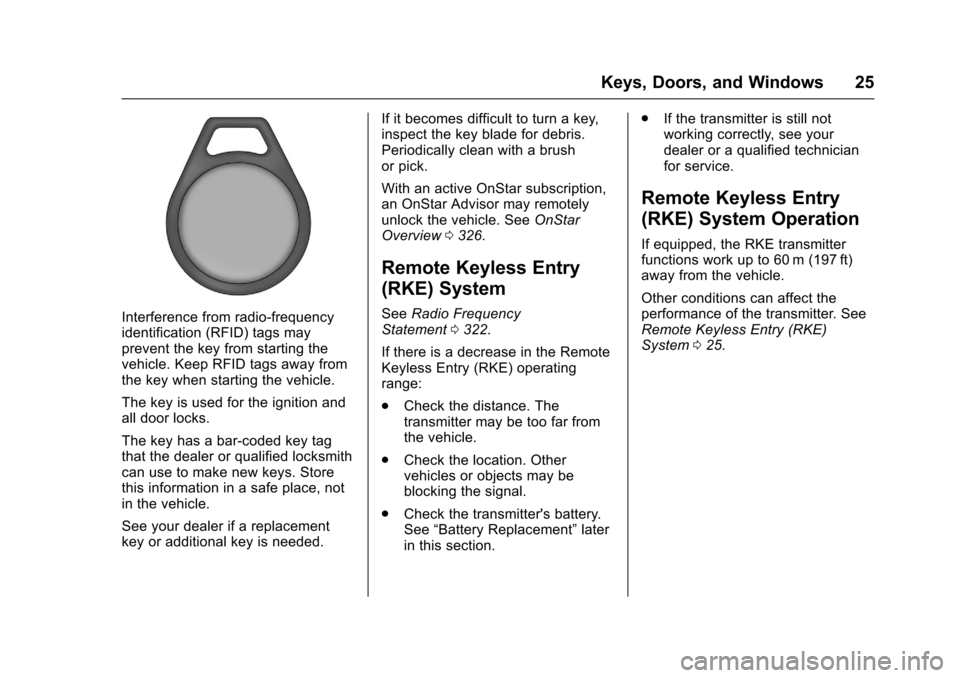
Interference from radio-frequencyidentification (RFID) tags mayprevent the key from starting thevehicle. Keep RFID tags away fromthe key when starting the vehicle.
The key is used for the ignition andall door locks.
The key has a bar-coded key tagthat the dealer or qualified locksmithcan use to make new keys. Storethis information in a safe place, notin the vehicle.
See your dealer if a replacementkey or additional key is needed.
If it becomes difficult to turn a key,inspect the key blade for debris.Periodically clean with a brushor pick.
With an active OnStar subscription,an OnStar Advisor may remotelyunlock the vehicle. SeeOnStarOverview0326.
Remote Keyless Entry
(RKE) System
SeeRadio FrequencyStatement0322.
If there is a decrease in the RemoteKeyless Entry (RKE) operatingrange:
.Check the distance. Thetransmitter may be too far fromthe vehicle.
.Check the location. Othervehicles or objects may beblocking the signal.
.Check the transmitter's battery.See“Battery Replacement”laterin this section.
.If the transmitter is still notworking correctly, see yourdealer or a qualified technicianfor service.
Remote Keyless Entry
(RKE) System Operation
If equipped, the RKE transmitterfunctions work up to 60 m (197 ft)away from the vehicle.
Other conditions can affect theperformance of the transmitter. SeeRemote Keyless Entry (RKE)System025.
Page 66 of 346
Chevrolet Express Owner Manual (GMNA-Localizing-U.S./Canada/Mexico-9967827) - 2017 - crc - 5/2/16
Seats and Restraints 65
Servicing the
Airbag-Equipped Vehicle
Airbags affect how the vehicleshould be serviced. There are partsof the airbag system in severalplaces around the vehicle. Yourdealer and the service manual haveinformation about servicing thevehicle and the airbag system. Topurchase a service manual, seeService Publications OrderingInformation0321.
{Warning
For up to 10 seconds after the
vehicle is turned off and the
battery is disconnected, an airbag
can still inflate during improper
service. You can be injured if you
are close to an airbag when it
inflates. Avoid yellow connectors.
They are probably part of the
airbag system. Be sure to follow
proper service procedures, and
make sure the person performing
work for you is qualified to do so.
Adding Equipment to the
Airbag-Equipped Vehicle
Adding accessories that change thevehicle's frame, bumper system,height, front end, or side sheetmetal, may keep the airbag systemfrom working properly. Theoperation of the airbag system canalso be affected by changing anyparts of the front seats, safety belts,the airbag sensing and diagnosticmodule, steering wheel, instrumentpanel, any of the airbag modules,ceiling or pillar garnish trim, frontsensors, or airbag wiring.
Yo u r d e a l e r a n d t h e s e r v i c e m a n u a lhave information about the locationof the airbag sensors, sensing anddiagnostic module, and airbagwiring.
If the vehicle has rollover roof-railairbags, seeDifferent Size Tiresand Wheels0269for additionalimportant information.
If you have to modify your vehiclebecause you have a disability andyou have questions about whetherthe modifications will affect the
vehicle's airbag system, or if youhave questions about whether theairbag system will be affected if thevehicle is modified for any otherreason, call Customer Assistance.SeeCustomer AssistanceOffices0314.
Airbag System Check
The airbag system does not needregularly scheduled maintenance orreplacement. Make sure the airbagreadiness light is working. SeeAirbag Readiness Light099.
Caution
If an airbag covering is damaged,
opened, or broken, the airbag
may not work properly. Do not
open or break the airbag
coverings. If there are any
opened or broken airbag
coverings, have the airbag
covering and/or airbag module
replaced. For the location of the
airbags, seeWhere Are the
Airbags?057.Seeyourdealer
for service.
Page 131 of 346
Chevrolet Express Owner Manual (GMNA-Localizing-U.S./Canada/Mexico-9967827) - 2017 - crc - 5/2/16
130 Lighting
Reading Lamps
If equipped with reading lamps,press the button next to each lampto turn it on or off.
The vehicle may also have readinglamps in other locations. The lampscannot be adjusted.
Lighting Features
Entry/Exit Lighting
The vehicle has an illuminatedentry/exit feature.
The dome lamps come on if theE
DOME OFF button is in theextended position, when a door isopened, or the key is removed fromthe ignition.
Battery Load
Management
The vehicle may have ElectricPower Management (EPM) thatestimates the battery's temperatureand state of charge. It then adjuststhe voltage for best performanceand extended life of the battery.
When the battery's state of chargeis low, the voltage is raised slightlyto quickly bring the charge back up.When the state of charge is high,the voltage is lowered slightly toprevent overcharging. If the vehiclehas a voltmeter gauge or a voltagedisplay on the Driver Information
Center (DIC), you may see thevoltage move up or down. This isnormal. If there is a problem, analert will be displayed.
The battery can be discharged atidle if the electrical loads are veryhigh. This is true for all vehicles.This is because the generator(alternator) may not be spinning fastenough at idle to produce all thepower that is needed for very highelectrical loads.
Ahighelectricalloadoccurswhenseveral of the following are on, suchas: headlamps, high beams, foglamps, rear window defogger,climate control fan at high speed,heated seats, engine cooling fans,trailer loads, and loads plugged intoaccessory power outlets.
EPM works to prevent excessivedischarge of the battery. It does thisby balancing the generator's outputand the vehicle's electrical needs.It can increase engine idle speed togenerate more power, wheneverneeded. It can temporarily reducethe power demands of someaccessories.
Page 220 of 346
Chevrolet Express Owner Manual (GMNA-Localizing-U.S./Canada/Mexico-9967827) - 2017 - crc - 5/2/16
Vehicle Care 219
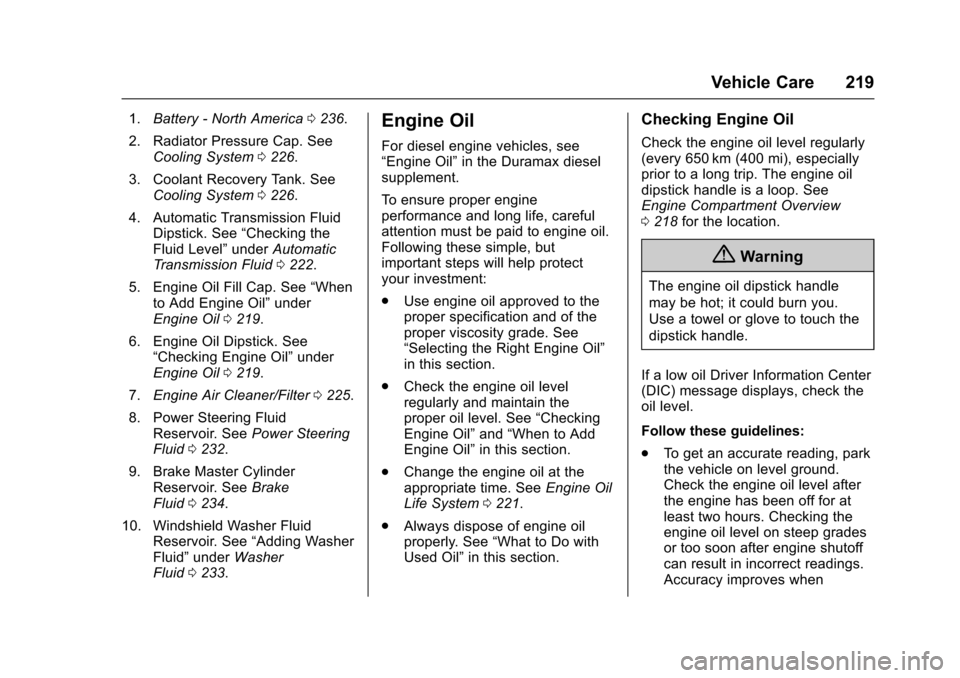
1.Battery - North America0236.
2. Radiator Pressure Cap. SeeCooling System0226.
3. Coolant Recovery Tank. SeeCooling System0226.
4. Automatic Transmission FluidDipstick. See“Checking theFluid Level”underAutomaticTr a n s m i s s i o n F l u i d0222.
5. Engine Oil Fill Cap. See“Whento Add Engine Oil”underEngine Oil0219.
6. Engine Oil Dipstick. See“Checking Engine Oil”underEngine Oil0219.
7.Engine Air Cleaner/Filter0225.
8. Power Steering FluidReservoir. SeePower SteeringFluid0232.
9. Brake Master CylinderReservoir. SeeBrakeFluid0234.
10. Windshield Washer FluidReservoir. See“Adding WasherFluid”underWasherFluid0233.
Engine Oil
For diesel engine vehicles, see“Engine Oil”in the Duramax dieselsupplement.
To e n s u r e p r o p e r e n g i n eperformance and long life, carefulattention must be paid to engine oil.Following these simple, butimportant steps will help protectyour investment:
.Use engine oil approved to theproper specification and of theproper viscosity grade. See“Selecting the Right Engine Oil”in this section.
.Check the engine oil levelregularly and maintain theproper oil level. See“CheckingEngine Oil”and“When to AddEngine Oil”in this section.
.Change the engine oil at theappropriate time. SeeEngine OilLife System0221.
.Always dispose of engine oilproperly. See“What to Do withUsed Oil”in this section.
Checking Engine Oil
Check the engine oil level regularly(every 650 km (400 mi), especiallyprior to a long trip. The engine oildipstick handle is a loop. SeeEngine Compartment Overview0218for the location.
{Warning
The engine oil dipstick handle
may be hot; it could burn you.
Use a towel or glove to touch the
dipstick handle.
If a low oil Driver Information Center(DIC) message displays, check theoil level.
Follow these guidelines:
.To g e t a n a c c u r a t e r e a d i n g , p a r kthe vehicle on level ground.Check the engine oil level afterthe engine has been off for atleast two hours. Checking theengine oil level on steep gradesor too soon after engine shutoffcan result in incorrect readings.Accuracy improves when
Page 237 of 346
Chevrolet Express Owner Manual (GMNA-Localizing-U.S./Canada/Mexico-9967827) - 2017 - crc - 5/2/16
236 Vehicle Care
Battery - North America
The original equipment battery ismaintenance free. Do not removethe cap and do not add fluid.
Refer to the replacement numbershown on the original battery labelwhen a new battery is needed. SeeEngine Compartment Overview0218for battery location.
{Warning
WA R N I N G :Battery posts,
terminals, and related
accessories contain lead and lead
compounds, chemicals known to
the State of California to cause
cancer and birth defects or other
reproductive harm. Batteries also
contain other chemicals known to
the State of California to cause
cancer.WASH HANDS AFTER
HANDLING.
SeeCalifornia Proposition
65 Warning0215.
Vehicle Storage
{Warning
Batteries have acid that can burn
you and gas that can explode.
Yo u c a n b e b a d l y h u r t i f y o u a r e
not careful. SeeJump Starting -
North America0282for tips on
working around a battery without
getting hurt.
Infrequent Usage: Remove theblack, negative (✓)cablefromthebattery to keep the battery fromrunning down.
Extended Storage: Remove theblack, negative (✓)cablefromthebattery or use a battery tricklecharger.
Rear Axle
When to Check Lubricant
It is not necessary to regularlycheck rear axle fluid unless yoususpect there is a leak or you hear
an unusual noise. A fluid loss couldindicate a problem. Have itinspected and repaired.
How to Check Lubricant
To g e t a n a c c u r a t e r e a d i n g , t h evehicle should be on a levelsurface.
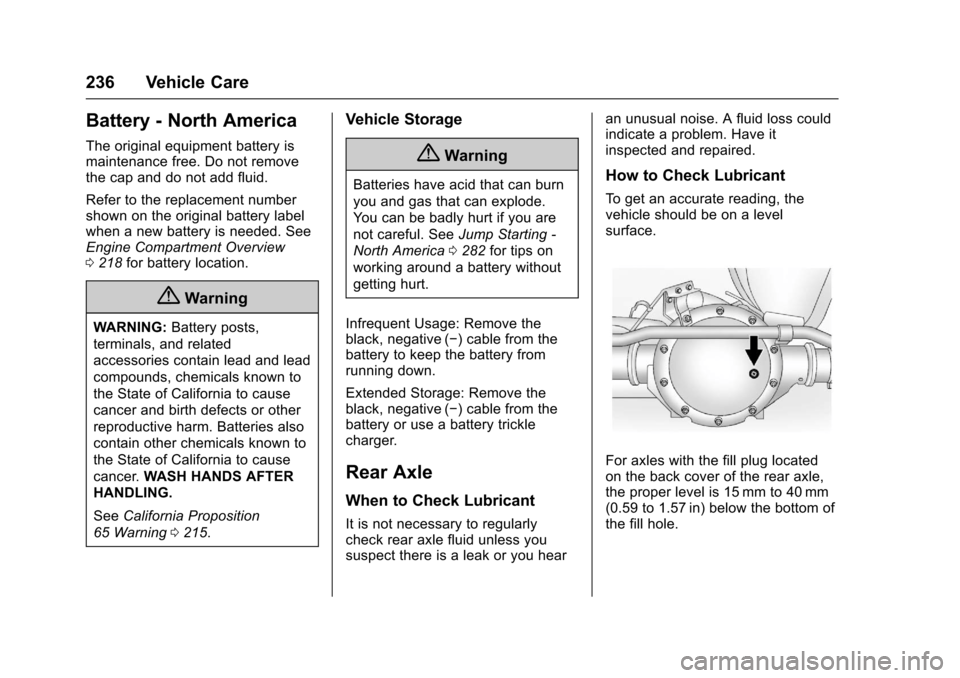
For axles with the fill plug locatedon the back cover of the rear axle,the proper level is 15 mm to 40 mm(0.59 to 1.57 in) below the bottom ofthe fill hole.
Page 284 of 346
Chevrolet Express Owner Manual (GMNA-Localizing-U.S./Canada/Mexico-9967827) - 2017 - crc - 5/2/16
Vehicle Care 283
Caution
Ignoring these steps could result
in costly damage to the vehicle
that would not be covered by the
vehicle warranty. Trying to start
the vehicle by pushing or pulling it
will not work, and it could damage
the vehicle.
1. Check the other vehicle.It must have a 12-volt batterywith a negative ground system.
Caution
If the other vehicle does not have
a12-voltsystemwithanegative
ground, both vehicles can be
damaged. Only use a vehicle that
has a 12-volt system with a
negative ground for jump starting.
2. Get the vehicles close enoughso the jumper cables canreach, but be sure the vehiclesare not touching each other.If they are, it could cause a
ground connection you do notwant. You would not be able tostart your vehicle, and the badgrounding could damage theelectrical systems.
To a v o i d t h e p o s s i b i l i t y o f t h evehicles rolling, set the parkingbrake firmly on both vehiclesinvolved in the jump startprocedure. Put an automatictransmission in P (Park) or amanual transmission in Neutralbefore setting the parkingbrake.
Caution
If any accessories are left on or
plugged in during the jump
starting procedure, they could be
damaged. The repairs would not
be covered by the vehicle
warranty. Whenever possible, turn
off or unplug all accessories on
either vehicle when jump starting.
3. Turn off the ignition on bothvehicles. Unplug unnecessaryaccessories plugged into the
cigarette lighter or theaccessory power outlet. Turnoff the radio and all lamps thatare not needed. This will avoidsparks and help save bothbatteries. And it could save theradio!
4. Open the hoods and locate thepositive (+) and negative (✓)terminal locations of the othervehicle.
On your van, use the unpaintedradio antenna bracket as aremote negative (✓)terminal.
{Warning
Using a match near a battery can
cause battery gas to explode.
People have been hurt doing this,
and some have been blinded.
Use a flashlight if you need more
light.
Battery fluid contains acid that
can burn you. Do not get it on
you. If you accidentally get it in
(Continued)
Page 286 of 346
Chevrolet Express Owner Manual (GMNA-Localizing-U.S./Canada/Mexico-9967827) - 2017 - crc - 5/2/16
Vehicle Care 285
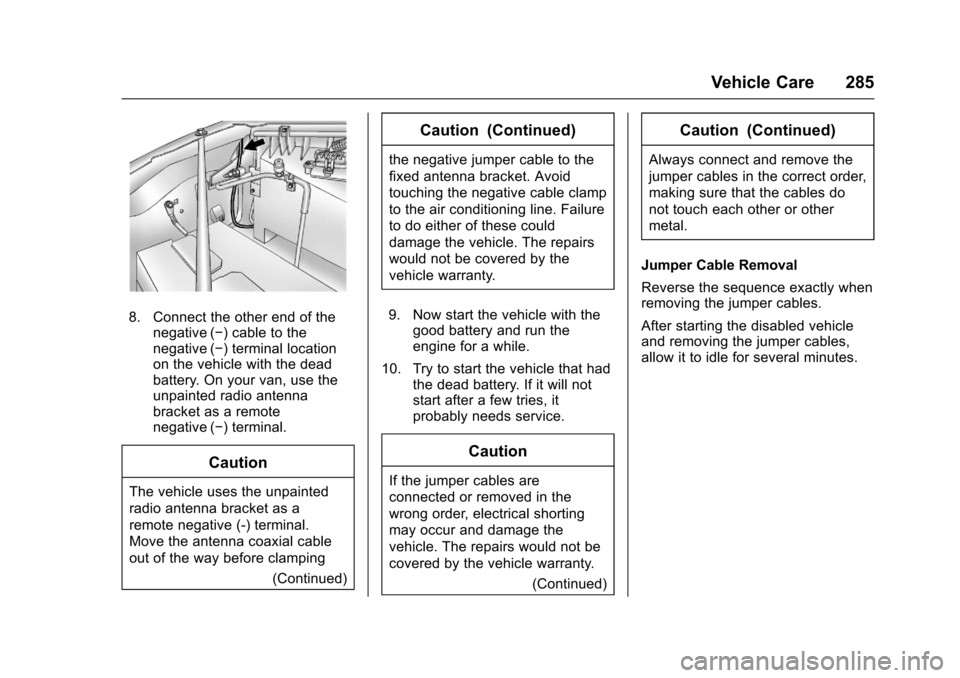
8. Connect the other end of thenegative (✓)cabletothenegative (✓)terminallocationon the vehicle with the deadbattery. On your van, use theunpainted radio antennabracket as a remotenegative (✓)terminal.
Caution
The vehicle uses the unpainted
radio antenna bracket as a
remote negative (-) terminal.
Move the antenna coaxial cable
out of the way before clamping
(Continued)
Caution (Continued)
the negative jumper cable to the
fixed antenna bracket. Avoid
touching the negative cable clamp
to the air conditioning line. Failure
to do either of these could
damage the vehicle. The repairs
would not be covered by the
vehicle warranty.
9. Now start the vehicle with thegood battery and run theengine for a while.
10. Try to start the vehicle that hadthe dead battery. If it will notstart after a few tries, itprobably needs service.
Caution
If the jumper cables are
connected or removed in the
wrong order, electrical shorting
may occur and damage the
vehicle. The repairs would not be
covered by the vehicle warranty.
(Continued)
Caution (Continued)
Always connect and remove the
jumper cables in the correct order,
making sure that the cables do
not touch each other or other
metal.
Jumper Cable Removal
Reverse the sequence exactly whenremoving the jumper cables.
After starting the disabled vehicleand removing the jumper cables,allow it to idle for several minutes.
Page 327 of 346
Chevrolet Express Owner Manual (GMNA-Localizing-U.S./Canada/Mexico-9967827) - 2017 - crc - 5/2/16
326 OnStar
OnStar
OnStar Overview
OnStar Overview . . . . . . . . . . . . . 326
OnStar Services
Emergency . . . . . . . . . . . . . . . . . . . 327Security . . . . . . . . . . . . . . . . . . . . . . 327Navigation . . . . . . . . . . . . . . . . . . . . 328Connections . . . . . . . . . . . . . . . . . . 328Diagnostics . . . . . . . . . . . . . . . . . . . 330
OnStar Additional Information
OnStar AdditionalInformation . . . . . . . . . . . . . . . . . . 331
OnStar Overview
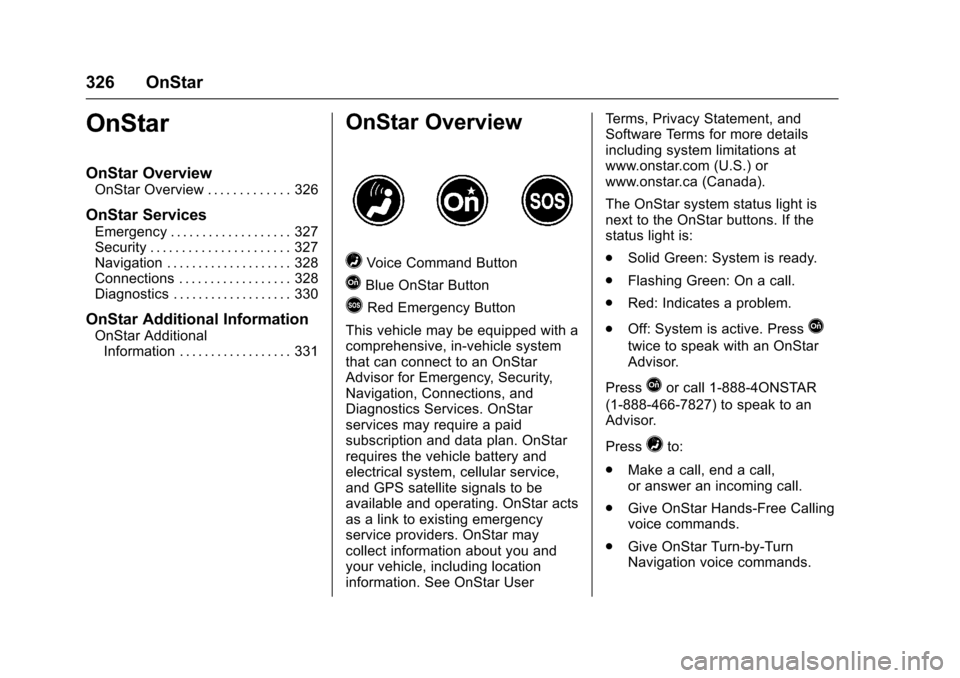
=Voice Command Button
QBlue OnStar Button
>Red Emergency Button
This vehicle may be equipped with acomprehensive, in-vehicle systemthat can connect to an OnStarAdvisor for Emergency, Security,Navigation, Connections, andDiagnostics Services. OnStarservices may require a paidsubscription and data plan. OnStarrequires the vehicle battery andelectrical system, cellular service,and GPS satellite signals to beavailable and operating. OnStar actsas a link to existing emergencyservice providers. OnStar maycollect information about you andyour vehicle, including locationinformation. See OnStar User
Te r m s , P r i v a c y S t a t e m e n t , a n dSoftware Terms for more detailsincluding system limitations atwww.onstar.com (U.S.) orwww.onstar.ca (Canada).
The OnStar system status light isnext to the OnStar buttons. If thestatus light is:
.Solid Green: System is ready.
.Flashing Green: On a call.
.Red: Indicates a problem.
.Off: System is active. PressQ
twice to speak with an OnStarAdvisor.
PressQor call 1-888-4ONSTAR
(1-888-466-7827) to speak to anAdvisor.
Press=to:
.Make a call, end a call,or answer an incoming call.
.Give OnStar Hands-Free Callingvoice commands.
.Give OnStar Turn-by-TurnNavigation voice commands.