2017 CHEVROLET CRUZE ignition
[x] Cancel search: ignitionPage 161 of 405

Chevrolet Cruze Owner Manual (GMNA-Localizing-U.S./Canada/Mexico-
9803785) - 2017 - CRC - 4/13/16
160 Lighting
.The vehicle's windshield is dirty,
cracked, or obstructed by
something that blocks the view
of the light sensor.
. The vehicle is loaded such that
the front end points upward,
causing the light sensor to aim
high and not detect headlamps
and taillamps.
. The vehicle is being driven on
winding or hilly roads.
The IntelliBeam system may need to
be disabled if any of the above
conditions exist.
Headlamp High/
Low-Beam Changer
3
: Push the turn signal lever
toward the instrument panel to
change the headlamps from low to
high beam.
Pull the turn signal lever toward you
and release it to return to low-beam
headlamps.
When the high-beam headlamps are
on, this indicator light on the
instrument cluster will also be on.
Flash-to-Pass
To flash the high beams, pull the
turn signal lever all the way toward
you. Then release it.
Daytime Running
Lamps (DRL)
If equipped, DRL can make it easier
for others to see the front of your
vehicle during the day. Fully
functional DRL are required on all
vehicles first sold in Canada. The
vehicle may have dedicated
Light-Emitting Diode (LED) DRL.
The DRL will come on when all of
the following conditions are met:
. The ignition is on. .
The exterior lamp control is
in AUTO.
. The light sensor determines it is
daytime.
. The parking brake is released or
the vehicle is not in P (Park).
When the DRL are on, the taillamps,
sidemarker lamps, and other lamps
will not be on.
The DRL turn off when the
headlamps are turned to
Oor the
ignition is off.
Automatic Headlamp
System
The feature only works on vehicles
with automatic light control.
When it is dark enough outside and
the exterior lamp control is in the
automatic position, the headlamps
come on automatically. See Exterior
Lamp Controls 0158.
Page 163 of 405
Chevrolet Cruze Owner Manual (GMNA-Localizing-U.S./Canada/Mexico-
9803785) - 2017 - CRC - 4/13/16
162 Lighting
Turn and Lane-Change
Signals
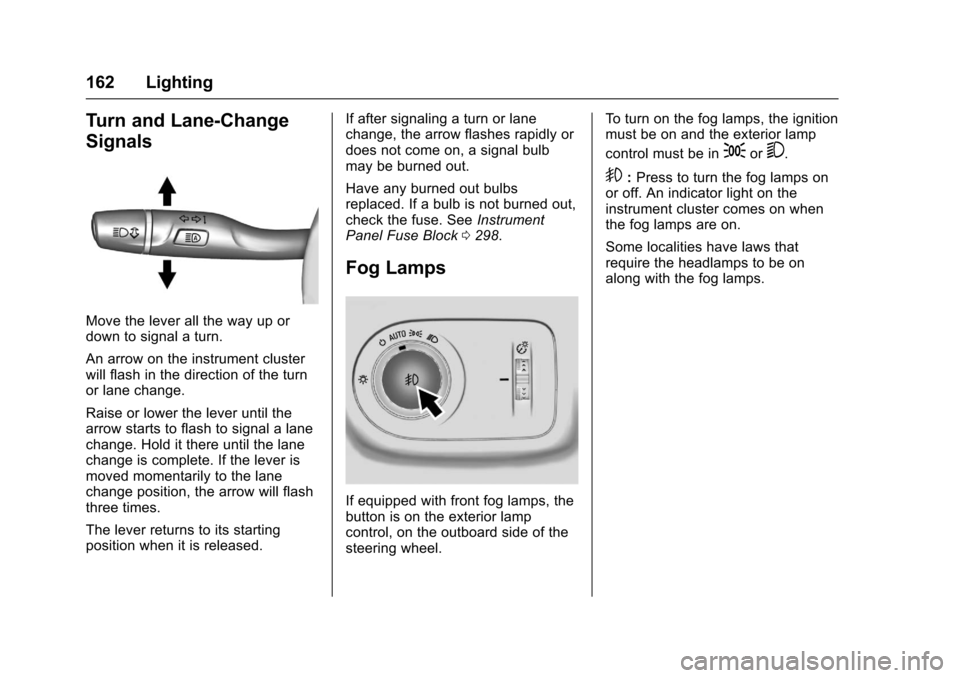
Move the lever all the way up or
down to signal a turn.
An arrow on the instrument cluster
will flash in the direction of the turn
or lane change.
Raise or lower the lever until the
arrow starts to flash to signal a lane
change. Hold it there until the lane
change is complete. If the lever is
moved momentarily to the lane
change position, the arrow will flash
three times.
The lever returns to its starting
position when it is released.If after signaling a turn or lane
change, the arrow flashes rapidly or
does not come on, a signal bulb
may be burned out.
Have any burned out bulbs
replaced. If a bulb is not burned out,
check the fuse. See
Instrument
Panel Fuse Block 0298.
Fog Lamps
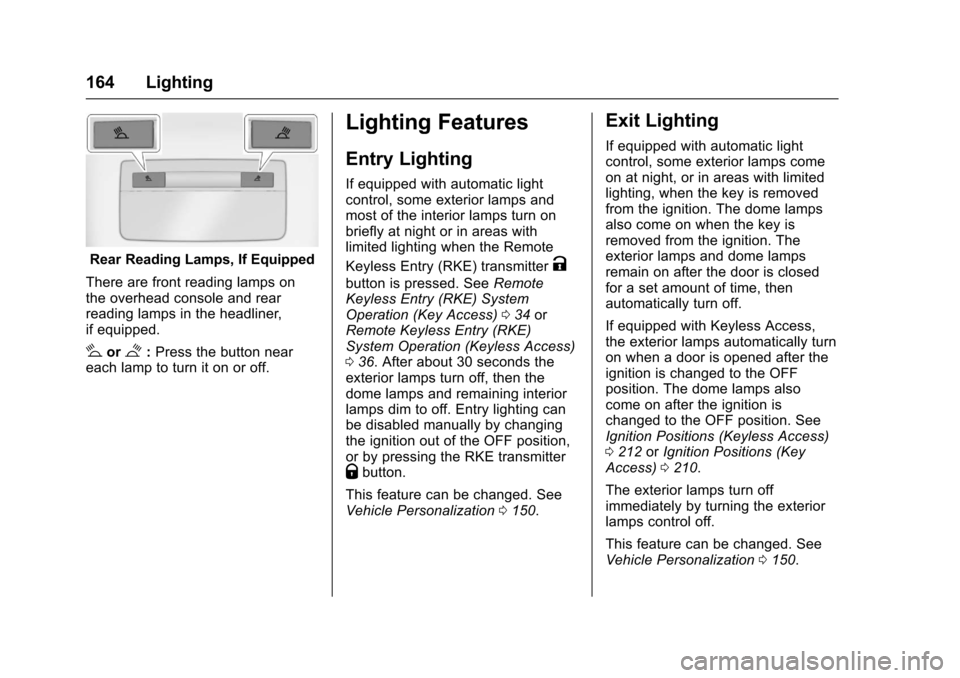
If equipped with front fog lamps, the
button is on the exterior lamp
control, on the outboard side of the
steering wheel. To turn on the fog lamps, the ignition
must be on and the exterior lamp
control must be in
;or5.
9:
Press to turn the fog lamps on
or off. An indicator light on the
instrument cluster comes on when
the fog lamps are on.
Some localities have laws that
require the headlamps to be on
along with the fog lamps.
Page 165 of 405
Chevrolet Cruze Owner Manual (GMNA-Localizing-U.S./Canada/Mexico-
9803785) - 2017 - CRC - 4/13/16
164 Lighting
Rear Reading Lamps, If Equipped
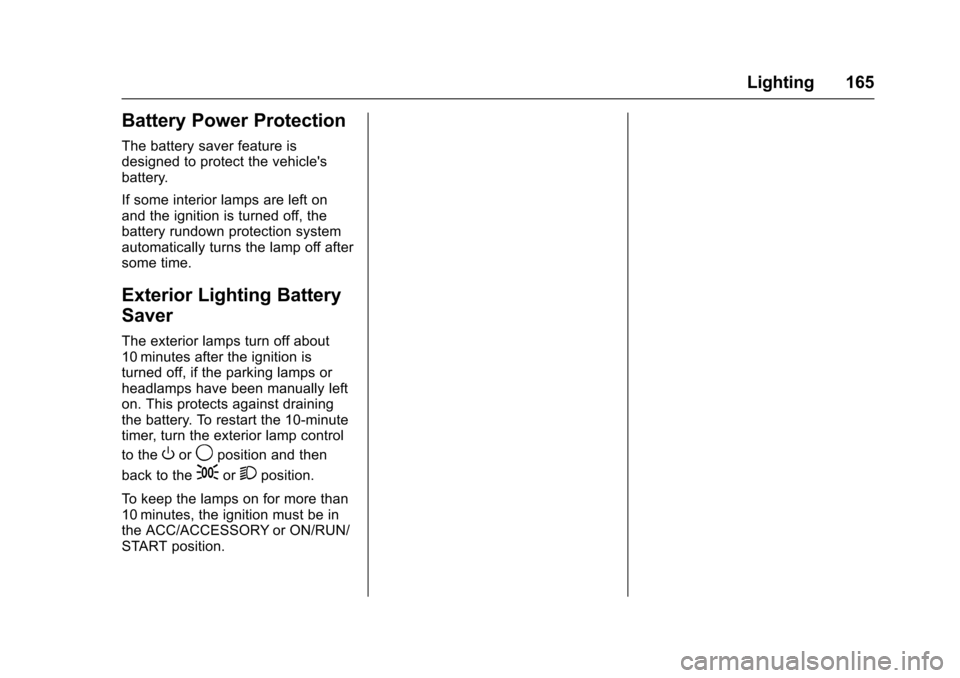
There are front reading lamps on
the overhead console and rear
reading lamps in the headliner,
if equipped.
#or$: Press the button near
each lamp to turn it on or off.
Lighting Features
Entry Lighting
If equipped with automatic light
control, some exterior lamps and
most of the interior lamps turn on
briefly at night or in areas with
limited lighting when the Remote
Keyless Entry (RKE) transmitter
K
button is pressed. See Remote
Keyless Entry (RKE) System
Operation (Key Access) 034 or
Remote Keyless Entry (RKE)
System Operation (Keyless Access)
0 36. After about 30 seconds the
exterior lamps turn off, then the
dome lamps and remaining interior
lamps dim to off. Entry lighting can
be disabled manually by changing
the ignition out of the OFF position,
or by pressing the RKE transmitter
Qbutton.
This feature can be changed. See
Vehicle Personalization 0150.
Exit Lighting
If equipped with automatic light
control, some exterior lamps come
on at night, or in areas with limited
lighting, when the key is removed
from the ignition. The dome lamps
also come on when the key is
removed from the ignition. The
exterior lamps and dome lamps
remain on after the door is closed
for a set amount of time, then
automatically turn off.
If equipped with Keyless Access,
the exterior lamps automatically turn
on when a door is opened after the
ignition is changed to the OFF
position. The dome lamps also
come on after the ignition is
changed to the OFF position. See
Ignition Positions (Keyless Access)
0212 orIgnition Positions (Key
Access) 0210.
The exterior lamps turn off
immediately by turning the exterior
lamps control off.
This feature can be changed. See
Vehicle Personalization 0150.
Page 166 of 405
Chevrolet Cruze Owner Manual (GMNA-Localizing-U.S./Canada/Mexico-
9803785) - 2017 - CRC - 4/13/16
Lighting 165
Battery Power Protection
The battery saver feature is
designed to protect the vehicle's
battery.
If some interior lamps are left on
and the ignition is turned off, the
battery rundown protection system
automatically turns the lamp off after
some time.
Exterior Lighting Battery
Saver
The exterior lamps turn off about
10 minutes after the ignition is
turned off, if the parking lamps or
headlamps have been manually left
on. This protects against draining
the battery. To restart the 10-minute
timer, turn the exterior lamp control
to the
Oor9position and then
back to the
;or2position.
To keep the lamps on for more than
10 minutes, the ignition must be in
the ACC/ACCESSORY or ON/RUN/
START position.
Page 168 of 405
Chevrolet Cruze Owner Manual (GMNA-Localizing-U.S./Canada/Mexico-
9803785) - 2017 - CRC - 4/13/16
Infotainment System 167
The infotainment system has built-in
features intended to help avoid
distraction by disabling some
functions when driving. These
functions may gray out when they
are unavailable. Many infotainment
features are also available through
the instrument cluster and steering
wheel controls.
Before driving:
.Become familiar with the
operation, faceplate buttons, and
screen buttons. .
Set up the audio by presetting
favorite stations, setting the
tone, and adjusting the
speakers.
. Set up phone numbers in
advance so they can be called
easily by pressing a single
button or by using a single voice
command if equipped with
Bluetooth phone capability.
See Defensive Driving 0201.
To play the infotainment system with
the ignition off, see Retained
Accessory Power (RAP) 0219.Theft-Deterrent Feature
The infotainment system has an
electronic security system installed
to prevent theft.
The infotainment system only works
in the vehicle in which it was first
installed, and cannot be used in
another vehicle.
Page 170 of 405
Chevrolet Cruze Owner Manual (GMNA-Localizing-U.S./Canada/Mexico-
9803785) - 2017 - CRC - 4/13/16
Infotainment System 169
.USB/Music/Pictures: Press
to go to the next content.
Press and hold to fast
forward.
5.
5
. Press and release to
access the phone screen,
answer an incoming call,
or access the device home
screen.
Home Page
Touchscreen Buttons
Touchscreen buttons show on the
screen when available. When a
function is unavailable, the button
may gray out. When a function is
selected, the button may highlight.
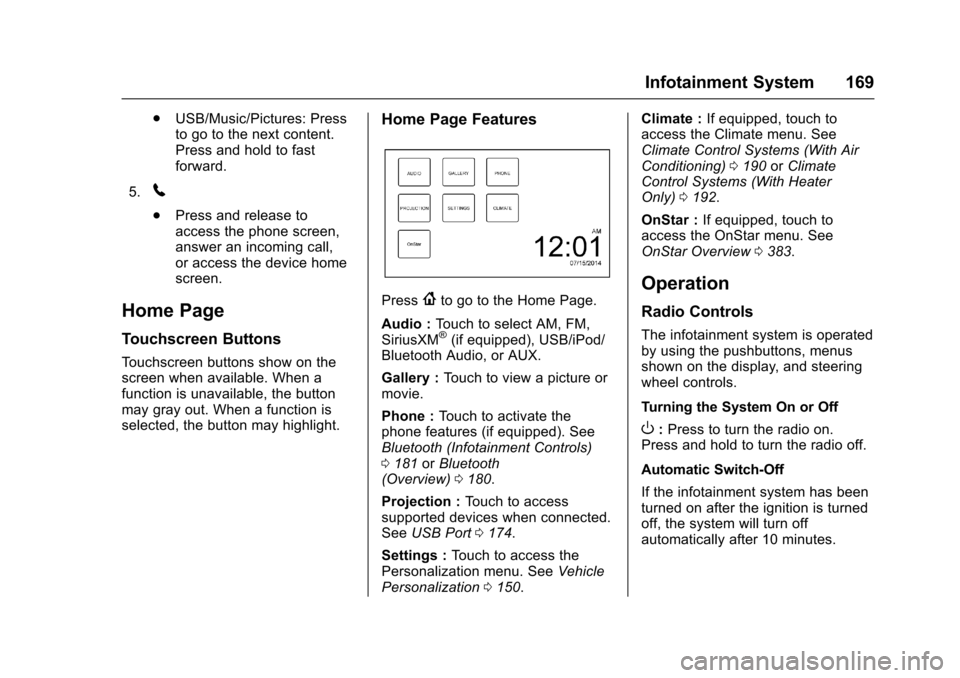
Home Page Features
Press{to go to the Home Page.
Audio : Touch to select AM, FM,
SiriusXM
®(if equipped), USB/iPod/
Bluetooth Audio, or AUX.
Gallery : Touch to view a picture or
movie.
Phone : Touch to activate the
phone features (if equipped). See
Bluetooth (Infotainment Controls)
0 181 orBluetooth
(Overview) 0180.
Projection : Touch to access
supported devices when connected.
See USB Port 0174.
Settings : Touch to access the
Personalization menu. See Vehicle
Personalization 0150. Climate :
If equipped, touch to
access the Climate menu. See
Climate Control Systems (With Air
Conditioning) 0190 orClimate
Control Systems (With Heater
Only) 0192.
OnStar : If equipped, touch to
access the OnStar menu. See
OnStar Overview 0383.
Operation
Radio Controls
The infotainment system is operated
by using the pushbuttons, menus
shown on the display, and steering
wheel controls.
Turning the System On or Off
O:Press to turn the radio on.
Press and hold to turn the radio off.
Automatic Switch-Off
If the infotainment system has been
turned on after the ignition is turned
off, the system will turn off
automatically after 10 minutes.
Page 175 of 405
Chevrolet Cruze Owner Manual (GMNA-Localizing-U.S./Canada/Mexico-
9803785) - 2017 - CRC - 4/13/16
174 Infotainment System
Audio Players
Avoiding Untrusted Media
Devices
When using media devices such as
CDs, DVDs, Blu-Ray Discs®, SD
cards, USB drives, and mobile
devices, consider the source.
Untrusted media devices could
contain files that affect system
operation or performance. Avoid use
if the content or origin cannot be
trusted.
USB Port
Using the USB Port
The infotainment system can play
music by connecting an auxiliary
device to the USB port.
USB Support
This vehicle may have two USB
ports. One port in the center
console for data and charging and
one in the rear of the center console
for charging only. External devices
such as iPhones/iPods
®and USB
storage devices may be connected. USB Supported Devices
.
USB Flash Drives
. Portable USB Hard Drives
Not all iPods and USB drives are
compatible with the USB port.
Make sure the iPod has the latest
firmware from Apple
®for proper
operation. iPod firmware can be
updated using the latest iTunes
®
application. See www.apple.com/
itunes.
For help with identifying your iPod,
go to www.apple.com/support.
The USB port can play both lower
and upper case .mp3, .wma, .ogg,
and .wav files stored on a USB
storage device.
Supported Apple
®Devices
To view supported devices in the
U.S., see www.my.chevrolet.com
\learned.
To view supported devices in
Canada, see
www.chevroletowner.ca.
To view supported devices in
Mexico, see your dealer. USB Supported File and Folder
Structure
The infotainment system supports:
.
FAT16
. FAT32
. exFAT
Connecting a USB Storage
Device or iPod/iPhone
To connect a USB storage device,
connect the device to the USB port.
To connect an iPod/iPhone, connect
one end of the device’ s cable to the
iPod/iPhone and the other end to
the USB port.
The iPod/iPhone charges while it is
connected to the vehicle if the
vehicle is in ACC/ACCESSORY or
ON/RUN. See Ignition Positions
(Keyless Access) 0212 orIgnition
Positions (Key Access) 0210.
When the vehicle is turned off, the
iPod/iPhone automatically powers
off and will not charge or draw
power from the vehicle's battery.
Page 176 of 405
Chevrolet Cruze Owner Manual (GMNA-Localizing-U.S./Canada/Mexico-
9803785) - 2017 - CRC - 4/13/16
Infotainment System 175
For more information on USB
usage, see“Audio System
Information” following.
Audio System Information
The infotainment system can play
the music files contained in the USB
storage device or iPod/iPhone
products.
Using MP3/WMA/OGG/WAV Files
.
Music files with .mp3, .wma,
.ogg, and .wav file name
extensions can be played.
. MP3 files that can be played: Bit
rate: 8 kbps to 320 kbps.
Sampling frequency: 48 kHz,
44.1 kHz, 32 kHz, 24 kHz,
22.05 kHz, and 16 kHz.
. Files with a bit rate above
128 kbps will result in higher
quality sound.
. ID3 Tag information for MP3
files, such as the album name
and the artist, can be played.
. To display album title, track title,
and artist information, the file
should be compatible with the
ID3 Tag V1 and V2 formats. Using USB Storage Devices and
an iPod/iPhone
.
Use a USB or flash memory type
storage device. Do not connect
using a USB adaptor.
. Do not connect and reconnect
the USB device repeatedly in a
short time, as this may cause
static electricity and problems
using the device.
. Use a USB device with a metal
connecting terminal.
. Connection with i-Stick Type
USB storage devices may be
faulty due to vehicle vibration.
. Do not touch the USB
connecting terminal.
. Only USB storage devices
formatted in FAT16/32 or exFAT
file systems are recognized.
NTFS and other file systems are
not recognized.
. The time it takes to process files
will depend on the USB storage
device type and capacity, and
the type of files stored. .
Some USB storage device files
may not be compatible.
. Up to two USB devices and one
iPod can be played through a
USB hub. All devices may not be
supported, depending on the
performance of the USB hub.
If there is not enough power
supply, it may not operate
normally.
. Do not disconnect the USB
storage device while it is playing.
This may cause damage to the
product or affect the
performance of the USB device.
. Disconnect the USB storage
device when the ignition is
turned off. If the ignition is turned
on while the USB device is
connected, the USB device may
be damaged or may not operate
normally.
. USB storage devices can only
be connected for playing music,
viewing photo files,
or upgrading.