2017 CHEVROLET CRUZE ignition
[x] Cancel search: ignitionPage 53 of 405
Chevrolet Cruze Owner Manual (GMNA-Localizing-U.S./Canada/Mexico-
9803785) - 2017 - CRC - 4/13/16
52 Keys, Doors, and Windows
The system is automatically
disarmed when the vehicle is
started with the correct key. The key
uses a transponder that matches an
immobilizer control unit in the
vehicle and automatically disarms
the system. Only an authorized key
starts the vehicle. The vehicle may
not start if the key is damaged.
The security light in the instrument
cluster comes on if there is a
problem with arming or disarming
the theft-deterrent system.
When trying to start the vehicle, the
security light comes on briefly when
the ignition is turned on.
If the engine does not start and the
security light stays on, there is a
problem with the system. Turn the
ignition off and try again.If the engine still does not start, and
the key appears to be undamaged
or the light continues to stay on, try
another ignition key. If the engine
does not start with the other key, the
vehicle needs service. If the vehicle
does start, the first key may be
damaged. See your dealer who can
service the theft-deterrent system
and have a new key made.
Do not leave the key or device that
disarms or deactivates the
theft-deterrent system in the vehicle.
Immobilizer Operation
(Keyless Access)
This vehicle has a passive
theft-deterrent system.
The system does not have to be
manually armed or disarmed.
The vehicle is automatically
immobilized when the transmitter
leaves the vehicle.
The immobilization system is
disarmed when the ignition button is
pressed and a valid transmitter is
found in the vehicle.
The security light in the instrument
cluster comes on when there is a
problem with arming or disarming
the theft-deterrent system.
The system has one or more
transmitters matched to an
immobilizer control unit in your
vehicle. Only a correctly matched
transmitter will start the vehicle.
If the transmitter is ever damaged,
you may not be able to start your
vehicle.
When trying to start the vehicle, the
security light comes on briefly when
the ignition is turned on.
If the engine does not start and the
security light stays on, there is a
problem with the system. Turn the
vehicle off and try again.
Page 57 of 405
Chevrolet Cruze Owner Manual (GMNA-Localizing-U.S./Canada/Mexico-
9803785) - 2017 - CRC - 4/13/16
56 Keys, Doors, and Windows
Window Lockout
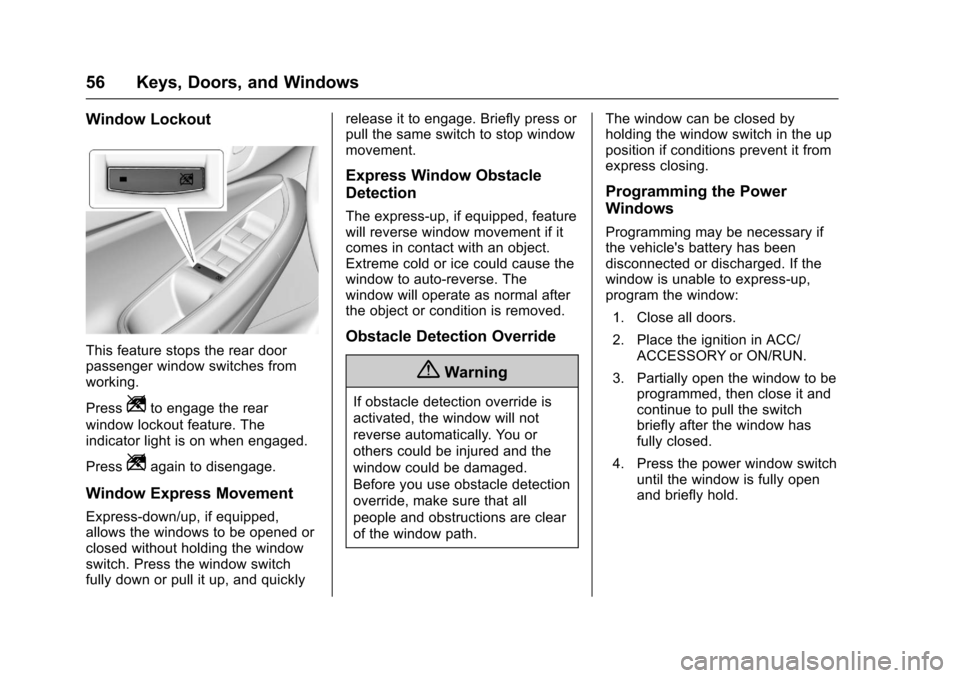
This feature stops the rear door
passenger window switches from
working.
Press
Zto engage the rear
window lockout feature. The
indicator light is on when engaged.
Press
Zagain to disengage.
Window Express Movement
Express-down/up, if equipped,
allows the windows to be opened or
closed without holding the window
switch. Press the window switch
fully down or pull it up, and quickly release it to engage. Briefly press or
pull the same switch to stop window
movement.
Express Window Obstacle
Detection
The express-up, if equipped, feature
will reverse window movement if it
comes in contact with an object.
Extreme cold or ice could cause the
window to auto-reverse. The
window will operate as normal after
the object or condition is removed.
Obstacle Detection Override
{Warning
If obstacle detection override is
activated, the window will not
reverse automatically. You or
others could be injured and the
window could be damaged.
Before you use obstacle detection
override, make sure that all
people and obstructions are clear
of the window path.
The window can be closed by
holding the window switch in the up
position if conditions prevent it from
express closing.
Programming the Power
Windows
Programming may be necessary if
the vehicle's battery has been
disconnected or discharged. If the
window is unable to express-up,
program the window:
1. Close all doors.
2. Place the ignition in ACC/ ACCESSORY or ON/RUN.
3. Partially open the window to be programmed, then close it and
continue to pull the switch
briefly after the window has
fully closed.
4. Press the power window switch until the window is fully open
and briefly hold.
Page 58 of 405
Chevrolet Cruze Owner Manual (GMNA-Localizing-U.S./Canada/Mexico-
9803785) - 2017 - CRC - 4/13/16
Keys, Doors, and Windows 57
Sun Visors
Pull the sun visor down to block
glare. Detach the sun visor from the
center mount to pivot to the side
window or, if equipped, extend
along the rod.
Roof
Sunroof
If equipped, the sunroof only
operates with the ignition on or in
ACC/ACCESSORY, or when
Retained Accessory Power (RAP) is
active. SeeRetained Accessory
Power (RAP) 0219.
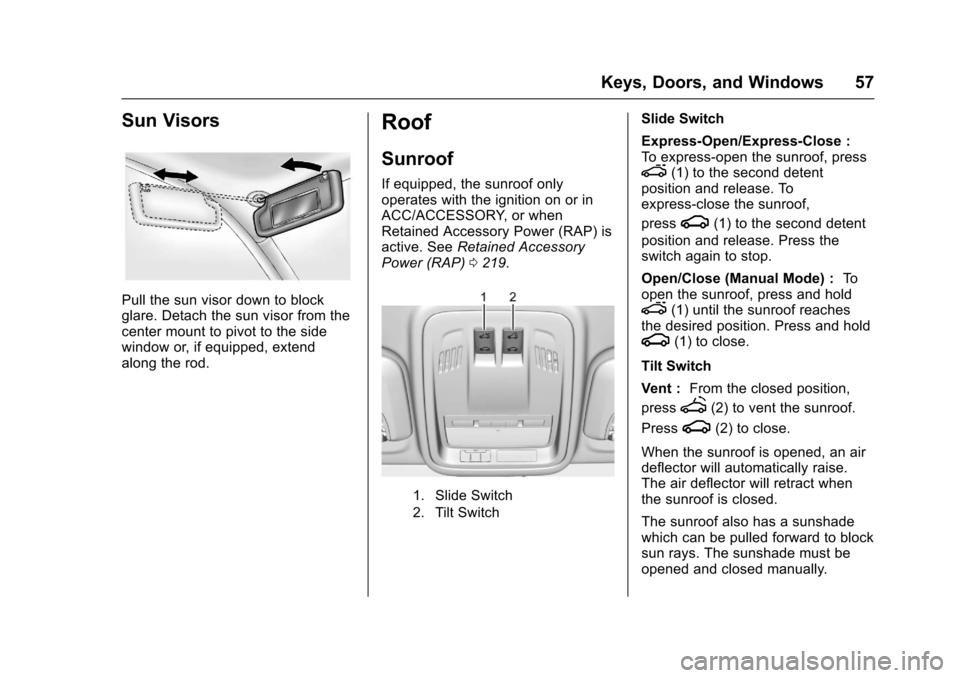
1. Slide Switch
2. Tilt Switch
Slide Switch
Express-Open/Express-Close :
To express-open the sunroof, press
e(1) to the second detent
position and release. To
express-close the sunroof,
press
g(1) to the second detent
position and release. Press the
switch again to stop.
Open/Close (Manual Mode) : To
open the sunroof, press and hold
e(1) until the sunroof reaches
the desired position. Press and hold
g(1) to close.
Tilt Switch
Vent : From the closed position,
press
f(2) to vent the sunroof.
Press
g(2) to close.
When the sunroof is opened, an air
deflector will automatically raise.
The air deflector will retract when
the sunroof is closed.
The sunroof also has a sunshade
which can be pulled forward to block
sun rays. The sunshade must be
opened and closed manually.
Page 65 of 405
Chevrolet Cruze Owner Manual (GMNA-Localizing-U.S./Canada/Mexico-
9803785) - 2017 - CRC - 4/13/16
64 Seats and Restraints
Heated Front Seats
{Warning
If you cannot feel temperature
change or pain to the skin, the
seat heater may cause burns. To
reduce the risk of burns, people
with such a condition should use
care when using the seat heater,
especially for long periods of
time. Do not place anything on
the seat that insulates against
heat, such as a blanket, cushion,
cover, or similar item. This may
cause the seat heater to
overheat. An overheated seat
heater may cause a burn or may
damage the seat.
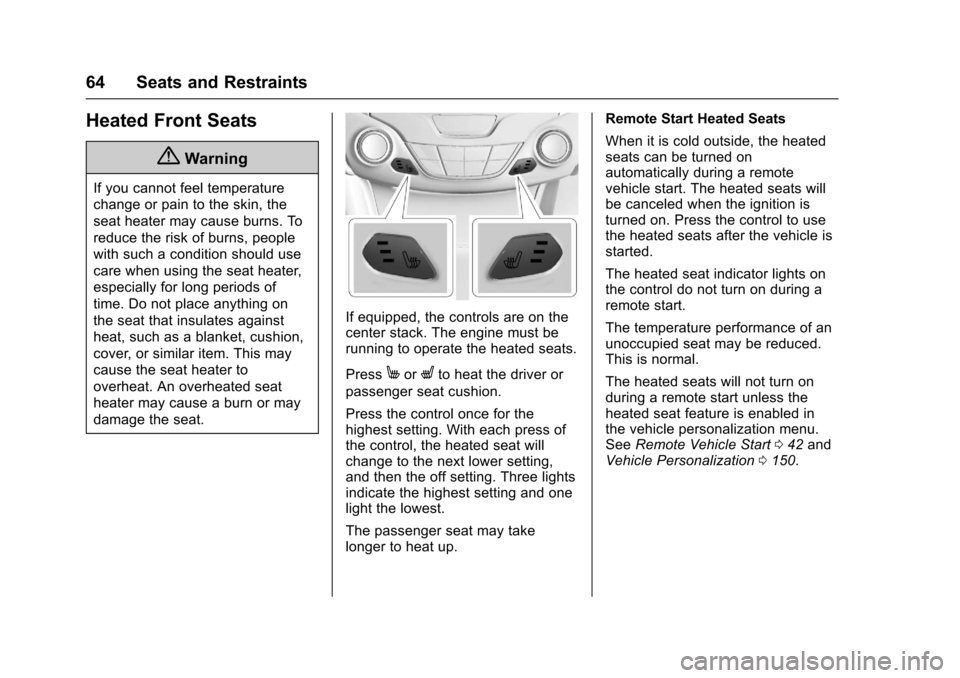
If equipped, the controls are on the
center stack. The engine must be
running to operate the heated seats.
Press
MorLto heat the driver or
passenger seat cushion.
Press the control once for the
highest setting. With each press of
the control, the heated seat will
change to the next lower setting,
and then the off setting. Three lights
indicate the highest setting and one
light the lowest.
The passenger seat may take
longer to heat up. Remote Start Heated Seats
When it is cold outside, the heated
seats can be turned on
automatically during a remote
vehicle start. The heated seats will
be canceled when the ignition is
turned on. Press the control to use
the heated seats after the vehicle is
started.
The heated seat indicator lights on
the control do not turn on during a
remote start.
The temperature performance of an
unoccupied seat may be reduced.
This is normal.
The heated seats will not turn on
during a remote start unless the
heated seat feature is enabled in
the vehicle personalization menu.
See
Remote Vehicle Start 042 and
Vehicle Personalization 0150.
Page 110 of 405
Chevrolet Cruze Owner Manual (GMNA-Localizing-U.S./Canada/Mexico-
9803785) - 2017 - CRC - 4/13/16
Instruments and Controls 109
c:Press to reject an incoming
call or end a current call. Press to
mute or unmute the infotainment
system when not on a call.
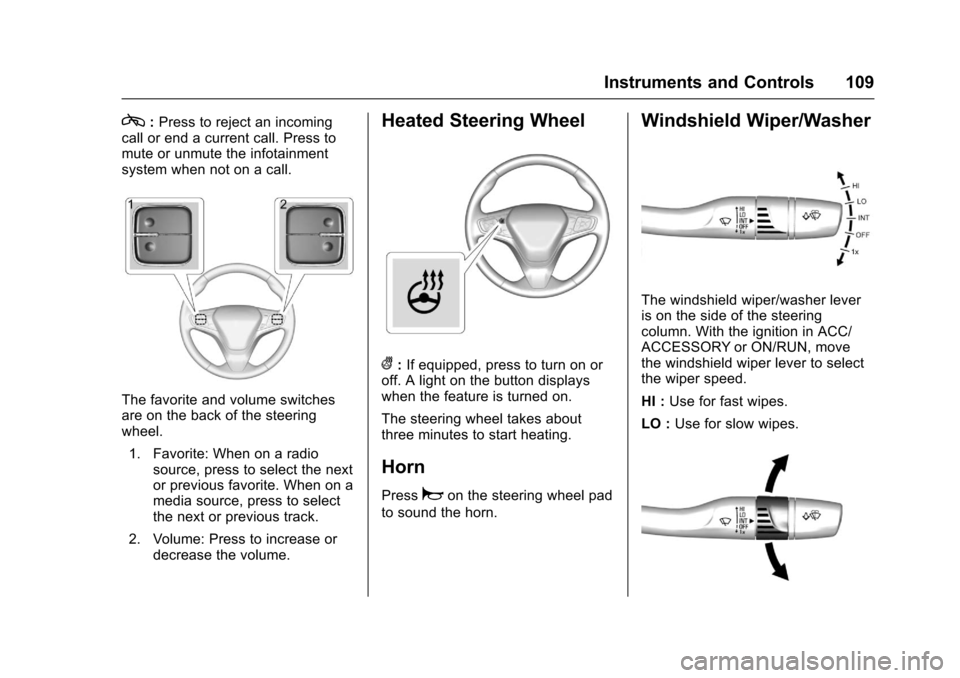
The favorite and volume switches
are on the back of the steering
wheel.
1. Favorite: When on a radio source, press to select the next
or previous favorite. When on a
media source, press to select
the next or previous track.
2. Volume: Press to increase or decrease the volume.
Heated Steering Wheel
(:If equipped, press to turn on or
off. A light on the button displays
when the feature is turned on.
The steering wheel takes about
three minutes to start heating.
Horn
Pressaon the steering wheel pad
to sound the horn.
Windshield Wiper/Washer
The windshield wiper/washer lever
is on the side of the steering
column. With the ignition in ACC/
ACCESSORY or ON/RUN, move
the windshield wiper lever to select
the wiper speed.
HI : Use for fast wipes.
LO : Use for slow wipes.
Page 113 of 405
Chevrolet Cruze Owner Manual (GMNA-Localizing-U.S./Canada/Mexico-
9803785) - 2017 - CRC - 4/13/16
112 Instruments and Controls
If auto timing is set, the time
displayed on the clock may not
update immediately when driving
into a new time zone.
To set the clock display:1. Select SETTINGS from the Home Page, then select Time
and Date.
2. Select Clock Display.
3. Turn the MENU knob to Off or On.
4. Press the MENU knob to select.
Press
oBACK to go to the last
menu and save the changes.
Uplevel Radio Using
Touchscreen Controls
The infotainment system controls
are used to access the time and
date settings through the menu
system. See “Using the System”
under “Introduction” in the
infotainment manual. To set the time:
1. Touch SETTINGS from the Home Page, then touch Time
and Date.
2. Touch Set Time and touch
«
orªto increase or decrease
hours, minutes, and AM or PM.
Touch 12–24 Hr for 12 or
24 hour clock.
3. Touch
}to go back to the
previous menu.
Auto Set requires an OnStar
subscription.
If auto timing is set, the time
displayed on the clock may not
update immediately when driving
into a new time zone.
To set the date: 1. Touch SETTINGS from the Home Page, then touch Time
and Date.
2. Touch Set Date and touch
«
orªto increase or decrease
month, day, or year. 3. Touch
}to go back to the
previous menu.
To set the clock display: 1. Touch SETTINGS and touch Time and Date.
2. Touch Clock Display and touch OFF or ON to turn the clock
display off or on.
3. Touch
}to go back to the
previous menu.
The clock settings can also be
accessed by touching the time
display, then touching Set.
Power Outlets
Power Outlet 12-Volt Direct
Current
The accessory power outlet can be
used to plug in electrical equipment,
such as a cell phone or MP3 player.
There is an accessory power outlet
on the center floor console in front
of the shift lever. This outlet is
powered when the ignition is in the
ON/RUN or ACC/ACCESSORY
position, or until the driver door is
Page 114 of 405
Chevrolet Cruze Owner Manual (GMNA-Localizing-U.S./Canada/Mexico-
9803785) - 2017 - CRC - 4/13/16
Instruments and Controls 113
opened within 10 minutes of turning
off the vehicle. SeeRetained
Accessory Power (RAP) 0219.
Open the cover to access.
Caution
Leaving electrical equipment
plugged in for an extended period
of time while the vehicle is off will
drain the battery. Always unplug
electrical equipment when not in
use and do not plug in equipment
that exceeds the maximum
20 amp rating.
Certain electrical accessories may
not be compatible with the
accessory power outlet and could
overload vehicle or adapter fuses.
If a problem is experienced, see
your dealer.
When adding electrical equipment,
be sure to follow the installation
instructions included with the
equipment. See Add-On Electrical
Equipment 0262.
Caution
Hanging heavy equipment from
the power outlet can cause
damage not covered by the
vehicle warranty. The power
outlets are designed for
accessory power plugs only, such
as cell phone charge cords.
Power Outlet 110/120V Volt
Alternating Current
If equipped with this power outlet it
can be used to plug in electrical
equipment that uses a maximum
limit of 150 watts.
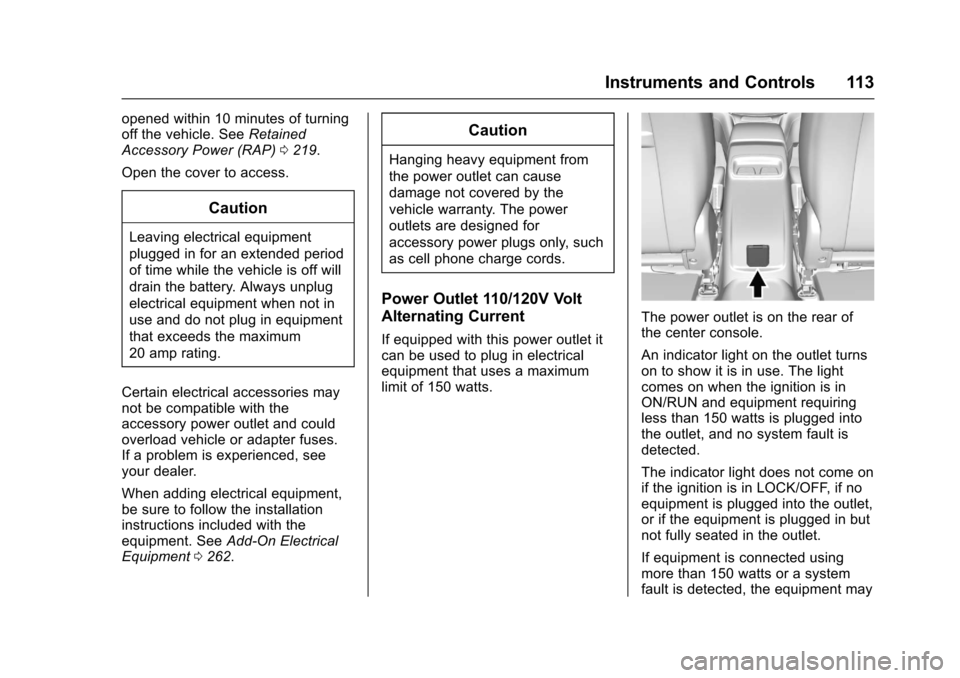
The power outlet is on the rear of
the center console.
An indicator light on the outlet turns
on to show it is in use. The light
comes on when the ignition is in
ON/RUN and equipment requiring
less than 150 watts is plugged into
the outlet, and no system fault is
detected.
The indicator light does not come on
if the ignition is in LOCK/OFF, if no
equipment is plugged into the outlet,
or if the equipment is plugged in but
not fully seated in the outlet.
If equipment is connected using
more than 150 watts or a system
fault is detected, the equipment may
Page 122 of 405
Chevrolet Cruze Owner Manual (GMNA-Localizing-U.S./Canada/Mexico-
9803785) - 2017 - CRC - 4/13/16
Instruments and Controls 121
Units :Presspwhile Units is
displayed to enter the Units menu.
Choose U.S. or metric units by
pressing
Vwhile the desired item is
highlighted.
Info Pages : Press
pwhile Info
Pages is displayed to enter the Info
Pages menu and select the items to
be displayed in the Info app. See
Driver Information Center (DIC)
(Uplevel) 0137 orDriver Information
Center (DIC) (Base Level) 0134.
Speed Warning : The Speed
Warning display allows the driver to
set a speed that they do not want to
exceed. To set the Speed Warning,
press
pwhen Speed Warning is
displayed. Press
worxto adjust
the value. Press
Vto set the speed.
Once the speed is set, this feature
can be turned off by pressing
V
while viewing this page. If the
selected speed limit is exceeded, a
pop-up warning is displayed with a
chime.
Speedometer
The speedometer shows the
vehicle's speed in either kilometers
per hour (km/h) or miles per
hour (mph).
Odometer
The odometer shows how far the
vehicle has been driven, in either
kilometers or miles.
Trip Odometer
The trip odometer shows how far
the vehicle has been driven since
the trip odometer was last reset.
The trip odometer is accessed and
reset through the Driver Information
Center (DIC). See Driver
Information Center (DIC) (Uplevel)
0 137 orDriver Information Center
(DIC) (Base Level) 0134.
Tachometer
The tachometer displays the engine
speed in revolutions per
minute (rpm). For vehicles with the Stop/Start
system, when the ignition is in ON/
RUN, the tachometer indicates the
vehicle status. When pointing to
AUTO STOP, the engine is off but
the vehicle is on and can move. The
engine could auto start at any time.
When the indicator points to OFF,
the vehicle is off.
When the engine is on, the
tachometer will indicate the engine’s
revolutions per minute (rpm). The
tachometer may vary by several
hundred rpm’s, during Auto Stop
mode, when the engine is shutting
off and restarting.
A slight bump may be felt when the
transmission is determining the
most fuel efficient operating range.
Caution
If the engine is operated with the
rpm’s in the warning area at the
high end of the tachometer, the
vehicle could be damaged, and
the damage would not be covered
(Continued)