2017 CHEVROLET CITY EXPRESS light
[x] Cancel search: lightPage 213 of 348
Chevrolet Express Owner Manual (GMNA-Localizing-U.S./Canada/Mexico-
9967827) - 2017 - crc - 9/26/16
212 Driving and Operating
Tow/Haul Mode
This button is on the instrument
panel, to the right of the steering
wheel.
Pressing this button turns on and off
the Tow/Haul Mode.
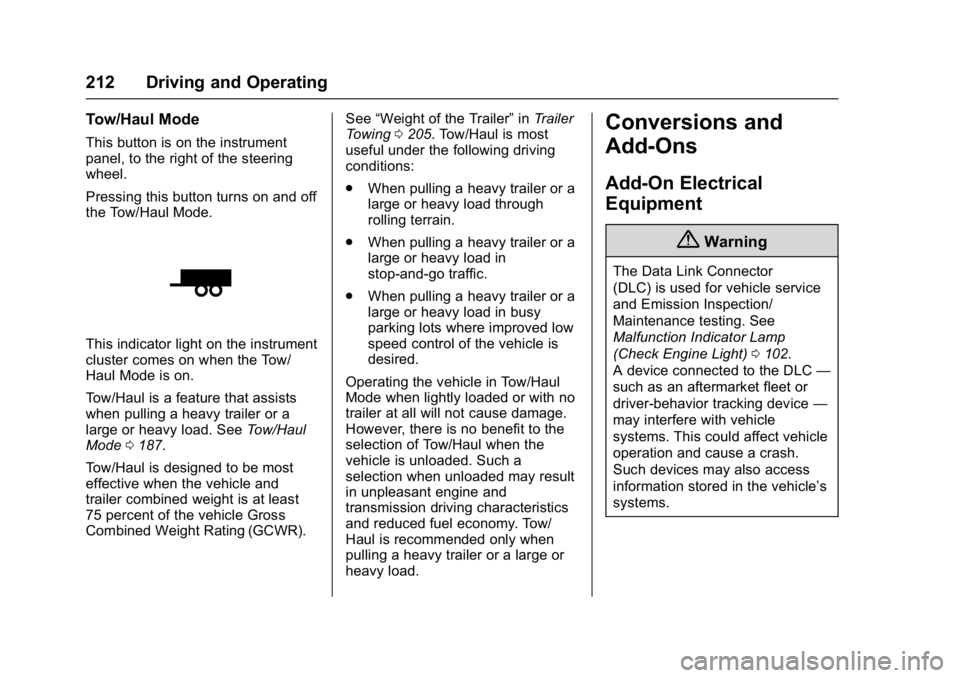
This indicator light on the instrument
cluster comes on when the Tow/
Haul Mode is on.
Tow/Haul is a feature that assists
when pulling a heavy trailer or a
large or heavy load. SeeTow/Haul
Mode 0187.
Tow/Haul is designed to be most
effective when the vehicle and
trailer combined weight is at least
75 percent of the vehicle Gross
Combined Weight Rating (GCWR). See
“Weight of the Trailer” inTrailer
Towing 0205. Tow/Haul is most
useful under the following driving
conditions:
. When pulling a heavy trailer or a
large or heavy load through
rolling terrain.
. When pulling a heavy trailer or a
large or heavy load in
stop-and-go traffic.
. When pulling a heavy trailer or a
large or heavy load in busy
parking lots where improved low
speed control of the vehicle is
desired.
Operating the vehicle in Tow/Haul
Mode when lightly loaded or with no
trailer at all will not cause damage.
However, there is no benefit to the
selection of Tow/Haul when the
vehicle is unloaded. Such a
selection when unloaded may result
in unpleasant engine and
transmission driving characteristics
and reduced fuel economy. Tow/
Haul is recommended only when
pulling a heavy trailer or a large or
heavy load.
Conversions and
Add-Ons
Add-On Electrical
Equipment
{Warning
The Data Link Connector
(DLC) is used for vehicle service
and Emission Inspection/
Maintenance testing. See
Malfunction Indicator Lamp
(Check Engine Light) 0102.
A device connected to the DLC —
such as an aftermarket fleet or
driver-behavior tracking device —
may interfere with vehicle
systems. This could affect vehicle
operation and cause a crash.
Such devices may also access
information stored in the vehicle’s
systems.
Page 224 of 348
Chevrolet Express Owner Manual (GMNA-Localizing-U.S./Canada/Mexico-
9967827) - 2017 - crc - 9/26/16
Vehicle Care 223
Caution (Continued)
fluid could come out and fall on
hot engine parts or exhaust
system parts, starting a fire. Too
little fluid could cause the
transmission to overheat. Be sure
to get an accurate reading if
checking the transmission fluid.
Wait at least 30 minutes with the
engine off, before checking the
transmission fluid level if the vehicle
has been driven:
. In hot weather, when outside
temperatures are above 32 °C
(90 °F).
. The vehicle is heavily loaded.
. At high speed for quite a while in
hot weather.
. In heavy traffic and hot weather.
. While pulling a trailer.
After driving under these conditions,
a hot check can be performed. The
fluid should be hot, which is 71 °C to
93 °C (160 °F to 200 °F). A cold fluid level check can be
performed after the vehicle has
been sitting for eight hours or more
with the engine off, but this is used
only as a reference. Let the engine
run at idle for five minutes if the
outside temperature is between 15 °
C to 32 °C (60 °F to 90 °F). Should
the fluid level be low during this cold
check, the fluid must be checked
warm or hot before adding fluid.
If the outside temperature is colder
than 15 °C (60 °F) or hotter than 32 °
C (90 °F), a cold check cannot be
performed.
A warm fluid level check can be
performed by driving the vehicle
under lightly loaded conditions and
outside temperatures between 10 °C
to 27 °C (50 °F to 80 °F). The
vehicle should be driven for at least
24 km (15 mi) before performing a
warm check. Checking the fluid
warm or hot will give a more
accurate reading of the fluid level
than a cold check.
Because the vehicle is equipped
with a high-efficiency air-to-oil
cooler, the transmission fluid
temperature may not reach therequired hot fluid level checking
temperature under normal lightly
loaded driving vehicle conditions.
Checking the Fluid Level
Prepare the vehicle:
1. Park the vehicle on a level place. Keep the engine
running.
2. With the parking brake applied, place the shift lever in P (Park).
3. With a foot on the brake pedal, move the shift lever through
each gear range, pausing for
about three seconds in each
range. When M is reached,
move the selector from M1
through M3. Then, position the
shift lever in P (Park).
4. Let the engine run at idle for two minutes or more.
Then, without shutting off the
engine, use the steps that follow.
Page 226 of 348
Chevrolet Express Owner Manual (GMNA-Localizing-U.S./Canada/Mexico-
9967827) - 2017 - crc - 9/26/16
Vehicle Care 225
It does not take much fluid,
generally less than 0.5 L (1 pt). Do
not overfill.
Caution
Use of the incorrect automatic
transmission fluid may damage
the vehicle, and the damage may
not be covered by the vehicle
warranty. Always use the
automatic transmission fluid listed
inRecommended Fluids and
Lubricants 0306.
. After adding fluid, recheck the
fluid level as described under
“How to Check Automatic
Transmission Fluid,” earlier in
this section.
. When the correct fluid level is
obtained, push the dipstick back
in all the way; then flip the
handle down to lock the dipstick
in place.
Engine Air Cleaner/Filter
The air cleaner/filter assembly is on
the front of the engine compartment
on the driver side of the vehicle.
See Engine Compartment Overview
0 218.
When to Inspect the Engine Air
Cleaner/Filter
For intervals on changing and
inspecting the engine air filter, see
Maintenance Schedule 0298.
How to Inspect the Engine Air
Cleaner/Filter
Do not start the engine or have the
engine running with the engine air
filter housing open. Before removing
the engine air filter, make sure that
the engine air filter housing and
nearby components are free of dirt
and debris. Remove the engine air
filter. Lightly tap and shake the
engine air filter (away from the
vehicle) to release dust and dirt.
Inspect the engine air filter for
damage, and replace if damaged.
Do not clean the engine air filter or
components with water or
compressed air.
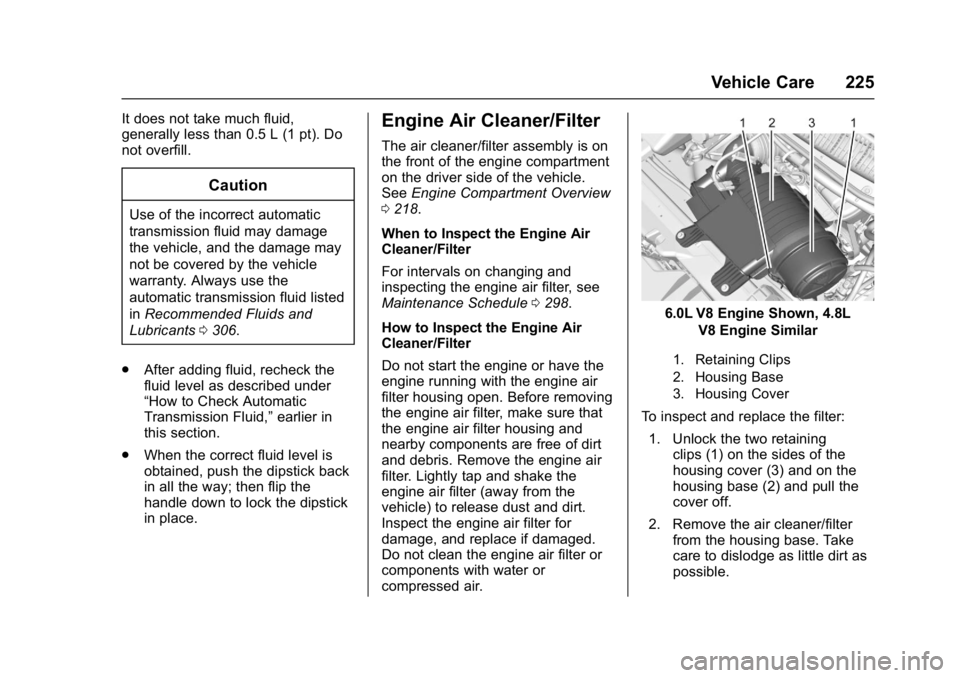
6.0L V8 Engine Shown, 4.8L V8 Engine Similar
1. Retaining Clips
2. Housing Base
3. Housing Cover
To inspect and replace the filter:
1. Unlock the two retaining clips (1) on the sides of the
housing cover (3) and on the
housing base (2) and pull the
cover off.
2. Remove the air cleaner/filter from the housing base. Take
care to dislodge as little dirt as
possible.
Page 235 of 348
Chevrolet Express Owner Manual (GMNA-Localizing-U.S./Canada/Mexico-
9967827) - 2017 - crc - 9/26/16
234 Vehicle Care
Brakes
Disc brake pads have built-in wear
indicators that make a high-pitched
warning sound when the brake pads
are worn and new pads are needed.
The sound can come and go or can
be heard all the time when the
vehicle is moving, except when
applying the brake pedal firmly.
{Warning
The brake wear warning sound
means that soon the brakes will
not work well. That could lead to
a crash. When the brake wear
warning sound is heard, have the
vehicle serviced.
Caution
Continuing to drive with worn-out
brake pads could result in costly
brake repair.Some driving conditions or climates
can cause a brake squeal when the
brakes are first applied or lightly
applied. This does not mean
something is wrong with the brakes.
Properly torqued wheel nuts are
necessary to help prevent brake
pulsation. When tires are rotated,
inspect brake pads for wear and
evenly tighten wheel nuts in the
proper sequence to torque
specifications. See
Capacities and
Specifications 0310.
Brake pads should be replaced as
complete sets.
Brake Pedal Travel
See your dealer if the brake pedal
does not return to normal height,
or if there is a rapid increase in
pedal travel. This could be a sign
that brake service may be required.
Replacing Brake System Parts
Always replace brake system parts
with new, approved replacement
parts. If this is not done, the brakes
may not work properly. The braking
performance expected can change
in many other ways if the wrong replacement brake parts are
installed or if parts are improperly
installed.
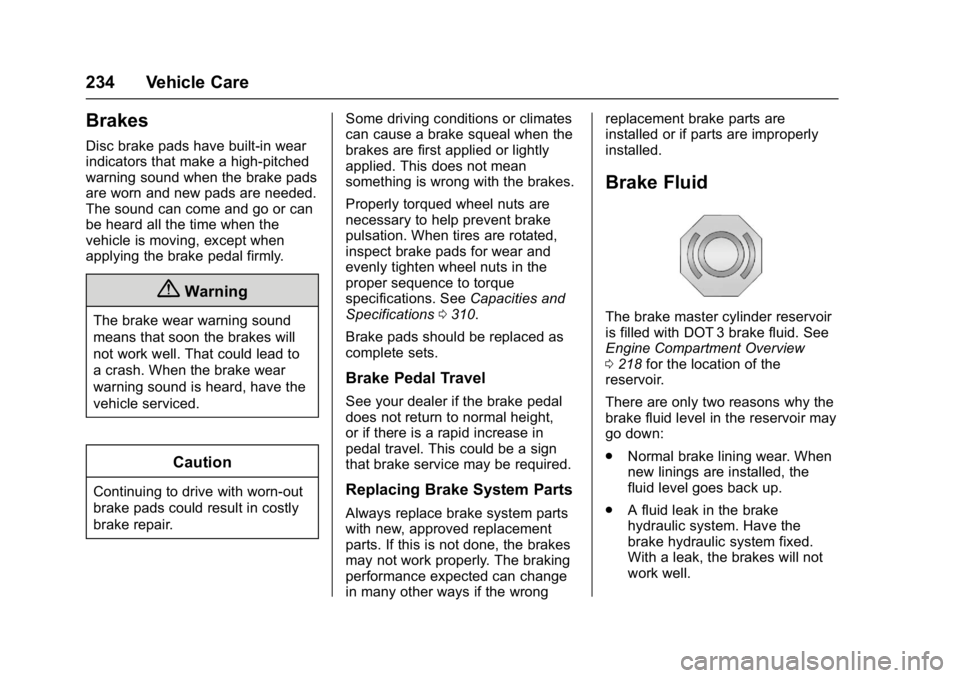
Brake Fluid
The brake master cylinder reservoir
is filled with DOT 3 brake fluid. See
Engine Compartment Overview
0
218 for the location of the
reservoir.
There are only two reasons why the
brake fluid level in the reservoir may
go down:
. Normal brake lining wear. When
new linings are installed, the
fluid level goes back up.
. A fluid leak in the brake
hydraulic system. Have the
brake hydraulic system fixed.
With a leak, the brakes will not
work well.
Page 236 of 348
Chevrolet Express Owner Manual (GMNA-Localizing-U.S./Canada/Mexico-
9967827) - 2017 - crc - 9/26/16
Vehicle Care 235
Always clean the brake fluid
reservoir cap and the area around
the cap before removing it.
Do not top off the brake fluid.
Adding fluid does not correct a leak.
If fluid is added when the linings are
worn, there will be too much fluid
when new brake linings are
installed. Add or remove fluid, as
necessary, only when work is done
on the brake hydraulic system.
{Warning
If too much brake fluid is added, it
can spill on the engine and burn,
if the engine is hot enough. You
or others could be burned, and
the vehicle could be damaged.
Add brake fluid only when work is
done on the brake hydraulic
system.
When the brake fluid falls to a low
level, the brake warning light comes
on. See Brake System Warning
Light 0104. Brake fluid absorbs water over time.
Replace brake fluid at the specified
intervals to prevent increased
stopping distance. See
Maintenance
Schedule 0298.
Checking Brake Fluid
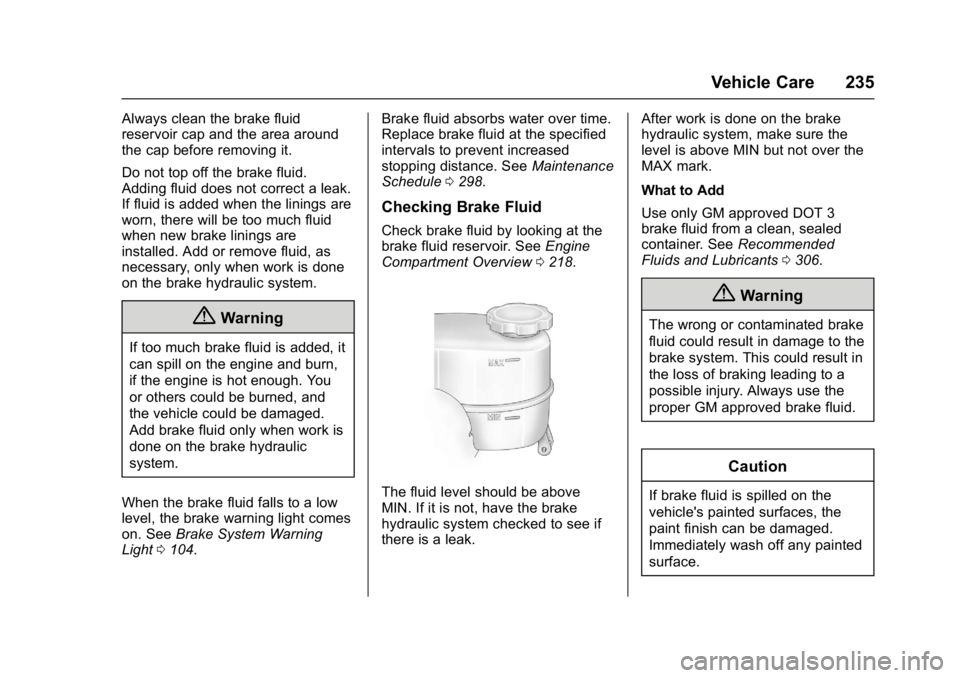
Check brake fluid by looking at the
brake fluid reservoir. See Engine
Compartment Overview 0218.
The fluid level should be above
MIN. If it is not, have the brake
hydraulic system checked to see if
there is a leak. After work is done on the brake
hydraulic system, make sure the
level is above MIN but not over the
MAX mark.
What to Add
Use only GM approved DOT 3
brake fluid from a clean, sealed
container. See
Recommended
Fluids and Lubricants 0306.
{Warning
The wrong or contaminated brake
fluid could result in damage to the
brake system. This could result in
the loss of braking leading to a
possible injury. Always use the
proper GM approved brake fluid.
Caution
If brake fluid is spilled on the
vehicle's painted surfaces, the
paint finish can be damaged.
Immediately wash off any painted
surface.
Page 244 of 348
Chevrolet Express Owner Manual (GMNA-Localizing-U.S./Canada/Mexico-
9967827) - 2017 - crc - 9/26/16
Vehicle Care 243
1. Use a small tool to unlatch theoutboard clip on the lamp by
pushing inboard and prying the
lamp assembly forward.
2. Remove the lamp from the grille.
3. Turn the bulb socket counterclockwise one-quarter
turn and remove it from the
lamp assembly.
4. Remove the bulb from the socket by pulling it straight out.
5. Replace the bulb.
6. Turn the bulb socket clockwise to reinstall it in the lamp
assembly.
7. Reinstall the lamp assembly into the grille until the outboard
clip snaps into place.Taillamps
To replace a taillamp/turn signal
lamp or back-up lamp bulb:
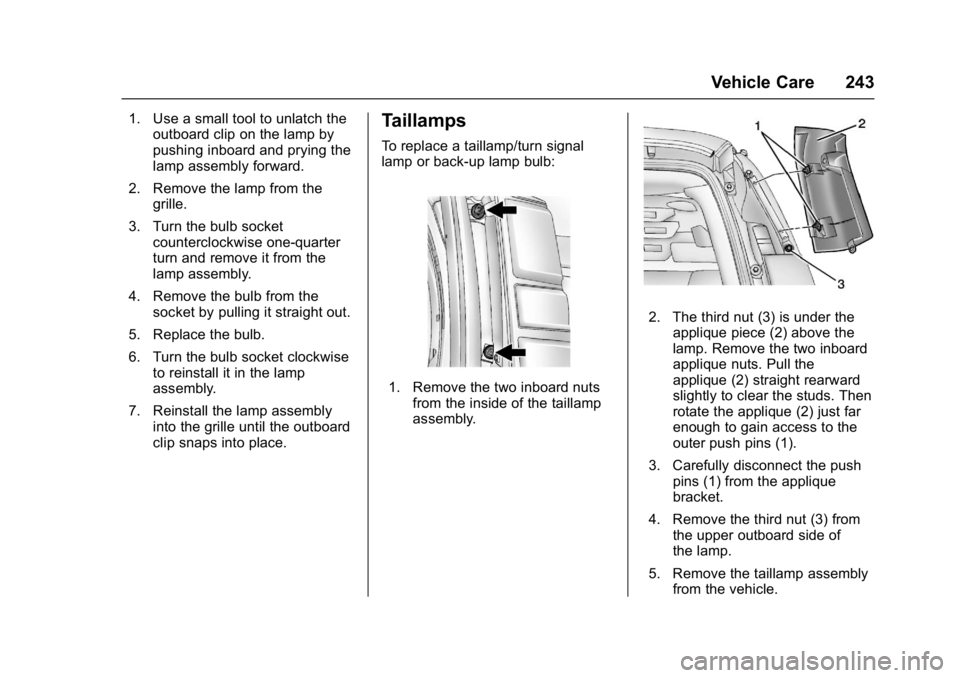
1. Remove the two inboard nutsfrom the inside of the taillamp
assembly.
2. The third nut (3) is under theapplique piece (2) above the
lamp. Remove the two inboard
applique nuts. Pull the
applique (2) straight rearward
slightly to clear the studs. Then
rotate the applique (2) just far
enough to gain access to the
outer push pins (1).
3. Carefully disconnect the push pins (1) from the applique
bracket.
4. Remove the third nut (3) from the upper outboard side of
the lamp.
5. Remove the taillamp assembly from the vehicle.
Page 250 of 348
Chevrolet Express Owner Manual (GMNA-Localizing-U.S./Canada/Mexico-
9967827) - 2017 - crc - 9/26/16
Vehicle Care 249
FusesUsage
67 Daytime running lamps 1 (UPLVL
+V22) (if equipped)
68 Auxiliary stoplamps
69 Trailer stoplamps
70 –
71 Fuel heater/Flex fuel sensor
72 Body control module 6
73 Lighter/Data link connector
74 Front blower
75 Fuel injectors
76 –
77 O2 sensor 2
78 Engine control module/Powertrain
79 Ignition/Injectors –even Relays
Usage
15 Run/Crank
37 –
38 Fuel pump
39 Crank
40 A/C
48 EV fan clutch
49 Powertrain
50 –
57 Cooling fan –low
60 Fan control
Page 255 of 348

Chevrolet Express Owner Manual (GMNA-Localizing-U.S./Canada/Mexico-
9967827) - 2017 - crc - 9/26/16
254 Vehicle Care
Tire Sidewall Labeling
Useful information about a tire is
molded into the sidewall. The
examples show a typical
passenger vehicle and light
truck tire sidewall.
Passenger (P-Metric) Tire
(1) Tire Size:The tire size code
is a combination of letters and
numbers used to define a
particular tire's width, height,
aspect ratio, construction type,
and service description. See the
“Tire Size” illustration later in this
section for more detail. (2) TPC Spec (Tire
Performance Criteria
Specification)
:Original
equipment tires designed to
GM's specific tire performance
criteria have a TPC specification
code molded onto the sidewall.
GM's TPC specifications meet or
exceed all federal safety
guidelines.
(3) DOT (Department of
Transportation)
:The
Department of Transportation
(DOT) code indicates that the
tire is in compliance with the
U.S. Department of
Transportation Motor Vehicle
Safety Standards.
DOT Tire Date of
Manufacture
:The last four
digits of the TIN indicate the tire
manufactured date. The first two
digits represent the week
(01-52) and the last two digits,
the year. For example, the third week of the year 2010 would
have a four-digit DOT date
of 0310.
(4) Tire Identification Number
(TIN)
:The letters and numbers
following the DOT code are the
Tire Identification Number (TIN).
The TIN shows the
manufacturer and plant code,
tire size, and date the tire was
manufactured. The TIN is
molded onto both sides of the
tire, although only one side may
have the date of manufacture.
(5) Tire Ply Material
:The type
of cord and number of plies in
the sidewall and under the tread.
(6) Uniform Tire Quality
Grading (UTQG)
:Tire
manufacturers are required to
grade tires based on three
performance factors: treadwear,
traction, and temperature
resistance. For more
information, see Uniform Tire
Quality Grading 0270.