2017 BMW 6 SERIES GRAN COUPE change time
[x] Cancel search: change timePage 114 of 261

maneuvers or driving over obstacles, for exam‐
ple, curbs, potholes, etc.
Because the possible driving distance de‐
pends on how the vehicle is used during the
trip, the actual distance may be shorter or lon‐
ger depending on the driving speed, road con‐
ditions, external temperature, cargo load, etc.
WARNING
Your vehicle handles differently when a
run-flat tire is damaged and has low or missing
tire inflation pressure, e.g., your lane stability is
reduced when braking, braking distances are
longer and the self-steering properties will
change. There is risk of an accident.
Drive moderately and do not exceed a speed of
50 mph/80 km/h.◀
Final tire failure
Vibrations or loud noises while driving can indi‐
cate the final failure of a tire.
Reduce speed and stop; otherwise, pieces of
the tire could come loose and cause an acci‐
dent.
Do not continue driving. Contact a dealer’s
service center or another qualified service cen‐
ter or repair shop.
Intelligent Safety The concept
Intelligent Safety enables central operation of
the driver assistance system.
Depending on how the vehicle is equipped, In‐
telligent Safety consists of one or more sys‐
tems that can help prevent a imminent colli‐
sion. These systems are active automatically
every time the engine is started using the
Start/Stop button:▷Front-end collision warning, refer to
page 115.▷Pedestrian warning, refer to page 120.Information
WARNING
Indicators and warnings do not relieve
the driver from personal responsibility. Due to
system limits, warnings or reactions of the sys‐
tem may not be output or they may be output
too late or incorrectly. There is risk of an acci‐
dent. Adjust the driving style to the traffic con‐
ditions. Watch traffic closely and actively inter‐
vene in the respective situations.◀
WARNING
Due to system limits, individual functions
can malfunction during tow-starting/towing
with the Intelligent Safety systems activated,
e.g., approach control warning with light brak‐
ing function. There is risk of an accident.
Switch all Intelligent Safety systems off prior to
tow-starting/towing.◀
Overview
Button in the vehicle
Intelligent Safety button
Seite 114ControlsSafety114
Online Edition for Part no. 01 40 2 969 305 - II/16
Page 160 of 261
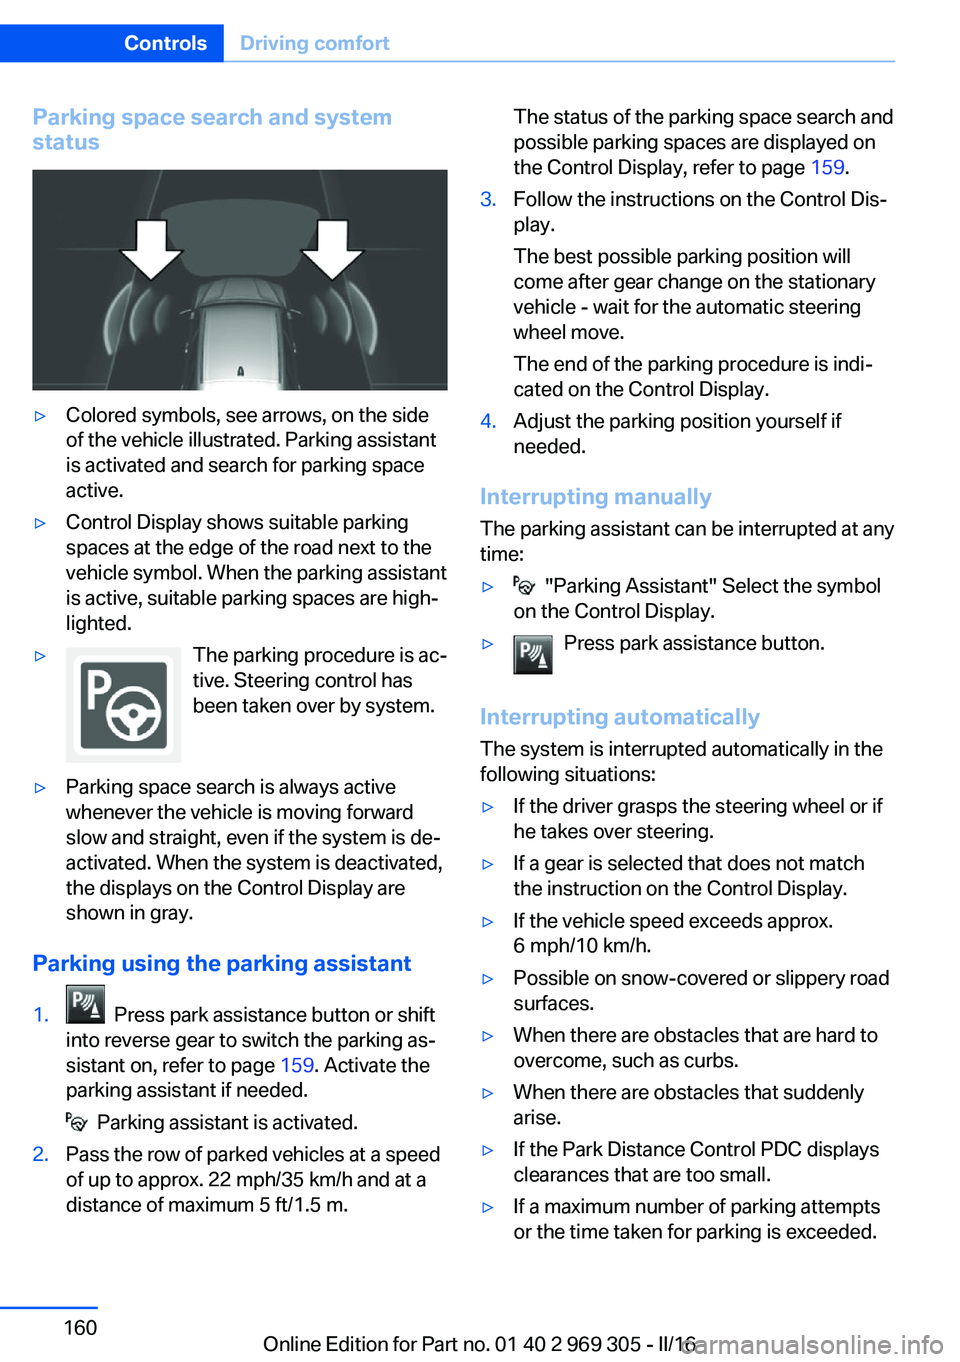
Parking space search and system
status▷Colored symbols, see arrows, on the side
of the vehicle illustrated. Parking assistant
is activated and search for parking space
active.▷Control Display shows suitable parking
spaces at the edge of the road next to the
vehicle symbol. When the parking assistant
is active, suitable parking spaces are high‐
lighted.▷The parking procedure is ac‐
tive. Steering control has
been taken over by system.▷Parking space search is always active
whenever the vehicle is moving forward
slow and straight, even if the system is de‐
activated. When the system is deactivated,
the displays on the Control Display are
shown in gray.
Parking using the parking assistant
1. Press park assistance button or shift
into reverse gear to switch the parking as‐
sistant on, refer to page 159. Activate the
parking assistant if needed.
Parking assistant is activated.
2.Pass the row of parked vehicles at a speed
of up to approx. 22 mph/35 km/h and at a
distance of maximum 5 ft/1.5 m.The status of the parking space search and
possible parking spaces are displayed on
the Control Display, refer to page 159.3.Follow the instructions on the Control Dis‐
play.
The best possible parking position will
come after gear change on the stationary
vehicle - wait for the automatic steering
wheel move.
The end of the parking procedure is indi‐
cated on the Control Display.4.Adjust the parking position yourself if
needed.
Interrupting manually
The parking assistant can be interrupted at any
time:
▷ "Parking Assistant" Select the symbol
on the Control Display.▷Press park assistance button.
Interrupting automatically
The system is interrupted automatically in the
following situations:
▷If the driver grasps the steering wheel or if
he takes over steering.▷If a gear is selected that does not match
the instruction on the Control Display.▷If the vehicle speed exceeds approx.
6 mph/10 km/h.▷Possible on snow-covered or slippery road
surfaces.▷When there are obstacles that are hard to
overcome, such as curbs.▷When there are obstacles that suddenly
arise.▷If the Park Distance Control PDC displays
clearances that are too small.▷If a maximum number of parking attempts
or the time taken for parking is exceeded.Seite 160ControlsDriving comfort160
Online Edition for Part no. 01 40 2 969 305 - II/16
Page 163 of 261

Climate control functions in detail
Switching the system on/off
Switching on
Press any button except:▷Rear window defroster.▷Left side of Air flow button.▷Seat heating.▷Seat ventilation.▷If necessary, SYNC program.
Switching off
▷Complete system: Press and hold the left button on
the driver's side until the control
clicks off.▷On the front passenger side:
Press and hold the left button on
the front passenger side.
Temperature
Turn the ring to set the desired
temperature.
The automatic climate control achieves this
temperature as quickly as possible, if needed
by using the maximum cooling or heating ca‐
pacity, and then keeps it constant.
Do not rapidly switch between different tem‐
perature settings. Otherwise, the automatic cli‐
mate control will not have sufficient time to ad‐
just the set temperature.
Cooling function
The air in the car's interior will be cooled and
dehumidified and, depending on the tempera‐
ture setting, warmed again.
The car's interior can only be cooled with the
engine running.
Press button.
Air conditioning is switched on or off.
Depending on the weather, the windshield and
side windows may fog up briefly when the en‐
gine is started.
The cooling function is switched on automati‐
cally with the AUTO program.
When using the automatic climate control,
condensation water, refer to page 187, devel‐
ops that exits underneath the vehicle.
Maximum cooling Press button.
The system is set to the lowest tem‐
perature, optimum air flow and recirculated-air
mode.
Air flows out of the vents to the upper body re‐
gion. The vents need to be open for this.
The function is available above an external
temperature of approx. 32 ℉/0 ℃ and with the
engine running is indicated.
Adjust air flow with the program active.
AUTO program Press button.
Air flow, air distribution and tempera‐
ture are controlled automatically.
Depending on the selected temperature,
AUTO intensity program and outside influen‐
ces, the air is directed to the windshield, side
windows, upper body, and into the floor area.
The cooling function, refer to page 163, is
switched on automatically with the AUTO pro‐
gram.
At the same time, a condensation sensor con‐
trols the program so as to prevent window
condensation as much as possible.
Intensity of the AUTO program
With the AUTO program activated, the auto‐
matic intensity control can be changed.Seite 163Climate controlControls163
Online Edition for Part no. 01 40 2 969 305 - II/16
Page 166 of 261
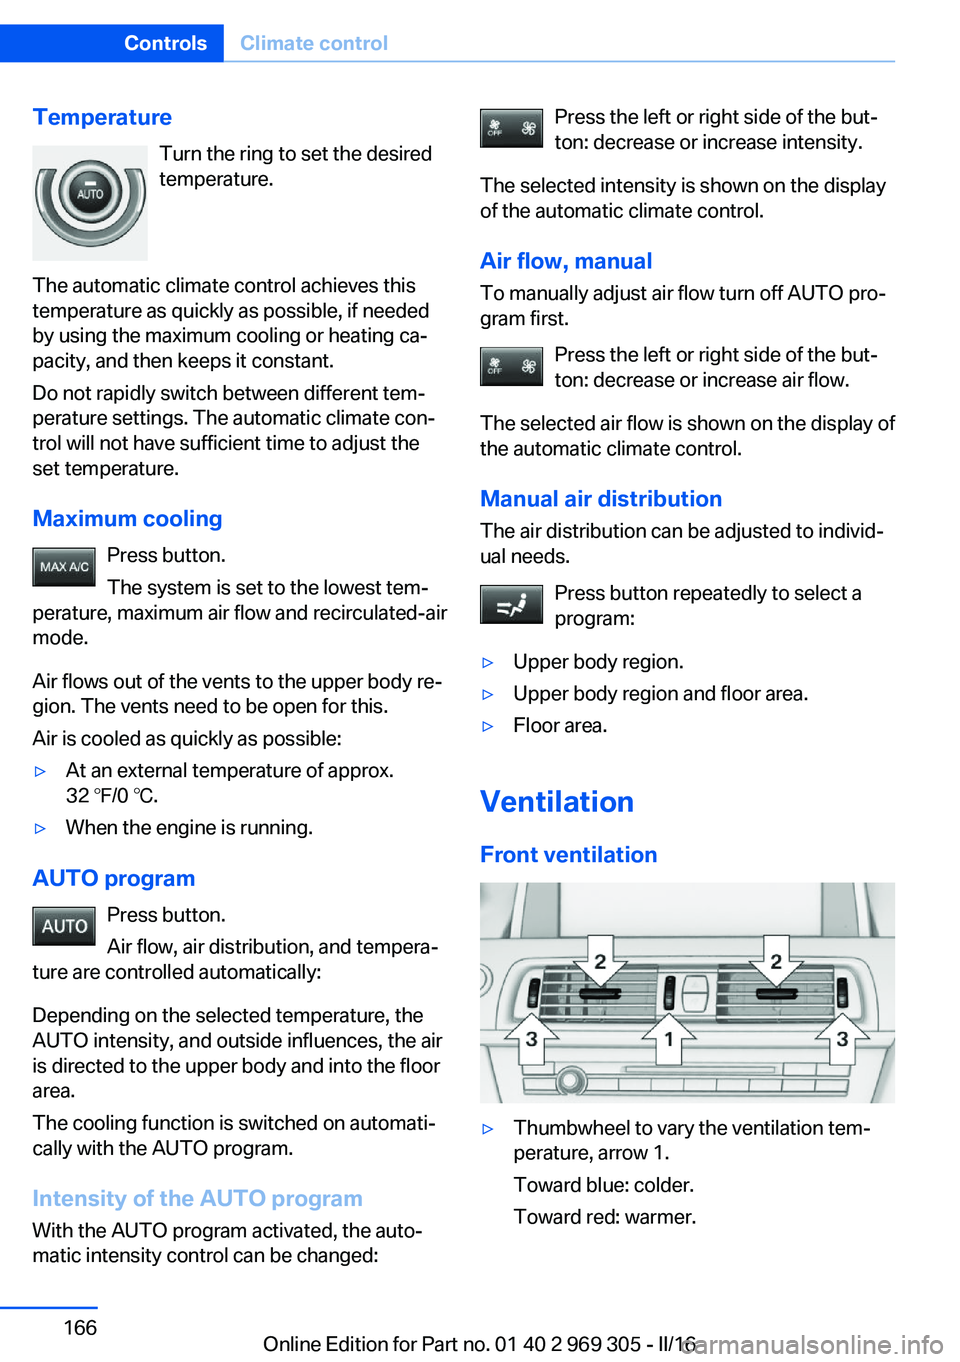
TemperatureTurn the ring to set the desired
temperature.
The automatic climate control achieves this
temperature as quickly as possible, if needed
by using the maximum cooling or heating ca‐
pacity, and then keeps it constant.
Do not rapidly switch between different tem‐
perature settings. The automatic climate con‐
trol will not have sufficient time to adjust the
set temperature.
Maximum cooling Press button.
The system is set to the lowest tem‐
perature, maximum air flow and recirculated-air
mode.
Air flows out of the vents to the upper body re‐
gion. The vents need to be open for this.
Air is cooled as quickly as possible:▷At an external temperature of approx.
32 ℉/0 ℃.▷When the engine is running.
AUTO program
Press button.
Air flow, air distribution, and tempera‐
ture are controlled automatically:
Depending on the selected temperature, the
AUTO intensity, and outside influences, the air
is directed to the upper body and into the floor
area.
The cooling function is switched on automati‐
cally with the AUTO program.
Intensity of the AUTO programWith the AUTO program activated, the auto‐
matic intensity control can be changed:
Press the left or right side of the but‐
ton: decrease or increase intensity.
The selected intensity is shown on the display
of the automatic climate control.
Air flow, manual To manually adjust air flow turn off AUTO pro‐
gram first.
Press the left or right side of the but‐
ton: decrease or increase air flow.
The selected air flow is shown on the display of
the automatic climate control.
Manual air distribution
The air distribution can be adjusted to individ‐
ual needs.
Press button repeatedly to select a
program:▷Upper body region.▷Upper body region and floor area.▷Floor area.
Ventilation
Front ventilation
▷Thumbwheel to vary the ventilation tem‐
perature, arrow 1.
Toward blue: colder.
Toward red: warmer.Seite 166ControlsClimate control166
Online Edition for Part no. 01 40 2 969 305 - II/16
Page 167 of 261
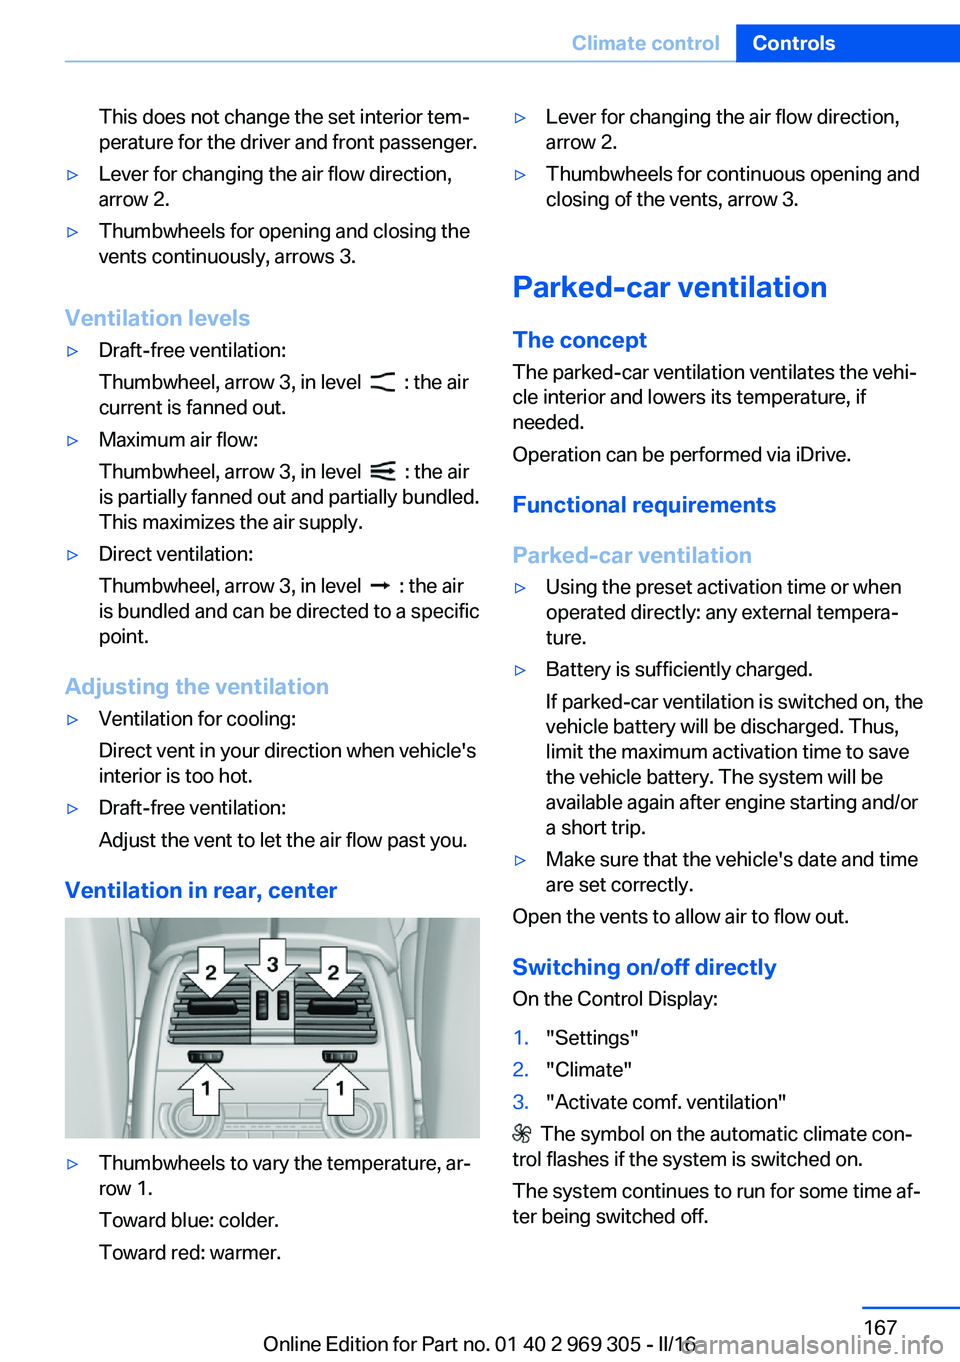
This does not change the set interior tem‐
perature for the driver and front passenger.▷Lever for changing the air flow direction,
arrow 2.▷Thumbwheels for opening and closing the
vents continuously, arrows 3.
Ventilation levels
▷Draft-free ventilation:
Thumbwheel, arrow 3, in level
: the air
current is fanned out.
▷Maximum air flow:
Thumbwheel, arrow 3, in level
: the air
is partially fanned out and partially bundled.
This maximizes the air supply.
▷Direct ventilation:
Thumbwheel, arrow 3, in level
: the air
is bundled and can be directed to a specific
point.
Adjusting the ventilation
▷Ventilation for cooling:
Direct vent in your direction when vehicle's
interior is too hot.▷Draft-free ventilation:
Adjust the vent to let the air flow past you.
Ventilation in rear, center
▷Thumbwheels to vary the temperature, ar‐
row 1.
Toward blue: colder.
Toward red: warmer.▷Lever for changing the air flow direction,
arrow 2.▷Thumbwheels for continuous opening and
closing of the vents, arrow 3.
Parked-car ventilation
The concept The parked-car ventilation ventilates the vehi‐
cle interior and lowers its temperature, if
needed.
Operation can be performed via iDrive.
Functional requirements
Parked-car ventilation
▷Using the preset activation time or when
operated directly: any external tempera‐
ture.▷Battery is sufficiently charged.
If parked-car ventilation is switched on, the
vehicle battery will be discharged. Thus,
limit the maximum activation time to save
the vehicle battery. The system will be
available again after engine starting and/or
a short trip.▷Make sure that the vehicle's date and time
are set correctly.
Open the vents to allow air to flow out.
Switching on/off directly
On the Control Display:
1."Settings"2."Climate"3."Activate comf. ventilation"
The symbol on the automatic climate con‐
trol flashes if the system is switched on.
The system continues to run for some time af‐
ter being switched off.
Seite 167Climate controlControls167
Online Edition for Part no. 01 40 2 969 305 - II/16
Page 170 of 261
proximately 20 seconds until the LED on
the interior mirror flashes. This erases all
programming of the buttons on the interior
mirror.3.Hold the hand-held transmitter for the sys‐
tem to be controlled approx. 1 to 3 in‐
ches/2.5 to 8 cm away from the buttons of
the interior mirror. The required distance
depends on the manual transmitter.4.Simultaneously press and hold the button
of the desired function on the hand-held
transmitter and the button to be program‐
med on the interior mirror. The LED on the
interior mirror will begin flashing slowly.5.Release both buttons as soon as the LED
flashes more rapidly. The LED flashing
faster indicates that the button on the inte‐
rior mirror has been programmed.
If the LED does not flash faster after at
least 60 seconds, change the distance be‐
tween the interior mirror and the hand-held
transmitter and repeat the step. Several
more attempts at different distances may
be necessary. Wait at least 15 seconds be‐
tween attempts.
Canada: if programming with the hand-
held transmitter was interrupted, hold
down the interior mirror button and repeat‐
edly press and release the hand-held
transmitter button for 2 seconds.6.To program other functions on other but‐
tons, repeat steps 3 to 5.
The systems can be controlled using the inte‐
rior mirror buttons.
Special feature of the alternating-code wireless system
If you are unable to operate the system after
repeated programming, please check if the
system to be controlled features an alternat‐
ing-code radio system.
Read the system's owner's manual, or press
the programmed button on the interior mirror
longer. If the LED on the interior mirror starts
flashing rapidly and then stays lit constantly for
2 seconds, the system features an alternating-
code radio system. Flashing and continuous il‐
lumination of the LED will repeat for approxi‐
mately 20 seconds.
For systems with an alternating-code radio
system, the universal remote control and the
system also have to be synchronized.
Please read the owner's manual to find out
how to synchronize the system.
Synchronizing is easier with the aid of a sec‐
ond person.
Synchronizing the universal remote control
with the system:1.Park the vehicle within range of the re‐
mote-controlled system.2.Program the relevant button on the interior
mirror as described.3.Locate and press the synchronizing button
on the system being programmed. You
have approx. 30 seconds for the next step.4.Hold down the programmed button on the
interior mirror for approximately 3 seconds
and then release it. If necessary, repeat this
step up to three times in order to finish
synchronization. Once synchronization is
complete, the programmed function will be
carried out.
Reprogramming individual buttons
1.Switch on the ignition.2.Press and hold the interior mirror button to
be programmed.3.As soon as the interior mirror LED starts
flashing slowly, hold the hand-held trans‐
mitter for the system to be controlled ap‐
prox. 1 to 3 inches/2.5 to 8 cm away from
the buttons of the interior mirror. The re‐
quired distance depends on the manual
transmitter.Seite 170ControlsInterior equipment170
Online Edition for Part no. 01 40 2 969 305 - II/16
Page 192 of 261
▷ECO PRO bonus range, refer to page 192.▷ECO PRO tips driving instruction, refer to
page 193.▷ECO PRO climate control, refer to
page 192.▷ECO PRO coasting driving status, refer to
page 194.
Activate ECO PRO
Press button repeatedly until ECO
PRO is displayed in the instrument
cluster.
Configuring ECO PRO
Via the Driving Dynamics Control
1.Activate ECO PRO.2."Configure ECO PRO"
Via the iDrive
1."Settings"2."Driving mode"3."Configure ECO PRO"
ECO PRO Tip
▷"Tip at:":
Adjust the ECO PRO speed.▷"ECO PRO speed warning":
An ECO PRO tip is displayed if the speed
of the set ECO PRO limit is exceeded.
Coasting
Fuel-efficiency can be optimized by disengag‐
ing the engine and Coasting with the engine
idling.
This function is only available in ECO PRO
mode.
ECO PRO climate control
"ECO PRO climate control"
Climate control is set to be fuel-efficient.
By making a slight change to the set tempera‐
ture, or slowly adjusting the rate of heating or
cooling of the car's interior, fuel consumption
can be economized.
The mirror heating is made available when out‐
side temperatures are very cold.
ECO PRO Efficiency Shows potential savings with the current set‐
tings in percentages.
Display in the instrument cluster
Display in the instrument display
When ECO PRO mode is activated, the display
switches to a special configuration.
Some of the displays may differ from the dis‐
play in the instrument cluster.
Blue bar segments symbolize the gained bo‐
nus range in stages.
In addition, the bonus range is highlighted in
blue in the total range display.
ECO PRO bonus range An adjusted driving style helps
you extend your driving range.
This may be displayed as the
bonus range in the instrument
cluster.
The bonus range is shown in the range display.
The bonus range is automatically reset every
time the vehicle is refueled.Seite 192Driving tipsSaving fuel192
Online Edition for Part no. 01 40 2 969 305 - II/16
Page 222 of 261
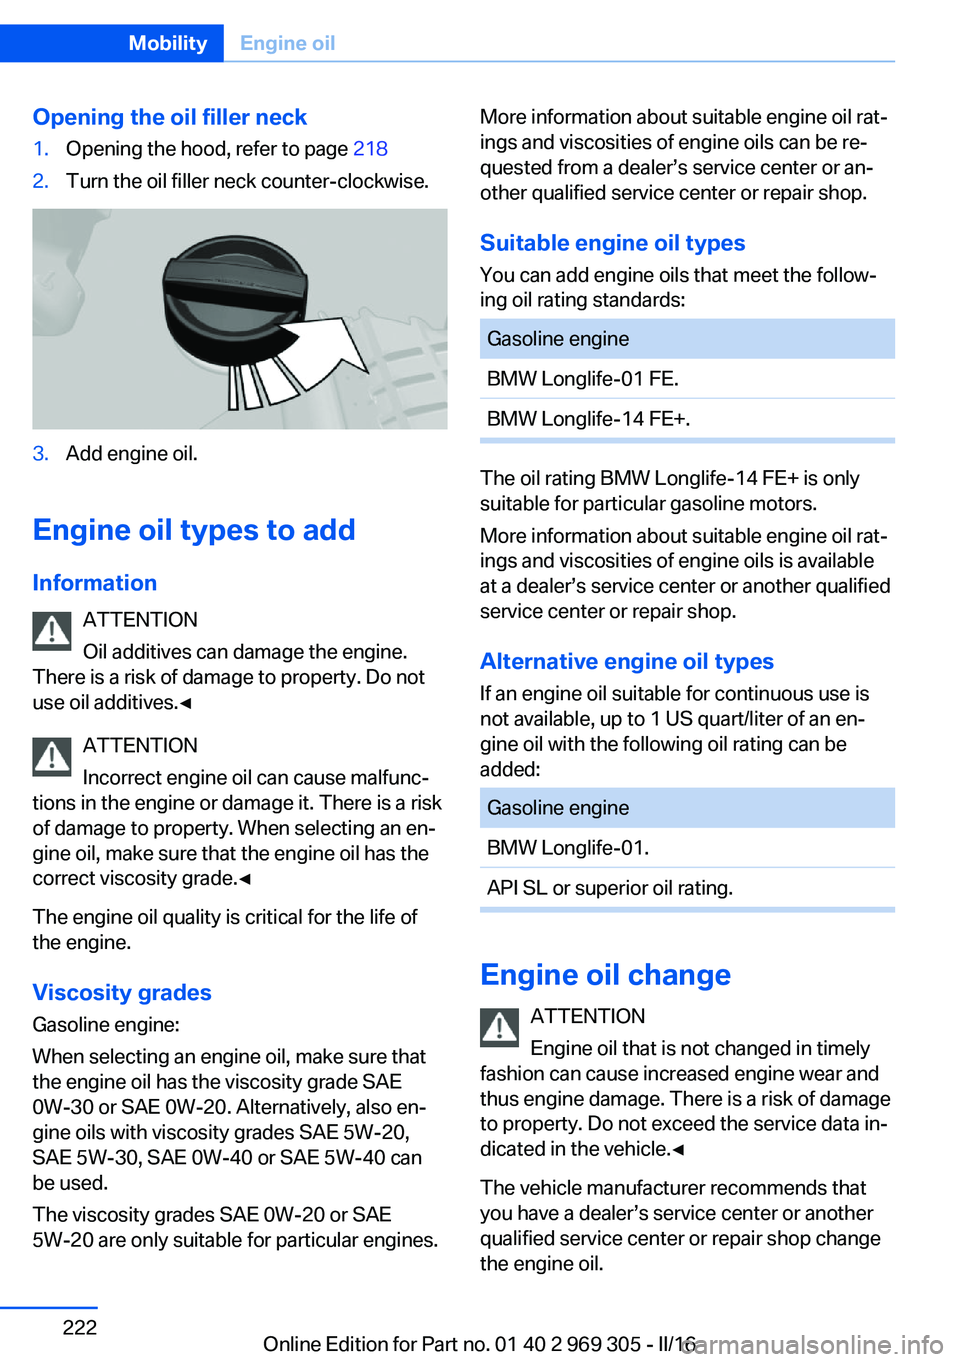
Opening the oil filler neck1.Opening the hood, refer to page 2182.Turn the oil filler neck counter-clockwise.3.Add engine oil.
Engine oil types to add
Information ATTENTION
Oil additives can damage the engine.
There is a risk of damage to property. Do not
use oil additives.◀
ATTENTION
Incorrect engine oil can cause malfunc‐
tions in the engine or damage it. There is a risk
of damage to property. When selecting an en‐
gine oil, make sure that the engine oil has the
correct viscosity grade.◀
The engine oil quality is critical for the life of
the engine.
Viscosity gradesGasoline engine:
When selecting an engine oil, make sure that
the engine oil has the viscosity grade SAE
0W-30 or SAE 0W-20. Alternatively, also en‐
gine oils with viscosity grades SAE 5W-20,
SAE 5W-30, SAE 0W-40 or SAE 5W-40 can
be used.
The viscosity grades SAE 0W-20 or SAE
5W-20 are only suitable for particular engines.
More information about suitable engine oil rat‐
ings and viscosities of engine oils can be re‐
quested from a dealer’s service center or an‐
other qualified service center or repair shop.
Suitable engine oil types
You can add engine oils that meet the follow‐
ing oil rating standards:Gasoline engineBMW Longlife-01 FE.BMW Longlife-14 FE+.
The oil rating BMW Longlife-14 FE+ is only
suitable for particular gasoline motors.
More information about suitable engine oil rat‐
ings and viscosities of engine oils is available
at a dealer’s service center or another qualified
service center or repair shop.
Alternative engine oil typesIf an engine oil suitable for continuous use is
not available, up to 1 US quart/liter of an en‐ gine oil with the following oil rating can be
added:
Gasoline engineBMW Longlife-01.API SL or superior oil rating.
Engine oil change
ATTENTION
Engine oil that is not changed in timely
fashion can cause increased engine wear and
thus engine damage. There is a risk of damage
to property. Do not exceed the service data in‐
dicated in the vehicle.◀
The vehicle manufacturer recommends that
you have a dealer’s service center or another
qualified service center or repair shop change
the engine oil.
Seite 222MobilityEngine oil222
Online Edition for Part no. 01 40 2 969 305 - II/16