2017 Alfa Romeo Giulia stop start
[x] Cancel search: stop startPage 162 of 268
The setting is 4 (maximum) the first time
the system is used. After the distance
has been modified by the driver, the
new distance will be stored also after
the system is deactivated and
reactivated.
To Decrease The Distance
Push and release the distance button to
decrease the distance setting. The
distance setting decreases by one bar
(shorter) every time the button is
pushed.
The set speed is held if there are no
vehicles ahead. Once the shortest
distance has been selected, the next
push of the button will set the
maximum distance.
If a slower vehicle is detected in the
same lane, the vehicle icon on the
display illuminates from grey to white.
The system automatically adjusts thevehicle’s speed to keep the set
distance, independently of the set
speed.
The vehicle holds the set distance until:
The vehicle ahead accelerates to a
speed higher than the set speed.
The vehicle ahead leaves the lane or
the detection field of the Adaptive
Cruise Control system sensor.
The distance setting is changed.
The Adaptive Cruise Control system
is deactivated/paused.
Warning!
The maximum breaking applied by the
system is limited. The driver may apply the
brakes in all cases if needed.
If the system predicts that the braking
level is insufficient to hold the set distance,
either “BRAKE!” or a dedicated message is
displayed to warn the driver of approaching
the vehicle ahead. An acoustic signal is
also emitted. In this case, it is advised to
brake immediately as necessary to hold a
safe distance from the vehicle ahead.
The driver is responsible for ensuring
that there are no pedestrians, other
vehicles or objectives along the direction of
the vehicle. Failure to comply with these
precautions may cause serious accidents
and injuries.
The driver is fully responsible for holding
a safe distance from the vehicle ahead
respecting the highway code in force in the
respective country.
“Stop And Go” Function
The “Stop and Go” operating strategy
allows you to maintain a safe distance
from the vehicle ahead until the vehicle
has completely stopped. It will also
restart the vehicle automatically if the
vehicle ahead drives away within two
seconds, otherwise it is necessary to
press the accelerator pedal or push the
RES button to restart.
Warning!
When the ACC system is resumed, the
driver must ensure that there are no
pedestrians, vehicles or objects in the path
of the vehicle. Failure to follow these
warnings can result in a collision and death
or serious personal injury.
GUID-07146S0015EMDistance Button
160
STARTING AND OPERATING
Page 166 of 268
If the obstacle is detected in the rear left
and/or right area, a single flashing arc
will be shown in the corresponding area
on the display and the system will emit
an acoustic signal, either at frequent
intervals or constantly.
In general, the vehicle is closer to the
obstacle when a single flashing arc is
shown on the display and the acoustic
signal becomes continuous.
If several obstacles are detected
simultaneously in the rear area, the
display will show all of them, regardless
of the area in which they were detected.
The color on the display depends on
the distance from and position of the
obstacle.
It is possible to exit from the display
screen by pressing the Rotary Pad,
however, the acoustic alert will remain
active.
Fault Indication
Parking sensor faults, if any, will be
indicated when REVERSE is engaged
by a message on the instrument cluster
display. Refer to "Warning Lights And
Messages" in "Getting To Know Your
Instrument Panel".
Messages On The Display
In case of system failure, a dedicated
message appears on the instrument
cluster for about 5 seconds.Cleaning The Front Sensors:Ifthe
display shows a message requiring the
sensors to be cleaned, make sure that
the outer surface and the underside of
the rear bumper is free of debris (e.g.
snow, mud, ice, etc.). Once these areas
are clear, place the ignition in STOP
mode. Then, return it to ON mode. If
the message is still displayed, contact
an authorized dealer.
Audio System Not Available :Ifthe
display shows a message that the
audio system is not available, it means
that the acoustic signal will be emitted
by the instrument panel, and not
through the vehicles speakers.
Note: Some conditions may influence
the performance of the ParkSense
system:
Reduced sensor sensitivity could
be due to the presence of ice, snow,
mud, or thick paint on the surface of
the sensor.
The sensors may detect a false
obstacle (echo interference) due to
mechanical interference, for example
when washing the vehicle or in
extreme weather.
The signals sent by the sensors can
be altered by the presence of
ultrasonic systems (e.g. pneumatic
brake systems of trucks or pneumatic
drills) near the vehicle.
System performance can be
influenced by the position of the
sensors. For example, due to a change
in the ride setting (caused by wear to
the shock absorbers or suspension),
by changing tires, overloading the
vehicle or operations that require the
vehicle to be lowered.
Be sure not to place bumper
stickers or other adhesives over the
sensors as this will affect system
performance.
Warning!
Drivers must be careful when backing up
even when using the Parking Sensor
system. Always check carefully behind your
vehicle, and be sure to check for
pedestrians, animals, other vehicles,
obstructions, or blind spots before backing
up. You are responsible for the safety of
your surroundings and must continue to
pay attention while backing up. Failure to
do so can result in serious injury or death.
164
STARTING AND OPERATING
Page 168 of 268
Note:If the sensors detect several
front and rear obstacles, the closest
obstacle is considered. An intermittent
signal will sound if the obstacles are at
the same distance (front and rear).
When the system emits an acoustic
signal, the volume of the Connect
system, if activated, is automatically
lowered.
Indication On Display
The driver can select the type of
warning they would like to be displayed
through the Connect system. To access
the function on the main menu, select in
the following order:
1. “Settings”
2. “Driver assistance”
3. “Park Sensors”
4. “Mode”
5. “Sound-Display”
Visual Indications
The system indicates the presence of
an obstacle by displaying a single arc in
the detected areas, in relation to the
distance of the object and the position
of the vehicle.
If the obstacle is detected in the front or
rear central area, a single arc will be
displayed as the obstacle approaches,
first constant, then flashing, in addition
to an acoustic signal. If the obstacle is detected in the front or
rear left and/or right area, a single
flashing arc will be shown in the
corresponding area on the display and
the system will emit an acoustic signal,
either at frequent intervals or constantly.
If several obstacles are detected
simultaneously in the front and rear
area, the display will show all of them,
regardless of the area in which they
were detected.
In general, the vehicle is closer to the
obstacle when a single or several
flashing arcs are shown on the display
and the acoustic signal becomes
continuous. The color on the display
depends on the distance from and
position of the obstacle.
It is possible to exit from the display
screen by pressing the Rotary Pad,
however, the acoustic alert will remain
active.
Fault Indication
Parking sensor faults, if any, will be
indicated by a message on the display
on the instrument cluster. Refer to
"Warning Lights And Messages" in
"Getting To Know Your Instrument
Panel".
Messages On The Display
In case of system failure, a dedicated
message appears on the instrument
cluster for about 5 seconds.Cleaning the front or rear
sensors: If the display shows a
message requiring the sensors to be
cleaned, make sure that the outer
surface and the underside of the front
and rear bumpers are free of debris
(e.g. snow, mud, ice, etc.). Once these
areas are clear, place the ignition in
STOP mode. Then, return it to ON
mode. If the message is still displayed,
contact an authorized dealer.
Audio system not available :Ifthe
display shows a message that the
audio system is not available, it means
that the acoustic signal will be emitted
by the instrument panel, and not
through the vehicles speakers.
Note: Some conditions may influence
the performance of the ParkSense
system:
Reduced sensor sensitivity could
be due to the presence of ice, snow,
mud, or thick paint on the surface of
the sensor.
The sensors may detect a false
obstacle (echo interference) due to
mechanical interference, for example
when washing the vehicle or in
extreme weather.
The signals sent by the sensors can
be altered by the presence of
ultrasonic systems (e.g. pneumatic
brake systems of trucks or pneumatic
drills) near the vehicle.
166
STARTING AND OPERATING
Page 174 of 268
Messages On The Display
If the trunk lid is lifted, the camera will
not detect any obstacle behind the
vehicle. The display will show a
dedicated warning message.
Make sure the trunk lid is closed by
pushing next to the lock until it clicks.
Important Notes
Ice, snow or mud on the surface of
the camera may reduce its sensitivity. It
is important to keep the camera surface
clean, and free from debris.
When parking, take care over
obstacles that may be above or under
the camera range.
REFUELING THE
VEHICLE
Refueling The Vehicle
Before refueling, make sure that the fuel
type is correct.
Also, stop the engine before refueling.
Note: An inefficient catalytic converter
leads to harmful exhaust emissions,
thus contributing to air pollution.
Caution!
Never introduce leaded fuel to the tank,
even in small amounts in an emergency, as
this would damage the catalytic converter
beyond repair.
Refueling Capacity
To ensure that you fill the tank
completely, top off twice after the first
click of the fuel nozzle.
Further top-off could cause faults in the
fuel feeding system.
Refueling Procedure
The fuel filler door is unlocked when the
central door locking system is
unlocked. It is automatically locked
when the central locking system is
applied. Opening The Fuel Filler Door
To refuel proceed as follows:
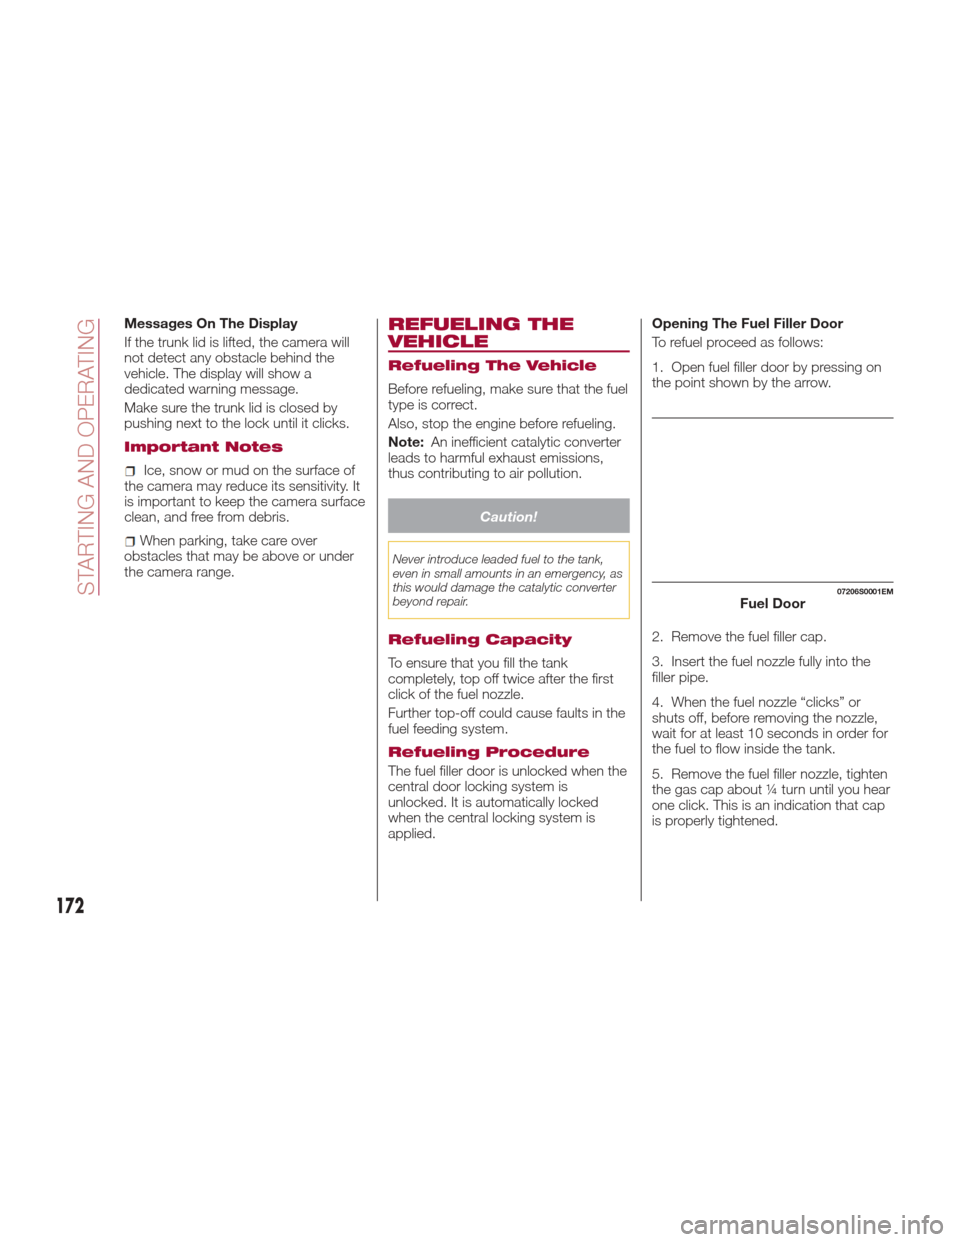
1. Open fuel filler door by pressing on
the point shown by the arrow.
2. Remove the fuel filler cap.
3. Insert the fuel nozzle fully into the
filler pipe.
4. When the fuel nozzle “clicks” or
shuts off, before removing the nozzle,
wait for at least 10 seconds in order for
the fuel to flow inside the tank.
5. Remove the fuel filler nozzle, tighten
the gas cap about ¼ turn until you hear
one click. This is an indication that cap
is properly tightened.
07206S0001EMFuel Door
172
STARTING AND OPERATING
Page 177 of 268

TRAILER TOWING
Trailer Towing — If
Equipped
Trailer towing is not recommended for
this vehicle.
SUGGESTIONS FOR
DRIVING
Saving Fuel
Below are some suggestions which
may help you save fuel and lower the
amount of harmful emissions released
into the atmosphere.
Vehicle maintenance
Checks and operations should be
carried out in accordance with the
"Scheduled Servicing" (see chapter
"Servicing And Maintenance").
Tires
Check the tire pressures at least once
every four weeks: if the pressure is too
low, consumption levels increase as
resistance to rolling is higher.
Unnecessary loads
Do not travel with an overloaded trunk.
The weight of the vehicle and its
arrangement greatly affect fuel
consumption and stability.
Electric devices
Use electrical systems only for the
amount of time needed. The rear
window defroster, additional headlights,
windshield wipers and heater blower
fan require a considerable amount of
energy; increasing the current uptake
increases fuel consumption (by up to
+25% when city driving).Climate control system
Using the climate control system will
increase consumption: use standard
ventilation when the temperature
outside permits.
Devices for aerodynamic control
The use of non-certified devices for
aerodynamic control may adversely
affect air drag and consumption levels.
Driving Style
Starting
Do not warm up the engine at low or
high revs when the vehicle is stationary;
this causes the engine to warm up
more slowly, thereby increasing fuel
consumption and emissions. It is
therefore advisable to drive off
immediately, slowly, avoiding high
speeds: by doing this the engine will
warm up more quickly.
Unnecessary Actions
Avoid revving up when starting at traffic
lights or before stopping the engine.
This action is unnecessary and causes
increased fuel consumption and
pollution.
Gear Selection
Use a high gear when traffic and road
conditions allow it. Using a low gear for
faster acceleration will increase fuel
consumption. Improper use of a high
gear increases consumption, emissions
and engine wear.
175
Page 178 of 268

Max. Speed
Fuel consumption considerably
increases as speed increases. Maintain
a constant speed, avoiding
unnecessary braking and acceleration,
which cost in terms of both fuel
consumption and emissions.
Acceleration
Accelerating violently severely affects
consumption and emissions:
acceleration should be gradual and
should not exceed the maximum
torque.
Conditions Of Use
Cold Starting
Short trips and frequent cold starts will
not allow the engine to reach optimum
operating temperature. This results in a
significant increase in consumption
levels (from +15 to +30% in city driving)
and emissions.
Traffic And Road Conditions
High fuel consumption is caused by
heavy traffic, for instance when
travelling in traffic with frequent use of
low gears or in cities with many traffic
lights. Winding mountain roads and
rough road surfaces also adversely
affect consumption.
Stops In Traffic
During prolonged stops (e.g. railway
crossings) switch off the engine.
Transporting
Passengers
Warning!
It is extremely dangerous to leave
children in a parked vehicle when the
temperature outside is very high. The heat
inside the passenger compartment may
have serious, or even fatal, consequences.
Never travel in the trunk of the vehicle. In
the event of an accident, anyone inside the
trunk would be at greater risk of serious or
even fatal injury.
Ensure that all the occupants of the
vehicle wear their seat belts correctly and
that any children are positioned correctly
on the dedicated child restraint systems.
Transporting Animals
The intervention of the airbags may be
dangerous for an animal on the front
seat. It is therefore advised to arrange
animals on the rear seat inside
dedicated cages restrained by the
vehicle’s seat belts.
Keep in mind that, in the event of a
sudden braking or an accident, an
inadequately restrained animal may be
projected within the passenger
compartment, risking injury to the
animal itself and the other occupants of
the vehicle.
Exhaust Gas
Exhaust emissions are very dangerous,
and may be lethal. They contain carbon
monoxide, a colorless, odorless gas
which can cause fainting and poisoning
if inhaled.
To avoid inhaling carbon monoxide,
take the following measures:
Do not keep the engine running in
closed spaces.
If, for some reason (e.g. transporting
bulky loads), it is necessary to drive
with the trunk open, close all the
windows and run the climate control fan
at maximum speed. DO NOT activate
air recirculation mode.
Should it be necessary to stay in the
stationary vehicle with engine running,
adjust the ventilation/heating system
and operate the fan in such a way that
outside air will enter the passenger
compartment. Activate the maximum
fan speed.
Maintenance of the exhaust system
provides the best protection against
leaks of carbon monoxide into the
passenger compartment.
Should an unusual noise from the
exhaust system or the presence of
exhaust gas in the passenger
compartment be identified, or if the
underbody or rear section of the vehicle
is damaged, have the entire exhaust
system and bodywork areas checked
to identify any components which are
176
STARTING AND OPERATING
Page 195 of 268
Inflation Procedure
Warning!
Do not attempt to seal a tire on the side
of the vehicle closest to traffic. Pull far
enough off the road to avoid the danger of
being hit when using the Tire Service Kit.
Do not use Tire Service Kit or drive the
vehicle under the following circumstances:
If the puncture in the tire tread is
approximately 1/4 inch (6 mm) or larger.
If the tire has any sidewall damage.
If the tire has any damage from driving
with extremely low tire pressure.
If the tire has any damage from driving
on a flat tire.
If the wheel has any damage.
If you are unsure of the condition of the
tire or the wheel.
Keep Tire Service Kit away from open
flames or heat sources.
A loose Tire Service Kit thrown forward
in a collision or hard stop could endanger
the occupants of the vehicle. Always stow
the Tire Service Kit in the place provided.
Failure to follow these warnings can result
in injuries that are serious or fatal to you,
your passengers, and others around you.
Take care not to allow the contents of
Tire Service Kit to come in contact with
hair, eyes, or clothing. Tire Service Kit
sealant is harmful if inhaled, swallowed, or
absorbed through the skin. It causes skin,
eye, and respiratory irritation. Flush
immediately with plenty of water if there is
any contact with eyes or skin. Change
clothing as soon as possible, if there is any
contact with clothing.
Tire Service Kit Sealant solution contains
latex. In case of an allergic reaction or rash,
consult a physician immediately. Keep Tire
Service Kit out of reach of children. If
swallowed, rinse mouth immediately with
plenty of water and drink plenty of water.
Do not induce vomiting! Consult a
physician immediately.
To use your Tire Repair Kit, proceed as
follows:
1. Engage the electric parking brake.
2. Insert the sealant cartridge
containing the sealing liquid in the
proper compressor holder, pushing
down hard. Unscrew the tire valve cap,
take out the filler tube and tighten the
ring nut on the tire valve. 3. Make sure the power switch of the
compressor is in the off position (O).
4. Insert the plug into the power outlet
in the center console, then start the
engine.
08066S0004EMAttaching Filler Tube To Deflated
Tire
1— Sealant Cartridge
2— Filler Tube
193
Page 196 of 268

5. Start the compressor by placing the
power switch in the on position (I).
6. Inflate the tire to the pressure
indicated on the tire placard, located on
the driver’s side B-Pillar or the rear edge
of the driver’s side door. Refer to “Tires”
in “Servicing And Maintenance” for
more information. In order to obtain a
more precise reading, check the
pressure value on pressure gauge with
the compressor off.7. If the pressure is not at least
26.1 psi (1.8 bar) after 15 minutes,
disengage the compressor from the
valve and power outlet. Then, move the
vehicle forwards approximately five tire
turns in order to distribute the sealing
fluid inside the tire evenly, and then
repeat the inflation operation.
8. If you still cannot obtain a pressure
of at least 26 psi (1.8 bar) within
15 minutes from the compressor
switching on, do not drive the vehicle,
and contact an authorized dealer.9. Drive the vehicle for about 5 miles
(8 km), stop, engage the electric
parking brake, and recheck the tire
pressure.
10. If the pressure is less than 26 psi
(1.8 bar),
Do Notdrive the vehicle, and
see an authorized dealer.
11. If a pressure value of at least 26 psi
(1.8 bar) is detected, restore the correct
pressure (with engine running and
electric parking brake engaged), and
drive immediately with great care to an
authorized dealer.
Warning!
Tire Repair Kit is not a permanent flat tire
repair. Have the tire inspected and repaired
or replaced after using Tire Repair Kit. Do
not exceed 50 mph (80 km/h) until the tire
is repaired or replaced. Failure to follow this
warning can result in injuries that are
serious or fatal to you, your passengers,
and others around you. Have the tire
checked as soon as possible at an
authorized dealer.
08066S0006EMCenter Console Power Outlet08066S0005EMAir Compressor
5— Power Switch
6— Pressure Gauge
194
IN CASE OF EMERGENCY