Page 217 of 268

Warning!
Use only refrigerants and compressor
lubricants approved by the manufacturer
for your air conditioning system. Some
unapproved refrigerants are flammable and
can explode, injuring you. Other
unapproved refrigerants or lubricants can
cause the system to fail, requiring costly
repairs. Refer to Warranty Information
Book, located in your owner’s information
kit, for further warranty information.
Lubricating Moving
Parts Of The Bodywork
Ensure that the locks and bodywork
junction points, including components
such as the seat guides, door hinges
(and rollers), trunk and hood are
periodically lubricated with
lithium-based grease to ensure correct,
silent operation and to protect them
from rust and wear.
Thoroughly clean the components,
eliminating every trace of dirt and dust.
After lubricating, eliminate excess oil
and grease. Also pay particular
attention to the hood closing devices,
to ensure correct operation. During
operations on the hood, to be carried
out with the engine cold, also
remember to check, clean and lubricate
the locking, release and safety devices.Lubricate the external lock barrels twice
a year. Apply a small amount of
high-quality lubricant directly into the
lock barrel.
If necessary, contact your authorized
dealer as soon as possible.
Windshield Wiper
Periodically clean the windshield and
rear window and rubber profile of the
windshield wiper blades, using a
sponge or a soft cloth and a
non-abrasive detergent. This eliminates
the salt or impurities accumulated when
driving.
Prolonged operation of the windshield
window wipers with dry glass may
cause the deterioration of the blades, in
addition to abrasion of the surface of
the glass. To eliminate the impurities on
the dry glass, always operate the
windshield washers.
In the event of very low outdoor
temperatures, below zero degrees,
ensure that the movement of the rubber
part in contact with the glass is not
obstructed. Use a suitable deicing
product to release it if required.
Avoid using the windshield wipers to
remove frost or ice.
Also avoid contact of the rubber profile
of the blades with petroleum derivatives
such as engine oil, gas, etc.
Warning!
Driving with worn windshield wiper blades
is a serious hazard, because visibility is
reduced in bad weather conditions.
Note:
The life of the windshield wiper blades
varies according to the usage
frequency. In any case, it is advised to
replace the blades approximately once
a year. When the blades are worn,
noise, marks on the glass or streaks of
water may be noticed. In the presence
of these conditions, clean the
windshield wiper blades or, if necessary,
replace them.
Raising The Windshield Wiper
Blades ("Service Position"
Function)
The "service position" function allows
the driver to replace the windshield
wiper blades more easily. It is also
recommended to activate this function
when it is snowing and to make it easier
to remove any dirt deposits in the area
where the blades are normally
positioned, when washing.
Activation Of The Function
To activate this function, disable the
windshield wiper before setting the
ignition device to STOP.
215
Page 218 of 268

This function can only be activated
within two minutes of cycling the
ignition to STOP.
To activate this function, move the lever
upward for at least three seconds.
Function deactivation
The function is deactivated if:
Wait for longer than two minutes
before turning the ignition to the STOP
position, after having raised the lever
and starting the service procedure in
this way.
The ignition is cycled to position ON
and the windshield wiper control.
If, after using the function, the ignition is
set back to ON with the blades in a
position other than rest position (at the
base of the windshield), they will only
return to rest position following a
command given using the stalk (stalk
upwards, into unstable position) or when a speed of 3 mph (5 km/h) is
exceeded.
Replacing The Windshield Wiper
Blades
Proceed as follows:
Raise the wiper arm, press tab of
the attachment spring and remove
the blade from the arm.
Fit the new blade, inserting the tab
in the dedicated housing in the arm
and checking that it is
locked.Lower the wiper arm onto
the windshield.
Note:
Do not operate the windshield
wiper with the blades lifted from the
windshield.
Windshield Washer
The window washer nozzles are fixed. If
there is no jet of fluid, first check that there is fluid in the reservoir (see
paragraph “Engine compartment” in
this chapter).
Then, check that the nozzle holes are
not clogged; use a needle to unblock
them if necessary.
Exhaust System
Adequate maintenance of the engine
exhaust system represents the best
protection against leaks of carbon
monoxide into the passenger
compartment.
If an unusual noise from the exhaust or
the presence of smoke in the
passenger compartment is identified, or
if the underbody or rear section of the
vehicle have been damaged, have the
entire exhaust system and adjoining
09046S0001EMMultifunction Lever
09046S0002EMWiper Release Tab
09046S0003EMWindshield Washers
1 — Washer Nozzles
216
SERVICING AND MAINTENANCE
Page 219 of 268

bodywork areas checked at your
authorized dealer to identify any
components which are broken,
damaged, worn or have moved from
their correct fitting position.
Open welding or loose connections
may permit exhaust gas to enter the
passenger compartment.
Have the exhaust system checked
every time the vehicle is raised. Replace
the components where necessary (for
these operations, contact an authorized
dealer).
In normal operating conditions, the
catalytic converter does not require
maintenance. To ensure that it operates
correctly, however, and prevent it from
getting damaged, it is extremely
important that the engine operates
perfectly.
To minimize the risk of damaging the
catalytic converter, proceed as follows:
Do not stop the engine or deactivate
the ignition with gear engaged and
vehicle in motion.
Do not attempt to start the engine
by bump starting.
Do not persist in using the vehicle if
idling is very irregular or the operating
conditions are very notably irregular.
Warning!
Exhaust gases can injure or kill. They
contain carbon monoxide (CO), which is
colorless and odorless. Breathing it can
make you unconscious and can eventually
poison you.
A hot exhaust system can start a fire if
you park over materials that can burn.
Such materials might be grass or leaves
coming into contact with your exhaust
system. Do not park or operate your
vehicle in areas where your exhaust system
can contact anything that can burn.
Cooling System
Warning!
Turn vehicle off and disconnect the fan
motor lead before working near the radiator
cooling fan.
You or others can be badly burned by
hot engine coolant (antifreeze) or steam
from your radiator. If you see or hear steam
coming from under the hood, do not open
the hood until the radiator has had time to
cool. Never open a cooling system
pressure cap when the radiator or coolant
bottle is hot.
Keep hands, tools, clothing, and jewelry
away from the radiator cooling fan when
the hood is raised. The fan starts
automatically and may start at any time,
whether the engine is running or not.
When working near the radiator cooling
fan, disconnect the fan motor lead or turn
the ignition to the OFF mode. The fan is
temperature controlled and can start at any
time the ignition is in the ON mode.
You or others can be badly burned by
hot engine coolant (antifreeze) or steam
from your radiator. If you see or hear steam
coming from under the hood, do not open
the hood until the radiator has had time to
cool. Never try to open a cooling system
pressure cap when the radiator is hot.
Engine Coolant Check
Check the engine coolant level every oil
change or before long trips.
If there are impurities in the engine
coolant, the system must be drained,
flushed and refilled: contact an
authorized dealer.
Check the front part of the condenser
to check for any build-up of insects,
leaves or other debris. Should it be
dirty, clean it by spraying delicately with
water.
Check the hoses of the engine cooling
system to ensure that the rubber has
not deteriorated and that there are no
cracks, tears, cuts or obstructions in
the expansion tank side and radiator
side connectors. Should there be any
217
Page 220 of 268
,
have the seal checked at an authorized
dealer.
With the engine off and at normal
operating temperature, check that the
co")
doubt regarding leaks from the system
(e.g. if frequent top ups are required),
have the seal checked at an authorized
dealer.
With the engine off and at normal
operating temperature, check that the
cooling system radiator cap is closed
properly.
Warning!
Do not open hot engine cooling system.
Never add engine coolant (antifreeze) when
the engine is overheated. Do not loosen or
remove the cap to cool an overheated
engine. Heat causes pressure to build up in
the cooling system. To prevent scalding or
injury, do not remove the pressure cap
while the system is hot or under pressure.
Do not use a pressure cap other than
the one specified for your vehicle. Personal
injury or engine damage may result.
Note:
Before removing the engine coolant
reservoir cap, wait for the system to
cool down. Topping Up / Draining / Flushing
The Engine Coolant
If the engine coolant (antifreeze) is dirty,
have cleaning and flushing carried out
at an authorized dealer.
See the "Maintenance Plan" for the
correct servicing intervals.
Note:
For topping up, use a fluid with the
same characteristics as those
indicated in the "Fluids And
Lubricants" table (see "Technical
Specifications" chapter).
Do not use pure water,
alcohol-based coolants, corrosions
inhibitors or additional anti-rust
products because they may be
incompatible with the engine coolant
and cause the clogging of the radiator.
The use of propylene glycol-based
coolant is also not recommended.
Engine Cooling System Cap
To prevent loss of engine coolant, make
sure that the expansion tank cap is
closed. If it is open, screw it completely
until you reach/hear the click.
Periodically check the cap and clean it
from any foreign bodies that may have
deposited on the external surface.
Warning!
Never add coolant with the engine hot
or overheated.
Do not attempt to cool an overheated
engine by loosening or removing the cap.
The heat causes a considerable increase in
pressure in the cooling system.
To prevent damage to the engine, only
use the engine cooling circuit caps
provided.
Disposal of Used Engine Coolant
Disposal of engine coolant is subject to
legal requirements: contact the
appropriate body to determine local
regulations.
Note:
To prevent the fluid from being
ingested by children or animals, do
not keep it in open containers or pour
it on the ground. If ingested, contact a
doctor immediately. Eliminate any
traces of fluid from the ground
immediately.
When the vehicle stops after a short
trip, steam may be seen coming out
from front of the hood. This is a
normal phenomenon which is due to
the presence of rain, snow or a lot of
moisture on the surface of the radiator.
218
SERVICING AND MAINTENANCE
Page 221 of 268

With engine and system cold, do
not top up with coolant beyond the
maximum level indicated on the
reservoir in the engine compartment.
Braking System
In order to guarantee the efficiency of
the braking system, periodically check
its components; for this operation,
contact an authorized dealer.
See the "Maintenance Plan" for the
correct servicing intervals.
Note: Driving with your foot resting on
the brake pedal may compromise its
efficiency, increasing the risk of
accidents. When driving, never keep
your foot on the brake pedal and don’t
put unnecessary strain on it to prevent
the brakes from overheating: excess
pad wear may cause damage to the
braking system.
When an insufficient oil level is
detected, contact an authorized dealer
to have the system checked.
Always keep the cap of the brake
fluid reservoir (in the engine
compartment) completely closed.
Warning!
Use only manufacturer's recommended
brake fluid. Refer to “Fluids And Lubricants”
in “Technical Specifications” for further
information. Using the wrong type of brake
fluid can severely damage your brake
system and/or impair its performance. The
proper type of brake fluid for your vehicle is
also identified on the original factory
installed hydraulic master cylinder reservoir.
To avoid contamination from foreign
matter or moisture, use only new brake
fluid or fluid that has been in a tightly
closed container. Keep the master cylinder
reservoir cap secured at all times. Brake
fluid in a open container absorbs moisture
from the air resulting in a lower boiling
point. This may cause it to boil
unexpectedly during hard or prolonged
braking, resulting in sudden brake failure.
This could result in a collision.
Overfilling the brake fluid reservoir can
result in spilling brake fluid on hot engine
parts, causing the brake fluid to catch fire.
Brake fluid can also damage painted and
vinyl surfaces, care should be taken to
avoid its contact with these surfaces.
Do not allow petroleum based fluid to
contaminate the brake fluid. Brake seal
components could be damaged, causing
partial or complete brake failure. This could
result in a collision.
Automatic Transmission
Use only a transmission oil with the
same characteristics as those indicated
in the "Fluids and Lubricants" table (see
"Technical Specifications" chapter).
Special Additives
Do not use any type of additive with the
automatic transmission oil. The
automatic transmission oil is a product
designed specially for this vehicle and
its performance may be compromised
through the use of further additives.
Caution!
Do not use chemical flushes in your
transmission as the chemicals can damage
your transmission components. Such
damage is not covered by the New Vehicle
Limited Warranty.
219
Page 222 of 268

Frequency of Oil Changes
In normal vehicle operating conditions,
it is not necessary to change the
transmission oil.
Caution!
If a transmission fluid leak occurs, visit your
authorized dealer immediately. Severe
transmission damage may occur. Your
authorized dealer has the proper tools to
adjust the fluid level accurately.
Replacing The Battery
If necessary, replace the battery with
another battery with the same
specifications. It is advised to contact
an authorized dealer for replacement.
Follow the battery manufacturer's
instructions for maintenance.
Note:
It will not be possible to open the trunk
with a key or by pressing the button in
the passenger compartment when the
battery is disconnected. So, always
position the manual trunk opening strap
on the trunk lock before disconnecting
the battery. The procedure is described
in the "Storing The Vehicle" section in
this chapter.
RAISING THE
VEHICLE
If the vehicle requires lifting, visit an
authorized dealer which is equipped
with shop jacks or jack arms.
The vehicle lifting points are marked on
the side skirts with the
symbols.
09056S0001EMVehicle Lift Point Locations
220
SERVICING AND MAINTENANCE
Page 223 of 268

TIRES
Tire Safety Information
Tire safety information will cover
aspects of the following information:
Tire Markings, Tire Identification
Numbers, Tire Terminology and
Definitions, Tire Pressures, and Tire
Loading.
Tire Markings
Note:
P (Passenger) — Metric tire sizing is
based on U.S. design standards.
P-Metric tires have the letter “P”
molded into the sidewall preceding the
size designation. Example:
P215/65R15 95H.
European — Metric tire sizing is
based on European design standards.
Tires designed to this standard have
the tire size molded into the sidewall
beginning with the section width. The
letter "P" is absent from this tire size
designation. Example: 215/
65R15 96H.
LT (Light Truck) — Metric tire sizing
is based on U.S. design standards.
The size designation for LT-Metric tires
is the same as for P-Metric tires except
for the letters “LT” that are molded into
the sidewall preceding the size
designation. Example: LT235/85R16.
Temporary spare tires are designed
for temporary emergency use only.
Temporary high pressure compact
spare tires have the letter “T” or “S”
molded into the sidewall preceding the
size designation. Example:
T145/80D18 103M.
High flotation tire sizing is based on
U.S. design standards and it begins
with the tire diameter molded into the
sidewall. Example: 31x10.5 R15 LT.
Tire Identification Number (TIN)
The TIN may be found on one or both
sides of the tire; however, the date code
mayonlybeononeside.Tireswith
white sidewalls will have the full TIN,
including the date code, located on the
white sidewall side of the tire. Look for
the TIN on the outboard side of black
sidewall tires as mounted on the
vehicle. If the TIN is not found on the
outboard side, then you will find it on
the inboard side of the tire.
GUID-0601085395USTire Markings
1 — U.S. DOT Sa-
fety Standards
Code (TIN) 4 — Maximum
Load
2 — Size Designa-
tion 5 — Maximum
Pressure
3 — Service De-
scription 6 — Treadwear,
Traction and Tem-
perature Grades
221
Page 224 of 268

EXAMPLE:
DOT MA L9 ABCD 0301
DOT =
Department of Transportation
– This symbol certifies that the tire is in compliance with the U.S. Department of Transportation tire safety standards and is
approved for highway use
MA = Code representing the tire manufacturing location (two digits)
L9 = Code representing the tire size (two digits)
ABCD = Code used by the tire manufacturer (one to four digits)
03 = Number representing the week in which the tire was manufactured (two digits)
– 03 means the 3rd week
01 = Number representing the year in which the tire was manufactured (two digits)
– 01 means the year 2001
– Prior to July 2000, tire manufacturers were only required to have one number to represent the year in which the tire was
manufactured. Example: 031 could represent the 3rd week of 1981 or 1991
Tire Terminology And Definitions
Term Definition
B-Pillar
The vehicle B-Pillar is the structural member of the body located behind the front door.
Cold Tire Inflation Pressure
Cold tire inflation pressure is defined as the tire pressure after the vehicle has not been driven
for at least three hours, or driven less than 1 mile (1.6 km) after sitting for a minimum of three
hours. Inflation pressure is measured in units of PSI (pounds per square inch) or kPa
(kilopascals).
Maximum Inflation PressureThe maximum inflation pressure is the maximum permissible cold tire inflation pressure for this
tire. The maximum inflation pressure is molded into the sidewall.
Recommended Cold Tire Inflation PressureVehicle manufacturer's recommended cold tire inflation pressure as shown on the tire placard.
Tire PlacardA label permanently attached to the vehicle describing the vehicle’s loading capacity, the
original equipment tire sizes and the recommended cold tire inflation pressures.
222
SERVICING AND MAINTENANCE
 1
1 2
2 3
3 4
4 5
5 6
6 7
7 8
8 9
9 10
10 11
11 12
12 13
13 14
14 15
15 16
16 17
17 18
18 19
19 20
20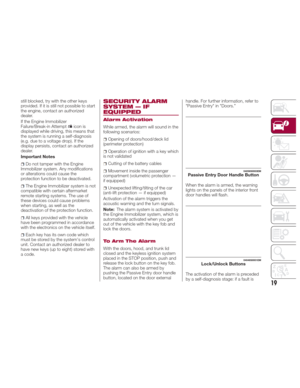 21
21 22
22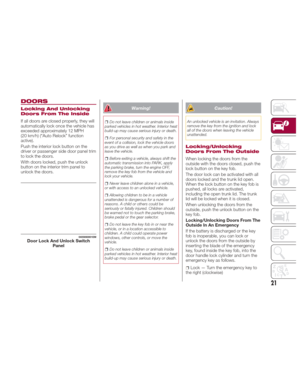 23
23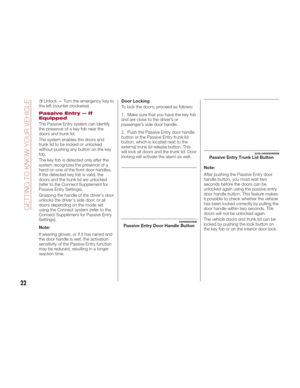 24
24 25
25 26
26 27
27 28
28 29
29 30
30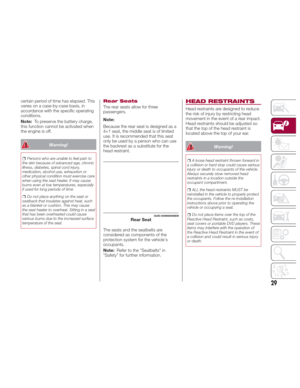 31
31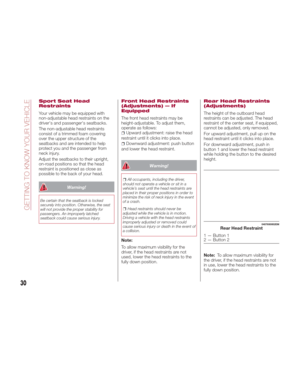 32
32 33
33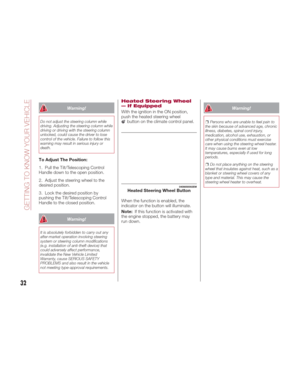 34
34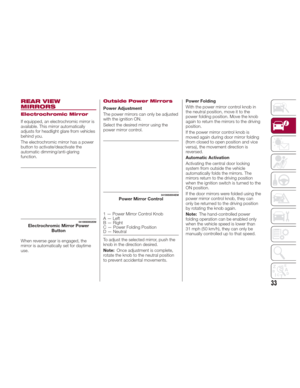 35
35 36
36 37
37 38
38 39
39 40
40 41
41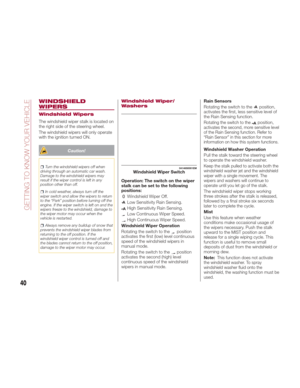 42
42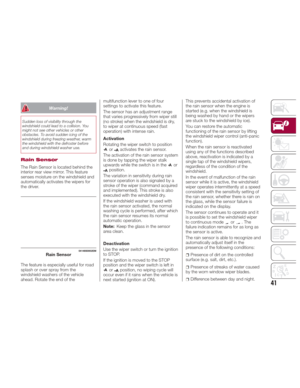 43
43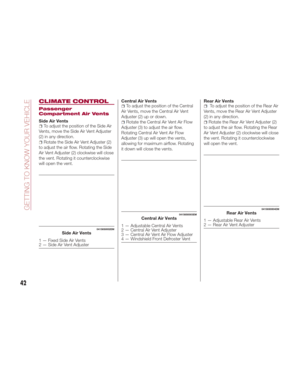 44
44 45
45 46
46 47
47 48
48 49
49 50
50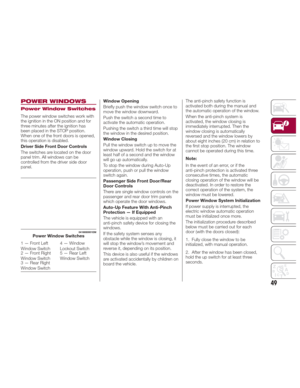 51
51 52
52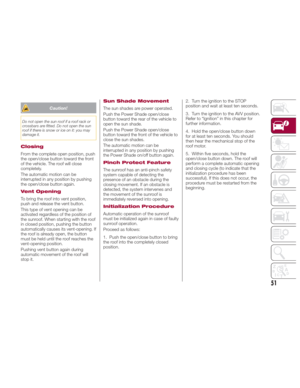 53
53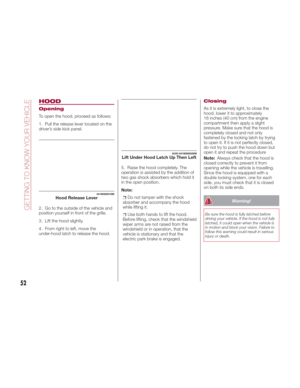 54
54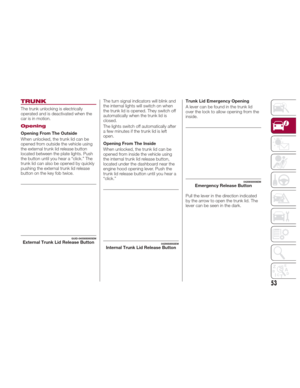 55
55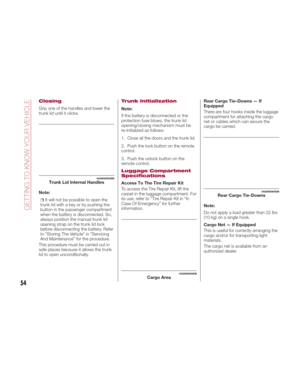 56
56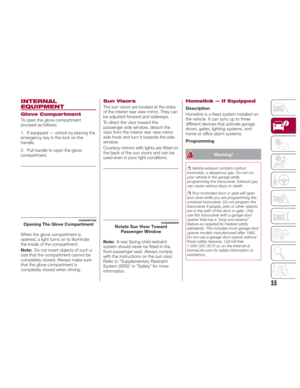 57
57 58
58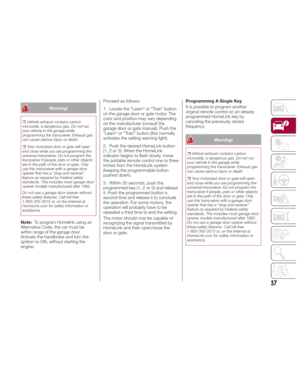 59
59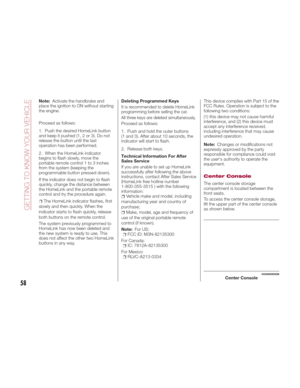 60
60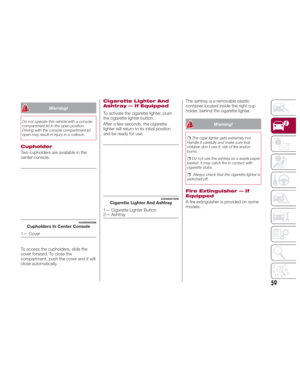 61
61 62
62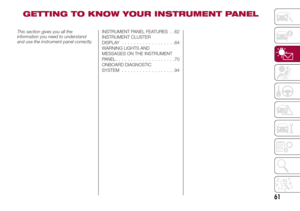 63
63 64
64 65
65 66
66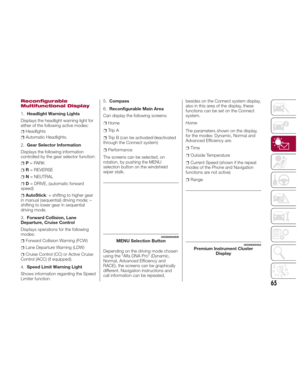 67
67 68
68 69
69 70
70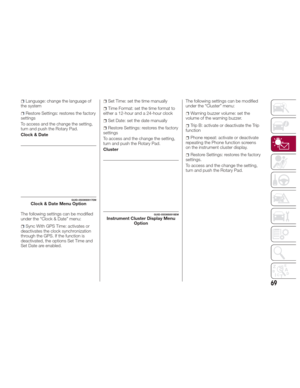 71
71 72
72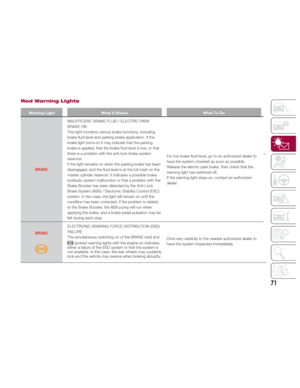 73
73 74
74 75
75 76
76 77
77 78
78 79
79 80
80 81
81 82
82 83
83 84
84 85
85 86
86 87
87 88
88 89
89 90
90 91
91 92
92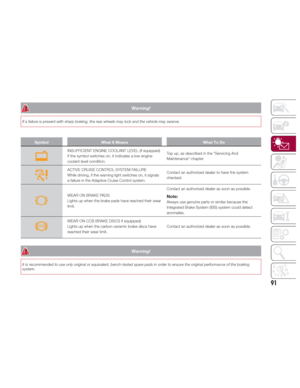 93
93 94
94 95
95 96
96 97
97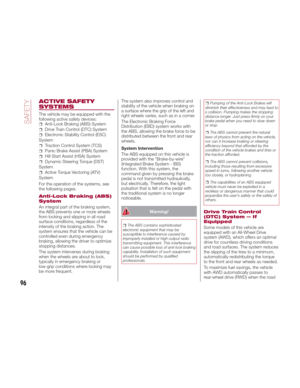 98
98 99
99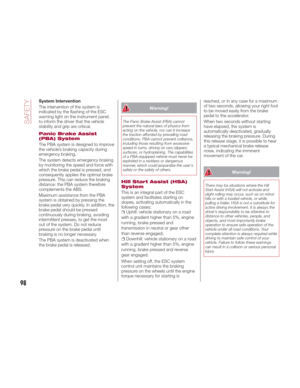 100
100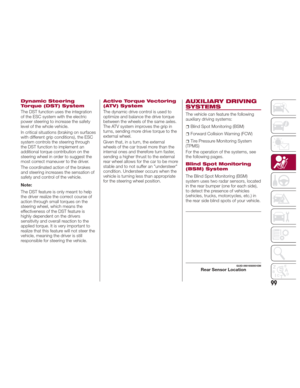 101
101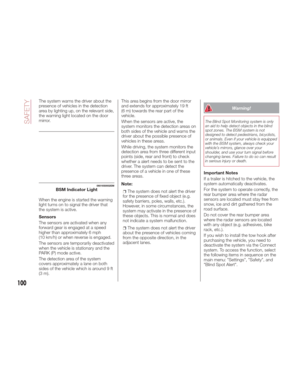 102
102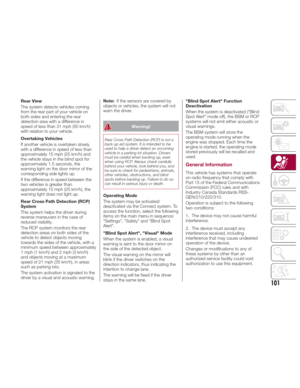 103
103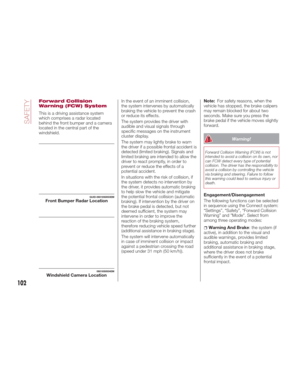 104
104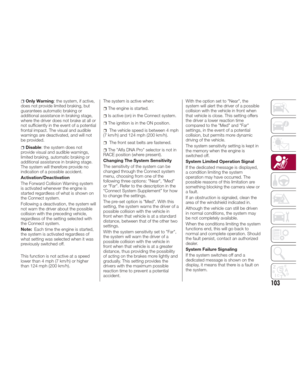 105
105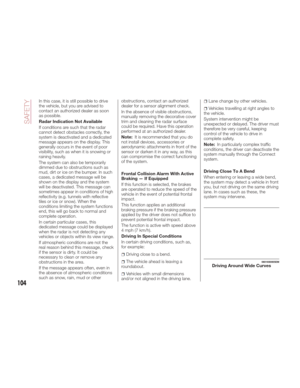 106
106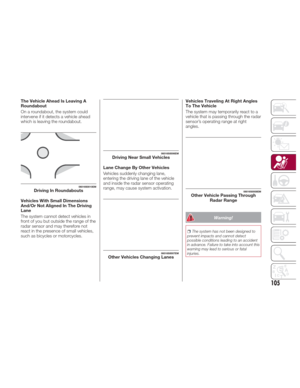 107
107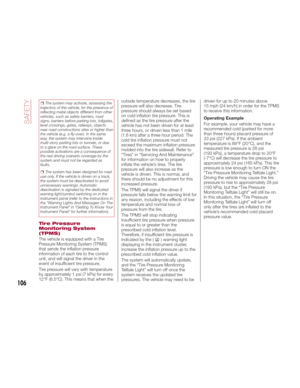 108
108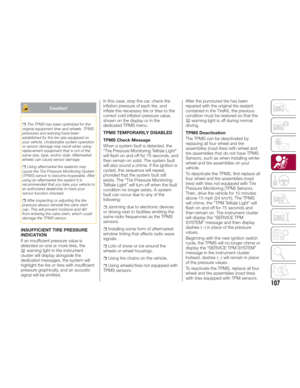 109
109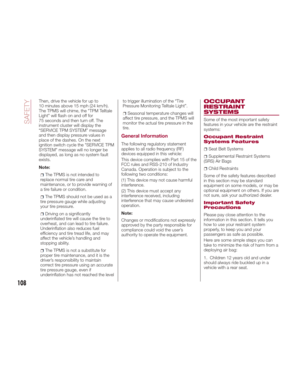 110
110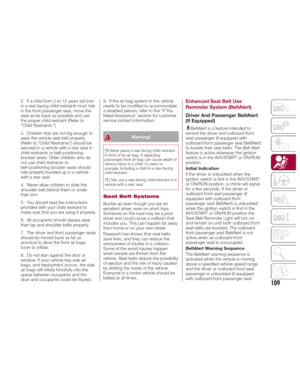 111
111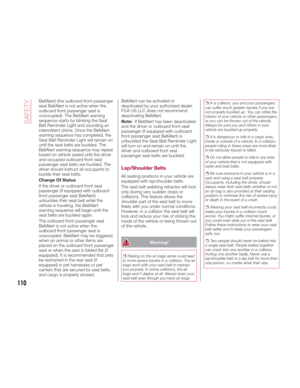 112
112 113
113 114
114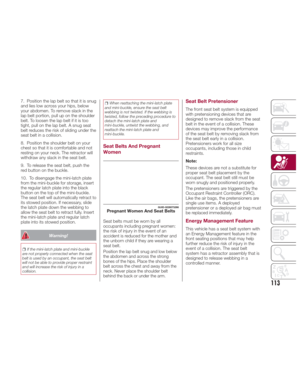 115
115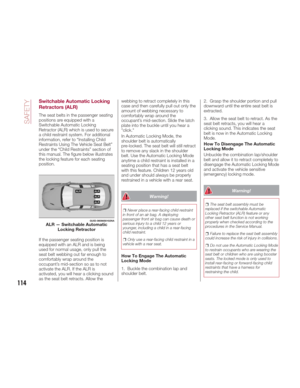 116
116 117
117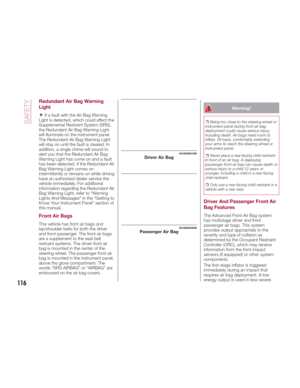 118
118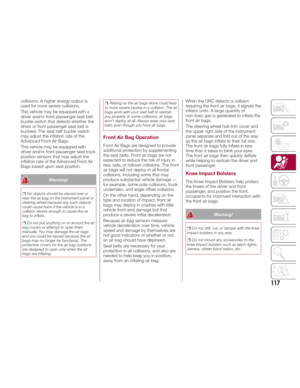 119
119 120
120 121
121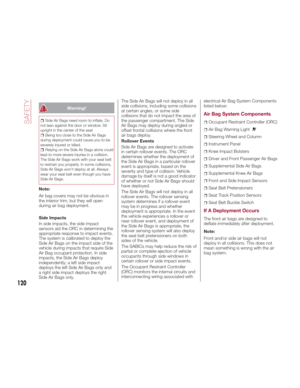 122
122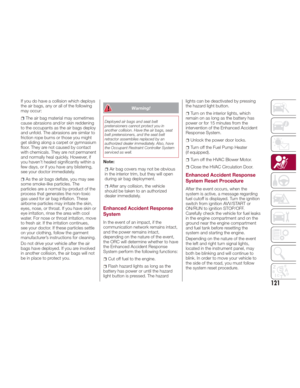 123
123 124
124 125
125 126
126 127
127 128
128 129
129 130
130 131
131 132
132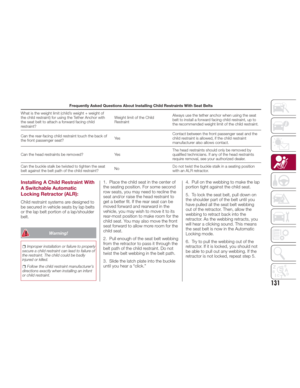 133
133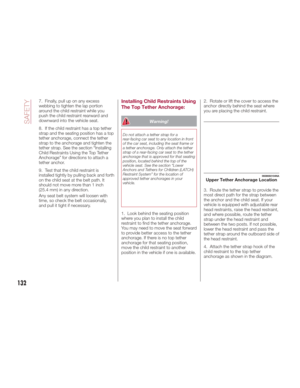 134
134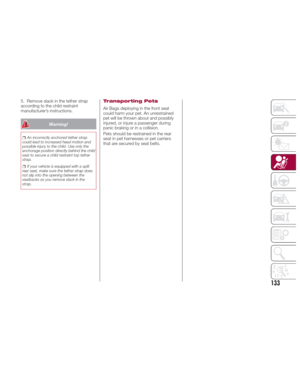 135
135 136
136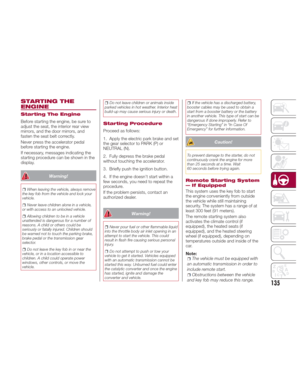 137
137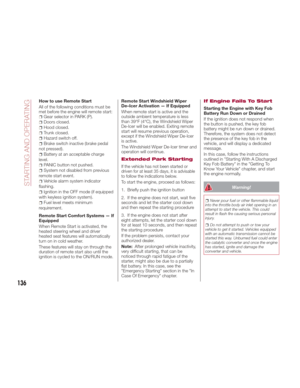 138
138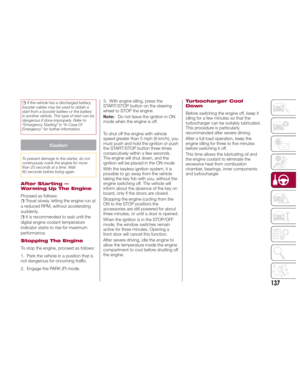 139
139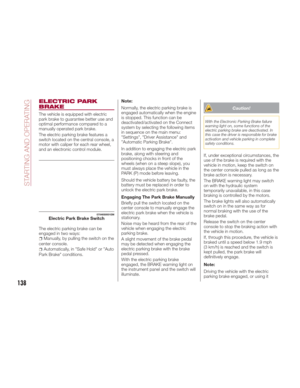 140
140 141
141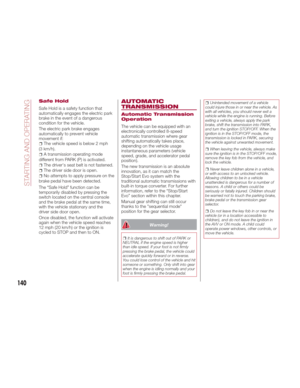 142
142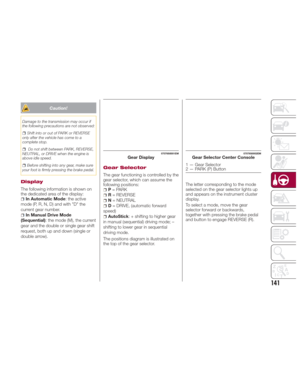 143
143 144
144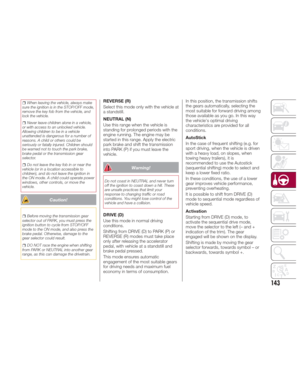 145
145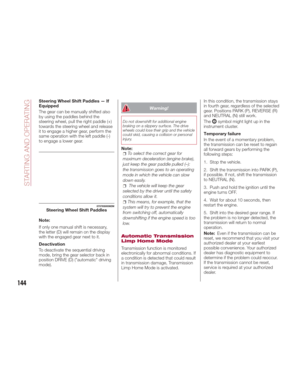 146
146 147
147 148
148 149
149 150
150 151
151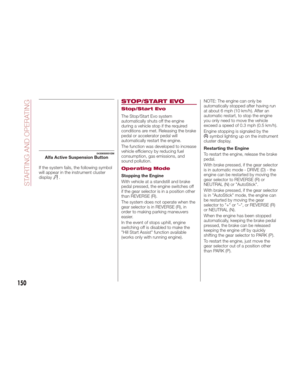 152
152 153
153 154
154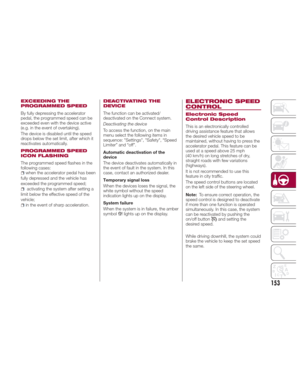 155
155 156
156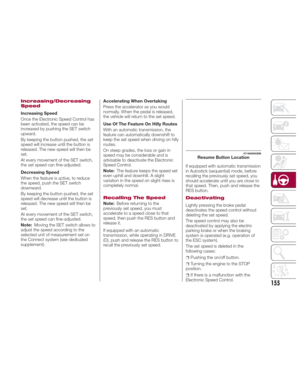 157
157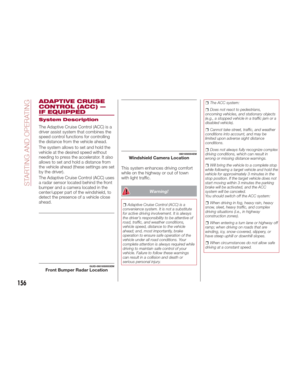 158
158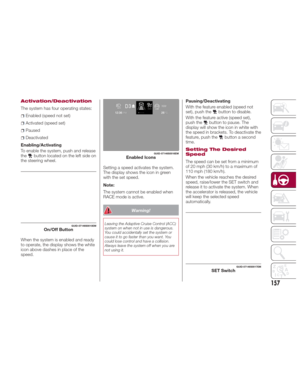 159
159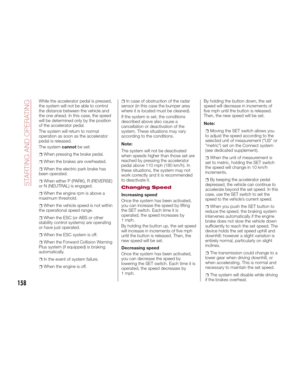 160
160 161
161 162
162 163
163 164
164 165
165 166
166 167
167 168
168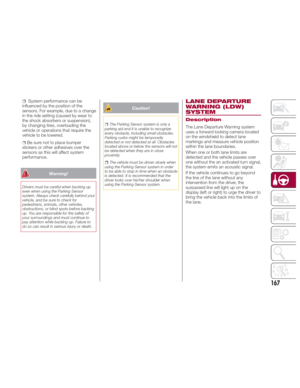 169
169 170
170 171
171 172
172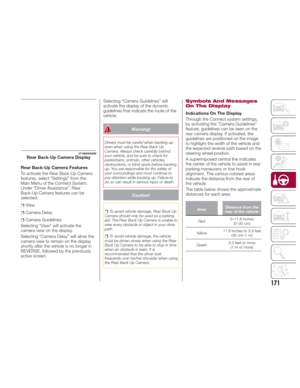 173
173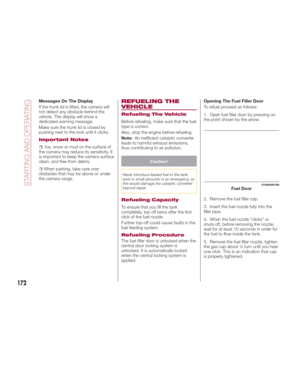 174
174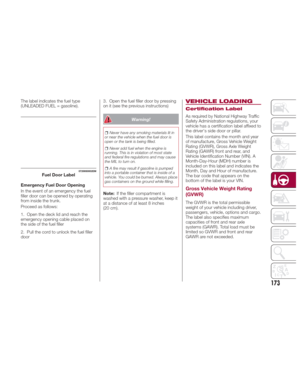 175
175 176
176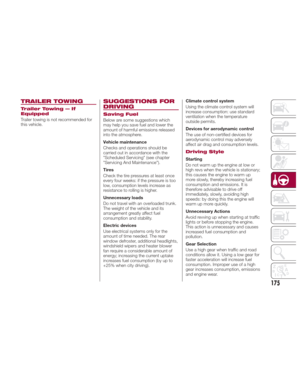 177
177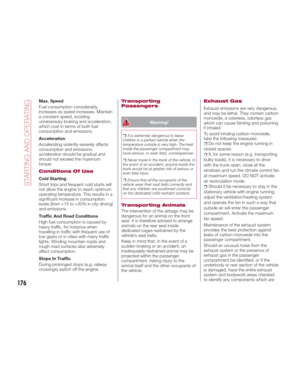 178
178 179
179 180
180 181
181 182
182 183
183 184
184 185
185 186
186 187
187 188
188 189
189 190
190 191
191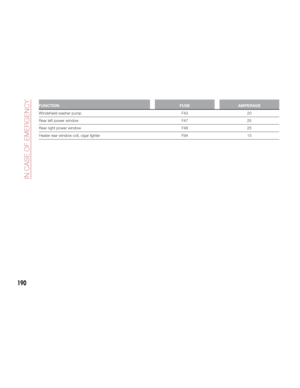 192
192 193
193 194
194 195
195 196
196 197
197 198
198 199
199 200
200 201
201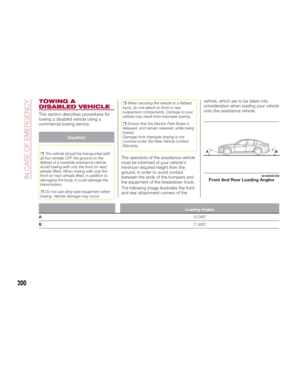 202
202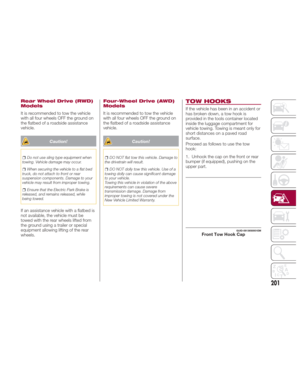 203
203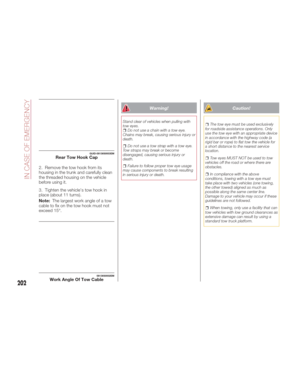 204
204 205
205 206
206 207
207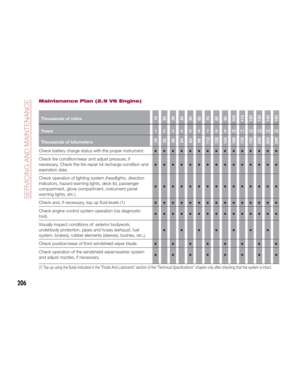 208
208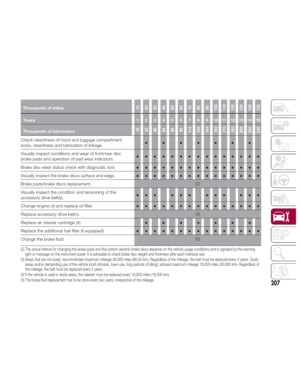 209
209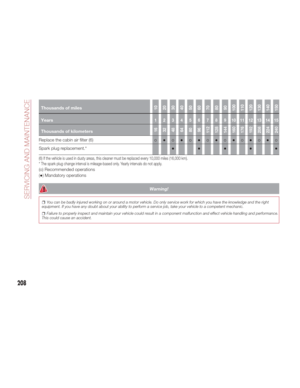 210
210 211
211 212
212 213
213 214
214 215
215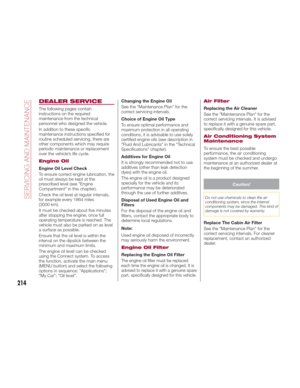 216
216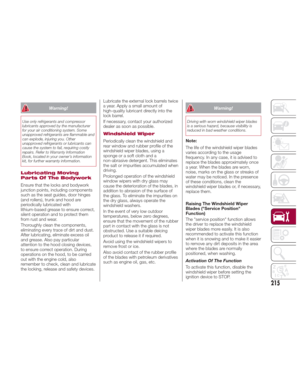 217
217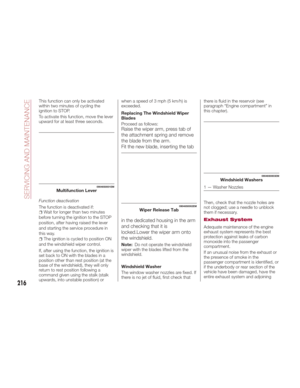 218
218 219
219 220
220 221
221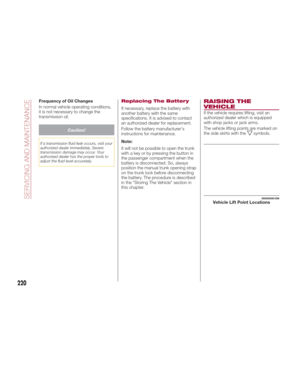 222
222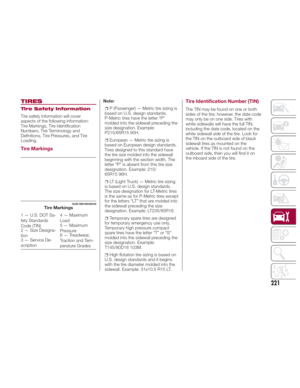 223
223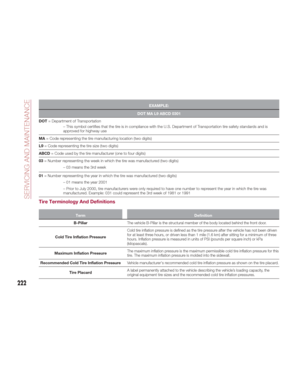 224
224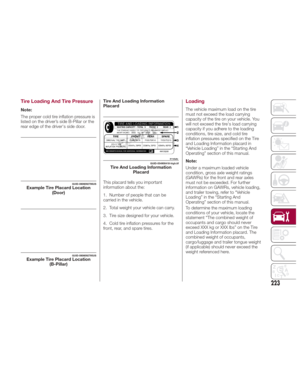 225
225 226
226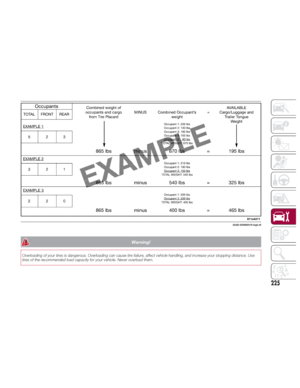 227
227 228
228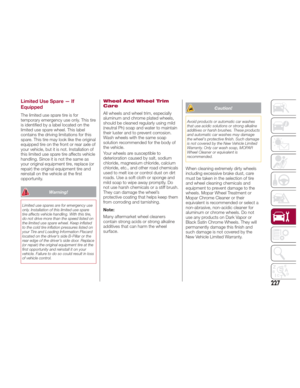 229
229 230
230 231
231 232
232 233
233 234
234 235
235 236
236 237
237 238
238 239
239 240
240 241
241 242
242 243
243 244
244 245
245 246
246 247
247 248
248 249
249 250
250 251
251 252
252 253
253 254
254 255
255 256
256 257
257 258
258 259
259 260
260 261
261 262
262 263
263 264
264 265
265 266
266 267
267