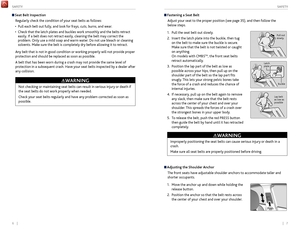
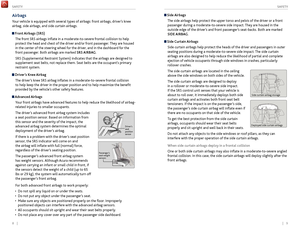
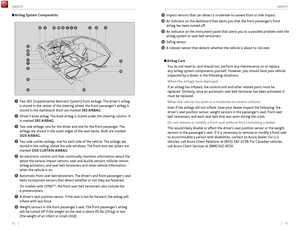
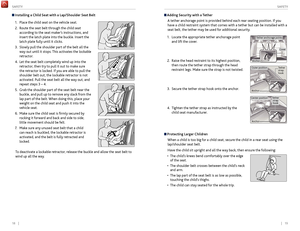
Page 41 of 75

74 || 75
DRIVING
DRIVING
Remote Engine Start*
Start your vehicle’s engine using the two-way remote transmitter from extended
distances before you enter the vehicle.
Lock button
ENGINE button: After
pressing the Lock
button, press and hold
to start the engine.Red indicator: Remote
is out of range or
cannot communicate
with the vehicle, or the
engine is stopped.
Amber indicator: Remote
is communicating with
the vehicle.
Green indicator:
Confirms doors are
locked or engine is
running.
Engine exhaust contains toxic carbon monoxide.
Breathing carbon monoxide can kill you or cause unconsciousness.
Never use the remote engine starter when the vehicle is parked in a garage
or other area with limited ventilation.
WARNING
*if equipped
Make sure the vehicle is in a safe location when using remote engine start (i.e., a
well ventilated area, away from flammable materials).
Starting the Engine
Press the Lock button, then press and hold the ENGINE button.
The engine runs for up to 10 minutes. To extend the time for another 10 minutes,
repeat the procedure during the initial 10 minutes.
While the engine is running, the climate control system adjusts the interior
temperature, the security system remains on, and lights and accessories remain
off.
Stopping the EnginePress and hold the ENGINE button.
The engine will also stop if it has been running for more than 10 minutes, or if any
door is opened without using the remote transmitter or keyless access.
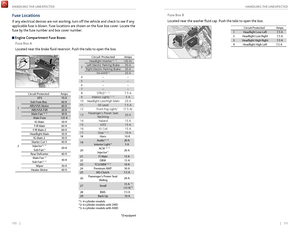
Load Limits Example
Example 1 Max load
850 lbs
(385 kg) Passenger weight
150 lbs x 2 = 300 lbs (68 kg x 2 = 136 kg) Cargo
weight
550 lbs
(249 kg)
Example 2 Max load
850 lbs
(385 kg) Passenger weight
150 lbs x 5 = 750 lbs (68 kg x 5 = 340 kg) Cargo
weight
100 lbs (45 kg)
Overloading or improper loading can affect handling and stability and cause a
crash in which you can be hurt or killed.
Follow all load limits and other loading guidelines in this manual.
WARNING
In addition, the total weight of the vehicle, all occupants, accessories, cargo, and
trailer tongue load must not exceed the Gross Vehicle Weight Rating (GVWR) or
the Gross Axle Weight Rating (GAWR). Both are on a label on the driver’s doorjamb.
The headlight aim on your vehicle was set by the factory, and does not need to be
adjusted. However, if you regularly carry heavy items in the trunk, have the aiming
readjusted at your dealer or by a qualified technician.
Your vehicle is not designed to tow a trailer. Attempting to do so can void your
warranties.
Page 42 of 75

76 || 77
DRIVING
DRIVING
When you change the shift lever from D to R and vice versa, come to a complete
stop and keep the brake pedal depressed. Operating the shift lever before the
vehicle has come to a complete standstill can damage the transmission.
Do not operate the shift lever while pressing the accelerator pedal. You could
damage the transmission.
NOTICE
Shifting
Change your vehicle’s gears to begin driving.
Shift Lever*
4-cylinder models
Park (P): Used for parking or starting/stopping the
engine. Press the brake pedal, then press the release
button to shift.
Reverse (R): Used for reversing.
Neutral (N): Used for idling.
Drive (D): Used for normal driving or sequential
shift mode (see page 78).
Release button
*if equipped
Starting to Drive
The keyless access system allows simple push-button start.
Before Starting the Engine With the shift lever in Park, press the brake pedal.
Keep your foot firmly on the brake pedal when
starting the engine.
The engine is harder to start in cold weather and in thinner air found at altitudes
above 8,000 feet (2,400 m). When starting the engine in cold weather, turn
off all electrical accessories such as the lights, climate control system, and rear
defogger in order to reduce battery drain. In extremely cold areas, an engine-
block heater will improve engine starting. Consult your dealer for details.
Changing the Power Mode
Accessory or On Mode: Press ENGINE START/
STOP once without pressing the brake pedal for
Accessory mode. Press it again for On mode.
Starting the engine: Press and hold the brake
pedal, then press ENGINE START/STOP. Keep your
foot firmly on the brake pedal when starting the
engine.
Turning the vehicle off: Shift to or select Park, then press ENGINE START/STOP.
If you press the button and the shift lever is not in Park, the vehicle goes into
Accessory mode.
Brake
pedal
Page 43 of 75

78 || 79
DRIVING
DRIVING
*if equipped
Electronic Gear Selector*
6-cylinder models
Select the vehicle’s gear using a simple button interface. Apply the brake pedal
and select a gear.
Park (P): Press to put the vehicle in Park. A red
indicator appears.
Reverse (R): Pull back to put the vehicle in Reverse.
A green indicator appears.
Neutral (N): Press to put the vehicle in Neutral. A red indicator appears.
Drive (D): Press to put the vehicle in Drive. A green indicator appears. Release the
electric parking brake to begin driving (see page 81).
In freezing or sub-freezing conditions, the electronic gear selector response may
be slow. Always apply the brake pedal before shifting into Park (P), and confirm
that (P) is shown on the gear position indicator before releasing the brake.
Auto park mode
For your convenience, Park (P) is automatically engaged when the vehicle is
turned off, or when all of the following conditions are met: the vehicle is stopped,
the driver’s seat belt is unbuckled, and the driver’s door is opened. You should
always apply the brake and shift to Park when idling, or before exiting the vehicle.
If you select any gear other than Park when the driver’s door is opened and the
driver’s seat belt is unbuckled, Park is reengaged when the brake pedal is released. The vehicle can roll away if left unattended without confirming that Park
(P) is engaged. Always keep your foot on the brake pedal until you have
confirmed that (P) is shown on the gear position indicator.
WARNING
When you change from D to R and vice versa, or want to change to Park (P),
come to a complete stop and keep the brake pedal applied. Operating the gear
buttons before the vehicle has come to a complete standstill can damage the
transmission.
NOTICE
Sequential Shift Mode*
4-cylinder models
Use the paddle shifters to change gears without removing your hands from the
steering wheel.
When the shift lever is in D: The vehicle goes into sequential shift mode
momentarily, and the gear indicator comes on. When you start driving at a
constant speed, sequential shift mode automatically switches off, and the gear
indicator goes off.
When the shift lever is in D (with SPORT+ mode): The vehicle goes into
sequential shift mode, and the M (sequential shift) indicator and gear indicator
come on. At speeds of 2 mph (4 km/h) or less, the vehicle automatically shifts
down into 1st gear.
To cancel this mode, press the IDS button (see page 84) to select a different
mode. When sequential shift mode is canceled, the M indicator and gear
indicator go off.
Second gear lock mode (in SPORT+ mode): If you pull the (+) paddle shifter
while stopped or driving at 6 mph (10 km/h) or less, the gear is locked in 2nd
gear. This makes it easier to pull away on slippery surfaces such as snow-covered
roads. To cancel 2nd gear lock mode, pull the (-) paddle shifter.
(-) Paddle shifter:
Pull to shift down
to a lower gear. (+) Paddle shifter:
Pull to shift up to a
higher gear. Recommended shift points
Shift up
Acceleration
1st
to 2nd
15 mph (2
4 km/h)
2nd
to 3rd
25 mph (40 km/h)
3r
d to 4th
40 mph (64 km/h)
4th
to 5th
45 mph (7
2 km/h)
5th
to 6th
50 mph (80 km/h)
6th
to 7th
55 mph (89 km/h)
7th
to 8th
60 mph (9
7 km/h)
*if equipped
Page 44 of 75

80 || 81
DRIVING
DRIVING
Braking
Slow down or stop your vehicle, and keep it from moving when parked.
Foot Brake
Press the brake pedal to slow down or stop your
vehicle from moving.
Brake Assist SystemDuring hard or emergency braking, the system
increases braking force. The brake pedal may move
slightly or make a noise; this is normal. Continue to
hold the brake pedal firmly down.
Anti-Lock Brake System (ABS) During hard or emergency braking, the system rapidly pumps the brakes to
prevent wheel lockup and help you maintain steering control. The brake pedal
may pulsate slightly during ABS operation; this is normal. Do not pump the brake
pedal, and continue to hold it firmly down.
The ABS may not function correctly if you use an incorrect tire type and size.
NOTICE
Brake pedal
Electric Parking BrakeKeep your vehicle from moving while parked using a simple switch.
To apply: Pull up the switch. The PARK indicator
appears in the instrument panel.
To release: Press the brake pedal and make sure
your seat belt is fastened. Press the switch down to
release.
You can also lightly press the accelerator pedal if
your seat belt is fastened and the vehicle is on and in
Drive (D) or Reverse (R).
Pull
up to
apply
Press
down to
release.
Car wash mode
Follow the procedure below to use a conveyor-style car wash where you or
an attendant do not remain in the vehicle. Make sure the wiper lever is in the
OFF position (see page 33). You should inform the car wash attendant of this
procedure.
1.
When
the engine is running, apply the brake pedal and select Neutral (N).
2.
Within 5 seconds, pr
ess the ENGINE START/STOP button. The vehicle goes
into Accessory mode.
This mode lasts for 15 minutes before the gear changes to Park and the vehicle
turns off.
Sequential Mode* 6-cylinder models
Use the paddle shifters to change gears without removing your hands from the
steering wheel.
When the gear is in D: The vehicle goes into sequential mode momentarily,
and the gear indicator comes on. When you start driving at a constant speed,
sequential mode automatically switches off, and the gear indicator goes off.
When the gear is in D (with SPORT+ mode): The vehicle goes into sequential
mode, and the M (sequential mode) indicator and gear indicator come on.
To cancel this mode, press the IDS button (see page 84) to select a different
mode. When sequential mode is canceled, the M indicator and gear indicator go
off.
(-) Paddle shifter:
Pull to shift down
to a lower gear. (+) Paddle shifter:
Pull to shift up to a
higher gear. Recommended shift points
Shift up
Acceleration
1st
to 2nd
15 mph (2
4 km/h)
2nd
to 3rd
25 mph (40 km/h)
3r
d to 4th
40 mph (64 km/h)
4th
to 5th
45 mph (7
2 km/h)
5th
to 6th
50 mph (80 km/h)
6th
to 7th
55 mph (89 km/h)
7th
to 8th
60 mph (9
7 km/h)
8
th to 9th
65 mph (105 km/h)
*if equipped
Page 45 of 75

82 || 83
DRIVING
DRIVING
Auto Idle Stop*
Automatically stops and restarts the engine to help maximize fuel economy,
depending on environmental and vehicle conditions.
Activating Auto Idle Stop
When the vehicle stops with the gear position in
Drive (D) and the brake pedal is pressed, the engine
turns off and the auto idle stop indicator appears.
When you release the brake pedal, the engine
restarts and the vehicle begins to move.
Auto idle stop does not activate (or the engine may automatically restart) when
the driver’s seat belt is unfastened, the vehicle is stopped on a steep hill, the
windshield defroster is on, and other conditions. See the Owner’s Manual on the
Owner information CD or at owners.acura.com (U.S.) or myacura.ca (Canada) for
a full list of conditions.
Turning the System On or Off
Press the Auto Idle Stop Off button to turn the
system off. Press the button again to turn it on.
The system resets to ON every time you start the
engine.
Climate Control Operation
When auto idle stop is activated, the air conditioning system is turned off.
The engine may restart automatically under the following conditions:
•
Y
ou select MAX HEAT or MAX COOL on the climate control system.
•
Y
ou turn on the windshield defroster.
•
The interior humidity is high.
•
Ther
e is a significant difference between the climate control set temperature
and the actual interior temperature.
*if equipped
Automatic Brake Hold
Maintains rear brake hold even after the brake pedal is released. Make sure the
vehicle is on and your seat belt is fastened when operating this feature.
1.
Pr
ess the BRAKE HOLD button. The BRAKE
HOLD indicator appears in the instrument panel.
2.
With Driv
e (D) selected, press the brake pedal
and come to a complete stop. The HOLD
indicator appears, and brake hold is applied.
Release the brake pedal.
Press the accelerator pedal to cancel brake hold
and start moving.
To turn off brake hold: Press the brake pedal and press the BRAKE HOLD button
again.
Automatic brake hold cancels when:
•
Braking is applied
for more than 10 minutes.
•
The
driver’s seat belt is unfastened.
•
The
engine is turned off.
Automatic brake
hold button
Using the automatic brake hold system on steep hills or slippery roads may
still allow the vehicle to move if you remove your foot from the brake pedal.
If a vehicle unexpectedly moves, it may cause a crash resulting in serious
injury or death.
Never use the automatic brake hold system or rely on it to keep a vehicle
from moving when stopped on a steep hill or slippery roads.
WARNING
Using the automatic brake hold system to park the vehicle may result in the
vehicle unexpectedly moving.
If a vehicle moves unexpectedly, it may cause a crash, resulting in serious
injury or death.
Never leave the vehicle when braking is temporarily kept by automatic brake
hold and always park the vehicle by putting the transmission in Park (P) and
applying the parking brake.
WARNING
Page 46 of 75

84 || 85
DRIVING
DRIVING
Cruise Control*
Maintain a constant vehicle speed without having to keep your foot on the
accelerator pedal. Use cruise control on freeways or open roads where you can
travel at a constant speed with little acceleration or deceleration.
Improper use of cruise control can lead to a crash.
Use cruise control only when traveling on open highways in good weather.
WARNING
Setting the Vehicle Speed1.
Press the CRUISE button. The CRUISE MAIN
indicator appears.
2.
Accelerate to the desired speed (above 25 mph/40
km/h). Take your foot off the pedal and press
the SET/- switch to set the speed. The CRUISE
CONTROL indicator appears.
Adjusting the Vehicle Speed Press the RES/+ switch to increase speed, or the
SET/- switch to decrease speed.
Each time you press the button, the vehicle speed is
increased or decreased by about 1 mph (1.6 km/h).
If you keep the button pressed, the vehicle speed
increases or decreases until you release it.
Canceling Cruise ControlPress either the CANCEL button or the CRUISE
button, or the brake pedal. The CRUISE CONTROL
indicator goes off.
After cruise control has been canceled, you can still
resume the prior set speed by pressing RES/+ while
driving at a speed of at least 25 mph (40 km/h).
Press the CRUISE button to turn the system off.
CRUISE button
RES/+ button
SET/- button
CANCEL button
Econ: Maximiz es fuel efficiency .
Normal: Balances fuel efficiency and sportiness for everyday driving.
Sport : Enhances vehicle r esponse and feel through decreased steering assist and
incr eased thr ottle response.
Sport+: Adds to Sport mode and allows incr eased performance when using paddle
shifters (see page 7 8 or page 80).
Vehicle Stability Assist (VSA®)
Also known as Electr onic Stability Contr ol (ESC ), VSA helps to stabilize the vehicle
during cornering if the vehicle turns mor e or less than what was intended. It assists
in maintaining traction on slippery surfaces b y regulating engine output and
selectiv ely appl ying the brak es.
Turning VSA On or Off
VSA is turned on every time y ou turn on the vehicle. If you turn VSA off, your
v ehicle has normal braking and cornering ability , but VSA traction and stability
enhancement become less effectiv e.
Pr ess and hold the VSA
OFF button until you
hear a beep to turn VSA on or off . The VSA OFF
indicator appears when the system is off.
T raction contr ol stops functioning , which
allows the wheels to spin mor e freel y at low
speed. This can be helpful when trying to free
y our vehicle if it is stuck in mud or snow.
Integrated Dynamics System (IDS)
Choose a driving mode for your pr eference based on road conditions, vehicle speed,
and handling.
VSA OFF
button VSA OFF
indicator
The selected mode
briefly appears
in the multi-
information display.
Press IDS to
cycle through
modes.
*if equipped
Page 47 of 75

86 || 87
DRIVING
DRIVING
When in Operation
If a vehicle detected ahead of you slows down
abruptly, or if another vehicle cuts in front of you,
a beep sounds and BRAKE appears on the multi-
information display to alert you.
When a vehicle detected ahead is within ACC with
low speed follow range and stops, your vehicle also
stops. The Stopped message appears on the multi-
information display.
When the vehicle ahead of you starts again, the vehicle icon on the multi-
information display blinks. Press RES/+/SET/– up or down, or press the
accelerator pedal to resume the prior set speed.
Canceling ACCYou can press either the CANCEL button or the
CRUISE button, or press the brake pedal. The ACC
indicator goes off.
Certain conditions may cause ACC
to cancel
automaticall
y. When this happens, a beep sounds
and a message appears on the multi-information
display.
After cruise control has been canceled, you can still resume the prior set speed by
pressing the RES/+ switch.
Press the MAIN button to turn the system off.
Improper use of ACC with LSF can lead to a crash.
Use ACC with LSF only when driving on expressways or freeways and in good
weather conditions.
WARNING
Exiting a vehicle that has been stopped while the ACC with LSF system is
operating can result in the vehicle moving without operator control. Always
make sure Park (P) is selected before exiting the vehicle.
A vehicle that moves without operator control can cause a crash, resulting in
serious injury or death.
Never exit a vehicle when the vehicle is stopped by ACC with LSF.
WARNING
ACC with LSF has limited braking capability and may not stop your vehicle in
time to avoid a collision with a vehicle that quickly stops in front of you.
Always be prepared to apply the brake pedal if the conditions require.
WARNING
Adaptive Cruise Control (ACC) with Low Speed Follow (LSF)*
Helps maintain a constant vehicle speed and a set following interval behind a
vehicle detected ahead of yours. When the vehicle ahead changes speed, ACC
senses the change and accelerates or decelerates to maintain a set interval.
Activating and Setting the Vehicle Speed
1. Press the MAIN button. The ACC indicator appears.
2.
A
ccelerate to the desired speed.
Above 25 mph (40 km/h): Take your foot off the
pedal and press RES/+/SET/- to set the speed.
Below 25 mph (40 km/h) (Low Speed Follow):
Press SET/- to set the speed at 25 mph (40 km/h).
Adjusting the Vehicle Speed
Press the RES/+ switch to increase speed, or the
SET/- switch to decrease speed.
Each time you press the switch up or down, the
vehicle speed is increased or decreased by about
1 mph (1 km/h). If you keep the switch pressed up
or down, the vehicle speed increases or decreases
by 5 mph or 5 km/h until you release it.
Adjusting the Following Interval Press the Interval button to change the following
interval. Each time you press the button, the
following interval setting cycles through short,
middle, long, and extra long following intervals.
Switching to Standard Cruise ControlPress and hold the Interval button.
Interval Short Middle LongExtra Long
Approx.
Gap
(seconds) 1 .1
1.5 2 .12.8
MAIN button
RES/+ switch
SET/- switch
CANCEL button
INTERVAL button
*if equipped
Page 48 of 75
*
A camera mounted between the windshield and the rearview mirror determines if
your vehicle begins to move away from the center of a")
88 || 89
DRIVING
DRIVING
Lane Departure Warning (LDW)*
A camera mounted between the windshield and the rearview mirror determines if
your vehicle begins to move away from the center of a detected lane while driving
between 45–90 mph (72–145 km/h).
If you cross a detected lane line
without using the turn signal, a
message appears in the MID and a
beep sounds continuously.
Turning LDW On or Off
Press the LDW button to turn the system on or off.
A green indicator light appears on the button when
the system is on.
Important Safety Reminder
Like all assistance systems, LDW has limitations. Over-reliance on LDW may result
in a collision. It is always your responsibility to keep the vehicle within your lane.
LDW only alerts you when lane drift is detected without a turn signal in use. LDW
may not detect all lane markings or lane departures; accuracy will vary based on
weather, speed, and lane marker condition. It is always your responsibility to safely
operate the vehicle and avoid collisions.
Lane departure
message
Audible
beep
LDW
button Indicator
*if equipped
Forward Collision Warning (FCW) with Pedestrian Detection*
Warns you if the system determines there is likelihood of a frontal collision when
a vehicle is detected in front of you when your vehicle speed is 10 mph (15 km/h)
or higher, or a pedestrian is detected in front of you when your vehicle speed is
between 10–62 mph (15–100 km/h).
If you do not brake in time or
take preventive action, a visual
warning flashes, BRAKE flashes
in the MID, and a beep sounds
continuously.
Changing Settings
Determine the warning timing, or turn the system off. Use the interface dial to
make selections.
1.
Pr
ess the SETTINGS button.
2.
Select
Vehicle Settings. The vehicle must be in
Park (P).
3.
Select F
orward Collision Warning Distance.
4.
Select Long
, Normal (default), Short, or Off.
5.
Pr
ess BACK to exit the menu.
Important Safety Reminder
FCW cannot detect all pedestrians and vehicles ahead; accuracy of the system will
vary based on weather, speed, extreme interior heat, and other factors. FCW does
not include a braking function. It is always your responsibility to safely operate the
vehicle and avoid collisions.
BRAKE message
Audible
beep Visual warning
*if equipped