2017 Acura NSX glove box
[x] Cancel search: glove boxPage 7 of 473

Visual Index
6
Quick Reference Guide❙Power Window Switches (P 125)
❙Driver’s Front Airbag (P 46)
❙Hatch Release Button (P 119)
❙Hood Release Handle (P 374)
❙Passenger’s Front Airbag
(P 46)
❙Glove Box (P 151)
❙Driver’s Knee Airbag (P 50)
❙Door Mirror Controls (P 142)
❙Power Door Lock Master Switch (P 117)
❙Fuel Fill Door Release Button (P 358)
❙USB Port (P 163)
❙Memory Buttons* (P 139)
❙SET Button* (P 139)
❙Rearview Mirror (P 141)
❙Driver’s Side Interior Fuse
Boxes
(P 445)
❙Passenger’s Side Interior Fuse
Box
(P 446)
❙USB Port (P 163)
❙Accessory Power Socket
(P 154)
❙Electric Parking Brake Switch
(P 344)
❙Automatic Brake Hold Button
(P 347)
❙Shift Button
Electronic Gear Selector
(P 314)
17 NSX-31T6N6000.book 6 ページ 2016年4月22日 金曜日 午後3時44分
Page 112 of 473

Continued111
uuLocking and Unlocking the Doors uLocking/Unlocking the Doors from the Outside
Controls
By switching the auto pop-out main switch to OFF, you can disable the auto pop-out
function. For the purpose of safety and to prevent damaging the vehicle, disable this
function and manually operate the handle, especially when the vehicle is:
• being shipped by train, truck, or boat.
• going through a car wash.
• having maintenance performed on it.
■To temporarily deactivate the auto pop-out function:
Turn off the auto pop-out main switch in the
glove box.
■Auto Pop-Out Main Switch1Auto Pop-Out Main Switch
The auto pop-out function is deactivated in the
following situations:
•The auto pop-out main sw itch is turned off.
•The keyless access remote is not within a 6-foot
(2m) radius of the outside door handle.
•The keyless access remote is in the vehicle.
•The power mode is in ACCESSORY or ON.
Main Switch
ON
OFF
17 NSX-31T6N6000.book 111 ページ 2016年4月22日 金曜日 午後3時44分
Page 122 of 473
121
uuOpening and Closing the Hatch uHatch Main Switch
Controls
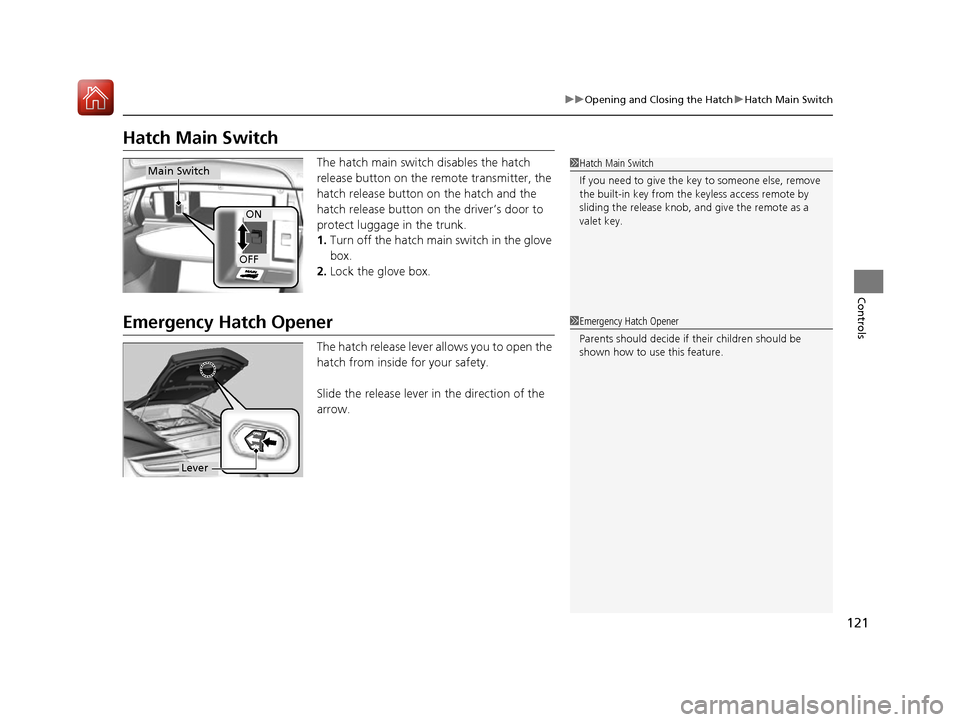
Hatch Main Switch
The hatch main switch disables the hatch
release button on the remote transmitter, the
hatch release button on the hatch and the
hatch release button on the driver’s door to
protect luggage in the trunk.
1. Turn off the hatch main switch in the glove
box.
2. Lock the glove box.
Emergency Hatch Opener
The hatch release lever allows you to open the
hatch from inside for your safety.
Slide the release lever in the direction of the
arrow.
1Hatch Main Switch
If you need to give the ke y to someone else, remove
the built-in key from the keyless access remote by
sliding the release knob, and give the remote as a
valet key.Main Switch
ON
OFF
1 Emergency Hatch Opener
Parents should decide if their children should be
shown how to use this feature.
Lever
17 NSX-31T6N6000.book 121 ページ 2016年4月22日 金曜日 午後3時44分
Page 130 of 473

129
uuOperating the Switches Around the Steering Wheel uENGINE START/STOP Button
Controls
Warning buzzers may sound from inside and/
or outside the vehicle to remind you that the
keyless access remote is out of the vehicle. If
the buzzer continues even after the remote is
put back inside, place it to be within its
operational range.
■When the power mode is in ON
If the keyless access remote is taken out of the
vehicle, and the driver’s door is closed,
warning buzzers sound from both inside and
outside the vehicle. A warning message on
the driver information interface notifies the
driver inside that the remote is out.
■When the power mode is in
ACCESSORY
If the keyless access remote is taken out of the
vehicle, and the driver’s door is closed, a
warning buzzer sounds from outside the
vehicle.
■Keyless Access Remote Reminder1 Keyless Access Remote Reminder
When the keyless access remote is within the
system’s operational range, and the driver’s door is
closed, the warni ng function cancels.
If the keyless access remote is taken out of the vehicle
after the power system has been turned on, you can
no longer change the ENGINE START/STOP button
mode or restart the power system. Always make sure
if the remote is in your vehicle when you operate the
ENGINE START/STOP button.
Removing the keyless access remote from the vehicle
through a window does not activate the warning
buzzer.
Do not put the keyless access remote on the
dashboard or in the glove box. It may cause the
warning buzzer to go off. Under some other
conditions that can prevent the vehicle from locating
the remote, the warning buzzer may also go off even
if the remote is within the system’s operational
range.
17 NSX-31T6N6000.book 129 ページ 2016年4月22日 金曜日 午後3時44分
Page 152 of 473
151
uuInterior Lights/Interior Convenience Items uInterior Convenience Items
Continued
Controls
Interior Convenience Items
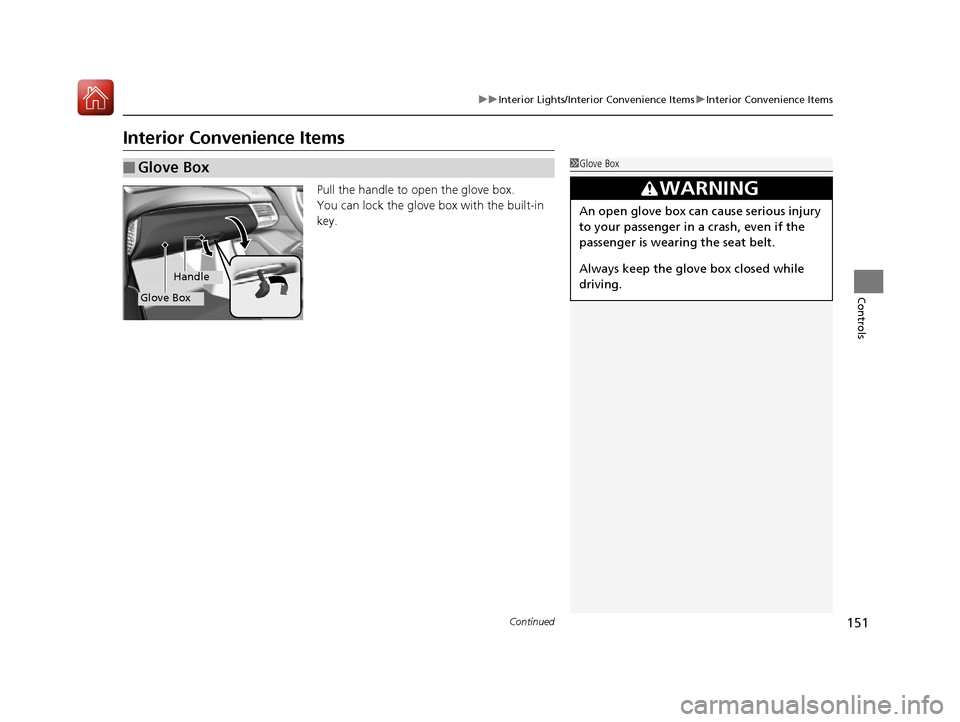
Pull the handle to open the glove box.
You can lock the glove box with the built-in
key.
■Glove Box1Glove Box
3WARNING
An open glove box can cause serious injury
to your passenger in a crash, even if the
passenger is wearing the seat belt.
Always keep the glove box closed while
driving.
Glove Box
Handle
17 NSX-31T6N6000.book 151 ページ 2016年4月22日 金曜日 午後3時44分
Page 164 of 473
163
uuAudio System uUSB Ports
Features
USB Ports
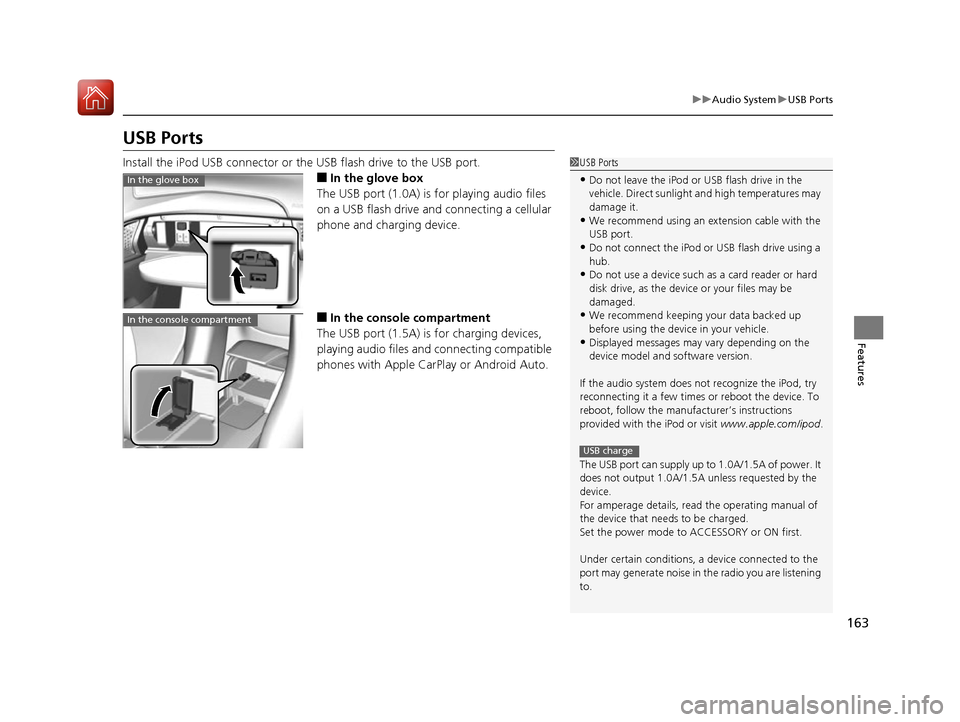
Install the iPod USB connector or the USB flash drive to the USB port.
■In the glove box
The USB port (1.0A) is for playing audio files
on a USB flash drive and connecting a cellular
phone and charging device.
■In the consol e compartment
The USB port (1.5A) is for charging devices,
playing audio files and connecting compatible
phones with Apple CarPlay or Android Auto.
1 USB Ports
•Do not leave the iPod or USB flash drive in the
vehicle. Direct sunlight and high temperatures may
damage it.
•We recommend using an ex tension cable with the
USB port.
•Do not connect the iPod or USB flash drive using a
hub.
•Do not use a device such as a card reader or hard
disk drive, as the device or your files may be
damaged.
•We recommend k eeping your data backed up
before using the device in your vehicle.
•Displayed messages may vary depending on the
device model and software version.
If the audio system does not recognize the iPod, try
reconnecting it a few times or reboot the device. To
reboot, follow the manufac turer’s instructions
provided with the iPod or visit www.apple.com/ipod.
The USB port can supply up to 1.0A/1.5A of power. It
does not output 1.0A/1.5A unless requested by the
device.
For amperage details, read the operating manual of
the device that ne eds to be charged.
Set the power mode to ACCESSORY or ON first.
Under certain condi tions, a device connected to the
port may generate noi se in the radio you are listening
to.
USB charge
In the glove box
In the console compartment
17 NSX-31T6N6000.book 163 ページ 2016年4月22日 金曜日 午後3時44分
Page 217 of 473
216
uuAudio System Basic Operation uApple CarPlay
Features
Apple CarPlay
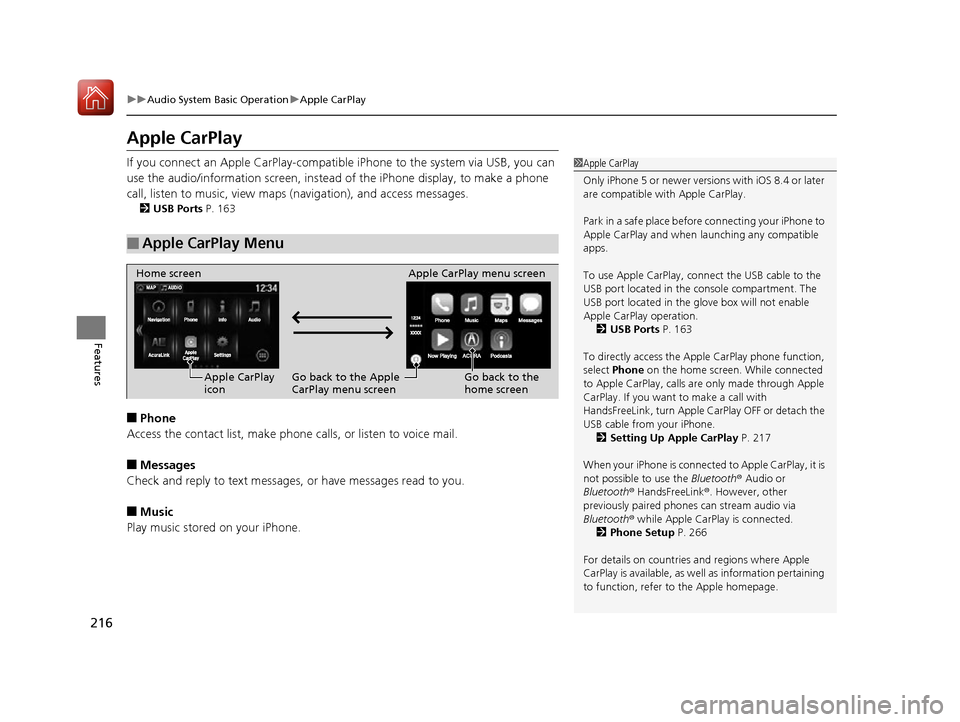
If you connect an Apple CarPlay-compatible iPhone to the system via USB, you can
use the audio/information screen, instead of the iPhone display, to make a phone
call, listen to music, view maps (navigation), and access messages.
2USB Ports P. 163
■Phone
Access the contact list, make phone calls, or listen to voice mail.
■Messages
Check and reply to text messages, or have messages read to you.
■Music
Play music stored on your iPhone.
■Apple CarPlay Menu
1 Apple CarPlay
Only iPhone 5 or newer versi ons with iOS 8.4 or later
are compatible with Apple CarPlay.
Park in a safe place before connecting your iPhone to
Apple CarPlay and when launching any compatible
apps.
To use Apple CarPlay, connect the USB cable to the
USB port located in the console compartment. The
USB port located in the glove box will not enable
Apple CarPla y operation.
2 USB Ports P. 163
To directly access the Appl e CarPlay phone function,
select Phone on the home screen. While connected
to Apple CarPlay, calls are only made through Apple
CarPlay. If you want to make a call with
HandsFreeLink, turn Apple CarPlay OFF or detach the
USB cable from your iPhone. 2 Setting Up Apple CarPlay P. 217
When your iPhone is connected to Apple CarPlay, it is
not possible to use the Bluetooth® Audio or
Bluetooth ® HandsFreeLink ®. However, other
previously paired phones can stream audio via
Bluetooth ® while Apple CarPlay is connected.
2 Phone Setup P. 266
For details on c ountries and regions where Apple
CarPlay is available, as well as information pertaining
to function, refer to the Apple homepage.
Home screen
Apple CarPlay
icon Apple CarPlay menu screen
Go back to the Apple
CarPlay menu screen
Go back to the
home screen
17 NSX-31T6N6000.book 216 ページ 2016年4月22日 金曜日 午後3時44分
Page 220 of 473
219
uuAudio System Basic Operation uAndroid Auto
Continued
Features
Android Auto
When you connect an Android phone to the audio system via USB, Android Auto is
automatically initiated. When connected via Android Auto, you can use the audio/
information screen to acce ss the Phone, Google Maps (Navigation), Google Play
Music, and Google Now functions. When you first use Android Auto, a tutorial will
appear on the screen.
We recommend that you complete this tuto rial while safely parked before using
Android Auto.
2 USB Ports P. 163
2 Auto Pairing Connection P. 221
1Android Auto
To use Android Auto, you need to download the
Android Auto app from Google Play to your
smartphone.
Only Android 5.0 (Lollipop) or later versions are
compatible with Android Auto.
Bluetooth A2DP cannot be used on your phone while
connected to Android Auto.
Park in a safe place befo re connecting your Android
phone to Android Auto and when launching any
compatible apps.
To use Android Auto, connect the USB cable to the
USB port located in the console compartment. The
USB port in the glove box will not enable Android
Auto operation.
2 USB Ports P. 163
To directly access the Android Auto phone function,
select Phone on the home screen.
2 Auto Pairing Connection P. 221
When your Android phone is connected to Android
Auto, it is not possible to use the Bluetooth® Audio.
However, other previously paired phones can stream
audio via Bluetooth ® while Android Auto is
connected. 2 Phone Setup P. 266
17 NSX-31T6N6000.book 219 ページ 2016年4月22日 金曜日 午後3時44分