2017.5 VAUXHALL MOVANO_B warning
[x] Cancel search: warningPage 149 of 259

Driving and operating147AdBlue canisterNotice
Only use the designated AdBlue
canisters for refilling, to prevent a
topping-up of too much AdBlue.
Additionally, the fumes in the tank
are captured in the canister and do
not emerge.
Notice
Since AdBlue has a limited
durability, check the date of expiry
before refilling.
1. Switch off engine and remove key
from ignition switch.
2. Open right-hand door and pull fuel
filler flap to open.3. Unscrew blue protective cap anticlockwise from the filler neck.
4. Open AdBlue canister.
5. Mount one end of the hose on the
canister and screw the other end
on the filler neck.
6. Lift the canister until it is empty, or
until the flow from the canister has stopped. This can take up to five
minutes.
7. Place the canister on the ground to empty the hose, wait 15
seconds.
8. Unscrew the hose from the filler neck.
9. Mount the protective cap and turn
clockwise until it engages.
10. Close filler flap and right-hand door.
Notice
Dispose of AdBlue canister
according to environmental
requirements. Hose can be reused
after flushing with clear water before
AdBlue dries out.Notice
Allow the vehicle to idle for at least
ten seconds to allow the system to
detect the AdBlue refill.
Failure to observe this procedure will
result in the system only recognising the AdBlue refill after approx.
20 minutes of driving.
If the AdBlue refill is detected
successfully, AdBlue level warnings
will disappear.
If the AdBlue refill is not detected
some time after running the engine,
seek the assistance of a workshop.
Filler cap
Only use genuine filler caps. AdBlue tank has a special filler cap.
Fault
If the system detects an operating
fault, control indicator Õ illuminates
together with A and a warning
chime. Seek the assistance of a
workshop immediately.
Depending on version, a
corresponding message may also
appear in the Driver Information
Centre 3 100.
Page 152 of 259

150Driving and operatingwarning may sound as a signal to
depress the brake pedal or apply the
parking brake.
Switch off engine if stopping for a
lengthy period, e.g. in traffic jams.
When the vehicle is parked and the
driver's door is opened, a warning
chime will sound if neutral is not
selected or the brake pedal has not
been depressed.
Engine braking
Automatic mode
When driving downhill, the manual
transmission automated does not
shift into higher gears until a fairly
high engine speed has been reached. It shifts down in good time when
braking.
Manual mode
To utilise the engine braking effect,
select a lower gear in good time when
driving downhill.Rocking the vehicle
Rocking the vehicle is only
permissible if the vehicle is stuck in
sand, mud, snow or a hole. Move the
selector lever between R and A/M (or
between + and -) in a repeat pattern,
while applying light pressure to the
accelerator pedal. Do not race the
engine and avoid sudden
acceleration.
Parking
Apply the parking brake. The most
recently engaged gear (see
transmission display) remains
engaged. With N, no gear is engaged.
When the ignition is switched off, the
transmission no longer responds to
movement of the selector lever.
If the ignition is not switched off, or the
parking brake has not been applied, a
warning chime will sound upon
opening the driver's door.
Manual mode If a higher gear is selected when the
engine speed is too low, or a lower
gear when the speed is too high, theshift is not executed. This prevents
the engine from running at too low or too high an engine speed.
If engine speed is too low, the
transmission automatically shifts to a
lower gear.
If engine speed is too high, the
transmission only switches to a higher gear via kickdown.
Electronic driving programmes
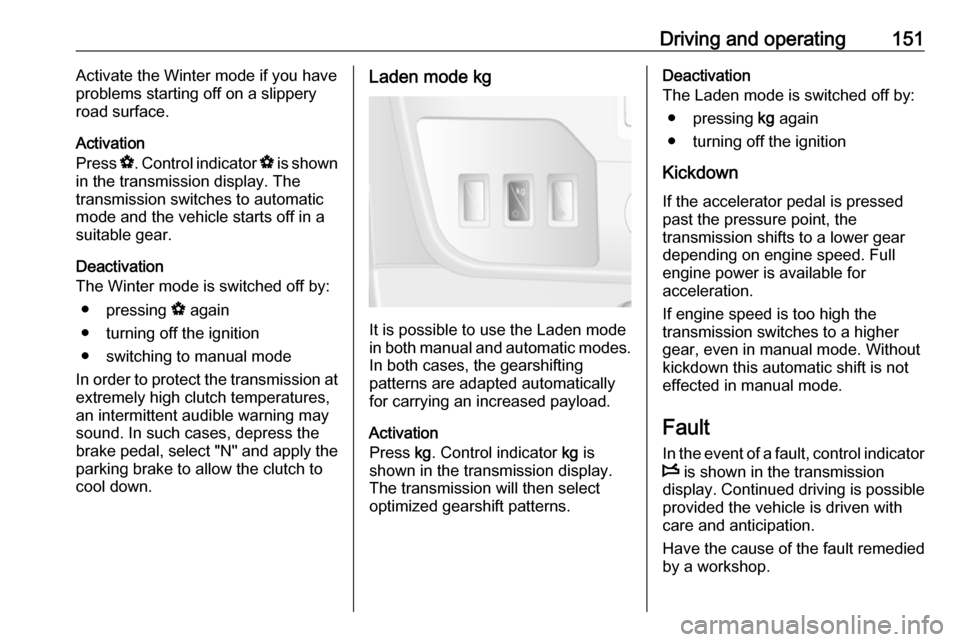
Winter mode V
Page 153 of 259

Driving and operating151Activate the Winter mode if you have
problems starting off on a slippery
road surface.
Activation
Press V. Control indicator V is shown
in the transmission display. The
transmission switches to automatic
mode and the vehicle starts off in a
suitable gear.
Deactivation
The Winter mode is switched off by:
● pressing V again
● turning off the ignition
● switching to manual mode
In order to protect the transmission at
extremely high clutch temperatures,
an intermittent audible warning may
sound. In such cases, depress the
brake pedal, select "N" and apply the parking brake to allow the clutch to
cool down.Laden mode kg
It is possible to use the Laden mode
in both manual and automatic modes. In both cases, the gearshifting
patterns are adapted automatically
for carrying an increased payload.
Activation
Press kg. Control indicator kg is
shown in the transmission display.
The transmission will then select
optimized gearshift patterns.
Deactivation
The Laden mode is switched off by:
● pressing kg again
● turning off the ignition
Kickdown If the accelerator pedal is pressed
past the pressure point, the
transmission shifts to a lower gear
depending on engine speed. Full
engine power is available for
acceleration.
If engine speed is too high the
transmission switches to a higher
gear, even in manual mode. Without
kickdown this automatic shift is not
effected in manual mode.
Fault
In the event of a fault, control indicator W is shown in the transmission
display. Continued driving is possible
provided the vehicle is driven with
care and anticipation.
Have the cause of the fault remedied
by a workshop.
Page 155 of 259

Driving and operating1539Warning
If there is a fault in the ABS, the
wheels may be liable to lock due
to braking that is heavier than
normal. The advantages of ABS are no longer available. During
hard braking, the vehicle can no longer be steered and may
swerve.
If control indicators u, A , R and
C illuminate, the ABS and ESP are
deactivated and the message
BRAKING FAULT is shown in the
Driver Information Centre. Seek the
assistance of a workshop.
Have the cause of the fault remedied
by a workshop.
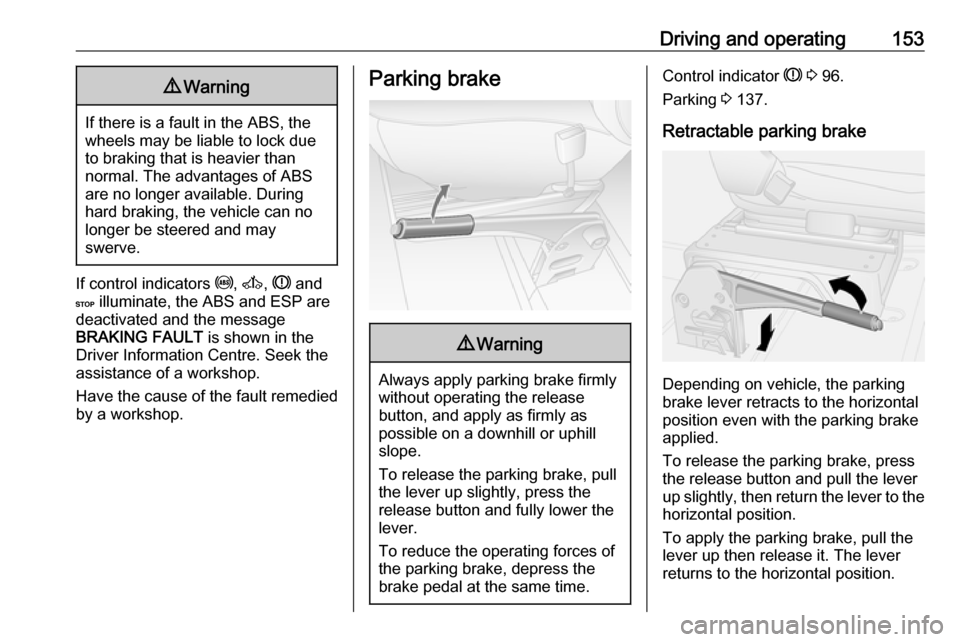
Parking brake9 Warning
Always apply parking brake firmly
without operating the release
button, and apply as firmly as
possible on a downhill or uphill
slope.
To release the parking brake, pull
the lever up slightly, press the
release button and fully lower the
lever.
To reduce the operating forces of
the parking brake, depress the
brake pedal at the same time.
Control indicator R 3 96.
Parking 3 137.
Retractable parking brake
Depending on vehicle, the parking
brake lever retracts to the horizontal
position even with the parking brake
applied.
To release the parking brake, press the release button and pull the lever
up slightly, then return the lever to the
horizontal position.
To apply the parking brake, pull the
lever up then release it. The lever
returns to the horizontal position.
Page 157 of 259

Driving and operating1559Warning
Do not let this special safety
feature tempt you into taking risks
when driving.
Adapt speed to the road
conditions.
Control indicator b 3 97.
Trailer stability assist (TSA) 3 170.
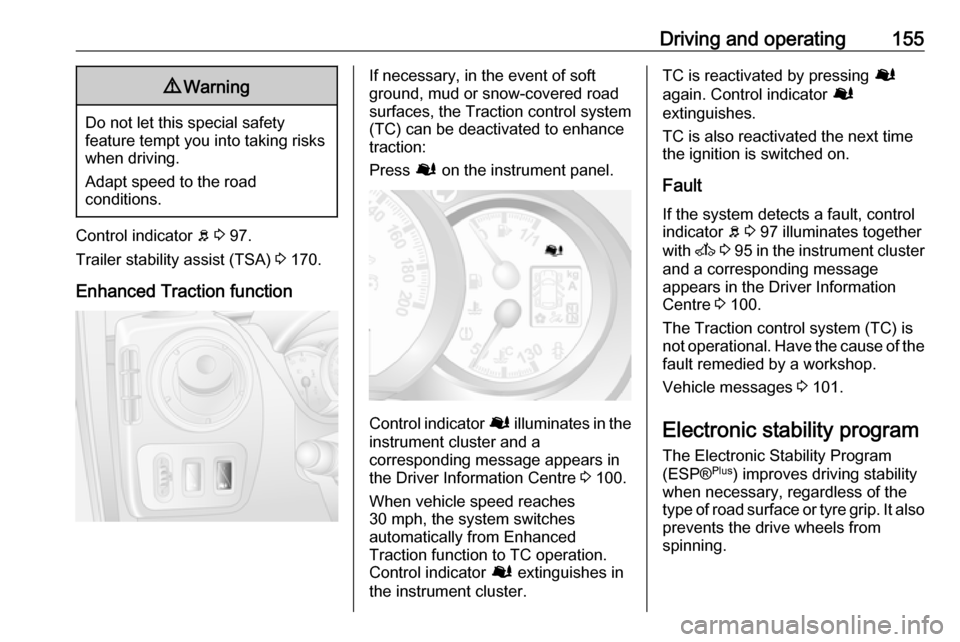
Enhanced Traction function
If necessary, in the event of soft
ground, mud or snow-covered road
surfaces, the Traction control system
(TC) can be deactivated to enhance
traction:
Press Ø on the instrument panel.
Control indicator Ø illuminates in the
instrument cluster and a
corresponding message appears in
the Driver Information Centre 3 100.
When vehicle speed reaches 30 mph, the system switches
automatically from Enhanced
Traction function to TC operation.
Control indicator Ø extinguishes in
the instrument cluster.
TC is reactivated by pressing Ø
again. Control indicator Ø
extinguishes.
TC is also reactivated the next time
the ignition is switched on.
Fault
If the system detects a fault, control indicator b 3 97 illuminates together
with A 3 95 in the instrument cluster
and a corresponding message
appears in the Driver Information
Centre 3 100.
The Traction control system (TC) is
not operational. Have the cause of the fault remedied by a workshop.
Vehicle messages 3 101.
Electronic stability program
The Electronic Stability Program
(ESP® Plus
) improves driving stability
when necessary, regardless of the
type of road surface or tyre grip. It also
prevents the drive wheels from
spinning.
Page 158 of 259

156Driving and operatingAs soon as the vehicle starts to
swerve (understeer/oversteer),
engine output is reduced and the wheels are braked individually. This
considerably improves the driving
stability of the vehicle on slippery road
surfaces.
ESP® Plus
is operational as soon as
the ignition is switched on and control
indicator b extinguishes in the
instrument cluster. A corresponding
message also appears in the Driver
Information Centre 3 100.
When ESP® Plus
comes into action b
flashes.9 Warning
Do not let this special safety
feature tempt you into taking risks
when driving.
Adapt speed to the road
conditions.
Control indicator b 3 97.
Trailer stability assist (TSA) 3 170.
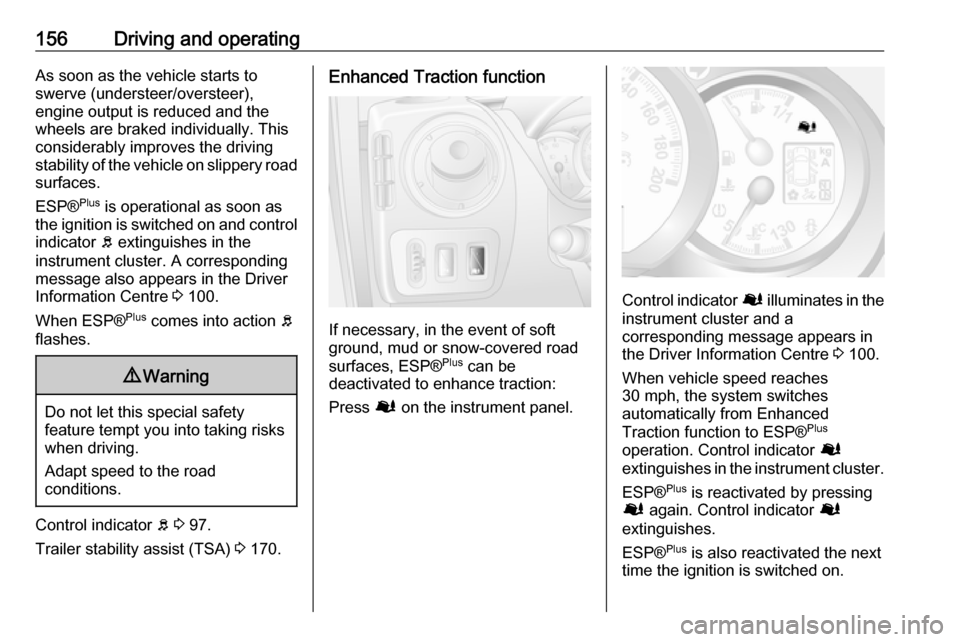
Enhanced Traction function
If necessary, in the event of soft
ground, mud or snow-covered road
surfaces, ESP® Plus
can be
deactivated to enhance traction:
Press Ø on the instrument panel.
Control indicator Ø illuminates in the
instrument cluster and a
corresponding message appears in
the Driver Information Centre 3 100.
When vehicle speed reaches
30 mph, the system switches
automatically from Enhanced
Traction function to ESP® Plus
operation. Control indicator Ø
extinguishes in the instrument cluster.
ESP® Plus
is reactivated by pressing
Ø again. Control indicator Ø
extinguishes.
ESP® Plus
is also reactivated the next
time the ignition is switched on.
Page 159 of 259

Driving and operating157Engine Drag Torque ControlThe engine drag torque control
system is an integral feature of
ESP® Plus
. When downshifting under
slippery road conditions, the engine
speed and torque increases to help
prevent locking of the drive wheels
during sudden deceleration.
Fault
If the system detects a fault, control indicator b 3 97 illuminates together
with A 3 95 in the instrument cluster
and a corresponding message
appears in the Driver Information
Centre 3 100.
The Electronic Stability Program
(ESP® Plus
) is not operational. Have
the cause of the fault remedied by a
workshop.
Vehicle messages 3 101.
Limited-slip rear axle
Rear-wheel drive vehicles may be
equipped with an automatic locking
rear differential which automatically controls the torque transmitted toeach rear wheel, enhancing traction
in the event of soft ground, mud or
snow-covered road surfaces.9 Warning
Do not let this special safety
feature tempt you into taking risks
when driving.
Adapt speed to the road
conditions.
When vehicle speed reaches
20 mph, or once the rear wheels
return to surfaces with normal grip,
e.g. paved roads, the system
automatically deactivates,
sometimes accompanied by a noise
(with no consequence to vehicle
behaviour).
The system can also be deactivated
manually once normal grip conditions have resumed by briefly releasing the
accelerator.
Driver assistance
systems9 Warning
Driver assistance systems are
developed to support the driver
and not to replace the driver's
attention.
The driver accepts full
responsibility when driving the
vehicle.
When using driver assistance
systems, always take care
regarding the current traffic
situation.
Cruise control
The cruise control can store and
maintain speeds of 20 mph and
above. Deviations from the stored
speeds may occur when driving uphill or downhill. The stored speed will
flash in the Driver Information Centre
3 100.
Page 163 of 259

Driving and operating161Speed limiter
Maximum speed limiter In accordance with local or national
regulations, the vehicle may be
equipped with a fixed maximum
speed limiter that cannot be disabled.
If equipped, a warning label indicating the fixed maximum speed limit (55 to
80 mph) is located on the instrument
panel.
Deviations from the maximum speed
limit may occur briefly when driving
downhill, for physical reasons.
A warning buzzer may sound for
ten seconds if the vehicle briefly
exceeds the set limit.
Vehicles also equipped with cruise
control speed limiter: the maximum
speed cannot be exceeded by
depressing the accelerator pedal
firmly beyond the point of resistance.
Cruise control speed limiter 3 157.Parking assist9 Warning
It is the driver who bears full
responsibility for the parking
manoeuvre.
Always check the surrounding
area while reversing and using the rear parking assist system.
The parking assist makes reverse
parking easier by measuring the
distance between the rear of the
vehicle and obstacles.
The system consists of four ultrasonic parking sensors in the rear bumper.
Notice
Attached parts in the detection area
cause system malfunction.
Activation
When reverse gear is engaged, the
system switches itself on
automatically. Readiness for
operation is indicated by a brief
acoustic signal.
An obstacle is indicated by buzzers.
The interval between the buzzers
becomes shorter as the vehicle gets
closer to the obstacle. When the
distance is less than 30 cm, the buzzer is continuous.