2017.5 VAUXHALL MOVANO_B display
[x] Cancel search: displayPage 125 of 259

Climate control123configures the remote control menu
automatically. If the LED flashes,
select Add or AddE and confirm.
Additional remote control units may
also be configured. Press the button
until LED flashes, switch on the
remote control, select Add and
confirm.
AddE teaches the current remote
control unit exclusively and blocks all
previously configured units. Add
teaches up to four remote control
units, but only one unit can operate the system at any one time.
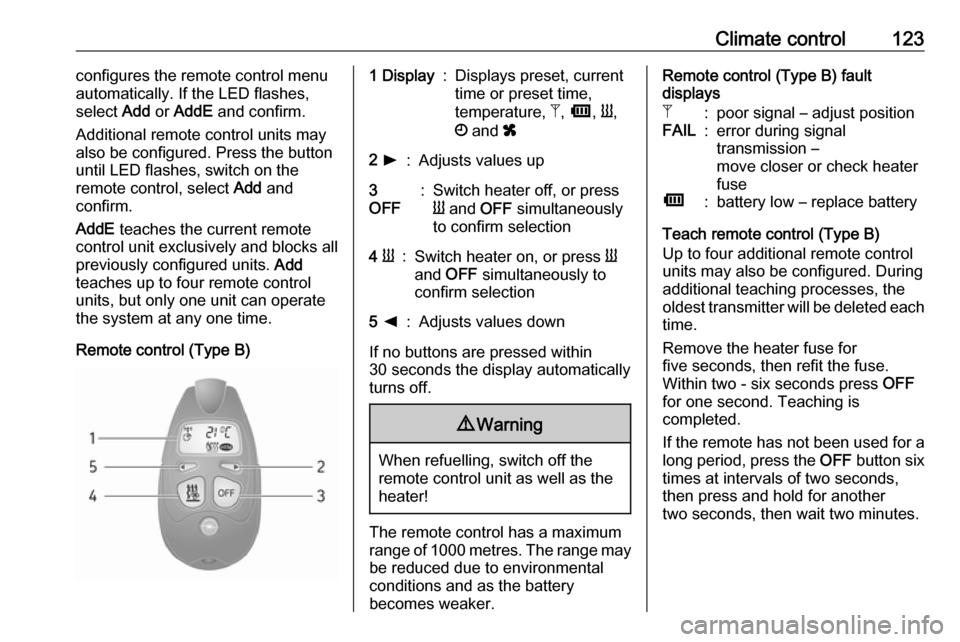
Remote control (Type B)1 Display:Displays preset, current
time or preset time,
temperature, Z, Ü , Y ,
Ö and x2 l:Adjusts values up3
OFF:Switch heater off, or press
Y and OFF simultaneously
to confirm selection4 Y:Switch heater on, or press Y
and OFF simultaneously to
confirm selection5 k:Adjusts values down
If no buttons are pressed within
30 seconds the display automatically
turns off.
9 Warning
When refuelling, switch off the
remote control unit as well as the
heater!
The remote control has a maximum
range of 1000 metres. The range may
be reduced due to environmental
conditions and as the battery
becomes weaker.
Remote control (Type B) fault
displaysZ:poor signal – adjust positionFAIL:error during signal
transmission –
move closer or check heater
fuseÜ:battery low – replace battery
Teach remote control (Type B)
Up to four additional remote control
units may also be configured. During
additional teaching processes, the
oldest transmitter will be deleted each
time.
Remove the heater fuse for
five seconds, then refit the fuse.
Within two - six seconds press OFF
for one second. Teaching is
completed.
If the remote has not been used for a long period, press the OFF button six
times at intervals of two seconds,
then press and hold for another
two seconds, then wait two minutes.
Page 126 of 259

124Climate controlManual control
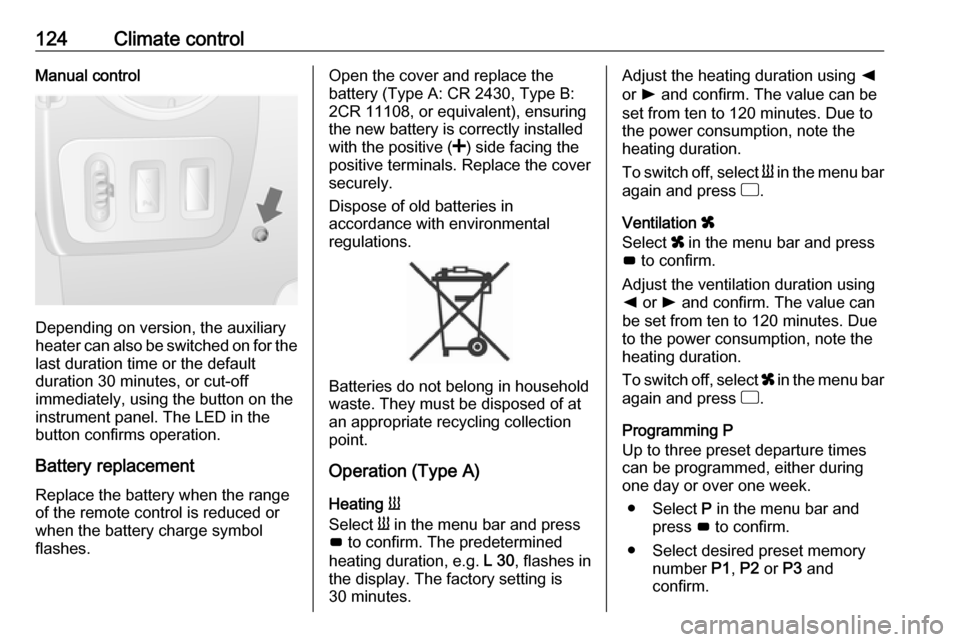
Depending on version, the auxiliary
heater can also be switched on for the
last duration time or the default
duration 30 minutes, or cut-off
immediately, using the button on the
instrument panel. The LED in the
button confirms operation.
Battery replacement
Replace the battery when the range
of the remote control is reduced or
when the battery charge symbol
flashes.
Open the cover and replace the
battery (Type A: CR 2430, Type B:
2CR 11108, or equivalent), ensuring
the new battery is correctly installed
with the positive ( <) side facing the
positive terminals. Replace the cover
securely.
Dispose of old batteries in
accordance with environmental
regulations.
Batteries do not belong in household
waste. They must be disposed of at
an appropriate recycling collection
point.
Operation (Type A)
Heating Y
Select Y in the menu bar and press
G to confirm. The predetermined
heating duration, e.g. L 30, flashes in
the display. The factory setting is 30 minutes.
Adjust the heating duration using k
or l and confirm. The value can be
set from ten to 120 minutes. Due to
the power consumption, note the
heating duration.
To switch off, select Y in the menu bar
again and press d.
Ventilation x
Select x in the menu bar and press
G to confirm.
Adjust the ventilation duration using k or l and confirm. The value can
be set from ten to 120 minutes. Due
to the power consumption, note the
heating duration.
To switch off, select x in the menu bar
again and press d.
Programming P
Up to three preset departure times
can be programmed, either during
one day or over one week.
● Select P in the menu bar and
press G to confirm.
● Select desired preset memory number P1, P2 or P3 and
confirm.
Page 127 of 259

Climate control125● Select F and confirm.
● Select weekday or weekday group and confirm.
● Select hour and confirm.
● Select minutes and confirm.
● Select Y or x and confirm.
● Select ECO or HIGH and confirm.
● Select duration and confirm. ● Press d to exit.
Repeat the procedure to programme
the other preset memory numbers if
required.
To activate a desired preset memory
number select P1, P2 or P3, then
select On and confirm.
When a program is activated P and
Y will be displayed together.
To deactivate a preset memory,
select P1, P2 or P3, then select Off
and confirm.
Heating stops automatically
five minutes after the programmed
departure time.Notice
The remote control system features a temperature sensor which
calculates the runtime according to the ambient temperature and thedesired heating level (ECO or
HIGH). The system starts
automatically between five and
60 minutes prior to the programmed
departure time.
Set time and weekday Þ
If the vehicle battery is disconnected
or its voltage is too low, the unit will
need to be reset.
● Select F in the menu bar and
confirm.
● Select Þ in the menu bar and
confirm.
● Adjust using k or l to change
the hour and confirm.
● Adjust using k or l to change
the minutes and confirm.
● Press d to exit.
● Select F in the menu bar and
confirm.
● Select Mo in the menu bar and
confirm.● Adjust using k or l to change
the weekday and confirm.
● Press d to exit.
Heating level
The preferred heating level for
programmed departure times can be
set to either ECO or HIGH.
● Select Y in the menu bar and
confirm.
● Select ECO or HIGH and confirm.
● Press d to exit.
Operation (Type B)
Heating Y or Ventilation x
Select the operating mode Y or x, if
necessary.
● Press l three times.
● Press Y and OFF
simultaneously, Y or x flashes.
● Adjust using k or l to select Y
or x.
● Press Y and OFF simultaneously
to confirm.
Page 128 of 259

126Climate controlTo switch on, press Y for
one second. The predetermined heating duration, e.g. 30, is
displayed. The factory setting is
30 minutes.
The heating duration can be set in
increments of ten minutes. Due to the power consumption, note the heatingduration.
● Press l four times.
● Press Y and OFF
simultaneously, Y/x flashes.
● Adjust using k or l to select the
desired heating duration.
● Press Y and OFF simultaneously
to confirm.
To switch off, press OFF.
Programming y
The system calculates the operating time of the heater depending on the
temperature inside the vehicle.
● Press k twice.
● Press Y and OFF
simultaneously, y flashes.● Adjust using k or l to select the
departure time.
● Press Y and OFF simultaneously
to confirm.
To switch on, press Y for one second ,
HTM is displayed.
Heating stops automatically after the
programmed departure time, or can
be manually switched off.
● Press k twice.
● Press OFF for one second, HTM
goes out.
Set time
If the vehicle battery is disconnected
or its voltage is too low, the time will
need to be reset.
● Press l once.
● Press Y and OFF
simultaneously, Ö flashes.
● Adjust using k or l to set the
time.
● Press Y and OFF simultaneously
to confirm.Heating level
The preferred heating level for
programmed departure times can be set to between C1 and C5.
● Press k three times.
● Press Y and OFF
simultaneously, Y flashes.
● Adjust using k or l to set the
heating level.
● Press Y and OFF simultaneously
to confirm.
To display the passenger
compartment temperature, press l
twice.
Page 132 of 259

130Driving and operatingDriving and
operatingDriving hints ............................... 131
Driving economically ...............131
Control of the vehicle ...............131
Steering ................................... 131
Starting and operating ...............132
New vehicle running-in ............132
Ignition switch positions ...........132
Starting the engine ..................133
Idle speed control ....................134
Overrun cut-off ........................ 134
Stop-start system ....................134
Parking .................................... 137
Air suspension ......................... 138
Engine exhaust .......................... 140
Diesel particle filter ..................140
Catalytic converter ...................140
AdBlue ..................................... 141
Manual transmission ..................148
Manual transmission automa‐ ted .............................................. 148
Transmission display ...............148
Starting the engine ..................149
Selector lever .......................... 149Manual mode........................... 150
Electronic driving programmes 150
Fault ........................................ 151
Interruption of power supply ....152
Brakes ........................................ 152
Antilock brake system .............152
Parking brake .......................... 153
Brake assist ............................. 154
Hill start assist ......................... 154
Ride control systems .................154
Traction Control system ..........154
Electronic stability program .....155
Limited-slip rear axle ...............157
Driver assistance systems .........157
Cruise control .......................... 157
Speed limiter ........................... 161
Parking assist .......................... 161
Rear view camera ...................163
Lane departure warning ..........165
Fuel ............................................ 166
Fuel for diesel engines ............166
Refuelling ................................ 167
Fuel consumption - CO 2-
Emissions .............................. 168
Trailer hitch ................................ 169
General information .................169
Driving characteristics and towing tips .............................. 169
Trailer towing ........................... 169Towing equipment ...................170
Trailer stability assist ...............170
Auxiliary features .......................170
Power take-off ......................... 170
Page 143 of 259

Driving and operating141Malfunction indicator light 3 95.
AdBlue
General information The selective catalytic reduction
(BlueInjection) is a method to
substantially reduce the nitrogen
oxides in the exhaust emission. This
is achieved by injecting a Diesel
Exhaust Fluid (DEF) into the exhaust
system.
The designation of this fluid is
AdBlue ®
. It is a non-toxic, non-
flammable, colourless and odourless
fluid which consists of 32% urea and
68% water.9 Warning
Avoid contact of your eyes or skin
with AdBlue.
In case of eye or skin contact,
rinse off with water.
Caution
Avoid contact of the paintwork with AdBlue.
In case of contact, rinse off with water.
AdBlue freezes at a temperature of
approx. -11 °C. As the vehicle is
equipped with an AdBlue pre-heater,
the emissions reduction at low
temperatures is ensured. The AdBlue
pre-heater works automatically.
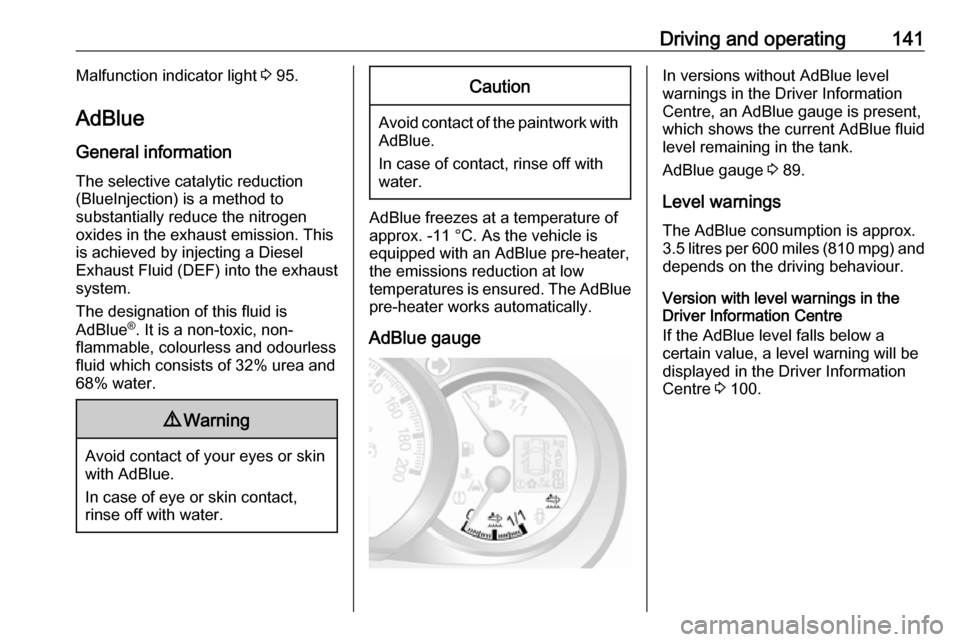
AdBlue gauge
In versions without AdBlue level
warnings in the Driver Information
Centre, an AdBlue gauge is present,
which shows the current AdBlue fluid
level remaining in the tank.
AdBlue gauge 3 89.
Level warnings
The AdBlue consumption is approx.
3.5 litres per 600 miles (810 mpg) and depends on the driving behaviour.
Version with level warnings in the
Driver Information Centre
If the AdBlue level falls below a
certain value, a level warning will be
displayed in the Driver Information
Centre 3 100.
Page 144 of 259

142Driving and operating
Additionally, control indicator Õ
illuminates continuously together with a warning chime.
Refill the AdBlue tank as soon as
possible. Refer to "Refilling AdBlue"
below.
If AdBlue is not refilled within a certain
distance, further level warnings are
displayed in the Driver Information
Centre depending on the current
AdBlue level.
Engine restarts prevented
Subsequent requests to refill AdBlue
and finally the announcement that an engine restart will be prevented are
displayed in the Driver Information
Centre.Notice
These restrictions are a legal
requirement.
Before the prevention of an engine
restart, a warning message with
0 miles is displayed in the Driver
Information Centre, indicating that after switching off the ignition an
engine restart will be prohibited.
After the prevention of an engine
start, a warning message is displayed in the Driver Information Centre
reminding the driver that AdBlue level
is insufficient.
To allow the engine to be restarted,
the tank should be refilled completely
or with a volume of at least ten litres
of AdBlue, depending on AdBlue
consumption.Warning stages: level warnings,
engine restarts prevented 1. Y illuminates after the ignition is
switched on with warning
message LEVEL ADBLUE LOW :
Driving is possible without any
restrictions.
Refill the AdBlue tank as soon as
possible.2. Y illuminates during driving with
warning message TOP UP
ADBLUE :
Possible loss of engine power.
Refill the AdBlue tank as soon as
possible.
3. Y illuminates during driving with
warning message XXX KM STOP
ADD ADBLUE :
Vehicle speed may be limited to
12 mph after switching the engine off and on again until the range is
reduced to 0 miles.
Refill the tank completely or with a
volume of at least ten litres of
AdBlue (depending on AdBlue
consumption) as soon as
possible.
4. Y illuminates during driving with
warning message 0 KM STOP
ADD ADBLUE :
The engine cannot be restarted
after switching off the ignition.
To allow the engine to be
restarted, refill the tank
completely or with a volume of at
least ten litres of AdBlue
(depending on AdBlue
Page 145 of 259

Driving and operating143consumption) as soon as
possible.
Illumination of control indicator Y may
be accompanied by a warning chime.
Warning chimes 3 101.High emission warnings
If the exhaust emission rises above a
certain value, warnings similar to the
range warnings as described above
will be displayed in the Driver
Information Centre. Control indicator
Õ illuminates continuously together
with A 3 95 and a warning chime.
Requests to have the exhaust system checked and finally the
announcement that an engine restart
will be prevented are displayed in the Driver Information Centre.
Notice
These restrictions are a legal
requirement.
At an AdBlue range of approx.
680 miles, a warning message is
displayed in the Driver Information Centre showing the remaining
distance the vehicle can travel beforeengine restarts are prevented. This
warning message is repeated approx.
every 60 miles.
Seek the assistance of a workshop as soon as possible.Warning stages: high emission
warnings 1. Y and A illuminate with warning
message CHECK ANTI-
POLLUTION :
Fault in the system that may result in a loss of engine power.
Seek the assistance of a
workshop as soon as possible.
2. Y and A illuminate with warning
message ANTIPOLLUTION xxx
KM FAIL :
Indicates that in less than
680 miles an engine restart will be
prohibited after switching off the
ignition.
This warning message will be
repeated every 60 miles.
Vehicle speed may be limited to
12 mph after switching the engine off and on again until the range is
reduced to 0 miles.Seek the assistance of a
workshop as soon as possible.
3. Y and A illuminate with warning
message ANTIPOLLUTION 0 KM
FAILURE :
The engine cannot be restarted
after switching off the ignition.
Seek the assistance of a
workshop.
Illumination of control indicators Y
and A may be accompanied by a
warning chime.
Warning chimes 3 101.
Version without level warnings in the Driver Information Centre