Page 129 of 261

Climate control127● Select F and confirm.
● Select weekday or weekday group and confirm.
● Select hour and confirm.
● Select minutes and confirm.
● Select Y or x and confirm.
● Select ECO or HIGH and confirm.
● Select duration and confirm. ● Press d to exit.
Repeat the procedure to programme
the other preset memory numbers if
required.
To activate a desired preset memory
number select P1, P2 or P3, then
select On and confirm.
When a program is activated P and
Y will be displayed together.
To deactivate a preset memory,
select P1, P2 or P3, then select Off
and confirm.
Heating stops automatically
five minutes after the programmed
departure time.Note
The remote control system features
a temperature sensor which
calculates the runtime according to
the ambient temperature and the desired heating level (ECO or
HIGH). The system starts
automatically between five and
60 minutes prior to the programmed
departure time.
Set time and weekday Þ
If the vehicle battery is disconnected
or its voltage is too low, the unit will
need to be reset.
● Select F in the menu bar and
confirm.
● Select Þ in the menu bar and
confirm.
● Adjust using k or l to change
the hour and confirm.
● Adjust using k or l to change
the minutes and confirm.
● Press d to exit.
● Select F in the menu bar and
confirm.
● Select Mo in the menu bar and
confirm.● Adjust using k or l to change
the weekday and confirm.
● Press d to exit.
Heating level
The preferred heating level for
programmed departure times can be
set to either ECO or HIGH.
● Select Y in the menu bar and
confirm.
● Select ECO or HIGH and confirm.
● Press d to exit.
Operation (Type B)
Heating Y or Ventilation x
Select the operating mode Y or x, if
necessary.
● Press l three times.
● Press Y and OFF
simultaneously, Y or x flashes.
● Adjust using k or l to select Y
or x.
● Press Y and OFF simultaneously
to confirm.
Page 130 of 261

128Climate controlTo switch on, press Y for
one second. The predetermined heating duration, e.g. 30, is
displayed. The factory setting is
30 minutes.
The heating duration can be set in
increments of ten minutes. Due to the power consumption, note the heatingduration.
● Press l four times.
● Press Y and OFF
simultaneously, Y/x flashes.
● Adjust using k or l to select the
desired heating duration.
● Press Y and OFF simultaneously
to confirm.
To switch off, press OFF.
Programming y
The system calculates the operating time of the heater depending on the
temperature inside the vehicle.
● Press k twice.
● Press Y and OFF
simultaneously, y flashes.● Adjust using k or l to select the
departure time.
● Press Y and OFF simultaneously
to confirm.
To switch on, press Y for one second ,
HTM is displayed.
Heating stops automatically after the
programmed departure time, or can
be manually switched off.
● Press k twice.
● Press OFF for one second, HTM
goes out.
Set time
If the vehicle battery is disconnected
or its voltage is too low, the time will
need to be reset.
● Press l once.
● Press Y and OFF
simultaneously, Ö flashes.
● Adjust using k or l to set the
time.
● Press Y and OFF simultaneously
to confirm.Heating level
The preferred heating level for
programmed departure times can be set to between C1 and C5.
● Press k three times.
● Press Y and OFF
simultaneously, Y flashes.
● Adjust using k or l to set the
heating level.
● Press Y and OFF simultaneously
to confirm.
To display the passenger
compartment temperature, press l
twice.
Page 131 of 261
Climate control129Air vents
Adjustable air vents At least one air vent must be open
while cooling is on in order to prevent
the evaporator from icing up due to
lack of air movement.
Centre air vents
Press the vent to open.
Direct the flow of air by swivelling the vent.
Push vent to close.
Side air vents
Press the vent to open.
Direct the flow of air by swivelling the vent.
Depending upon the position of the
temperature control, air will be
directed into the vehicle via the side
air vents.
9 Warning
Do not attach any objects to the
slats of the air vents. Risk of
damage and injury in the event of
an accident.
Combi
Adjustable air vents may be located in the roof frame. To open, press air
vent. Hold air vent and turn it to the
required position to direct the airflow.
Page 132 of 261

130Climate controlBus
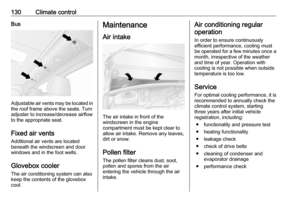
Adjustable air vents may be located inthe roof frame above the seats. Turn
adjuster to increase/decrease airflow
to the appropriate seat.
Fixed air vents Additional air vents are located
beneath the windscreen and door
windows and in the foot wells.
Glovebox cooler
The air conditioning system can also
keep the contents of the glovebox
cool.
Maintenance
Air intake
The air intake in front of the
windscreen in the engine
compartment must be kept clear to
allow air intake. Remove any leaves,
dirt or snow.
Pollen filter The pollen filter cleans dust, soot,
pollen and spores from the air
entering the vehicle through the air
intake.
Air conditioning regular
operation
In order to ensure continuously
efficient performance, cooling must
be operated for a few minutes once a
month, irrespective of the weather
and time of year. Operation with
cooling is not possible when outside
temperature is too low.
ServiceFor optimal cooling performance, it is
recommended to annually check the
climate control system, starting
three years after initial vehicle
registration, including:
● functionality and pressure test
● heating functionality
● leakage check
● check of drive belts
● cleaning of condenser and evaporator drainage
● performance check
Page 133 of 261
Climate control131Note
Refrigerant R-134a contains
fluorinated greenhouse gases with a
global warming potential of 1430.
Front air conditioning system is filled with 0.58 kg and has a CO 2
equivalent of 0.83 tonnes, the front
and rear air conditioning system in Combi variants is filled with 1.1 kg
and has a CO 2 equivalent of
1.57 tonnes and the front and rear air
conditioning system in Bus variants
is filled with 1.7 kg and has a CO 2
equivalent of 2.43 tonnes.
Depending on vehicle, information
regarding air conditioning refrigerant
appears on a label located in the
engine compartment.
Page 134 of 261

132Driving and operatingDriving and
operatingDriving hints ............................... 133
Driving economically ...............133
Control of the vehicle ...............133
Steering ................................... 133
Starting and operating ...............134
New vehicle running-in ............134
Ignition switch positions ...........134
Starting the engine ..................135
Idle speed control ....................136
Overrun cut-off ........................ 136
Stop-start system ....................136
Parking .................................... 139
Air suspension ......................... 140
Engine exhaust .......................... 142
Diesel particle filter ..................142
Catalytic converter ...................142
AdBlue ..................................... 143
Manual transmission ..................150
Manual transmission automa‐ ted .............................................. 150
Transmission display ...............150
Starting the engine ..................151
Selector lever .......................... 151Manual mode........................... 152
Electronic driving programmes 152
Fault ........................................ 153
Interruption of power supply ....154
Brakes ........................................ 154
Antilock brake system .............154
Parking brake .......................... 155
Brake assist ............................. 156
Hill start assist ......................... 156
Ride control systems .................156
Traction Control system ..........156
Electronic stability program .....157
Limited-slip rear axle ...............159
Driver assistance systems .........159
Cruise control .......................... 159
Speed limiter ........................... 163
Parking assist .......................... 163
Rear view camera ...................165
Lane departure warning ..........167
Fuel ............................................ 168
Fuel for diesel engines ............168
Refuelling ................................ 169
Fuel consumption - CO 2-
Emissions ............................... 170
Trailer hitch ................................ 171
General information .................171
Driving characteristics and towing tips .............................. 171
Trailer towing ........................... 171Towing equipment ...................172
Trailer stability assist ...............172
Auxiliary features .......................172
Power take-off ......................... 172
Page 135 of 261

Driving and operating133Driving hints
Driving economically
ECO mode ECO mode is a function that
optimises fuel consumption. It affects
engine power and torque,
acceleration, gear shift indication,
heating, air conditioning and electrical consumers.
ActivationPress ECO. Control indicator
illuminates when activated and a corresponding message appears in
the Driver Information Centre 3 102.
During driving, it is possible to
temporarily disable ECO mode, e.g.
to increase engine performance, by
depressing the accelerator pedal
firmly.
ECO mode is reactivated when
pressure is reduced on the
accelerator pedal.
Deactivation
Press ECO again. Control indicator
extinguishes.
Control of the vehicle
Never coast with engine not
running (except during Autostop)
Many systems will not function in this
situation (e.g. brake servo unit, power
steering). Driving in this manner is a
danger to yourself and others. All
systems function during an Autostop,
but there may be a controlled
reduction in power steering assist and
vehicle speed is reduced.Stop-start system 3 136.
Pedals To ensure the pedal travel is
uninhibited, there must be no mats in
the area of the pedals.
Use only floor mats which fit properly and are fixed by the retainers on the
driver's side.
Driving downhill
Engage a gear when driving downhill
to ensure that sufficient brake
pressure is available.
Steering If power steering assist is lost
because the engine stops or due to a system malfunction, the vehicle can
be steered but may require increased
effort.
Page 136 of 261

134Driving and operatingCaution
Vehicles equipped with hydraulic
power steering:
If the steering wheel is turned until it reaches the end of its travel, and
is held in that position for more
than 15 seconds, damage may
occur to the power steering
system and there may be loss of
power steering assist.
Starting and operating
New vehicle running-in
Do not brake unnecessarily hard for
the first few journeys and after new
disc brake pads have been fitted.
During the first drive, smoke may
occur because of wax and oil
evaporating off the exhaust system.
Park the vehicle in the open for a
while after the first drive and avoid
inhaling the fumes.
During the running-in period fuel and engine oil consumption may be
higher and the cleaning process of the diesel particle filter may take
place more often. Autostop may be
inhibited to allow for charging the
vehicle battery.
Stop-start system 3 136.
Diesel particle filter 3 142.
Ignition switch positions Turn key:0:ignition off: Some functions
remain active until key is
removed or driver's door is
opened, provided the ignition was
on previously1:accessory power mode: Steering wheel lock released, some
electrical functions are operable,
ignition is off2:ignition is on, diesel engine is
preheating. Control indicators
illuminate and most electrical
functions are operable3:engine start: Release key after
starting procedure begins