2017.5 OPEL ANTARA change time
[x] Cancel search: change timePage 75 of 225

Instruments and controls73Windscreen wiper/washerWindscreen wiper&:fast%:slow$:timed interval wiping or
automatic wiping with rain
sensor§:off
For a single wipe when the
windscreen wiper is off, press the
lever down.
Do not use if the windscreen is frozen.
Switch off in car washes.
Adjustable wiper interval
To set the wiping interval to a value
between 1 and 10 seconds:
● Switch on ignition.
● Push lever down from position §.
● Wait until wiping frequency reaches the desired interval.
● Set lever to position $.
The interval remains stored until the
next change or until the ignition is
switched off. Switching the ignition on
and moving the lever to $ sets the
interval to 3.5 seconds.
In this mode, wiping frequency is also
affected by vehicle speed. As vehicle speed increases, wiping will become
more frequent.
Automatic wiping with rain sensor$:automatic wiping with rain
sensor
The rain sensor detects the amount of water on the windscreen and
automatically regulates the frequency
of the windscreen wiper.
The wiper operates for one cycle to
check the system when the key is
turned to ignition switch position
ACC .
Page 94 of 225

92Instruments and controlsBoard-Info-DisplayThe Info-Display is located in the
instrument panel above the
Infotainment system.
Info-Display indicates:
● time 3 75
● outside temperature 3 75
● date 3 75
● Infotainment system - see Infotainment manual
An F in the display indicates a fault.
Have the cause of the fault remedied
by a workshop.
Trip computer, Board-Info-Display
3 100.
Selecting functions Functions and settings of the
Infotainment system can be accessed
via the Info-Display.
Functions are selected and executed
in the menu on the display using the
arrow buttons on the Infotainment
system or the left adjuster wheel on
the steering wheel.
If a check control warning message
appears on the Info-Display, the
display is blocked from other
functions. Acknowledge the message by pressing OK or the left adjuster
wheel. If there are several warning
messages, acknowledge them one at a time.
Check control 3 99.Select using the Infotainment system
buttons
In the Settings menu, press OK to call
up the required function. Use the arrow buttons to change settings.
In the BC menu, press OK to call up
the required function. Press OK to
operate the stop watch or restart
measurement and calculation.
Page 101 of 225

Instruments and controls99Always day design; black or coloured
text on a light background.
Always night design ; white or
coloured text on a dark background.
Selections are indicated by a o in
front of the menu item.
Ignition logic
See Infotainment manual.Vehicle messages
Warning chimes When starting the engine or whilst
driving
Only one warning chime will sound at a time.
The warning chime regarding
unfastened seat belts has priority
over any other warning chime.
● If seat belt is not fastened.
● When operating the turn and lane-change signals.
● When the vehicle is being driven and the electrical parking brake isapplied 3 143.
● When releasing the electrical parking brake without applying
the foot brake 3 90.
● If there is a fault in the braking system 3 85.
● If the parking assist detects an object 3 148.● During automatic self-cleaning of
the diesel particle filter 3 129.
● In vehicles equipped with engine overspeed warning; when
vehicle speed exceeds 120 km/h
3 91.
When the vehicle is parked and/or the driver's door is opened
● When the key is in the ignition switch.
● With exterior lights on.
Tyre pressure
Check control
Page 103 of 225

Instruments and controls101Board-Info-Display 3 92.
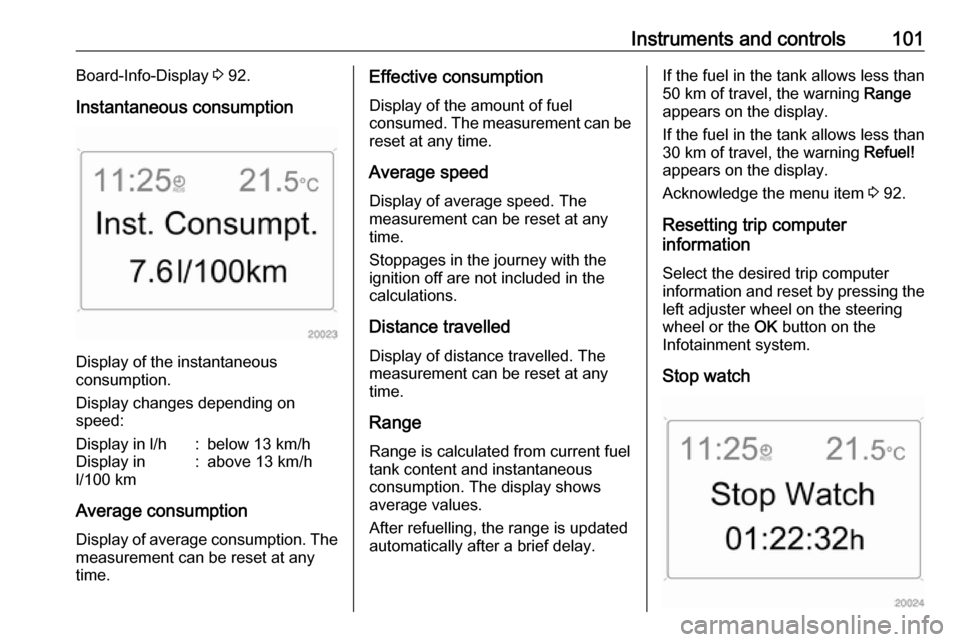
Instantaneous consumption
Display of the instantaneous
consumption.
Display changes depending on
speed:
Display in l/h:below 13 km/hDisplay in
l/100 km:above 13 km/h
Average consumption
Display of average consumption. The measurement can be reset at any
time.
Effective consumption
Display of the amount of fuel
consumed. The measurement can be reset at any time.
Average speed
Display of average speed. The
measurement can be reset at any
time.
Stoppages in the journey with the
ignition off are not included in the
calculations.
Distance travelled
Display of distance travelled. The
measurement can be reset at any
time.
RangeRange is calculated from current fuel
tank content and instantaneous
consumption. The display shows average values.
After refuelling, the range is updated
automatically after a brief delay.If the fuel in the tank allows less than
50 km of travel, the warning Range
appears on the display.
If the fuel in the tank allows less than
30 km of travel, the warning Refuel!
appears on the display.
Acknowledge the menu item 3 92.
Resetting trip computer
information
Select the desired trip computer
information and reset by pressing the left adjuster wheel on the steering
wheel or the OK button on the
Infotainment system.
Stop watch
Page 105 of 225

Instruments and controls103
If the fuel in the tank allows less than
50 km of travel, the warning Range
appears on the display.
If the fuel in the tank allows less than
30 km of travel, the warning Refuel!
appears on the display.
Acknowledge the menu item 3 94.
Instantaneous consumption
Display of the instantaneous
consumption.
Display changes depending on
speed:
Display in l/h:below 13 km/hDisplay in
l/100 km:above 13 km/hDistance travelled
Display of distance travelled. The
measurement can be reset at any
time.
Average speed
Display of average speed. The
measurement can be reset at any
time.
Stoppages in the journey with the ignition off are not included in the
calculations.
Effective consumption Display of the amount of fuel
consumed. The measurement can be
reset at any time.
Average consumption Display of average consumption. Themeasurement can be reset at any
time.Resetting trip computer
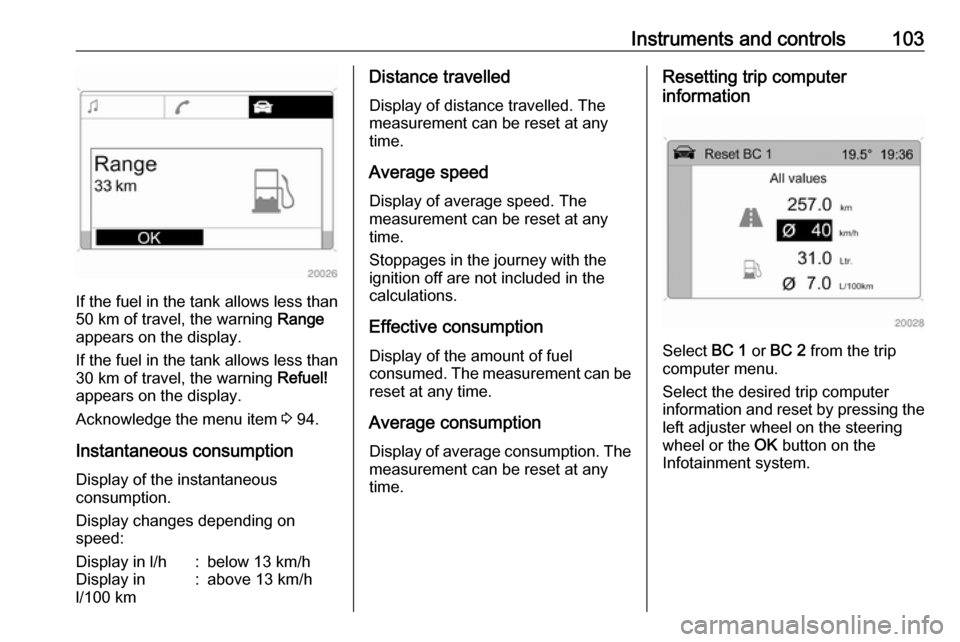
information
Select BC 1 or BC 2 from the trip
computer menu.
Select the desired trip computer
information and reset by pressing the left adjuster wheel on the steering
wheel or the OK button on the
Infotainment system.
Page 107 of 225

Lighting105LightingExterior lighting.......................... 105
Light switch .............................. 105
Automatic light control .............106
High beam ............................... 106
Headlight flash ......................... 106
Headlight range adjustment ....106
Headlights when driving abroad .................................... 107
Daytime running lights .............107
Hazard warning flashers ..........107
Turn and lane-change signals . 108
Front fog lights ......................... 108
Rear fog lights ......................... 109
Parking lights ........................... 109
Reversing lights .......................109
Misted light covers ...................109
Interior lighting ........................... 110
Instrument panel illumination control ..................................... 110
Interior lights ............................ 110
Load compartment lighting ......111
Reading lights .......................... 111
Sunvisor lights ......................... 112
Lighting features ........................112
Entry lighting ............................ 112Exit lighting.............................. 112
Battery discharge protection ....113Exterior lighting
Light switch
Turn light switch:
AUTO:automatic light control:
Headlights are switched on
and off automatically
depending on external
lighting conditions.7:off (or deactivation of
automatic light control).8:sidelights9:headlights
Control indicator C 3 90.
Page 137 of 225

Driving and operating135
4. Attach the adapter (located inglovebox) to the filler neck.
5. Open AdBlue canister.
6. Mount one end of the hose on the
canister and screw the other end
on the filler neck adapter.
7. Lift the canister until it is empty. 8. Unscrew the hose from the filler neck adapter.
9. Remove the adapter and return to
its container in the glovebox.
10. Mount the protective cap and turn
clockwise until it engages.
11. Replace the cover.
Note
Dispose of AdBlue canister and
hose according to environmental requirements.
Note
If an AdBlue refill is not detected,
drive continuously for 10 minutes,
keeping vehicle speed above
20 km/h.
If the AdBlue refill is detected
successfully, AdBlue level warnings
will disappear.
If the AdBlue refill is not detected
some time after running the engine,
seek the assistance of a workshop.
Note
If less than 10 litres of AdBlue have
been refilled during the last 2 years,
the remaining fluid should be
exchanged since AdBlue has a
limited durability. Seek the
assistance of a workshop.
Disregard could lead to damage to
the selective catalytic reduction
system.
Filler cap
Only use genuine filler caps. AdBlue
tank has a special filler cap.Fault
If the system detects an operating
fault, control indicator Y illuminates
together with a warning chime. Seek
the assistance of a workshop
immediately.
A corresponding message may
appear in the Driver Information
Centre 3 91.
Page 159 of 225

Vehicle care157General Information
Accessories and vehicle modifications
We recommend the use of genuine
parts and accessories and factory
approved parts specific for your
vehicle type. We cannot assess or guarantee reliability of other products
- even if they have a regulatory or
otherwise granted approval.
Do not make any modifications to the
electrical system, e.g. changes of
electronic control units (chip tuning).Caution
When transporting the vehicle on
a train or on a recovery vehicle, the
mud flaps might be damaged.
Vehicle storage
Storage for a long period of time
If the vehicle is to be stored for several months:
● Wash and wax the vehicle.
● Have the wax in the engine compartment and underbody
checked.
● Clean and preserve the rubber seals.
● Change the engine oil.
● Drain the washer fluid reservoir.
● Check the coolant antifreeze and
corrosion protection.
● Adjust tyre pressure to the value specified for full load.
● Park the vehicle in a dry, well ventilated place. Engage first or
reverse gear or move selector
lever to P. Prevent the vehicle
from rolling.
● Do not apply the electrical parking brake.● Open the bonnet, close all doorsand lock the vehicle.
● Disconnect the clamp from the negative terminal of the vehicle
battery. Beware that all systems
are not functional, e.g. anti-theft
alarm system.
Putting back into operation
When the vehicle is to be put back into
operation:
● Connect the clamp to the negative terminal of the vehicle
battery. Activate the electronics
of the power windows.
● Check tyre pressure.
● Fill up the washer fluid reservoir.
● Check the engine oil level.
● Check the coolant level.
● Fit the number plate if necessary.