Page 105 of 225

Instruments and controls103
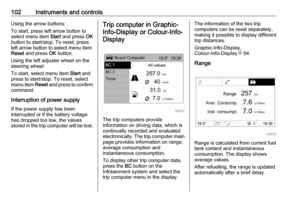
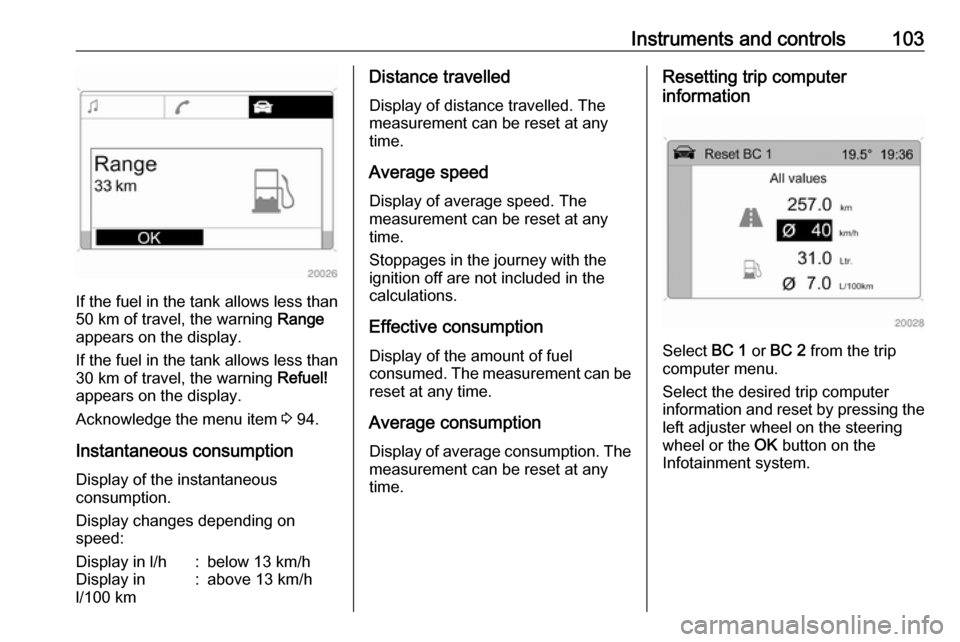
If the fuel in the tank allows less than
50 km of travel, the warning Range
appears on the display.
If the fuel in the tank allows less than
30 km of travel, the warning Refuel!
appears on the display.
Acknowledge the menu item 3 94.
Instantaneous consumption
Display of the instantaneous
consumption.
Display changes depending on
speed:
Display in l/h:below 13 km/hDisplay in
l/100 km:above 13 km/hDistance travelled
Display of distance travelled. The
measurement can be reset at any
time.
Average speed
Display of average speed. The
measurement can be reset at any
time.
Stoppages in the journey with the ignition off are not included in the
calculations.
Effective consumption Display of the amount of fuel
consumed. The measurement can be
reset at any time.
Average consumption Display of average consumption. Themeasurement can be reset at any
time.Resetting trip computer
information
Select BC 1 or BC 2 from the trip
computer menu.
Select the desired trip computer
information and reset by pressing the left adjuster wheel on the steering
wheel or the OK button on the
Infotainment system.
Page 106 of 225

104Instruments and controls
To reset all information of a trip
computer, select menu item All
values . After resetting, "- - -" is
displayed for the trip computer
information selected. The
recalculated values are displayed
after a brief delay.
Stop watch
Select menu item Timer from the
Board Computer menu. The Timer
menu is displayed.
To start, select menu item Start. To
reset, select menu item Reset.
The desired stop watch display can
be selected from the Options menu:
Driving Time excl. Stops : The time the
vehicle is in motion is recorded.
Stationary time is not included.
Driving Time incl. Stops : The time the
vehicle is in motion is recorded. The
time the vehicle is stationary with the
key in the ignition switch is included.
Travel Time : Measurement of the
time from manual activation via Start
to manual deactivation via Reset.
Interruption of power supply If the power supply has been
interrupted or if the battery voltage has dropped too low, the values
stored in the trip computer will be lost.
Page 107 of 225

Lighting105LightingExterior lighting.......................... 105
Light switch .............................. 105
Automatic light control .............106
High beam ............................... 106
Headlight flash ......................... 106
Headlight range adjustment ....106
Headlights when driving abroad .................................... 107
Daytime running lights .............107
Hazard warning flashers ..........107
Turn and lane-change signals . 108
Front fog lights ......................... 108
Rear fog lights ......................... 109
Parking lights ........................... 109
Reversing lights .......................109
Misted light covers ...................109
Interior lighting ........................... 110
Instrument panel illumination control ..................................... 110
Interior lights ............................ 110
Load compartment lighting ......111
Reading lights .......................... 111
Sunvisor lights ......................... 112
Lighting features ........................112
Entry lighting ............................ 112Exit lighting.............................. 112
Battery discharge protection ....113Exterior lighting
Light switch
Turn light switch:
AUTO:automatic light control:
Headlights are switched on
and off automatically
depending on external
lighting conditions.7:off (or deactivation of
automatic light control).8:sidelights9:headlights
Control indicator C 3 90.
Page 108 of 225
106LightingTail lightsTail lights illuminate together with low
beam/high beam and sidelights.
Automatic light control
When the automatic light control
function is switched on and the
engine is running, low beam switches on automatically depending on
outside light conditions.
For reasons of safety, the light switch
should always remain in the AUTO
position.
To ensure automatic light control
functions properly, do not cover the
light sensor on top of the instrument
panel.
Driving abroad 3 107.
Wiper activated lighting With light switch in the AUTO
position, when the windscreen wiper
is operated for 8 cycles or more the
exterior lights illuminate
automatically.
High beam
To switch from low to high beam,
push lever.
To switch to low beam, pull lever back
again.
Control indicator C 3 90.
Headlight flash
To activate the headlight flash, pull
lever.
Headlight range adjustment
Manual headlight range
adjustment ?
Page 109 of 225

Lighting107With low beam switched on, adapt
headlight range to suit vehicle load.
Correct adjustment of the headlight
range reduces dazzle for other road
users.
Vehicles without automatic level
control system
Turn thumb wheel ? to required
position:0:front seats occupied1:all seats occupied2:all seats occupied and load
compartment laden3:driver's seat occupied and load
compartment laden
Vehicles with automatic level control
system
Turn thumb wheel to required
position:
0:front seats occupied1:all seats occupied1:all seats occupied and load
compartment laden2:driver's seat occupied and load
compartment laden
Automatic level control 3 147.
Automatic headlight range
adjustment
On vehicles with Xenon headlights,
the headlight range is adjusted
automatically based on vehicle load.
If control indicator q illuminates in the
instrument cluster while driving, a
fault has occurred. Have the cause of
the fault remedied immediately by a
workshop.
Control indicator q for Automatic
headlight levelling system 3 90.
Headlights when driving abroad
The asymmetrical headlight beam
extends visibility at the edge of the
road on the passenger side.
However, when driving in countries
where traffic drives on the opposite
side of the road, have the headlights adjusted to prevent dazzling of
oncoming traffic. Seek the assistance
of a workshop.Daytime running lights
Daytime running lights increase
visibility of the vehicle during daylight.
They are switched on automatically
when ignition is on.
Automatic light control 3 106.
Hazard warning flashers
Operated by pressing ¨.
In the event of an accident with airbag
deployment the hazard warning
flashers are activated automatically.
Page 110 of 225

108LightingTurn and lane-changesignalslever up:right turn signallever down:left turn signal
If the lever is moved past the
resistance point, the turn signal is
switched on constantly.
When the steering wheel is turned
back, the turn signal is automatically
deactivated. This will not happen
when making a minor steering
manoeuvre such as lane changing.
For three flashes, e.g. when changing
lanes, press the lever until resistance is felt and then release. Move the
lever to the resistance point and hold for longer indication.
The volume of the turn signal audible
warning is dependent upon vehicle
speed.
Switch the turn signal off manually by moving the lever to its original
position.
Control indicators O 3 83.
Front fog lightsOperated by pressing >. Control
indicator > 3 90 illuminates in the
instrument cluster when the front fog
lights are switched on.
The front fog lights can only be
switched on when both the ignition
and low beam/high beam or sidelights are on.
Light switch in position AUTO:
switching on front fog lights will switch
on low beam and sidelights
automatically.
Follow the regulations of the country
in which you are driving when using
front fog lights.
Page 111 of 225

Lighting109Rear fog lights
Operated by pressing ø.
Control indicator ø 3 91 illuminates
in the instrument cluster when the rear fog light is switched on.
The rear fog light can only be
switched on when the ignition is on
and the light switch is in position 9,
or the front fog lights are on and the
light switch is in position 8.
Light switch in position AUTO:
switching on rear fog light will switch
on low beam and sidelights
automatically.
The vehicle rear fog light is
deactivated when towing.
Parking lights
When the vehicle is parked, the
parking lights on one side can be
activated:
1. Set light switch to 7 or AUTO .
2. Switch off ignition.
3. Move turn signal lever all the way up (right parking lights) or down
(left parking lights).
Confirmed by a signal tone and the
corresponding turn signal control
indicator.
To deactivate, switch on the ignition or move the turn signal lever in the
opposite direction.
Reversing lights
The reversing lights come on when
the ignition is on and reverse gear is
selected.
Centre high-mounted brake light Illuminates when the brakes are
applied, acting as a third stop light, to
supplement the brake lights.
Misted light covers
The inside of the light housing may
mist up briefly in poor, wet and cold weather conditions, in heavy rain or
after washing. The mist disappears
quickly by itself; to help switch on the
headlights.
Page 112 of 225

110LightingInterior lightingInstrument panelillumination control
Brightness of the following lights can
be adjusted when the exterior lights
are on:
● Instrument panel illumination
● Info-Display
● Illuminated switches and operation elements.
Turn thumb wheel k to the right or left
until the desired brightness is obtained.
If driver's door is opened or q is
pressed on the remote control,
instrument panel illuminates
automatically for 30 seconds until
ignition switch is turned to position ACC .
Display mode 3 94.
Interior lights
During entry and exit of the vehicle,
the front and rear courtesy lights
automatically switch on and then off
after a delay.
Note
In the event of an accident with
airbag deployment the courtesy
lights are turned on automatically.Front courtesy light
Front and rear reading lights and the
load compartment lights function as
courtesy lights and illuminate when
the doors or the tailgate are opened.
If the doors or tailgate remain open, the lights stay illuminated for
10 minutes. Once all doors and the tailgate are closed, the courtesy lights dim gradually after 10 seconds.
By pressing d in the roof console,
both the front and rear reading lights
illuminate. Press again to turn off.