2017.5 OPEL AMPERA E ESP
[x] Cancel search: ESPPage 115 of 265

Infotainment system113If the mobile phone is connected,
select Phone to display the main
menu of the phone portal.
For a detailed description of mobile
phone operation via the Infotainment
system 3 137.
Projection
To show specific apps of your
smartphone display on the
Infotainment system, connect your smartphone.
Select Projection to start the
projection function.
Depending on the smartphone
connected, a main menu with
different selectable apps is displayed.
For a detailed description 3 132.
Settings
Select Settings to open a menu for
various system related settings, e.g.
deactivating Audible touch feedback .
OnStar
To display the OnStar menu, select
OnStar .
For a detailed description 3 95.
Basic operation
The display of the Infotainment
system has a touch-sensitive surface
that allows direct interaction with the
displayed menu controls.Caution
Do not use pointed or hard items
like ballpoint pens, pencils or
similar for touch screen operation.
v screen button
Select v in the top left corner of the
screen or press p on the faceplate to
display the Infotainment home
screen.
1 screen button
Select 1 to display the application
overview screen.
u screen button
When operating the menus, select u
in the respective submenu to return to the next higher menu level.
Page 116 of 265

114Infotainment system
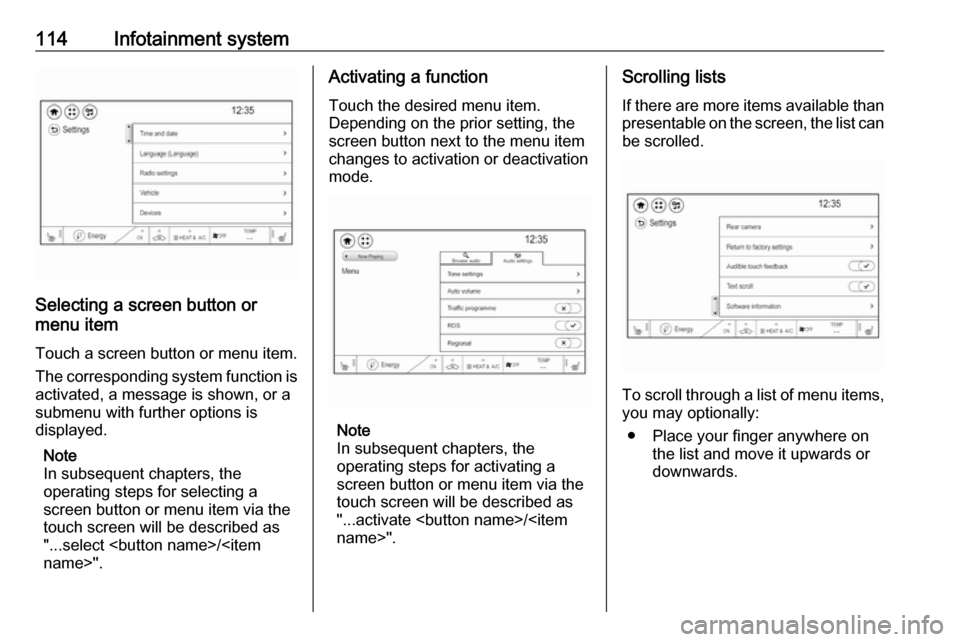
Selecting a screen button or
menu item
Touch a screen button or menu item.
The corresponding system function is activated, a message is shown, or a
submenu with further options is
displayed.
Note
In subsequent chapters, the
operating steps for selecting a
screen button or menu item via the
touch screen will be described as
"...select
Page 117 of 265

Infotainment system115Note
Constant pressure must be applied
and the finger must be moved at
constant speed.
● Move the slider of the scroll bar on the left side of the list up and
down with your finger.
Note
In subsequent chapters, the
operating steps for scrolling to a list item via the touch screen will be
described as "...scroll to
Editing the Infotainment home
screen
Press p to display the Infotainment
home screen and then select Edit. A
screen with different possible home
screen layouts is displayed.
Select the desired layout. The layout
is changed.
If you select Custom layout , a screen
for custom layout settings is
displayed.
Touch the different screen areas and design the layout as desired.
Quick-jumping to the Audio or
Phone menu
Using the w symbol displayed in the
top line of some menus, you may
directly jump to the main menu of the
active audio source.When a phone call is active and the phone screen is not displayed, a
quick-jump phone icon is displayed to directly jump to the phone main
menu.
Tone settings In the tone settings menu, the tone
characteristics can be set. The menu
may be accessed from each audio
main menu.
To open the tone settings menu,
select Menu and then activate the
Audio settings tab. Select Tone
settings to display the respective
menu.
Page 118 of 265

116Infotainment system
Bass
Use this setting to enhance or
attenuate the deep frequencies of the
audio sources.
Touch + or - to adjust the setting.
Mid
Use this setting to enhance or
attenuate the midrange frequencies
of the audio source.
Touch + or - to adjust the setting.
Treble
Use this setting to enhance or
attenuate the high frequencies of the
audio sources.
Touch + or - to adjust the setting.
Balance and fader
Use the illustration at the right side of
the menu to adjust balance and fader.
To define the point in the passenger
compartment where the sound is at its
highest level, touch the
corresponding point in the illustration.
Equaliser mode
Use this setting to optimise the tone
for the style of music, e.g. Rock or
Classical .
Activate the desired sound style. If you choose Custom, you can
manually adjust the tone settings.
BOSE premium audio If the system is equipped with BOSE
premium audio, only two equaliser
settings are available.Activate Talk if you want the tone
settings to be adjusted automatically.
Activate Custom if you want to adjust
the tone settings manually.
Volume settings Maximum startup volume
Press p and then select 1 in the top
left corner of the screen to display the application overview screen.
Select Settings , Radio settings and
then Maximum start-up volume .
Touch + or - to adjust the setting.
Speed compensated volumeThe volume can be automatically
adjusted according to the speed
noise level of the vehicle.
Press p and then select 1 in the top
left corner of the screen to display the application overview screen.
Select Audio and then activate the
desired audio source. Select Menu
and activate the Audio settings tab.
Select Auto volume to display the
respective submenu.
Page 119 of 265

Infotainment system117To adjust the degree of volume
adaptation, select one of the options
in the list.
Off : no enhancement of volume with
increasing vehicle speed.
High : maximum enhancement of
volume with increasing vehicle
speed.
Audible touch feedback function
If the audible touch feedback function
is activated, each touch of a screen
button or menu item is indicated by a
beeping sound.
Press p and then select 1 in the top
left corner of the screen to display the application overview screen.
Select Settings and then scroll
through the list to Audible touch
feedback .
Touch the screen button next to
Audible touch feedback to activate or
deactivate the function.
Audio Cues Audio cues are short sound effects
indicating certain system actions.
Configuration
Press p and then select 1 in the top
left corner of the screen to display the
application overview screen.
Select Settings and then Radio
settings . Activate or deactivate Audio
Cues .
Audio Cues Volume
Press p and then select 1 in the top
left corner of the screen to display the application overview screen.
Select Settings and then Radio
settings . Select Audio Cues Volume
to display the respective submenu.
Adjust the volume as desired.
Note
The Audio Cues Volume setting is
only available if Audio Cues is
activated.
Volume of traffic announcements
To adjust the volume of traffic
announcements, set the desired
volume while a traffic announcement
is given out by the system. The
respective setting is then stored by
the system.
System settings
The following settings concern the
whole system. All other settings are
described by theme in the respective
chapters of this manual.
Page 120 of 265

118Infotainment systemTime and date settings
Press p and then select 1 in the top
left corner of the screen to display the application overview screen.
Select Settings and then Time and
date to display the respective
submenu.
Auto set
To choose whether time and date are to be set automatically or manually,
select Auto set .
For time and date to be set
automatically, select On - RDS.
For time and date to be set manually,
select Off - Manual . If Auto set is set
to Off - Manual , the submenu items
Set time and Set date are available.
Set time
To adjust the time and date settings, select Set time .
Select the time format at the left side of the screen. Activate 12 hr or 24 hr .
Touch + and - to adjust the time
settings.
Set date
To adjust the time and date settings,
select Set date .
Touch + and - to adjust the date
settings.
Language settings
Press p and then select 1 in the top
left corner of the screen to display the application overview screen.
Select Settings and then Language to
display the respective menu.
To adjust the language for the menu
texts: touch the desired language.Text scroll function
If long text is displayed on the screen
e.g. song titles or station names, the
text may either be scrolled continually or it may be scrolled once and then
displayed in truncated form.
Press p and then select 1 in the top
left corner of the screen to display the application overview screen.
Select Settings .
If you wish the text to be scrolled
continually, activate Text scroll.
If you wish the text to be scrolled in
blocks, deactivate the setting.
Page 121 of 265

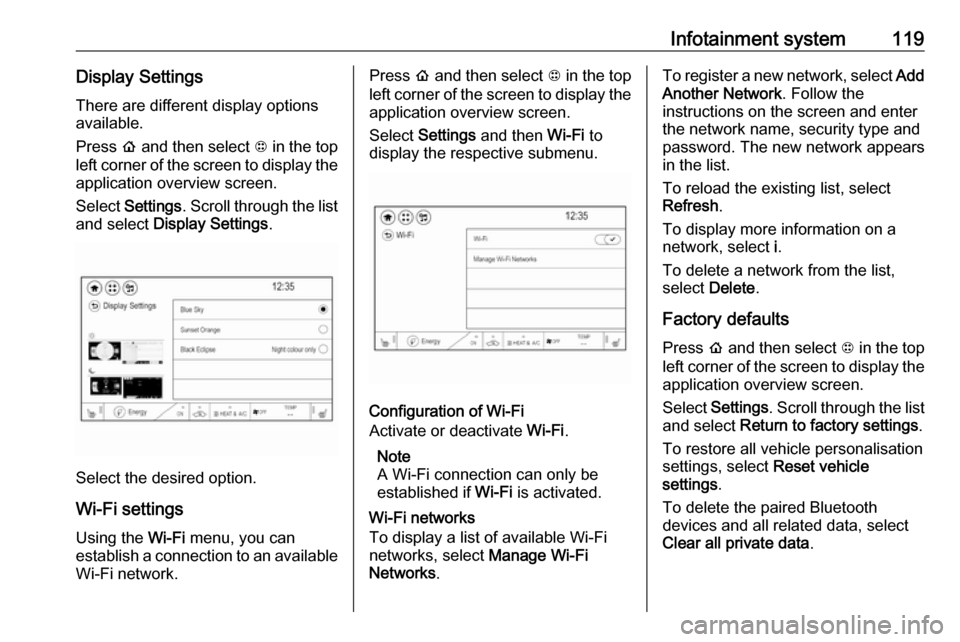
Infotainment system119Display SettingsThere are different display options
available.
Press p and then select 1 in the top
left corner of the screen to display the application overview screen.
Select Settings . Scroll through the list
and select Display Settings .
Select the desired option.
Wi-Fi settings Using the Wi-Fi menu, you can
establish a connection to an available
Wi-Fi network.
Press p and then select 1 in the top
left corner of the screen to display the application overview screen.
Select Settings and then Wi-Fi to
display the respective submenu.
Configuration of Wi-Fi
Activate or deactivate Wi-Fi.
Note
A Wi-Fi connection can only be
established if Wi-Fi is activated.
Wi-Fi networks
To display a list of available Wi-Fi
networks, select Manage Wi-Fi
Networks .
To register a new network, select Add
Another Network . Follow the
instructions on the screen and enter
the network name, security type and
password. The new network appears
in the list.
To reload the existing list, select
Refresh .
To display more information on a
network, select i.
To delete a network from the list,
select Delete .
Factory defaults Press p and then select 1 in the top
left corner of the screen to display the application overview screen.
Select Settings . Scroll through the list
and select Return to factory settings .
To restore all vehicle personalisation
settings, select Reset vehicle
settings .
To delete the paired Bluetooth
devices and all related data, select
Clear all private data .
Page 123 of 265

Infotainment system121Audio menu
Select Menu to display the audio
menu.
To return from the audio menu to the
audio main screen, select Now
playing .
Current station information From the FM or DAB main screen,
select Menu and then activate the
Browse audio tab.
To display additional information on
the station currently playing, select
Current station information .
Station search
Automatic station search Briefly press or touch t or v on the
control panel or on the screen to play the previous or next station available.
Manual station search
Press and hold t or v on the
control panel. Release when the required frequency has almost been
reached.
A search is made for the next station that can be received and it is played
automatically.
Note
FM waveband: when the RDS
function is activated, only RDS
stations 3 123 are searched for, and
when the radio traffic service (TP) is activated, only traffic service
stations 3 123 are searched for.
Station tuning
Touch x on the screen. The tuning
display is shown.
Enter the desired frequency.
Use { to delete digits entered.
Select x to delete the whole input. If
necessary, touch d or c to
subsequently adjust the input.
Note
A " ." between the digits is
automatically added by the system
at the right location.
Stations lists
Stations
Select Menu to open the
corresponding waveband-specific
submenu.