2016 YAMAHA GRIZZLY 350 warning
[x] Cancel search: warningPage 73 of 146

7-13
7
This procedure should be practiced at slow speed
many times in a large unpaved area with no obsta-
cles. If an incorrect technique is used, your ATV
may continue to go straight. If the ATV doesn’t
turn, come to a stop and then practice the proce-
dure again. If the riding surface is slippery or
loose, it may help to position more of your weight
over the front wheels by moving forward on the
seat.
Once you have learned this technique, you should
be able to perform it at higher speeds or in tighter
curves. Improper riding procedures such as abrupt throt-
tle changes, excessive braking, incorrect body
movements, or too much speed for the sharpness
of the turn may cause the ATV to tip. If the ATV be-
gins to tip over to the outside while negotiating a
turn, lean more to the inside. It may also be nec-
essary to gradually let off on the throttle and steer
to the outside of the turn to avoid tipping over.
Remember: Avoid higher speeds until you are
thoroughly familiar with the operation of your ATV.
CLIMBING UPHILL
WARNING
EWB01672Climbing hills improperly can cause overturns
or loss of control. Use proper riding techniques
described in this Owner’s Manual.
Never operate the ATV on hills too steep for
the ATV or for your abilities. The ATV can
overturn more easily on extremely steep hills
than on level surfaces or small hills.
Always check the terrain carefully before you
start up any hill. Never climb hills with exces-
sively slippery or loose surfaces.
Shift your weight forward.
Never open the throttle suddenly. The ATV
could flip over backwards.
1. Lean towards inside of turn.
2. Support your weight on the outer footboard.U1NS64E0.book Page 13 Thursday, June 25, 2015 8:36 AM
Page 76 of 146

7-16
7around and remount, following the procedure de-
scribed in the Owner’s Manual. WARNING! Stall-
ing, rolling backwards or improperly
dismounting while climbing a hill could result in
ATV overturning. If you cannot control the ATV,
dismount immediately on the uphill side.
[EWB01803]RIDING DOWNHILL
WARNING
EWB01622Going down a hill improperly could cause over-
turns or loss of control. Always follow proper
procedures for going down hills as described
in this Owner’s Manual.
Always check the terrain carefully before you
start down any hill.
Never operate the ATV on hills too steep for
the ATV or for your abilities. The ATV can
overturn more easily on extremely steep hills
than on level surfaces or small hills.
Shift your weight backward and to the up
side of the hill.
Never go down a hill at high speed.
Avoid going down a hill at an angle that
would cause the ATV to lean sharply to one
side. Go straight down the hill where possi-
ble.
Improper braking can cause the wheels on
the uphill side to come off the ground or cau-
se loss of traction. Apply brakes gradually. If
in “2WD”, apply only the rear brake.
When riding your ATV downhill, shift your weight
as far to the rear and uphill side of the ATV as pos-
sible. Move back on the seat and sit with your
arms straight. Engine compression will do most of
the braking for you. For maximum engine com-
pression braking effect, change to “4WD” before
beginning to descend the hill.
U1NS64E0.book Page 16 Thursday, June 25, 2015 8:36 AM
Page 77 of 146
7-17
7
Use caution while descending a hill with loose or
slippery surfaces. Braking ability and traction may
be adversely affected by these surfaces. Improper
braking may also cause a loss of traction.
When this ATV is in “4WD”, all wheels (front and
rear) are interconnected by the drive train. This
means that applying either the front brake or the
rear brake will brake all wheels. When descending
hills, using either brake lever or the brake pedal
will brake the wheels on the downhill side. Avoid
sudden application of either the front or rear brake
because the wheels on the uphill side could come
off the ground. Apply both the front and rear
brakes gradually.
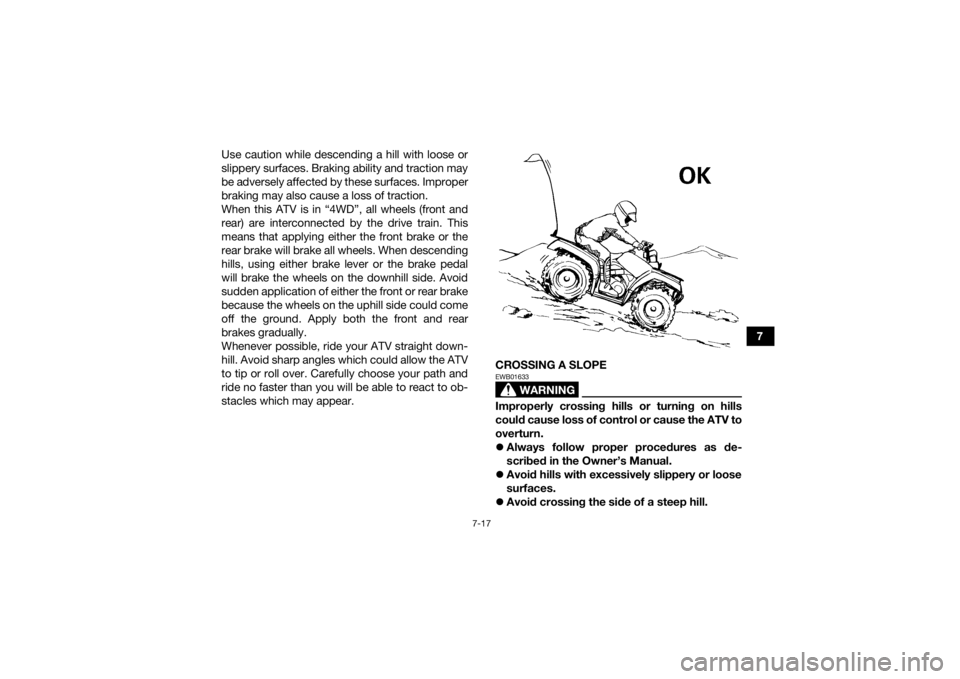
Whenever possible, ride your ATV straight down-
hill. Avoid sharp angles which could allow the ATV
to tip or roll over. Carefully choose your path and
ride no faster than you will be able to react to ob-
stacles which may appear.
CROSSING A SLOPE
WARNING
EWB01633Improperly crossing hills or turning on hills
could cause loss of control or cause the ATV to
overturn.
Always follow proper procedures as de-
scribed in the Owner’s Manual.
Avoid hills with excessively slippery or loose
surfaces.
Avoid crossing the side of a steep hill.
U1NS64E0.book Page 17 Thursday, June 25, 2015 8:36 AM
Page 78 of 146
7-18
7
Shift your weight to the uphill side of the ATV.
Never attempt to turn the ATV around on any
hill until you have mastered the turning tech-
nique as described in the Owner’s Manual on
level ground. Be very careful when turning
on any hill.
Traversing a sloping surface on your ATV requires
you to properly position your weight to maintain
proper balance. Be sure that you have learned the
basic riding skills on flat ground before attempting
to cross a sloping surface. Avoid slopes with slip-
pery surfaces or rough terrain that may upset your
balance.
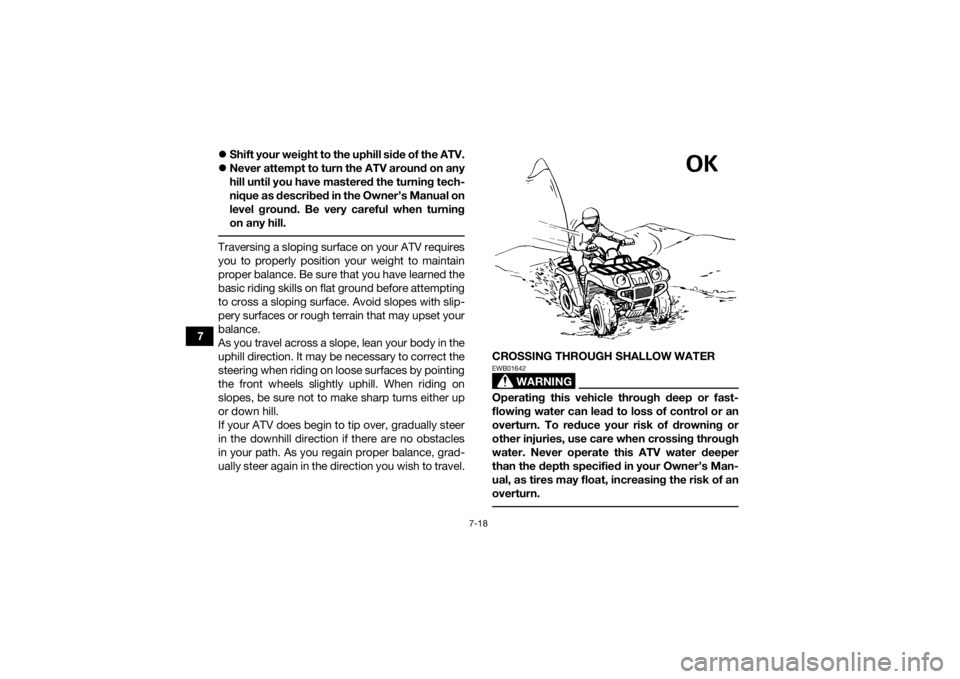
As you travel across a slope, lean your body in the
uphill direction. It may be necessary to correct the
steering when riding on loose surfaces by pointing
the front wheels slightly uphill. When riding on
slopes, be sure not to make sharp turns either up
or down hill.
If your ATV does begin to tip over, gradually steer
in the downhill direction if there are no obstacles
in your path. As you regain proper balance, grad-
ually steer again in the direction you wish to travel. CROSSING THROUGH SHALLOW WATER
WARNING
EWB01642Operating this vehicle through deep or fast-
flowing water can lead to loss of control or an
overturn. To reduce your risk of drowning or
other injuries, use care when crossing through
water. Never operate this ATV water deeper
than the depth specified in your Owner’s Man-
ual, as tires may float, increasing the risk of an
overturn.
U1NS64E0.book Page 18 Thursday, June 25, 2015 8:36 AM
Page 79 of 146
7-19
7
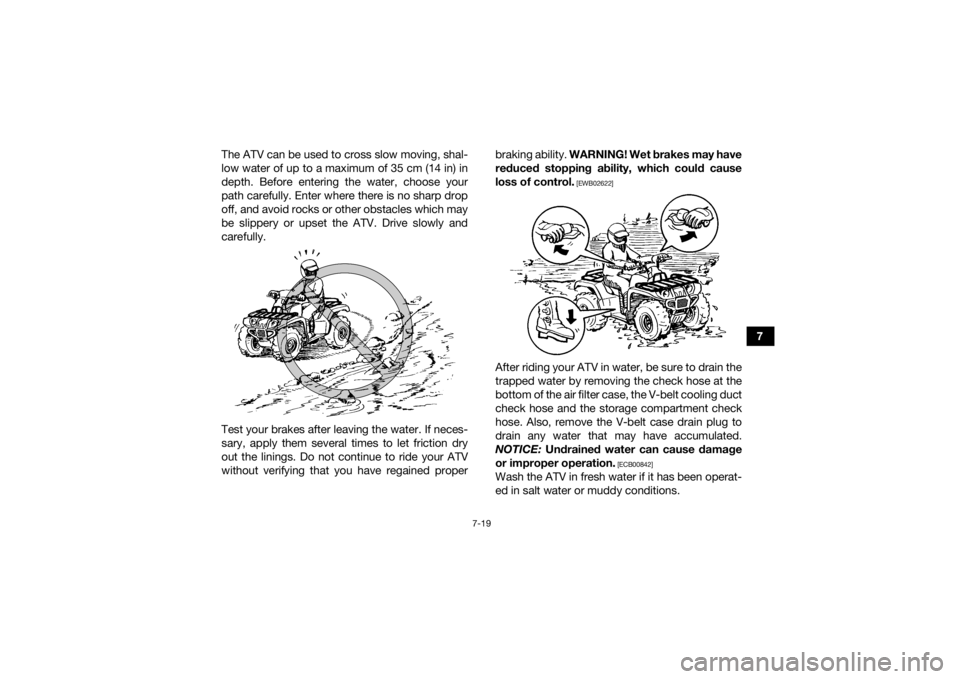
The ATV can be used to cross slow moving, shal-
low water of up to a maximum of 35 cm (14 in) in
depth. Before entering the water, choose your
path carefully. Enter where there is no sharp drop
off, and avoid rocks or other obstacles which may
be slippery or upset the ATV. Drive slowly and
carefully.
Test your brakes after leaving the water. If neces-
sary, apply them several times to let friction dry
out the linings. Do not continue to ride your ATV
without verifying that you have regained proper braking ability.
WARNING! Wet brakes may have
reduced stopping ability, which could cause
loss of control.
[EWB02622]
After riding your ATV in water, be sure to drain the
trapped water by removing the check hose at the
bottom of the air filter case, the V-belt cooling duct
check hose and the storage compartment check
hose. Also, remove the V-belt case drain plug to
drain any water that may have accumulated.
NOTICE: Undrained water can cause damage
or improper operation.
[ECB00842]
Wash the ATV in fresh water if it has been operat-
ed in salt water or muddy conditions.
U1NS64E0.book Page 19 Thursday, June 25, 2015 8:36 AM
Page 81 of 146
7-21
7
RIDING OVER ROUGH TERRAIN
WARNING
EWB01652Riding improperly over obstacles could cause
loss of control or a collision. Before operating
in a new area, check for obstacles. Never at-
tempt to ride over large obstacles, such as lar-
ge rocks or fallen trees. When you go over
obstacles, always follow proper procedures as
described in the Owner’s Manual. Riding over rough terrain should be done with
caution. Look out for obstacles which could cause
damage to the ATV or could lead to an upset or
accident. Be sure to keep your feet firmly mounted
on the footboards at all times. Avoid jumping the
ATV as loss of control and damage to the ATV may
result.
SLIDING AND SKIDDING
WARNING
EWB01663Skidding or sliding improperly may cause you
to lose control of this ATV. You may also regain
traction unexpectedly, which may cause the
ATV to overturn.
Learn to safely control skidding or sliding by
practicing at low speeds and on level,
smooth terrain.
On extremely slippery surfaces, such as ice,
go slowly and be very cautious in order to re-
duce the chance of skidding or sliding out of
control.
Care should be used when riding on loose or slip-
pery surfaces since the ATV may slide. If unex-
pected and uncorrected, sliding could lead to an
accident.
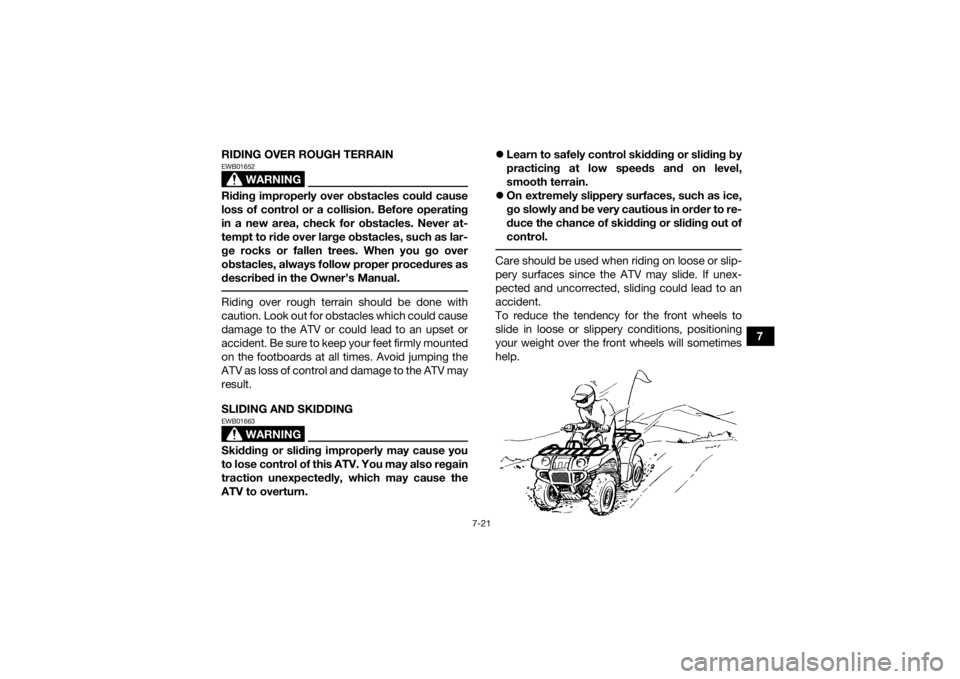
To reduce the tendency for the front wheels to
slide in loose or slippery conditions, positioning
your weight over the front wheels will sometimes
help.
U1NS64E0.book Page 21 Thursday, June 25, 2015 8:36 AM
Page 84 of 146
8-1
8
EBU28786
PERIODIC MAINTENANCE AND ADJUSTMENT
EBU21675Periodic inspection, adjustment, and lubrication
will keep your vehicle in the safest and most effi-
cient condition possible. Safety is an obligation of
the vehicle owner/operator. The most important
points of vehicle inspection, adjustment, and lu-
brication are explained on the following pages.
WARNING
EWB01842Failure to properly maintain the vehicle or per-
forming maintenance activities incorrectly may
increase your risk of injury or death during ser-
vice or while using the vehicle. If you are not fa-
miliar with vehicle service, have a Yamaha
dealer perform the service.
WARNING
EWB02563Turn off the engine when performing mainte-
nance unless otherwise specified.
A running engine has moving parts that can
catch on body parts or clothing and electri-
cal parts that can cause shocks or fires.
Running the engine while servicing can lead
to eye injury, burns, fire, or carbon monoxide
poisoning - possibly leading to death. See
page 2-6 for more information about carbon
monoxide.
WARNING
EWB02691Brake discs, calipers, drums, and linings can
become very hot during use. To avoid possible
burns, let brake components cool before
touching them. The intervals given in the periodic maintenance
charts should be considered as a general guide
under normal riding conditions. However, DE-
PENDING ON THE WEATHER, TERRAIN, GEO-
GRAPHICAL LOCATION, AND INDIVIDUAL USE,
THE MAINTENANCE INTERVALS MAY NEED TO
BE SHORTENED.
U1NS64E0.book Page 1 Thursday, June 25, 2015 8:36 AM
Page 104 of 146
8-21
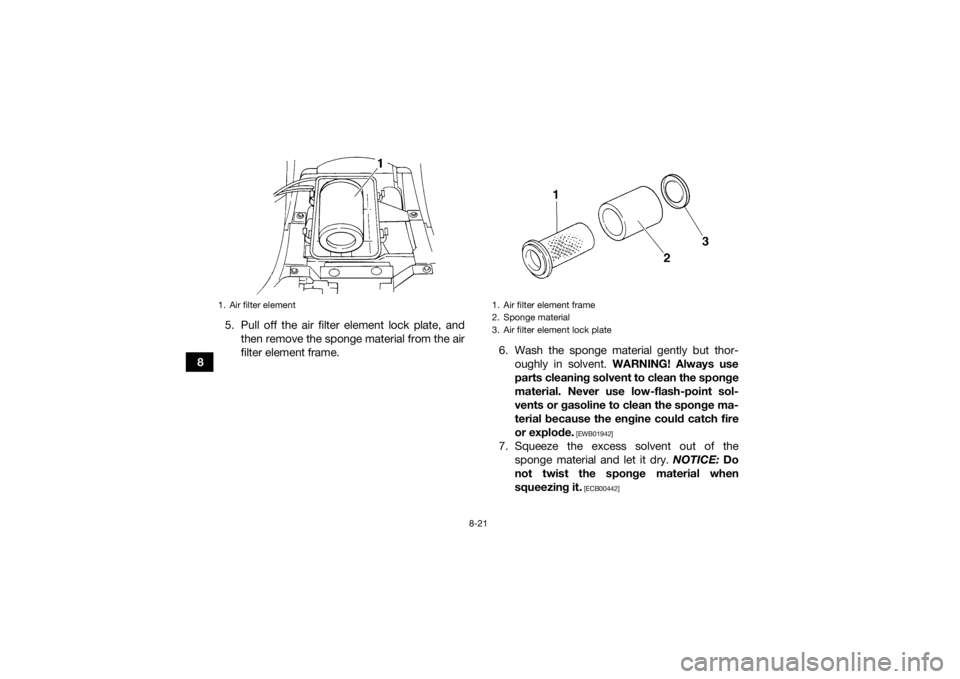
85. Pull off the air filter element lock plate, and
then remove the sponge material from the air
filter element frame. 6. Wash the sponge material gently but thor-
oughly in solvent. WARNING! Always use
parts cleaning solvent to clean the sponge
material. Never use low-flash-point sol-
vents or gasoline to clean the sponge ma-
terial because the engine could catch fire
or explode.
[EWB01942]
7. Squeeze the excess solvent out of the sponge material and let it dry. NOTICE: Do
not twist the sponge material when
squeezing it.
[ECB00442]
1. Air filter element
1. Air filter element frame
2. Sponge material
3. Air filter element lock plate
U1NS64E0.book Page 21 Thursday, June 25, 2015 8:36 AM