2016 YAMAHA FJR1300AS brake
[x] Cancel search: brakePage 99 of 126
Periodic maintenance an d a djustment
6-25
6
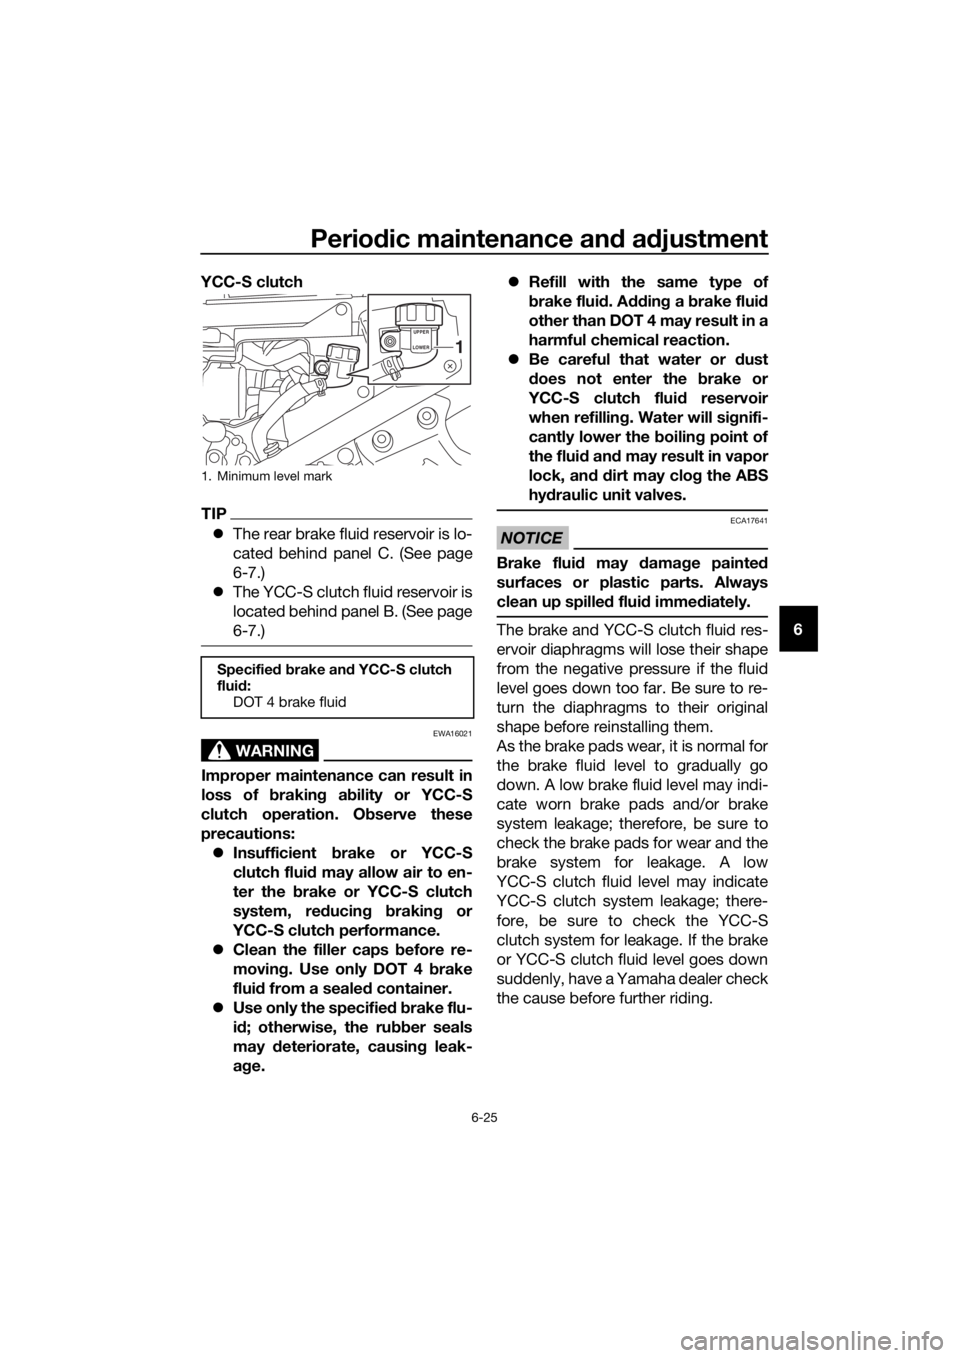
YCC-S clutch
TIP
The rear brake fluid reservoir is lo-
cated behind panel C. (See page
6-7.)
The YCC-S clutch fluid reservoir is
located behind panel B. (See page
6-7.)
WARNING
EWA16021
Improper maintenance can result in
loss of brakin g a bility or YCC-S
clutch operation. O bserve these
precautions: Insufficient brake or YCC-S
clutch flui d may allow air to en-
ter the b rake or YCC-S clutch
system, re ducin g brakin g or
YCC-S clutch performance.
Clean the filler caps before re-
moving . Use only DOT 4 brake
flui d from a seale d container.
Use only the specified b rake flu-
i d ; otherwise, the ru bber seals
may deteriorate, causin g leak-
a g e.
Refill with the same type of
brake flui d. A ddin g a brake flui d
other than DOT 4 may result in a
harmful chemical reaction.
Be careful that water or dust
d oes not enter the brake or
YCC-S clutch flui d reservoir
when refillin g. Water will si gnifi-
cantly lower the b oiling point of
the flui d an d ma y result in vapor
lock,
an d d irt may clo g the ABS
hy draulic unit valves.
NOTICE
ECA17641
Brake flui d may d amage painte d
surfaces or plastic parts. Always
clean up spille d flui d imme diately.
The brake and YCC-S clutch fluid res-
ervoir diaphragms will lose their shape
from the negative pressure if the fluid
level goes down too far. Be sure to re-
turn the diaphragms to their original
shape before reinstalling them.
As the brake pads wear, it is normal for
the brake fluid level to gradually go
down. A low brake fluid level may indi-
cate worn brake pads and/or brake
system leakage; therefore, be sure to
check the brake pads for wear and the
brake system for leakage. A low
YCC-S clutch fluid level may indicate
YCC-S clutch system leakage; there-
fore, be sure to check the YCC-S
clutch system for leakage. If the brake
or YCC-S clutch fluid level goes down
suddenly, have a Yamaha dealer check
the cause before further riding.
1. Minimum level mark
Specified b rake an d YCC-S clutch
flui d:
DOT 4 brake fluid
UPPER
LOWER
1
UB95E0E0.book Page 25 Friday, February 19, 2016 2:15 PM
Page 100 of 126

Periodic maintenance an d a djustment
6-26
6
EAU40604
Chan gin g the brake an d
YCC-S clutch fluid s
Have a Yamaha dealer change the
brake and YCC-S clutch fluids at the
intervals specified in the periodic main-
tenance and lubrication chart. In addi-
tion, have the oil seals of the brake and
YCC-S clutch master cylinders and
calipers as well as the brake and
YCC-S clutch hoses replaced at the in-
tervals listed below or whenever they
are damaged or leaking.
Oil seals: Replace every two
years.
Brake and YCC-S clutch hoses:
Replace every four years.
EAU23098
Checkin g an d lu bricatin g the
ca bles
The operation of all control cables and
the condition of the cables should be
checked before each ride, and the ca-
bles and cable ends should be lubri-
cated if necessary. If a cable is
damaged or does not move smoothly,
have a Yamaha dealer check or re-
place it. WARNING! Dama ge to the
outer housin g of cab les may result
in internal rustin g an d cause inter-
ference with cab le movement. Re-
place damag ed cab les as soon as
possi ble to prevent unsafe con di-
tions.
[EWA10712]
Recommen ded lu bricant:
Yamaha cable lubricant or other
suitable cable lubricant
UB95E0E0.book Page 26 Friday, February 19, 2016 2:15 PM
Page 101 of 126
Periodic maintenance an d a djustment
6-27
6
EAU23115
Checkin g an d lu bricatin g the
throttle grip an d cab le
The operation of the throttle grip
should be checked before each ride. In
addition, the cable should be lubricat-
ed by a Yamaha dealer at the intervals
specified in the periodic maintenance
chart.
The throttle cable is equipped with a
rubber cover. Make sure that the cover
is securely installed. Even though the
cover is installed correctly, it does not
completely protect the cable from wa-
ter entry. Therefore, use care not to
pour water directly onto the cover or
cable when washing the vehicle. If the
cable or cover becomes dirty, wipe
clean with a moist cloth.
EAU44276
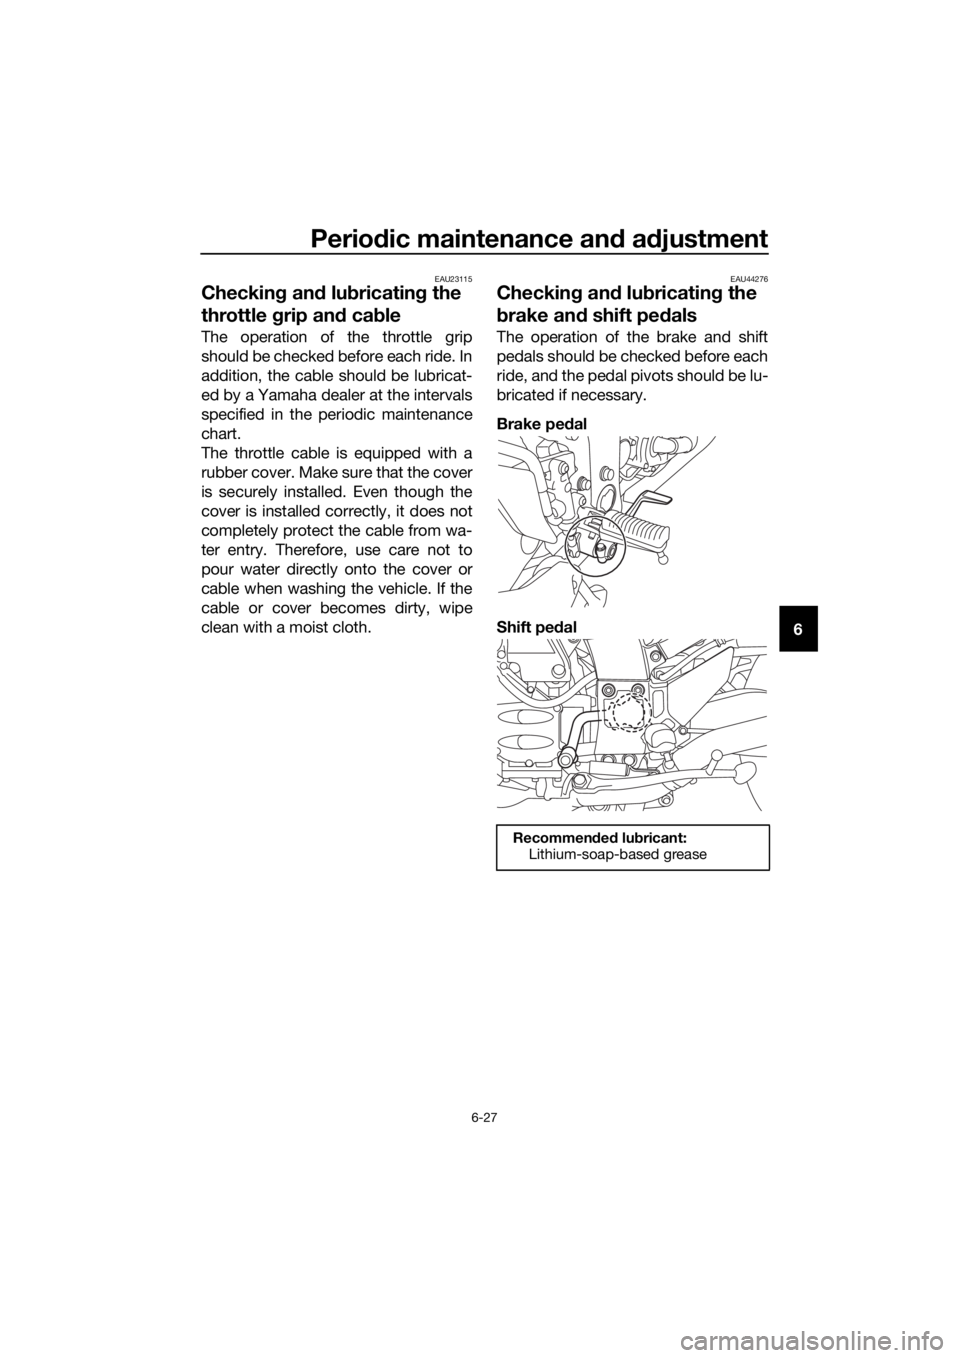
Checkin g an d lu bricatin g the
b rake an d shift pe dals
The operation of the brake and shift
pedals should be checked before each
ride, and the pedal pivots should be lu-
bricated if necessary.
Brake pe dal
Shift pe dal
Recommen ded lu bricant:
Lithium-soap-based grease
UB95E0E0.book Page 27 Friday, February 19, 2016 2:15 PM
Page 102 of 126
Periodic maintenance an d a djustment
6-28
6
EAU23155
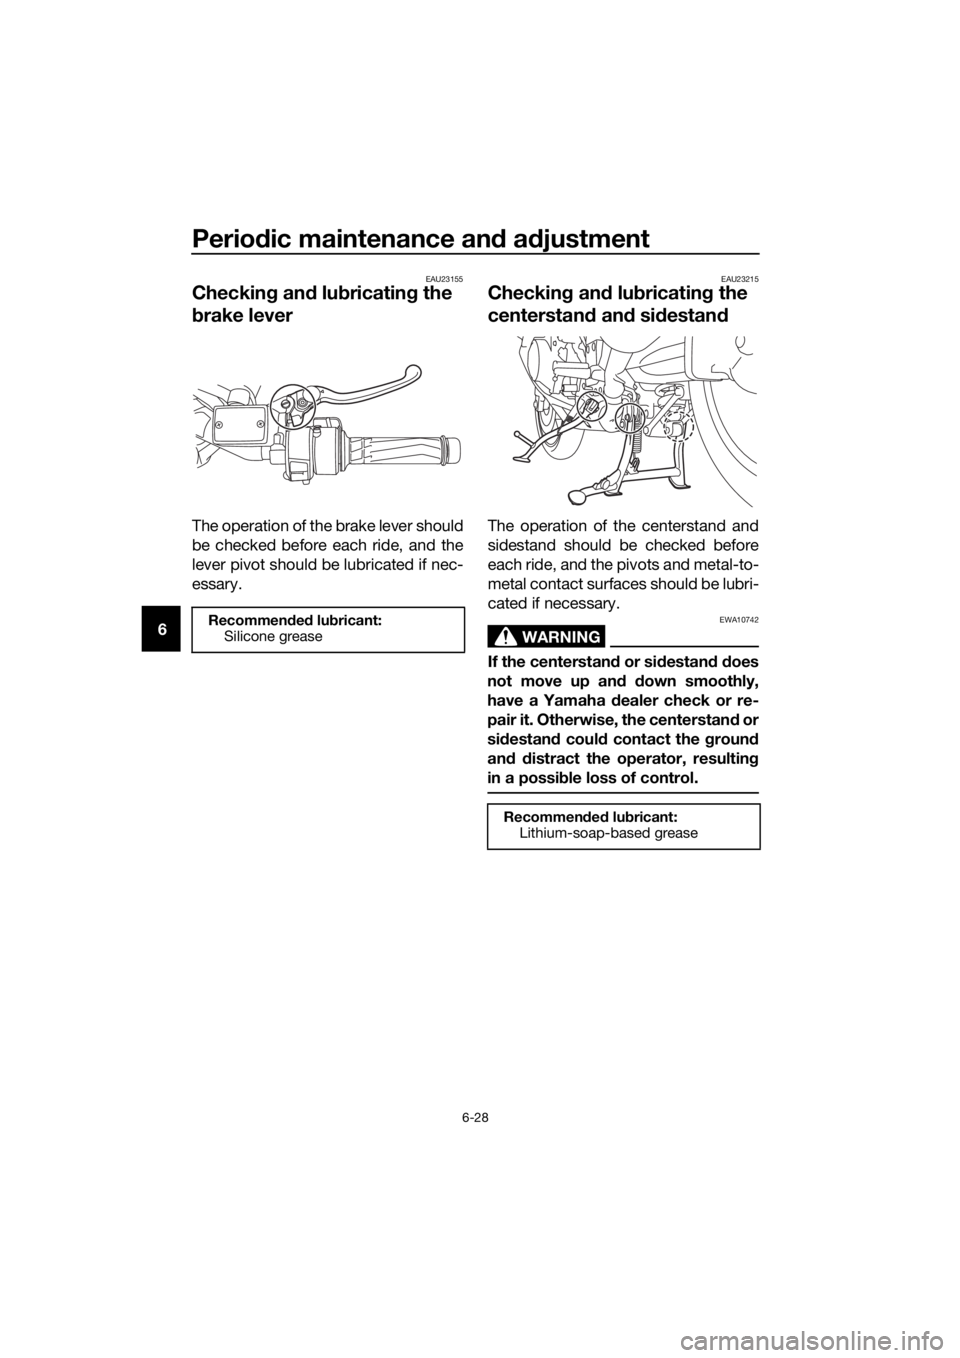
Checkin g an d lu bricatin g the
b rake lever
The operation of the brake lever should
be checked before each ride, and the
lever pivot should be lubricated if nec-
essary.
EAU23215
Checkin g an d lu bricatin g the
centerstand and sid estan d
The operation of the centerstand and
sidestand should be checked before
each ride, and the pivots and metal-to-
metal contact surfaces should be lubri-
cated if necessary.
WARNING
EWA10742
If the centerstan d or si destan d d oes
not move up an d d own smoothly,
have a Yamaha dealer check or re-
pair it. Otherwise, the centerstan d or
si destan d coul d contact the g round
an d d istract the operator, resultin g
in a possi ble loss of control.
Recommen ded lu bricant:
Silicone grease
Recommen ded lu bricant:
Lithium-soap-based grease
UB95E0E0.book Page 28 Friday, February 19, 2016 2:15 PM
Page 104 of 126
Periodic maintenance an d a djustment
6-30
6
EAU23273
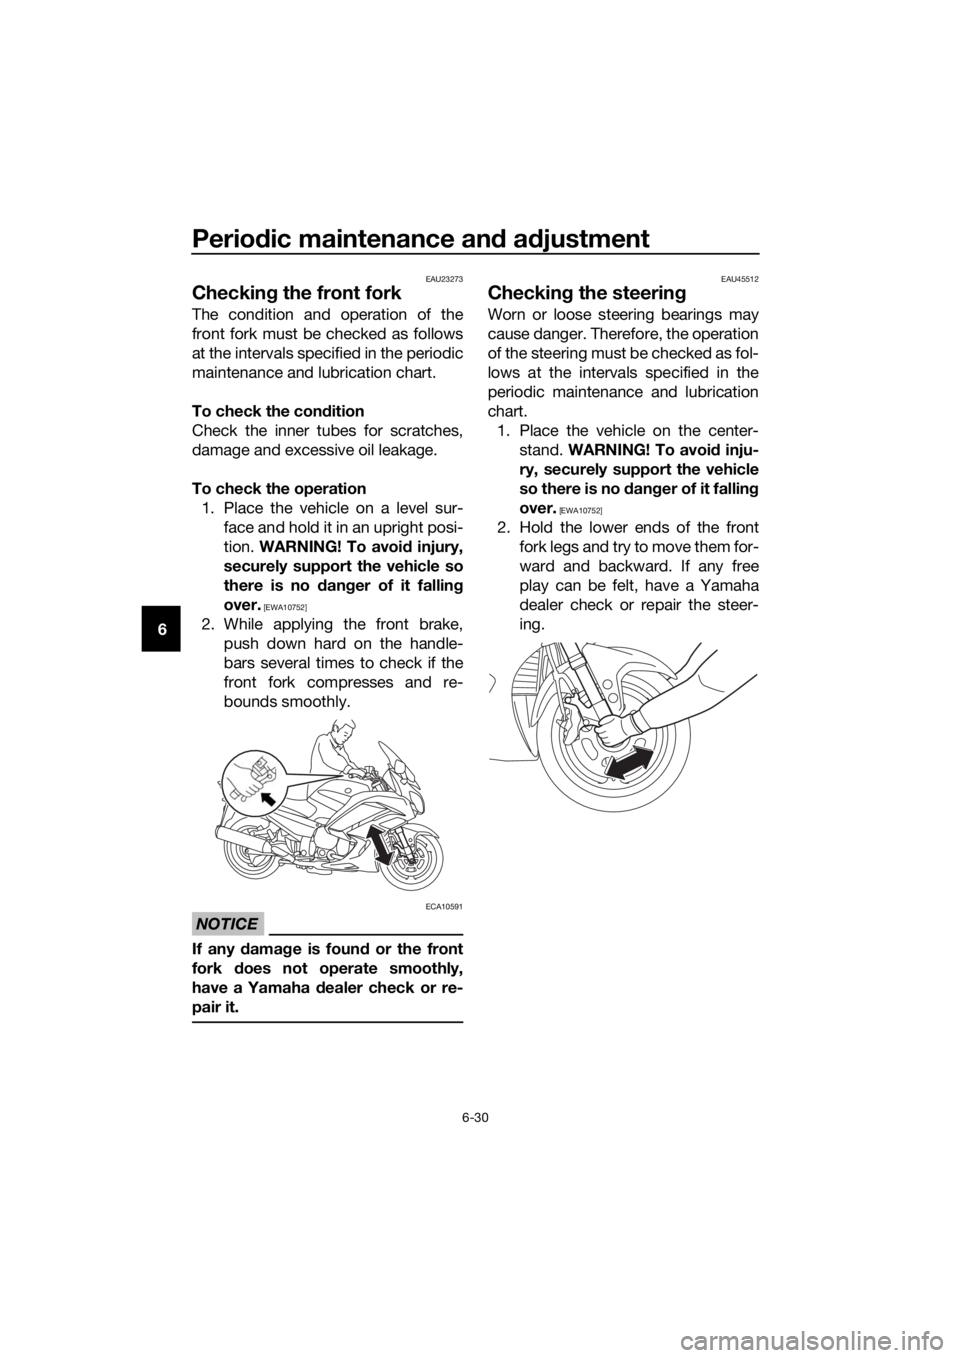
Checkin g the front fork
The condition and operation of the
front fork must be checked as follows
at the intervals specified in the periodic
maintenance and lubrication chart.
To check the con dition
Check the inner tubes for scratches,
damage and excessive oil leakage.
To check the operation 1. Place the vehicle on a level sur- face and hold it in an upright posi-
tion. WARNING! To avoi d injury,
securely support the vehicle so
there is no dan ger of it fallin g
over.
[EWA10752]
2. While applying the front brake, push down hard on the handle-
bars several times to check if the
front fork compresses and re-
bounds smoothly.
NOTICE
ECA10591
If any d amage is foun d or the front
fork does not operate smoothly,
have a Yamaha dealer check or re-
pair it.
EAU45512
Checkin g the steerin g
Worn or loose steering bearings may
cause danger. Therefore, the operation
of the steering must be checked as fol-
lows at the intervals specified in the
periodic maintenance and lubrication
chart.
1. Place the vehicle on the center- stand. WARNING! To avoi d inju-
ry, securely support the vehicle
so there is no dan ger of it fallin g
over.
[EWA10752]
2. Hold the lower ends of the front fork legs and try to move them for-
ward and backward. If any free
play can be felt, have a Yamaha
dealer check or repair the steer-
ing.
UB95E0E0.book Page 30 Friday, February 19, 2016 2:15 PM
Page 107 of 126

Periodic maintenance an d a djustment
6-33
6
EAU54515
Replacin g the fuses
The fuse boxes and individual fuses
are located under panel A. (See page
6-7.)
If a fuse is blown, replace it as follows.1. Turn the key to “OFF” and turn off the electrical circuit in question.
2. Remove the blown fuse, and then install a new fuse of the specified
amperage. WARNING! Do not
use a fuse of a hi gher ampera ge
ratin g than recommen ded to
avoi d causin g extensive dam-
a g e to the electrical system an d
possi bly a fire.
[EWA15132]
1. Main fuse
2. Spare fuse
3. Cruise control fuse
4. Brake light fuse
5. Fuse box
6. Main fuse 2
5
1
3
4
2
5 26
1. ABS motor fuse
2. ABS solenoid fuse
3. Fuel injection system fuse
4. Backup fuse (for clock and immobilizer sys-
tem)
5. Electronic throttle valve fuse
6. Headlight fuse
7. Spare fuse
8. YCC-S motor control fuse
9. Suspension fuse
10.Signaling system fuse
11.Terminal fuse 1 (for auxiliary DC jack)
12.ABS control unit fuse
13.Ignition fuse
14.Right radiator fan motor fuse
15.Left radiator fan motor fuse
16.Hazard fuse
17.Windshield motor fuse
15 7
11
10121314
71716
8
1
9
234
5
67
7
UB95E0E0.book Page 33 Friday, February 19, 2016 2:15 PM
Page 108 of 126

Periodic maintenance an d a djustment
6-34
6
3. Turn the key to “ON” and turn onthe electrical circuit in question to
check if the device operates.
4. If the fuse immediately blows again, have a Yamaha dealer
check the electrical system.
EAU72980
Vehicle li ghts
This model is equipped with full-LED
lighting. There are no user replaceable
bulbs.
If a light does not come on, check the
fuses and then have a Yamaha dealer
check the vehicle.
NOTICE
ECA16581
Do not affix any type of tinted film or
stickers to the head light lens.
Specifie d fuses:
Main fuse: 50.0 A
Main fuse 2:
30.0 A
Te r m i n a l f u s e 1 : 3.0 A
Headlight fuse: 7.5 A
Brake light fuse:
1.0 A
Signaling system fuse: 7.5 A
Ignition fuse: 20.0 A
Radiator fan motor fuse:
10.0 A × 2
Backup fuse: 7.5 A
Hazard fuse: 7.5 A
Fuel injection system fuse:
15.0 A
ABS control unit fuse: 7.5 A
ABS motor fuse: 30.0 A
ABS solenoid fuse:
20.0 A
Suspension fuse: 15.0 A
YCC-S motor control fuse: 30.0 A
Cruise control fuse:
1.0 A
Windshield motor fuse: 20.0 A
Electronic throttle valve fuse: 7.5 A
UB95E0E0.book Page 34 Friday, February 19, 2016 2:15 PM
Page 114 of 126
Motorcycle care and stora ge
7-3
7 2. After drying the motorcycle, apply
a corrosion protection spray on all
metal, including chrome- and
nickel-plated, surfaces to prevent
corrosion.
Windshield cleaning
Avoid using any alkaline or strong acid
cleaner, gasoline, brake fluid, or any
other solvent. Clean the windshield
with a cloth or sponge dampened with
a neutral detergent, and after cleaning,
thoroughly wash it off with water. For
additional cleaning, use Yamaha Wind-
shield Cleaner or other quality cleaner.
Some cleaning compounds for plastics
may leave scratches on surfaces of the
windshield. Before using them, make a
test by polishing an area which does
not affect your visibility.
After cleanin g
1. Dry the motorcycle with a chamois or an absorbing cloth.
2. Use a chrome polish to shine chrome, aluminum and stainless-
steel parts, including the exhaust
system. (Even the thermally in-
duced discoloring of stainless-
steel exhaust systems can be re-
moved through polishing.)
3. To prevent corrosion, it is recom- mended to apply a corrosion pro-
tection spray on all metal,
including chrome- and nickel-plat-
ed, surfaces.
4. Use spray oil as a universal clean- er to remove any remaining dirt.
5. Touch up minor paint damage caused by stones, etc.
6. Wax all painted surfaces. 7. Let the motorcycle dry completely
before storing or covering it.
WARNING
EWA11132
Contaminants on the brakes or tires
can cause loss of control. Make sure that there is no oil or
wax on the brakes or tires.
If necessary, clean the b rake
d iscs an d b rake linin gs with a
re gular brake disc cleaner or
acetone, an d wash the tires with
warm water an d a mil d d eter-
g ent. Before ri din g at hi gher
speed s, test the motorcycle’s
b rakin g performance an d cor-
nering b ehavior.
NOTICE
ECA10801
Apply spray oil an d wax spar-
in gly an d make sure to wipe off
any excess.
Never apply oil or wax to any
rubber an d plastic parts, but
treat them with a suitab le care
prod uct.
Avoi d using abrasive polishin g
compoun ds as they will wear
away the paint.
TIP
Consult a Yamaha dealer for ad-
vice on what products to use.
Washing, rainy weather or humid
climates can cause the headlight
lens to fog. Turning the headlight
on for a short period of time will
help remove the moisture from the
lens.
UB95E0E0.book Page 3 Friday, February 19, 2016 2:15 PM