Page 45 of 120

Instrument and control functions
3-31
3
EAU13447
Catalytic converters
This vehicle is equipped with catalytic
converters in the exhaust system.
WARNING
EWA10863
The exhaust system is hot after op-
eration. To prevent a fire hazar d or
b urns:
Do not park the vehicle near
possi ble fire hazar ds such as
g rass or other materials that
easily burn.
Park the vehicle in a place
where ped estrians or child ren
are not likely to touch the hot
exhaust system.
Make sure that the exhaust sys-
tem has coole d down before
d oin g any maintenance work.
Do not allow the eng ine to idle
more than a few minutes. Lon g
i d lin g can cause a b uild-up of
heat.
NOTICE
ECA10702
Use only unlea ded g asoline. The use
of lead ed g asoline will cause unre-
paira ble damag e to the catalytic
converter.
EAU39496
Seats
Passen ger seat
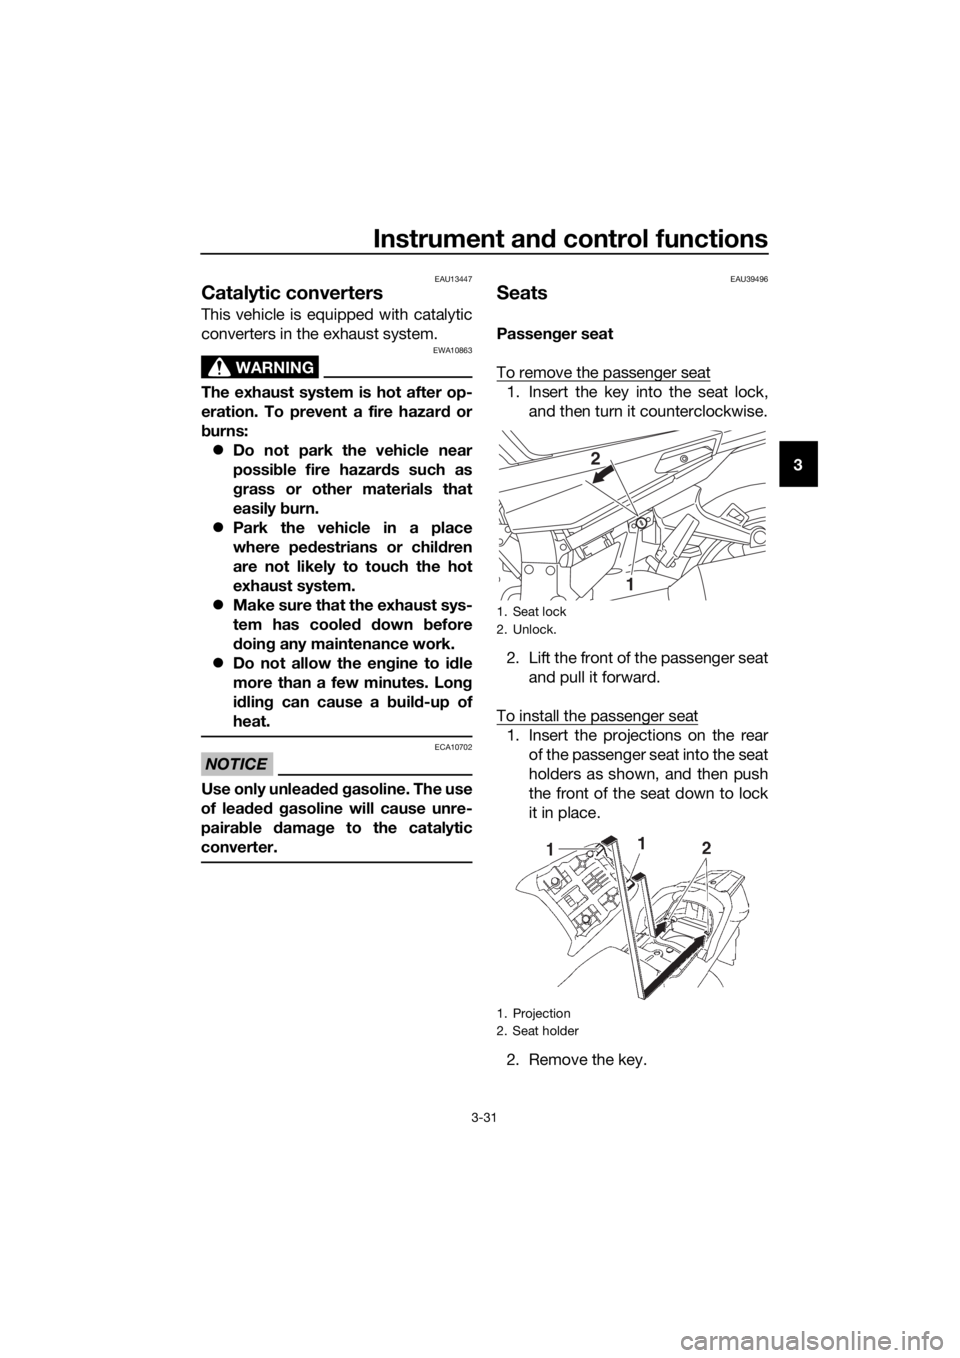
To remove the passenger seat
1. Insert the key into the seat lock, and then turn it counterclockwise.
2. Lift the front of the passenger seat and pull it forward.
To install the passenger seat
1. Insert the projections on the rear of the passenger seat into the seat
holders as shown, and then push
the front of the seat down to lock
it in place.
2. Remove the key.
1. Seat lock
2. Unlock.
1. Projection
2. Seat holder
1
2
UB88E0E0.book Page 31 Friday, October 16, 2015 11:59 AM
Page 46 of 120
Instrument and control functions
3-32
3 Ri
der seat
To remove the rider seat
1. Remove the passenger seat.
2. Push the rider seat lock lever, lo- cated under the back of the rider
seat, to the left as shown, and
then pull the seat off.
To install the rider seat
1. Insert the projection on the front of the rider seat into the seat holder
as shown, and then push the rear
of the seat down to lock it in place.
2. Install the passenger seat.
TIP
Make sure that the seats are prop-
erly secured before riding.
The rider seat height can be ad-
justed to change the riding posi-
tion. (See the following section.)
1. Rider seat lock lever
2. Rider seat
1. Projection
2. Seat holder
UB88E0E0.book Page 32 Friday, October 16, 2015 11:59 AM
Page 48 of 120

Instrument and control functions
3-34
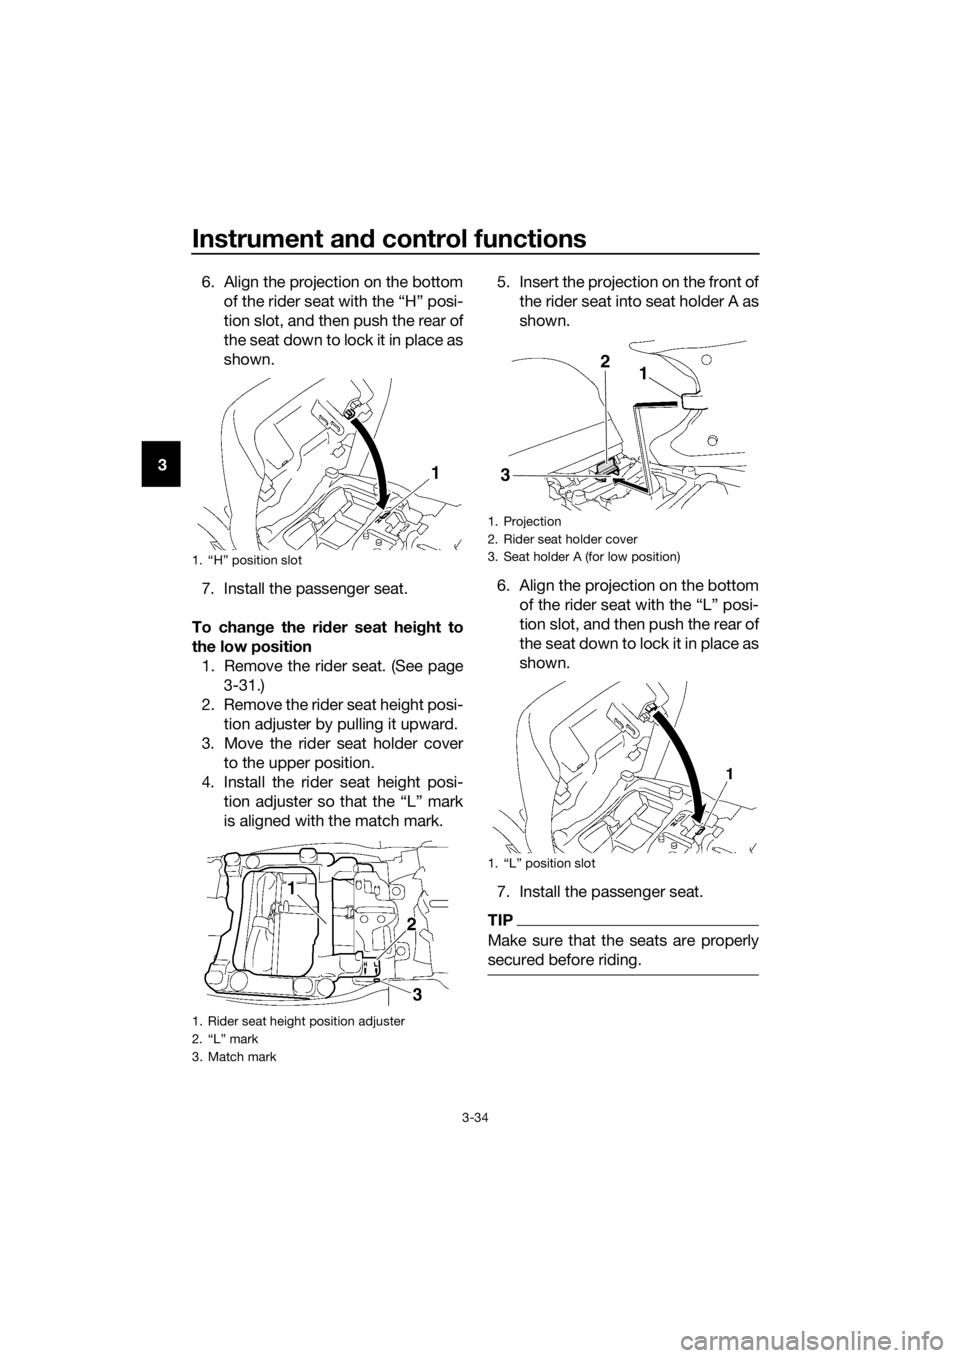
3 6. Align the projection on the bottom
of the rider seat with the “H” posi-
tion slot, and then push the rear of
the seat down to lock it in place as
shown.
7. Install the passenger seat.
To chan ge the ri der seat hei ght to
the low position 1. Remove the rider seat. (See page 3-31.)
2. Remove the rider seat height posi- tion adjuster by pulling it upward.
3. Move the rider seat holder cover to the upper position.
4. Install the rider seat height posi- tion adjuster so that the “L” mark
is aligned with the match mark. 5. Insert the projection on the front of
the rider seat into seat holder A as
shown.
6. Align the projection on the bottom of the rider seat with the “L” posi-
tion slot, and then push the rear of
the seat down to lock it in place as
shown.
7. Install the passenger seat.
TIP
Make sure that the seats are properly
secured before riding.
1. “H” position slot
1. Rider seat height position adjuster
2. “L” mark
3. Match mark
1. Projection
2. Rider seat holder cover
3. Seat holder A (for low position)
1. “L” position slot
12
3
UB88E0E0.book Page 34 Friday, October 16, 2015 11:59 AM
Page 76 of 120
Periodic maintenance an d a djustment
6-8
6 To install the panel
1. Fit the slot at the front of the panel
under the projection on the front
cowling, and then fit the slot at the
rear of the panel over the projec-
tion on the right side cowling as
shown.
TIP
Make sure that the fuses are covered
and located to the inside of the panel
lip.
2. Install the bolts and the quick fas-teners.
Panels B an d C
To remove a panel
1. Remove the seats. (See page 3-31.)
2. Remove the bolts and the quick fastener screws.
1. Slot
2. Projection
1. Slot
2. Projection
1. Slot
2. Projection
2
1
2
1
12
1. Fuse
1. Panel B
2. Quick fastener screw
3. Bolt
1
12
2
3
3
2
3
UB88E0E0.book Page 8 Friday, October 16, 2015 11:59 AM