2016 VOLVO V60 CROSS COUNTRY ignition
[x] Cancel search: ignitionPage 260 of 402
||
08 Starting and driving
08
258
ShiftlockWhen P has been selected, the transmission
is mechanically blocked in this position. The brake pedal must be depressed and the igni-tion must be in at least mode II (see Ignition
modes (p. 77)) before the gear lever can bemoved from the P position.
WARNING
Always apply the parking brake when the vehicle is parked, particularly when park-ing on a hill. The transmission's P mode
may not be able to keep the vehicle sta-tionary if it is parked on an incline.
Press the control to apply the parking brake, see Parking brake – general information(p. 274).
CAUTION
The vehicle must be stationary when posi- tion P is selected.
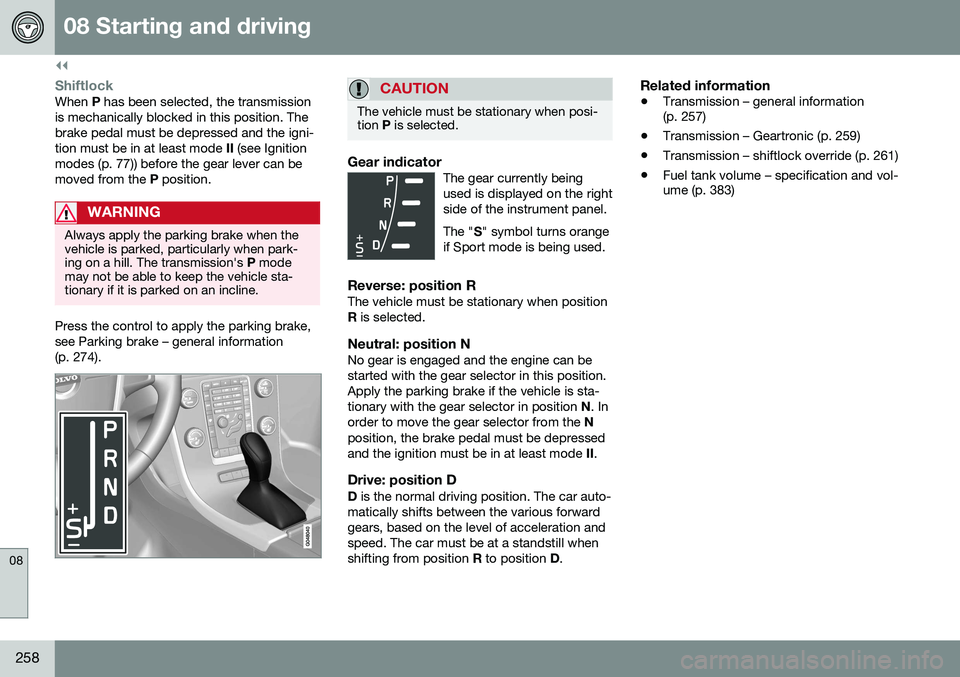
Gear indicatorThe gear currently being used is displayed on the rightside of the instrument panel. The " S" symbol turns orange
if Sport mode is being used.
Reverse: position RThe vehicle must be stationary when position R is selected.
Neutral: position NNo gear is engaged and the engine can bestarted with the gear selector in this position.Apply the parking brake if the vehicle is sta-tionary with the gear selector in position N. In
order to move the gear selector from the N
position, the brake pedal must be depressedand the ignition must be in at least mode II.
Drive: position DD is the normal driving position. The car auto-
matically shifts between the various forwardgears, based on the level of acceleration andspeed. The car must be at a standstill whenshifting from position R to position D.
Related information
• Transmission – general information (p. 257)
• Transmission – Geartronic (p. 259)
• Transmission – shiftlock override (p. 261)
• Fuel tank volume – specification and vol-ume (p. 383)
Page 261 of 402
08 Starting and driving
08
}}
* Option/accessory, for more information, see Introduction.259
Transmission – Geartronic
Geartronic allows you to manually shift among your vehicle's forward gears. The manualposition ( +S–) can be selected at any time.
Geartronic: manual shifting (+S–)To shift gears manually, move thegear selector to the side from D
toward +S–. The +S– symbol in the
instrument panel will change from
white to orange and the number of the gear
currently being used (
1, 2, 3, etc.) will be dis-
played (see the following illustration) 5
.
• To return to automatic shifting mode from +S–
, move the gear selector to the side
toward D.
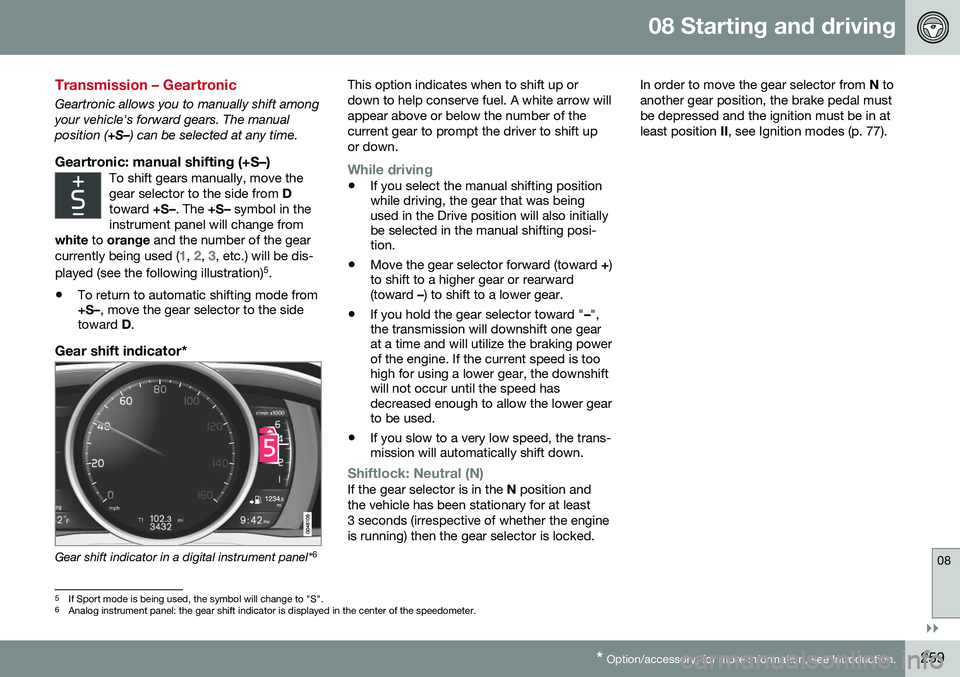
Gear shift indicator*
Gear shift indicator in a digital instrument panel* 6This option indicates when to shift up or down to help conserve fuel. A white arrow willappear above or below the number of thecurrent gear to prompt the driver to shift upor down.
While driving
•
If you select the manual shifting position while driving, the gear that was beingused in the Drive position will also initiallybe selected in the manual shifting posi-tion.
• Move the gear selector forward (toward
+)
to shift to a higher gear or rearward(toward –) to shift to a lower gear.
• If you hold the gear selector toward "
–",
the transmission will downshift one gearat a time and will utilize the braking powerof the engine. If the current speed is toohigh for using a lower gear, the downshiftwill not occur until the speed hasdecreased enough to allow the lower gearto be used.
• If you slow to a very low speed, the trans-mission will automatically shift down.
Shiftlock: Neutral (N)If the gear selector is in the
N position and
the vehicle has been stationary for at least 3 seconds (irrespective of whether the engineis running) then the gear selector is locked. In order to move the gear selector from
N to
another gear position, the brake pedal mustbe depressed and the ignition must be in atleast position II, see Ignition modes (p. 77).
5
If Sport mode is being used, the symbol will change to "S".
6 Analog instrument panel: the gear shift indicator is displayed in the center of the speedometer.
Page 267 of 402
08 Starting and driving
08
265
Condition/situation
The gear selector is moved from D to SB
, R
or " +/–".
The driver's door is opened with the gear selector in D – an audible signal and a text
message will inform the driver thatStart/Stop is active.
A Certain engines only
B Sport mode (where applicable)
WARNING
Do not open the hood if the engine has auto-stopped. The engine could suddenlyauto-start. Before opening the hood:
• Switch off the ignition using the START/STOP ENGINE
button.
• Be aware that if the engine has beenrunning, components in the enginecompartment will be very hot.
If the engine does not auto-start, this could be due to
:
• The driver's seat belt is not fastened
• The gear selector is in
P and the driver's
door is opened
In these cases, the driver will have to restart the engine by pressing the START/STOP
ENGINE button.
Related information
•Start/Stop – introduction (p. 262)
• Start/Stop – function (p. 262)
• Start/Stop – settings (p. 265)
• Start/Stop – Auto-stop exceptions (p. 263)
• Start/Stop – Hill Start Assist (HSA)(p. 262)
• Start/Stop – symbols and messages(p. 266)
Start/Stop – settings
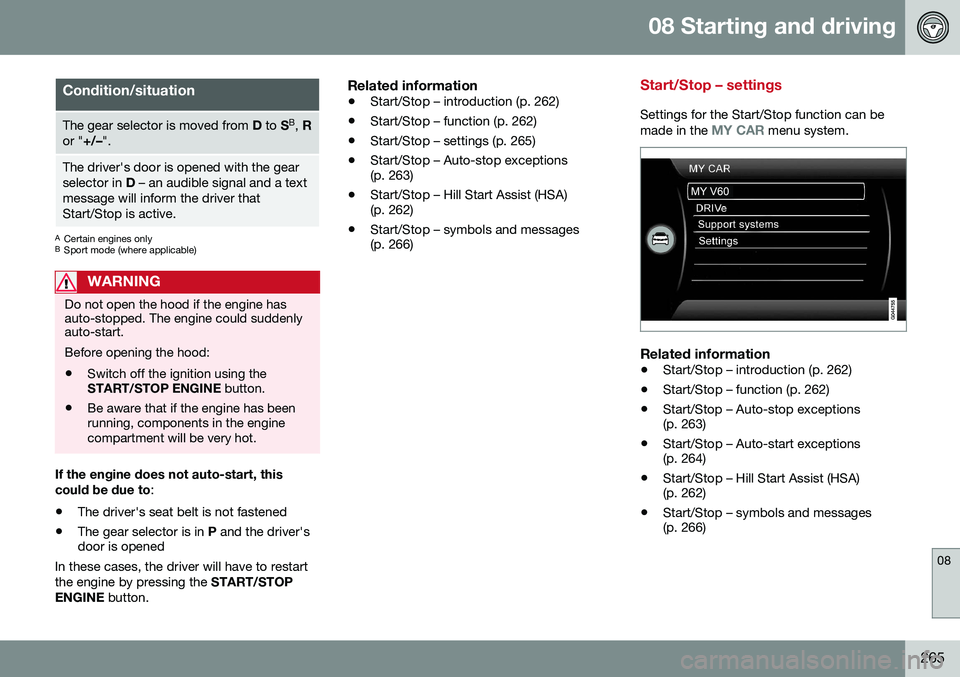
Settings for the Start/Stop function can be
made in the MY CAR menu system.
Related information
• Start/Stop – introduction (p. 262)
• Start/Stop – function (p. 262)
• Start/Stop – Auto-stop exceptions (p. 263)
• Start/Stop – Auto-start exceptions(p. 264)
• Start/Stop – Hill Start Assist (HSA)(p. 262)
• Start/Stop – symbols and messages(p. 266)
Page 278 of 402
08 Starting and driving
08
276
Parking brake – releasing
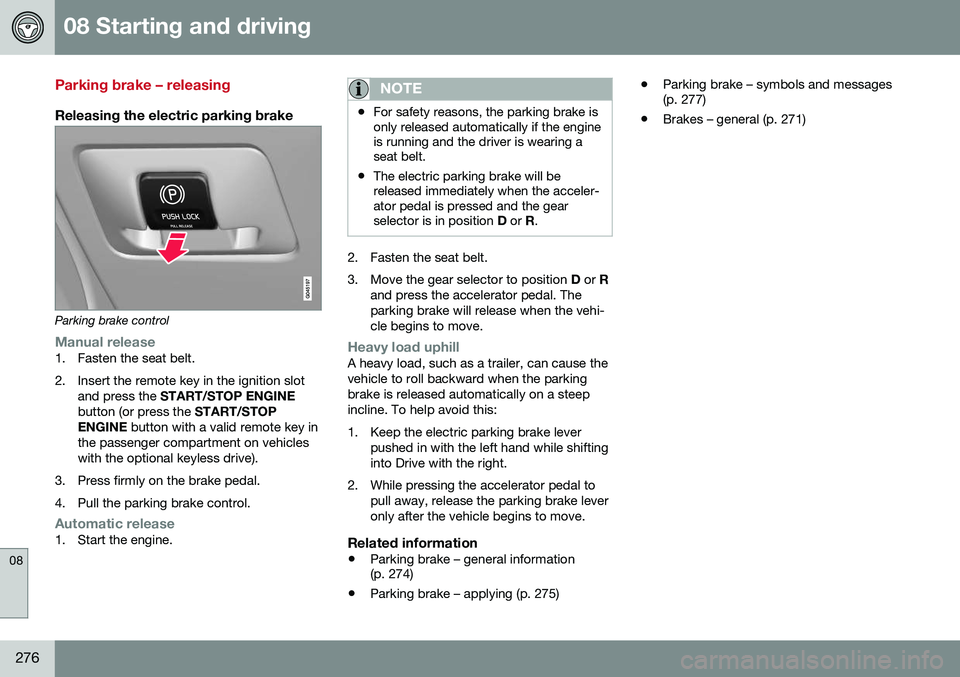
Releasing the electric parking brake
Parking brake control
Manual release1. Fasten the seat belt.
2. Insert the remote key in the ignition slotand press the START/STOP ENGINE
button (or press the START/STOP
ENGINE button with a valid remote key in
the passenger compartment on vehicles with the optional keyless drive).
3. Press firmly on the brake pedal.
4. Pull the parking brake control.
Automatic release1. Start the engine.
NOTE
• For safety reasons, the parking brake is only released automatically if the engineis running and the driver is wearing aseat belt.
• The electric parking brake will bereleased immediately when the acceler-ator pedal is pressed and the gearselector is in position
D or R.
2. Fasten the seat belt.
3. Move the gear selector to position D or R
and press the accelerator pedal. The parking brake will release when the vehi-cle begins to move.
Heavy load uphillA heavy load, such as a trailer, can cause the vehicle to roll backward when the parkingbrake is released automatically on a steepincline. To help avoid this:
1. Keep the electric parking brake lever pushed in with the left hand while shifting into Drive with the right.
2. While pressing the accelerator pedal to pull away, release the parking brake leveronly after the vehicle begins to move.
Related information
• Parking brake – general information (p. 274)
• Parking brake – applying (p. 275) •
Parking brake – symbols and messages(p. 277)
• Brakes – general (p. 271)
Page 281 of 402

08 Starting and driving
08
}}
279
Engine and cooling system
Under special conditions, for example when driving in hilly terrain, extreme heat or withheavy loads, there is a risk that the engine andcooling system will overheat. Proceed as follows to avoid overheating the engine. •Maintain a low speed when driving with a trailer up long, steep hills. For informa-tion, see Towing a trailer (p. 287)
• Do not turn the engine off immediatelywhen stopping after a hard drive.
WARNING
The cooling fan may start or continue to operate (for up to 6 minutes) after theengine has been switched off.
•
Remove any auxiliary lights from in front of the grille when driving in hot weatherconditions.
• Do not exceed engine speeds of4500 rpm if driving with a trailer in hillyterrain. The oil temperature could becometoo high.
Conserving electrical current
Keep the following in mind to help minimize battery drain:
• When the engine is not running, avoid using ignition mode
II. Many electrical
systems (the audio system, the optionalnavigation system, power windows, etc)will function in ignition modes 0 and I.
These modes reduce drain on the battery.
• Please keep in mind that using systems,accessories, etc., that consume a greatdeal of current when the engine is notrunning could result in the battery beingcompletely drained. Driving or having theengine running for approximately15 minutes will help keep the batterycharged.
• The optional 12-volt socket in the cargoarea (p. 138) area provides electrical cur-rent even with the ignition switched off,which drains the battery.
Before a long distance trip
It is always worthwhile to have your vehicle checked by a trained and qualified Volvo serv-ice technician before driving long distances.Your retailer will also be able to supply youwith bulbs, fuses, spark plugs and wiperblades for your use in the event that problemsoccur. As a minimum, the following items should be checked before any long trip:
• Check that engine runs smoothly and that fuel consumption is normal.
• Check for fuel, oil, and fluid leakage.
• Have the transmission oil level (p. 383)checked.
• Check condition of drive belts.
• Check state of the battery's charge.
• Examine tires carefully (the spare tire aswell), and replace those that areworn (p. 295). Check tire pres-sure (p. 302).
• The brakes, front wheel alignment, andsteering gear should be checked by atrained and qualified Volvo service techni-cian only.
• Check all lights, including high beams.
• Reflective warning triangles are legallyrequired in some states/provinces.
• Have a word with a trained and qualifiedVolvo service technician if you intend to
Page 285 of 402
08 Starting and driving
08
}}
283
WARNING
Never carry a cell phone that is switched
on while refueling your vehicle. If the
phone rings, this may cause a spark that could ignite gasoline fumes, resulting infire and injury.
WARNING
Carbon monoxide is a poisonous, color- less, and odorless gas. It is present in allexhaust gases. If you ever smell exhaustfumes inside the vehicle, make sure thepassenger compartment is ventilated, andimmediately return the vehicle to a trainedand qualified Volvo service technician forcorrection.
Related information
• Refueling – fuel requirements (p. 281)
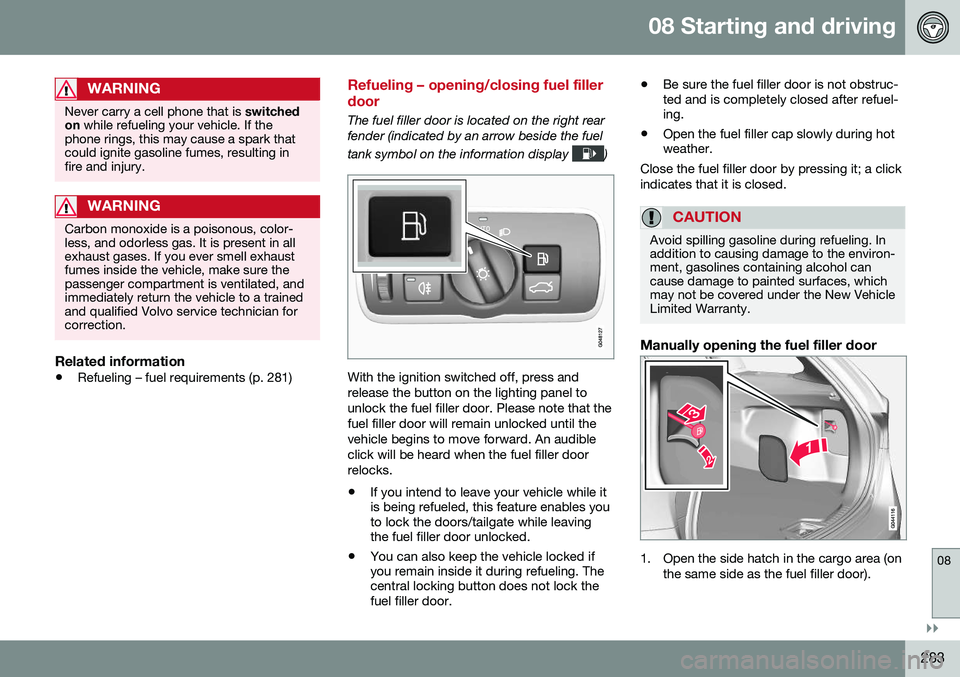
Refueling – opening/closing fuel filler door
The fuel filler door is located on the right rear fender (indicated by an arrow beside the fuel tank symbol on the information display
)
With the ignition switched off, press and release the button on the lighting panel tounlock the fuel filler door. Please note that thefuel filler door will remain unlocked until thevehicle begins to move forward. An audibleclick will be heard when the fuel filler doorrelocks. •If you intend to leave your vehicle while it is being refueled, this feature enables youto lock the doors/tailgate while leavingthe fuel filler door unlocked.
• You can also keep the vehicle locked ifyou remain inside it during refueling. Thecentral locking button does not lock thefuel filler door. •
Be sure the fuel filler door is not obstruc-ted and is completely closed after refuel-ing.
• Open the fuel filler cap slowly during hotweather.
Close the fuel filler door by pressing it; a click indicates that it is closed.
CAUTION
Avoid spilling gasoline during refueling. In addition to causing damage to the environ-ment, gasolines containing alcohol cancause damage to painted surfaces, whichmay not be covered under the New VehicleLimited Warranty.
Manually opening the fuel filler door
1. Open the side hatch in the cargo area (on the same side as the fuel filler door).
Page 286 of 402

||
08 Starting and driving
08
284
2. Open a perforated section of the insula-tion and grasp the handle on the green cord.
3. Gently pull the cord straight rearward until the fuel filler door clicks open.
Related information
• Refueling – opening/closing fuel cap (p. 284)
• Refueling – fuel requirements (p. 281)
• Refueling – octane rating (p. 282)
Refueling – opening/closing fuel cap
If necessary, the fuel filler door can be opened manually.
Opening/closing the fuel cap
Fuel vapor expands in hot weather. Open the filler cap slowly. After refueling, close the fuel filler cap by turning it clockwise until it clicks into place.
CAUTION
• Do not refuel with the engine run- ning 17
. Turn the ignition off or to posi-
tion I. If the ignition is on, an incorrect
reading could occur in the fuel gauge.
• Avoid overfilling the fuel tank. Do not press the handle on the filler nozzlemore than one extra time. Too muchfuel in the tank in hot weather condi-tions can cause the fuel to overflow.Overfilling could also cause damage tothe emission control systems.
Related information
•
Refueling – fuel requirements (p. 281)
• Refueling – octane rating (p. 282)
17
If the fuel filler cap is not closed tightly or if the engine is running when the vehicle is refueled, the Check Engine Light (malfunction indicator lamp) may indicate a fault. However, your vehicle's performance will not be affected. Use only Volvo original or approved fuel filler caps.
Page 287 of 402

08 Starting and driving
08
}}
285
Emission controls
Three-way catalytic converter
•Keep your engine properly tuned. Certain engine malfunctions, particularly involvingthe electrical, fuel or distributor ignitionsystems, may cause unusually high three-way catalytic converter temperatures. Donot continue to operate your vehicle ifyou detect engine misfire, noticeable lossof power or other unusual operating con-ditions, such as engine overheating orbackfiring. A properly tuned engine willhelp avoid malfunctions that could dam-age the three-way catalytic converter.
• Do not park your vehicle over combusti-ble materials, such as grass or leaves,which can come into contact with the hotexhaust system and cause such materialsto ignite under certain wind and weatherconditions.
• Excessive starter cranking (in excess ofone minute), or an intermittently firing orflooded engine can cause three-way cat-alytic converter or exhaust system over-heating.
• Remember that tampering or unauthor-ized modifications to the engine, theEngine Control Module, or the vehiclemay be illegal and can cause three-waycatalytic converter or exhaust systemoverheating. This includes: altering fuelinjection settings or components, alteringemission system components or location or removing components, and/or repea-ted use of leaded fuel.NOTE
Unleaded fuel is required for vehicles with three-way catalytic converters.
Heated oxygen sensorsThe heated oxygen sensors monitor the oxy- gen content of the exhaust gases. Readingsare fed into a control module that continu-ously monitors engine functions and controlsfuel injection. The ratio of fuel to air into theengine is continuously adjusted for efficientcombustion to help reduce harmful emis-sions.
Related information
•
Information displays – warning symbols (p. 72)
• Engine and cooling system (p. 279)
Economical driving
Better driving economy may be obtained by thinking ahead, avoiding rapid starts andstops and adjusting the speed of your vehicleto immediate traffic conditions.
Economical driving conserves natural resources
Observe the following rules:
• Bring the engine to normal operating tem- perature as soon as possible by drivingwith a light foot on the accelerator pedalfor the first few minutes of operation. Acold engine uses more fuel and is subjectto increased wear.
• Whenever possible, avoid using the vehi-cle for driving short distances. This doesnot allow the engine to reach normaloperating temperature.
• Drive carefully and avoid rapid accelera-tion and hard braking.
• Use the transmission's Drive (
D) position
as often as possible and avoid using kick-down.