2016 VOLVO V60 CROSS COUNTRY light
[x] Cancel search: lightPage 77 of 402

03 Instruments and controls
03
* Option/accessory, for more information, see Introduction.75
The center console control panel and the steer- ing wheel keypad. The illustration is generic andthe appearance/location of the buttons may vary.
MY CAR : opens the MY CAR menu sys-
tem.
OK/MENU : Press the button on the cen-
ter console or the thumb wheel on the steering wheel keypad to select a menualternative or to store a selected functionin the system's memory.
TUNE : Turn this control on the center
console or the thumb wheel on the steer- ing wheel keypad to navigate up/down ina menu.
EXIT
EXIT functionsDepending on which function the cursor is pointing to and the menu level, briefly press-ing EXIT will result in:
• An in-coming phone call will be rejected
• The current function will be cancelled
• Characters entered will be erased
• The most recent selection will be cancel- led
• Go back/up in the menu system
Pressing and holding EXIT takes you to the
normal view for MY CAR. If you are already in normal view, this will take you to the mainsource menu.
Menu selections and pathsPlease consult your Sensus Infotainment sup-plement for a description of the MY CARmenu selections and paths.
Information displays – ambient temperature sensor
Location of the ambient temperature sensor, A: digital instrument panel*, B: analog instrumentpanel
NOTE
When the ambient temperature is between 23° and 36 °F (–5° and +2 °C), a snowflakesymbol will be displayed next to the tem-perature. This symbol serves as a warningfor possible slippery road surfaces. Pleasenote that this symbol does not indicate a
fault with your vehicle. At low speeds or when the vehicle is not moving, the temperature readings may beslightly higher than the actual ambienttemperature.
Related information
• Information displays – introduction (p. 66)
Page 79 of 402

03 Instruments and controls
03
}}
* Option/accessory, for more information, see Introduction.77
Removing the remote keyThe remote key can be removed from the ignition slot by pulling it out.
Related information
• Ignition modes (p. 77)
Ignition modes
The vehicle's ignition has 3 modes:
0, I, and II
that can be used without starting the engine. The following table shows examples of whichfunctions are available in the respectivemodes.
NOTE
To access ignition modes I or II without
starting the engine, the brake pedal must not be depressed.
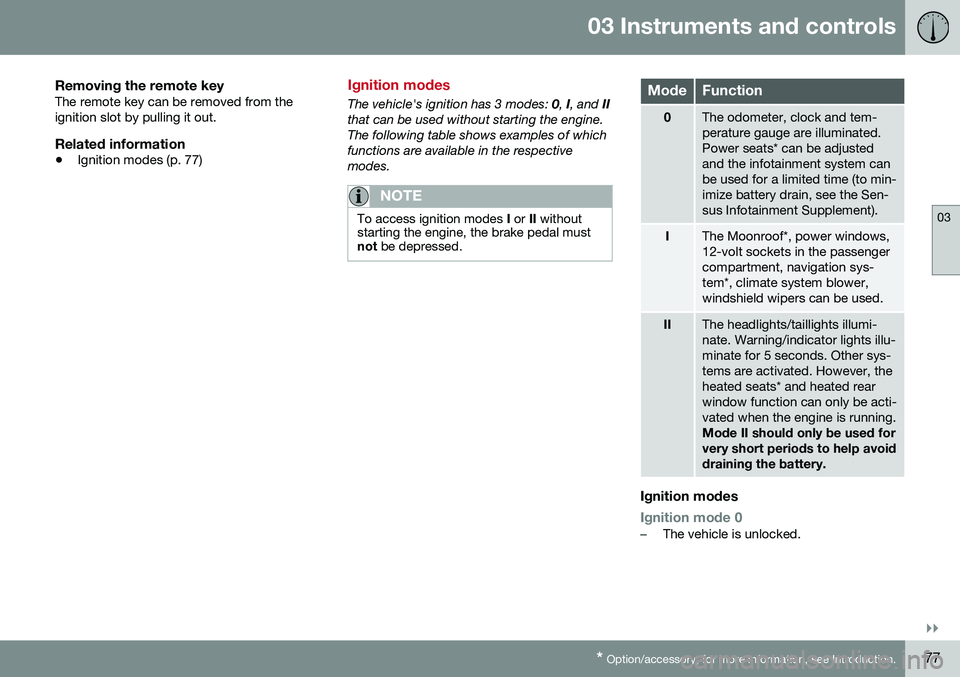
ModeFunction
0The odometer, clock and tem- perature gauge are illuminated.Power seats* can be adjustedand the infotainment system canbe used for a limited time (to min-imize battery drain, see the Sen-sus Infotainment Supplement).
IThe Moonroof*, power windows, 12-volt sockets in the passengercompartment, navigation sys-tem*, climate system blower,windshield wipers can be used.
IIThe headlights/taillights illumi- nate. Warning/indicator lights illu-minate for 5 seconds. Other sys-tems are activated. However, theheated seats* and heated rearwindow function can only be acti-vated when the engine is running. Mode II should only be used for very short periods to help avoiddraining the battery.
Ignition modes
Ignition mode 0–The vehicle is unlocked.
Page 88 of 402

||
03 Instruments and controls
03
86* Option/accessory, for more information, see Introduction.
3. Push back the lever to lock the steering
wheel in place. If the lever is difficult to push into place, press the steering wheellightly at the same time as you push thelever.
WARNING
Never adjust the steering wheel while driv- ing.
With the optional speed-dependent power steering the level of steering force can beadjusted, see Active chassis* (Four C)(p. 169).
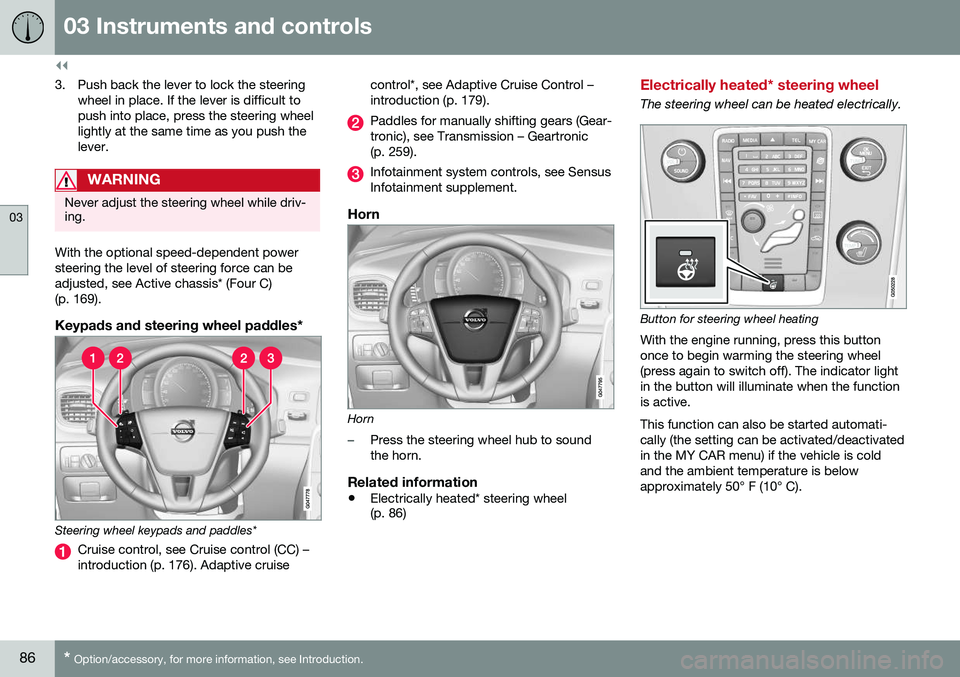
Keypads and steering wheel paddles*
Steering wheel keypads and paddles*
Cruise control, see Cruise control (CC) – introduction (p. 176). Adaptive cruise control*, see Adaptive Cruise Control –introduction (p. 179).
Paddles for manually shifting gears (Gear- tronic), see Transmission – Geartronic(p. 259).
Infotainment system controls, see Sensus Infotainment supplement.
Horn
Horn
–Press the steering wheel hub to sound the horn.
Related information
•
Electrically heated* steering wheel (p. 86)
Electrically heated* steering wheel
The steering wheel can be heated electrically.
Button for steering wheel heating
With the engine running, press this button once to begin warming the steering wheel(press again to switch off). The indicator lightin the button will illuminate when the functionis active. This function can also be started automati- cally (the setting can be activated/deactivatedin the MY CAR menu) if the vehicle is coldand the ambient temperature is belowapproximately 50° F (10° C).
Page 89 of 402

03 Instruments and controls
03
87
Lighting panel
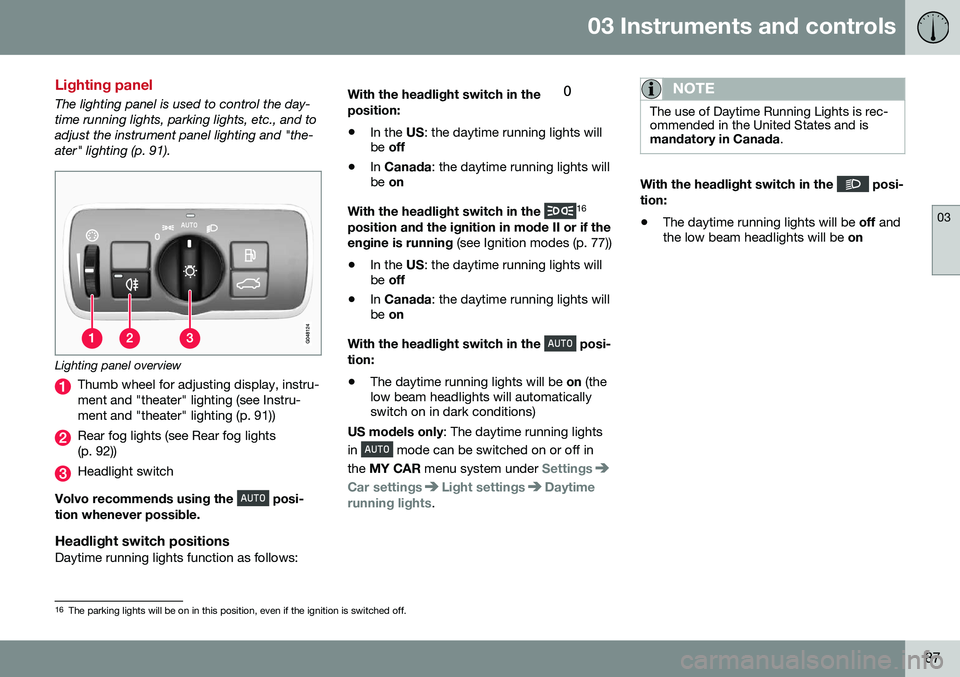
The lighting panel is used to control the day- time running lights, parking lights, etc., and toadjust the instrument panel lighting and "the-ater" lighting (p. 91).
Lighting panel overview
Thumb wheel for adjusting display, instru- ment and "theater" lighting (see Instru-ment and "theater" lighting (p. 91))
Rear fog lights (see Rear fog lights (p. 92))
Headlight switch
Volvo recommends using the
posi-
tion whenever possible.
Headlight switch positionsDaytime running lights function as follows: With the headlight switch in the
position:
• In the
US: the daytime running lights will
be off
• In
Canada : the daytime running lights will
be on
With the headlight switch in the
16
position and the ignition in mode II or if the engine is running (see Ignition modes (p. 77))
• In the
US: the daytime running lights will
be off
• In
Canada : the daytime running lights will
be on
With the headlight switch in the
posi-
tion:
• The daytime running lights will be
on (the
low beam headlights will automatically switch on in dark conditions)
US models only : The daytime running lights
in
mode can be switched on or off in
the MY CAR menu system under
Settings
Car settingsLight settingsDaytime
running lights.
NOTE
The use of Daytime Running Lights is rec- ommended in the United States and ismandatory in Canada .
With the headlight switch in the posi-
tion:
• The daytime running lights will be
off and
the low beam headlights will be on
16
The parking lights will be on in this position, even if the ignition is switched off.
Page 90 of 402

03 Instruments and controls
03
88* Option/accessory, for more information, see Introduction.
High/low beam headlights
When the engine is started, the low beams are activated automatically if the headlight control is in position
.
Headlight switch and steering wheel lever
High beam flash
Toggle between high and low beams
Continuous high beam headlights
With the headlight switch in the (in dark
conditions only, when the daytime running lights have automatically switched off and thelow beam headlights have switched on) or
position:
• Pull the lever toward the steering wheel to position 2 and release it to togglebetween low and high beams.
High beam flashPull the lever toward the steering wheel to position 1. The high beams come on until thelever is released.
Related information
•Active Bending Lights (ABL)* (p. 90)
• Active high beams (AHB)* (p. 88)
• Lighting panel (p. 87)
• Tunnel detection (models with the rain sensor* only) (p. 90)
Active high beams (AHB)*
AHB uses a camera at the upper edge of the windshield to detect the headlights of oncom-ing vehicles or the taillights of a vehicledirectly ahead. When this happens, the head-lights will automatically switch from highbeams to low beams. When the camera nolonger detects the headlights/taillights ofother vehicles, your headlights will switchback to high beams after several seconds. To activate AHB:
• Turn the headlight control to the
position.
The feature will begin functioning if the engine has been running for at least 20 seconds andthe vehicle's speed is at least 12 mph(20 km/h).
Headlight switch in the AUTO position
Page 91 of 402

03 Instruments and controls
03
89
Switch AHB on or off by pulling the left steer- ing wheel lever rearward (toward the steeringwheel) as far as possible and releasing it. IfAHB is switched off while the high beams areon, the headlights will change to low beams.
Models with an analog instrument panel
When AHB is activated, the symbol will
illuminate in the instrument panel. The high beam indicator (
) in the instrument panel
will also illuminate when the high beams are on.
Models with a digital instrument panel
When AHB is activated, will illuminate
as a white symbol in the instrument panel.
When the high beams are on, the symbol will change to blue.
NOTE
•Keep the windshield in front of the camera free of ice, snow, dirt, etc.
• Do not mount or in any way attachanything on the windshield that couldobstruct the camera.
If Active high beam Temporary
unavailable Switch manually is displayed in
the instrument panel, switching between high and low beams will have to be done man-ually. However, the light switch can remain in the
position. The same applies if
Windscreen Sensors blocked is displayed
and the
symbol is displayed. The symbol will go out when these messages are displayed. AHB may be temporarily unavailable (e.g., in heavy fog or rain). When AHB becomes activeagain or if the sensors in the windshield areno longer obscured, the messages will disap- pear and the
symbol will illuminate.
CAUTION
In the following situations, it may be nec- essary to switch between high and lowbeams manually:
• In heavy fog or rain
• In blowing snow or slush
• In bright moonlight
• In freezing rain
• In areas with dim street lighting
• When oncoming vehicles have dim front lighting
• If there are pedestrians on or near theroad
• If there are reflective objects, such assigns, near the road
• When oncoming vehicles' lights areobscured by e.g., fences, bushes, etc.
• When there are vehicles on connectingroads
• At the top of hills or in dips in the road
• In sharp curves
See The camera’s limitations (p. 212) for more information about the camera's limita-tions.
Related information
•
High/low beam headlights (p. 88)
• Lighting panel (p. 87)
Page 92 of 402

03 Instruments and controls
03
90* Option/accessory, for more information, see Introduction.
Tunnel detection (models with the rain sensor* only)
For models without automatic low beams, tunnel detection activates the low beamswhen the vehicle enters a tunnel. The lowbeams are switched off approx. 20 secondsafter the vehicle leaves the tunnel. The rain sensor reacts to the change in light- ing conditions when, for example, the vehicleenters a tunnel and the tunnel detection fea-ture will then activate the low beam head-lights. The low beams will be switched offapprox. 20 seconds after the vehicle leavesthe tunnel. The rain sensor does not have to be activated for tunnel detection to function.
Related information
• Lighting panel (p. 87)
• High/low beam headlights (p. 88)
Active Bending Lights (ABL)*
With ABL activated, the headlight beams adjust laterally to help light up a curveaccording to movements of the steeringwheel (see the right-pointing beam in the fol-lowing illustration).
Headlight pattern with the Active Bending Light function deactivated (left) and activated (right)
ABL is activated automatically 17
when the
engine is started. The function can be deactivated/reactivated in the MY CAR menu system under
My V60
Active Bending Lights or under Settings
Car settingsLight settingsActive
Bending Lights. See My Car – introduction (p. 74) for a description of the menu system.
NOTE
This function is only active in twilight or dark conditions, and only when the vehicleis in motion.
If a fault should occur in the system, the sym- bol will illuminate and a message will be dis-played as shown in the table.
SymbolDisplayExplanation
Headlamp failureServicerequiredThe system is not functioningproperly andshould beinspected/repaired by atrained andqualified Volvoservice techni-cian.
17
The factory default setting is on.
Page 93 of 402

03 Instruments and controls
03
* Option/accessory, for more information, see Introduction.91
Cornering lights 18Models equipped with ABL also have front cornering lights that temporarily provide extralight to the front left or right of the vehicle atlow speeds when making a sharp turn (forexample, when turning into a parking space)or when the turn signals are used. This feature is activated when: •
High or low beam headlights are on
and
• The vehicle's speed is below 20 mph (30 km/h)
The feature is also activated when the vehicle is backing up. The cornering lights are deactivated when the vehicle's speed exceeds approx. 25 mph(40 km/h).
Related information
• Lighting panel (p. 87)
• High/low beam headlights (p. 88)
• Active high beams (AHB)* (p. 88)
Auxiliary lights*
If the vehicle is fitted with auxiliary lights, the driver can use the
MY CAR menu system to
choose to deactivate and turn these lights onand off along with the high beam headlights. The auxiliary lights must be connected to the vehicle's electrical system, which should onlybe done by a trained and authorized Volvoservice technician. See My Car – introduction(p. 74) for more information about the menusystem.
Instrument and "theater" lighting
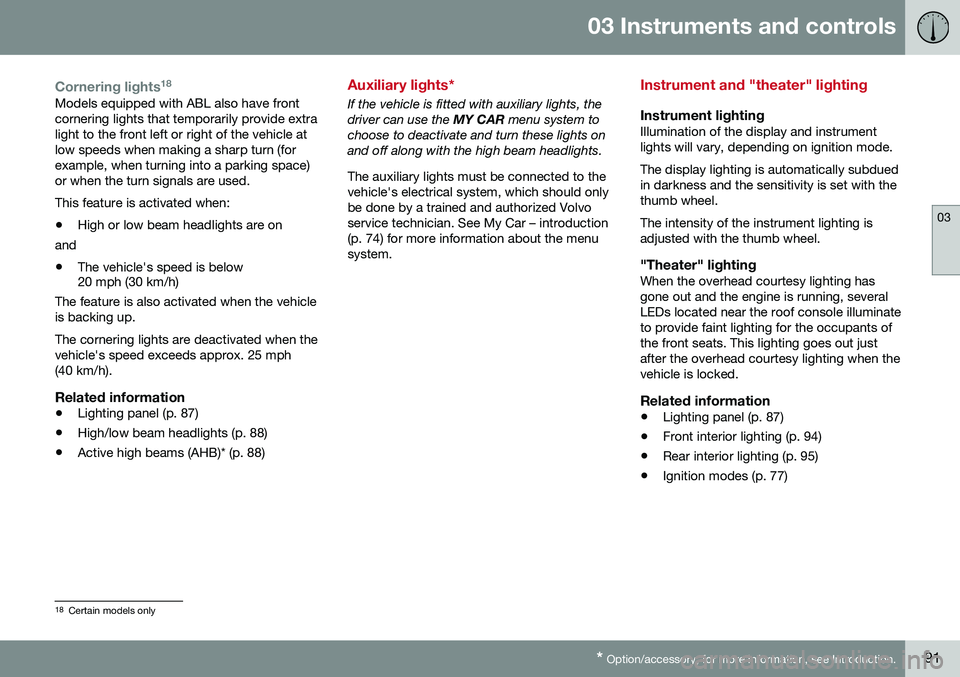
Instrument lightingIllumination of the display and instrument lights will vary, depending on ignition mode. The display lighting is automatically subdued in darkness and the sensitivity is set with thethumb wheel. The intensity of the instrument lighting is adjusted with the thumb wheel.
"Theater" lightingWhen the overhead courtesy lighting hasgone out and the engine is running, severalLEDs located near the roof console illuminateto provide faint lighting for the occupants ofthe front seats. This lighting goes out justafter the overhead courtesy lighting when thevehicle is locked.
Related information
• Lighting panel (p. 87)
• Front interior lighting (p. 94)
• Rear interior lighting (p. 95)
• Ignition modes (p. 77)
18
Certain models only