2016 VAUXHALL MOVANO_B ECU
[x] Cancel search: ECUPage 53 of 233

Seats, restraints51NO: Bakovervendt
barnesikringsutstyr må ALDRI brukes
på et sete med AKTIV
KOLLISJONSPUTE foran, da det kan
føre til at BARNET utsettes for
LIVSFARE og fare for ALVORLIGE
SKADER.
PT: NUNCA use um sistema de
retenção para crianças voltado para
trás num banco protegido com um AIRBAG ACTIVO na frente do
mesmo, poderá ocorrer a PERDA DE VIDA ou FERIMENTOS GRAVES na
CRIANÇA.
IT: Non usare mai un sistema di
sicurezza per bambini rivolto
all'indietro su un sedile protetto da
AIRBAG ATTIVO di fronte ad esso:
pericolo di MORTE o LESIONI
GRAVI per il BAMBINO!
EL: ΠΟΤΕ μη χρησιμοποιείτε παιδικό
κάθισμα ασφαλείας με φορά προς τα πίσω σε κάθισμα που προστατεύεται
από μετωπικό ΕΝΕΡΓΟ ΑΕΡΟΣΑΚΟ, διότι το παιδί μπορεί να υποστεί
ΘΑΝΑΣΙΜΟ ή ΣΟΒΑΡΟ
ΤΡΑΥΜΑΤΙΣΜΟ.PL: NIE WOLNO montować fotelika
dziecięcego zwróconego tyłem do
kierunku jazdy na fotelu, przed
którym znajduje się WŁĄCZONA
PODUSZKA POWIETRZNA.
Niezastosowanie się do tego
zalecenia może być przyczyną
ŚMIERCI lub POWAŻNYCH
OBRAŻEŃ u DZIECKA.
TR: Arkaya bakan bir çocuk emniyet
sistemini KESİNLİKLE önünde bir
AKTİF HAVA YASTIĞI ile
korunmakta olan bir koltukta
kullanmayınız. ÇOCUK ÖLEBİLİR
veya AĞIR ŞEKİLDE
YARALANABİLİR.
UK: НІКОЛИ не використовуйте
систему безпеки для дітей, що
встановлюється обличчям назад,
на сидінні з УВІМКНЕНОЮ
ПОДУШКОЮ БЕЗПЕКИ, інакше це
може призвести до СМЕРТІ чи
СЕРЙОЗНОГО ТРАВМУВАННЯ
ДИТИНИ.
HU: SOHA ne használjon hátrafelé
néző biztonsági gyerekülést előlről
AKTÍV LÉGZSÁKKAL védett ülésen,
mert a GYERMEK HALÁLÁT vagy
KOMOLY SÉRÜLÉSÉT okozhatja.HR: NIKADA nemojte koristiti sustav
zadržavanja za djecu okrenut prema
natrag na sjedalu s AKTIVNIM
ZRAČNIM JASTUKOM ispred njega,
to bi moglo dovesti do SMRTI ili
OZBILJNJIH OZLJEDA za DIJETE.
SL: NIKOLI ne nameščajte otroškega
varnostnega sedeža, obrnjenega v
nasprotni smeri vožnje, na sedež z
AKTIVNO ČELNO ZRAČNO
BLAZINO, saj pri tem obstaja
nevarnost RESNIH ali SMRTNIH
POŠKODB za OTROKA.
SR: NIKADA ne koristiti bezbednosni
sistem za decu u kome su deca
okrenuta unazad na sedištu sa
AKTIVNIM VAZDUŠNIM
JASTUKOM ispred sedišta zato što DETE može da NASTRADA ili da se
TEŠKO POVREDI.
MK: НИКОГАШ не користете детско
седиште свртено наназад на
седиште заштитено со АКТИВНО
ВОЗДУШНО ПЕРНИЧЕ пред него,
затоа што детето може ДА ЗАГИНЕ или да биде ТЕШКО ПОВРЕДЕНО.
BG: НИКОГА не използвайте
детска седалка, гледаща назад,
върху седалка, която е защитена
Page 55 of 233

Seats, restraints53Additionally there is a warning labelon the side of the instrument panel,
visible when the front passenger door
is open.
The front airbag system is triggered in
the event of an accident of a certain
severity. The ignition must be
switched on.
The inflated airbags cushion the
impact, thereby reducing the risk of
injury to the upper body and head of
the front seat occupants
considerably.9 Warning
Optimum protection is only
provided when the seat is in the
proper position 3 39.
Keep the area in which the airbag
inflates clear of obstructions.
Fit the seat belt correctly and
engage securely. Only then the
airbag is able to protect.
Side airbag system
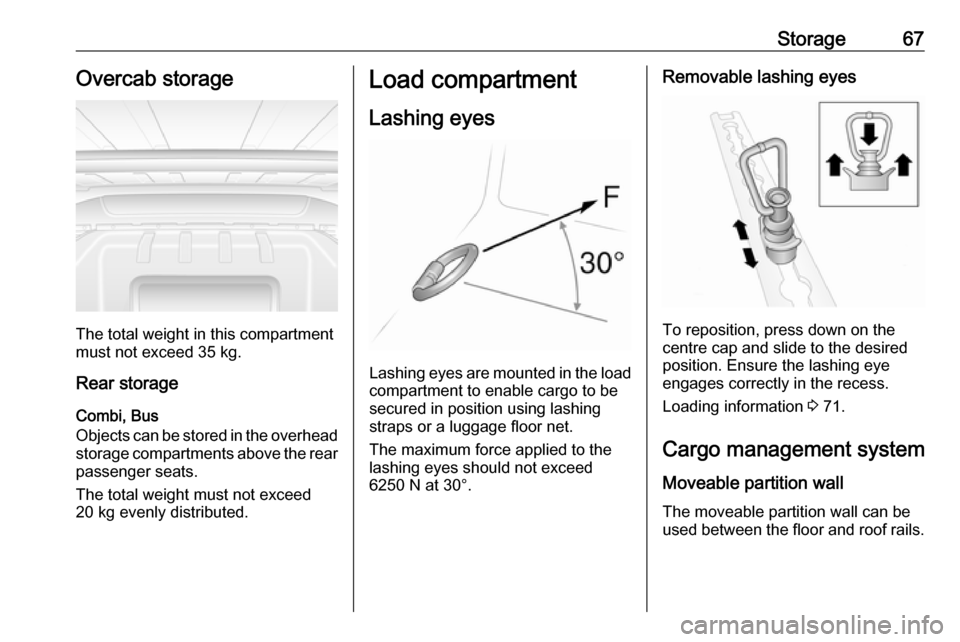
The side airbag system consists of an
airbag in each front seat backrest.
This can be identified by the word
AIRBAG .
The side airbag system is triggered in the event of an accident of a certain
severity. The ignition must be
switched on.
The inflated airbags cushion the
impact, thereby reducing the risk of
injury to the upper body and pelvis in
the event of a side-on collision
considerably.
9 Warning
Keep the area in which the airbag
inflates clear of obstructions.
Notice
Only use protective seat covers that have been approved for the vehicle.Be careful not to cover the airbags.
Airbag deactivation
Front airbag and side airbag systems for the front passenger seat must be
deactivated if a child restraint system
is to be fitted on this seat, in
accordance with the instructions in
the child restraint installation location
tables 3 56.
The belt pretensioners and all driver
airbag systems will remain active.
Page 57 of 233

Seats, restraints55Child restraints
Child restraint systems
We recommend the Vauxhall child
restraint system which is tailored
specifically to the vehicle.
When a child restraint system is being used, pay attention to the following
usage and installation instructions
and also those supplied with the child
restraint system.
Always comply with local or national
regulations. In some countries, the
use of child restraint systems is
forbidden on certain seats.9 Warning
When using a child restraint
system on the front passenger
seat, the airbag systems for the
front passenger seat must be
deactivated; if not, the triggering of the airbags poses a risk of fatal
injury to the child.
This is especially the case if rear-
facing child restraint systems are
used on the front passenger seat.
Airbag deactivation 3 53.
Airbag label 3 49.
The rear seats are the most
convenient location to fasten a child
restraint system.
Children should travel facing
rearwards in the vehicle as long as
possible. This makes sure that the
child's backbone, which is still very
weak, is under less strain in the event
of an accident.
Child locks 3 25.
Selecting the right system Suitable are restraint systems that
comply with valid UN ECE
regulations. Check local laws and
regulations for mandatory use of child restraint systems.
Ensure that the child restraint system to be installed is compatible with the
vehicle type.
Ensure that the mounting location of
the child restraint system within the
vehicle is correct, see following
tables.Allow children to enter and exit the
vehicle only on the side facing away
from the traffic.
When the child restraint system is not
in use, secure the seat with a seat belt or remove it from the vehicle.
Child restraint systems could be
fastened with ISOFIX mounting
brackets, Top-tether if available, and/
or a three-point seat belt. Refer to the following tables.
Notice
Do not affix anything on the child
restraint systems and do not cover
them with any other materials.
A child restraint system which has
been subjected to stress in an
accident must be replaced.
Page 69 of 233

Storage67Overcab storage
The total weight in this compartment
must not exceed 35 kg.
Rear storage
Combi, Bus
Objects can be stored in the overhead
storage compartments above the rear passenger seats.
The total weight must not exceed
20 kg evenly distributed.
Load compartment
Lashing eyes
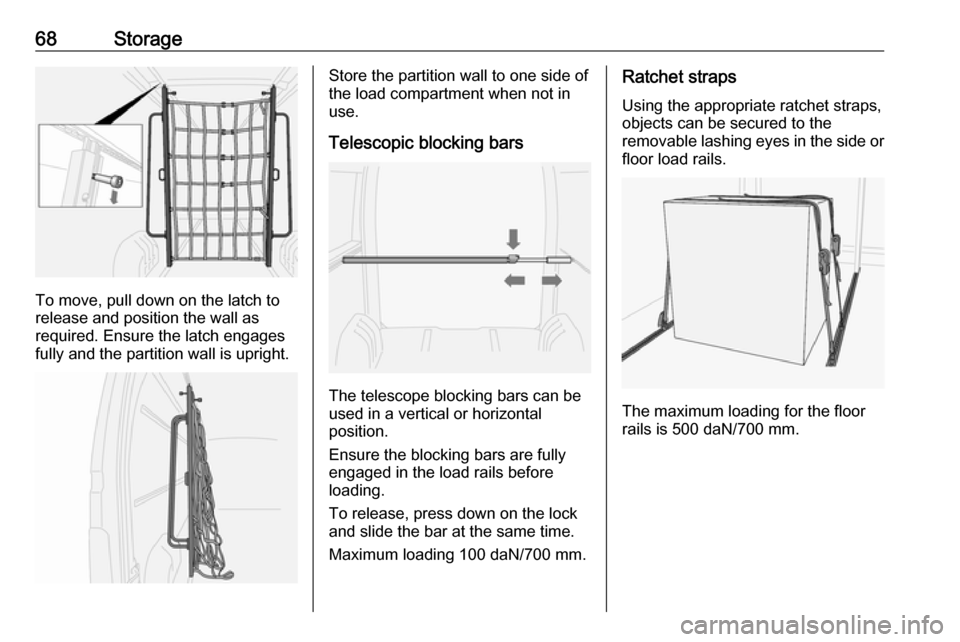
Lashing eyes are mounted in the load
compartment to enable cargo to be
secured in position using lashing
straps or a luggage floor net.
The maximum force applied to the
lashing eyes should not exceed
6250 N at 30°.
Removable lashing eyes
To reposition, press down on the
centre cap and slide to the desired position. Ensure the lashing eye
engages correctly in the recess.
Loading information 3 71.
Cargo management system
Moveable partition wall
The moveable partition wall can be
used between the floor and roof rails.
Page 70 of 233

68Storage
To move, pull down on the latch to
release and position the wall as
required. Ensure the latch engages fully and the partition wall is upright.
Store the partition wall to one side of
the load compartment when not in
use.
Telescopic blocking bars
The telescope blocking bars can be
used in a vertical or horizontal
position.
Ensure the blocking bars are fully
engaged in the load rails before
loading.
To release, press down on the lock
and slide the bar at the same time.
Maximum loading 100 daN/700 mm.
Ratchet straps
Using the appropriate ratchet straps,
objects can be secured to the
removable lashing eyes in the side or
floor load rails.
The maximum loading for the floor
rails is 500 daN/700 mm.
Page 71 of 233

Storage69
The maximum loading for the side
rails is 100 daN/700 mm.
Removable lashing eyes 3 67,
Loading information 3 71.
Safety net
Lower the safety net from the roof
area and attach to the lashing eyes
3 67.
Adjust the tension on the straps to
ensure the load is secure.
When not in use the safety net should be stored in the roof area.
Loading information 3 71.
Warning triangle
The warning triangle can be
accommodated in the space under
the front seats.
Underseat storage 3 66.
First aid kit
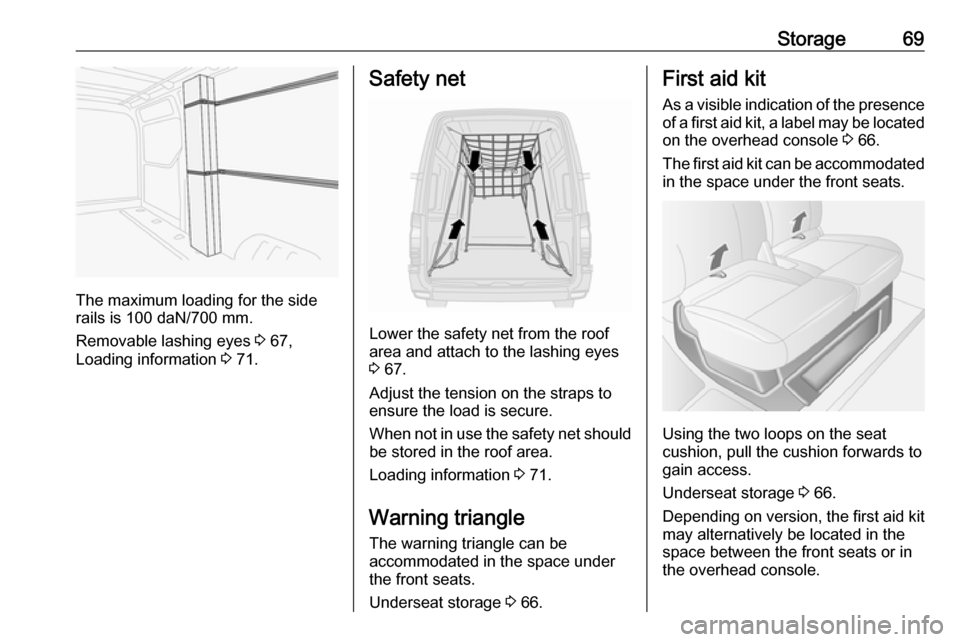
As a visible indication of the presence
of a first aid kit, a label may be located on the overhead console 3 66.
The first aid kit can be accommodated
in the space under the front seats.
Using the two loops on the seat
cushion, pull the cushion forwards to
gain access.
Underseat storage 3 66.
Depending on version, the first aid kit may alternatively be located in the
space between the front seats or in
the overhead console.
Page 73 of 233

Storage71Loading information● Heavy objects in the load compartment should be evenly
distributed and placed as far
forward as possible. If objects
can be stacked, the heavier
objects should be placed at the
bottom.
● Secure objects with lashing straps attached to lashing eyes
3 67.
● Secure loose objects in load compartment to prevent them
from sliding.
● The load must not obstruct the operation of the pedals, parking
brake and gear selector lever, or
hinder the freedom of movement of the driver. Do not place any
unsecured objects in the interior.
● Do not drive with an open load compartment. In addition, the
number plate is only
distinguishable and illuminated
correctly if the doors are closed.9 Warning
Always make sure that the load in
the vehicle is securely stowed.
Otherwise objects can be thrown
around inside the vehicle and
cause personal injury or damage
to the load or vehicle.
● The payload is the difference between the permitted gross
vehicle weight (see identification
plate 3 199) and the EC kerb
weight.
To calculate the payload, enter
the data for your vehicle in the
Weights table at the front of this
manual.
The EC kerb weight includes
weights for the driver (68 kg),
luggage (7 kg) and all fluids (tank 90% full).
Optional equipment and
accessories increase the kerb
weight.
● Driving with a roof load increases
the sensitivity of the vehicle to
cross-winds and has a
detrimental effect on vehicle
handling due to the vehicle's
higher centre of gravity.
Distribute the load evenly and secure it properly with retaining
straps. Adjust the tyre pressure
and vehicle speed according to
the load conditions. Check and
retighten the straps frequently.
Do not drive faster than 75 mph.
● The permissible roof load (which includes the weight of the roof
rack) is 200 kg for standard roof
variants. The roof load is the combined weight of the roof rack
and the load.
Page 113 of 233

Climate control111Open the cover using a coin and
replace the battery (CR 2430 or
equivalent), ensuring the new battery
is correctly installed with the positive
( < ) side facing the positive terminals.
Replace the cover securely.
Dispose of old batteries in
accordance with environmental
regulations.
Batteries do not belong in household
waste. They must be disposed of at
an appropriate recycling collection
point.
Remote control fault displays
cobA:poor signal –
adjust positionconP:no signal – move closerbALo:battery low –
change batteryErr:system error –
consult workshopAdd,
AddE:system in learning mode
Teach remote control
If the vehicle battery is reconnected,
the LED in the instrument panel
button illuminates and the system
configures the remote control menu
automatically. If the LED flashes,
press OK on remote control, select
Add or AddE and confirm.
Additional remote control units may
also be configured. Press the button
until LED flashes, switch on the
remote control, select Add and
confirm.
AddE teaches the current remote
control unit exclusively and blocks all
previously configured units. Add
teaches up to 4 remote control units,
but only one unit can operate the
system at any one time.
Operation
Heating Y
Select Y in the menu bar and confirm.
The predetermined heating duration,
e.g. L 30, flashes in the display. The
factory setting is 30 minutes.
To temporarily adjust the heating
duration, adjust with q or r and
confirm. The value can be set from 10 to 120 minutes. Due to the power
consumption, note the heating
duration.
To switch off, select Y in the menu bar
again and confirm.
Ventilation x
Select x in the menu bar and confirm.
The ventilation duration can be
accepted or adjusted. The duration
shown is accepted without
confirmation.
To switch off, select x in the menu bar
again and confirm.
Programming P
Up to 3 preset departure times can be programmed, either during one day or
over one week.