Page 22 of 588
22Pictorial index
Emergency flasher switch . . . . . . . . . . . . . . . . . . . . . . . . . . P. 464
Front-wheel drive control switch
*1 . . . . . . . . . . . . . . . . . . . P. 228
Tire pressure warning reset switch . . . . . . . . . . . . . . . . . . . P. 426
Power outlets . . . . . . . . . . . . . . . . . . . . . . . . . . . . . . . . . . . . . P. 385
AUX port/USB port . . . . . . . . . . . . . . . . . . . . . . . . . . . . . . . . . P. 259
1
2
3
4
5
Page 91 of 588

912. Instrument cluster
2
Instrument cluster
■Odometer
Displays the total distance the vehicle has been driven
■Trip meters “A” and “B”
Displays the distance the vehicle has been driven since the meter
was last reset. Trip meters “A” and “B” can be used to record and
display different distances independently.
Pushing and holding the “ODO/TRIP” button will reset the trip meter that
is currently displayed.
■
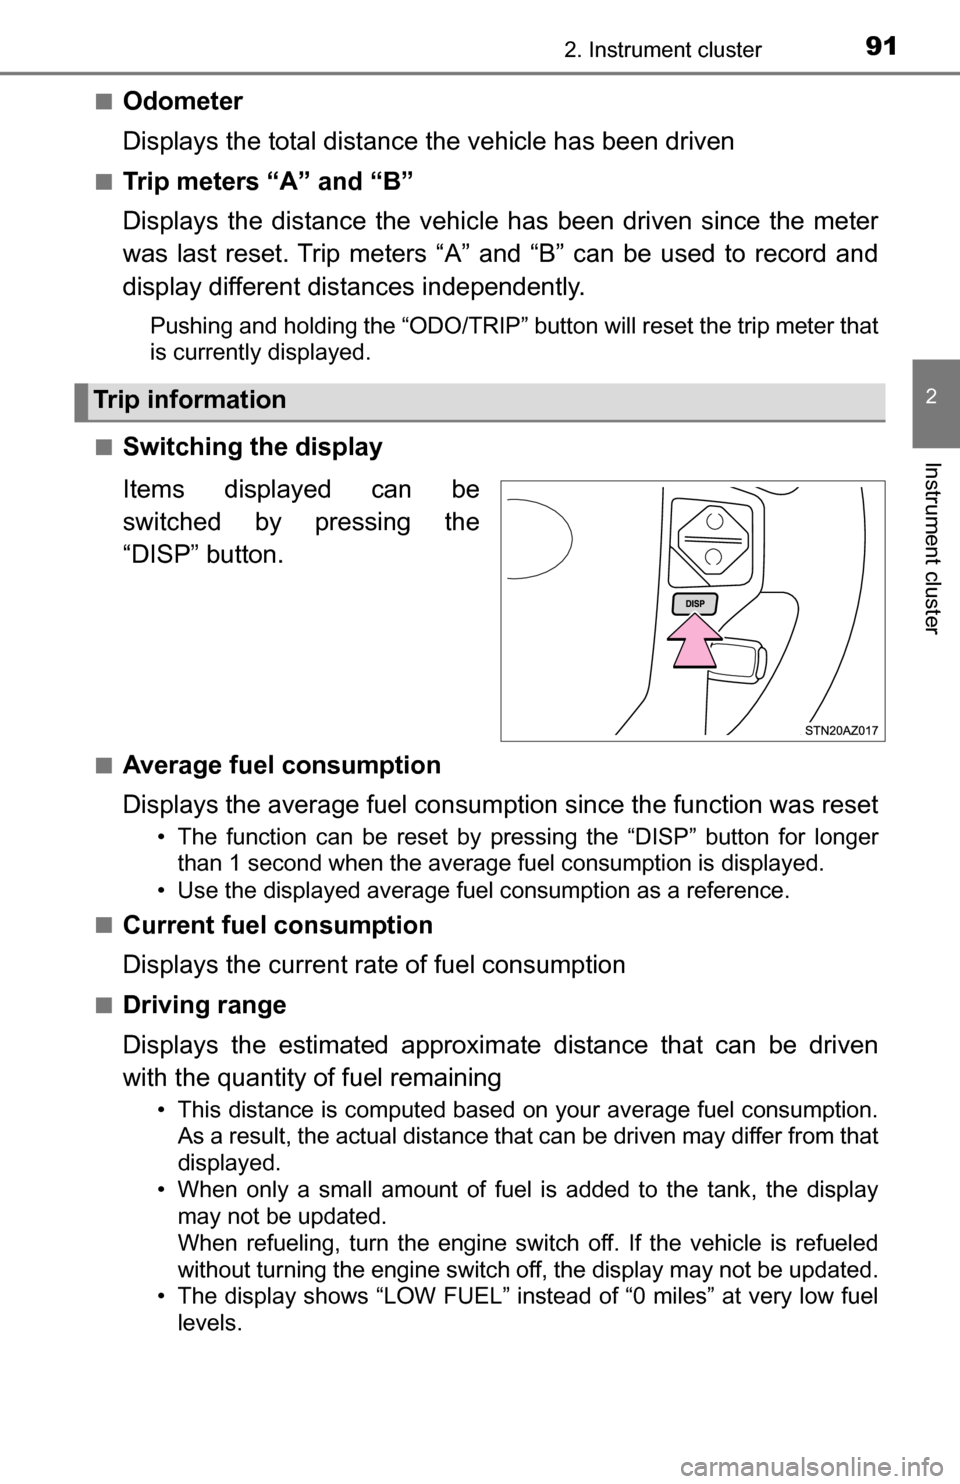
Switching the display
Items displayed can be
switched by pressing the
“DISP” button.
■Average fuel consumption
Displays the average fuel consumption since the function was reset
• The function can be reset by pressing the “DISP” button for longer than 1 second when the average fuel consumption is displayed.
• Use the displayed average fuel consumption as a reference.
■
Current fuel consumption
Displays the current rate of fuel consumption
■Driving range
Displays the estimated approxim ate distance that can be driven
with the quantity of fuel remaining
• This distance is computed based on your average fuel consumption. As a result, the actual distance that can be driven may differ from that
displayed.
• When only a small amount of fuel is added to the tank, the display may not be updated.
When refueling, turn the engine switch off. If the vehicle is refueled
without turning the engine switch off, the display may not be updated.
• The display shows “LOW FUEL” instead of “0 miles” at very low fuel
levels.
Trip information
Page 94 of 588
942. Instrument cluster
■Returning the previous screen
Press and hold the “DISP” but-
ton after selecting the “EXIT” by
pressing the “DISP” button.
■Turn-by-turn navigation (veh icles with navigation system)
■ When disconnecting and reco nnecting battery terminals
The following information data will be reset:
● Trip meters “A” and “B”
● Average fuel consumption
● Driving range
● Elapsed time
● Average vehicle speed
■ Liquid crystal display
Small spots or light spots may appear on the display. This phenomenon is
characteristic of liquid crystal displays, and there is no problem continuing to
use the display.
The turn-by-turn navigation appears only
while route guidance of the navigation
system is being performed. When a turn
approaches, the distance to the turn and
the turn direction are displayed.
• The image shown may differ from the
actual intersection.
• The turn-by-turn navigation can be set to on or off using the customization fea-
ture. ( P. 92)
Page 117 of 588
1173-3. Adjusting the seats
3
Operation of each component
Your preferred driving position (the position of the driver’s seat, steer-
ing wheel and outside rear view mirrors) can be recorded and recalled
by pressing a button.
Two different driving positions can be recorded into memory.
■Recording procedureCheck that the shift lever is in P.
Turn the engine switch to the “ON” position.
Adjust the driver’s seat, steering wheel, and outside rear view
mirrors to the desired positions.
While pressing the “SET”
button, or within 3 seconds
after the “SET” button is
pressed, press button “1” or
“2” until the buzzer sounds.
If the selected button has
already been preset, the previ-
ously recorded position will be
overwritten.
■
Recall procedure
Check that the shift lever is in P.
Turn the engine switch to the “ON” position.
Press one of the buttons for
the driving position you want
to recall until the buzzer
sounds.
Driving position memory
1
2
3
4
1
2
3
Page 204 of 588

2044-5. Using the driving support systems
■Cruise control can be set when
●The shift lever is in D or range 4 or higher of S has been selected.
● Vehicle speed is above approximately 25 mph (40 km/h).
■ Accelerating after setting the vehicle speed
●The vehicle can be accelerated normally. After acceleration, the set speed
resumes.
● Even without canceling the cruise control, the set speed can be increased
by first accelerating the vehicle to the desired speed and then pushing the
lever down to set the new speed.
■ Automatic cruise control cancellation
Cruise control will stop maintaining the vehicle speed in any of the following
situations.
●Actual vehicle speed falls more than approximately 10 mph (16 km/h) below
the preset vehicle speed.
At this time, the memorized set speed is not retained.
● Actual vehicle speed is below approximately 25 mph (40 km/h).
● VSC is activated.
● 4WD models: The operation cannot be switched for 5 seconds or more after
operating the front-wheel drive control switch.
■ If the cruise control indicator light flashes
Press the “ON-OFF” button once to deactivate the system, and then press
the button again to reactivate the system.
If the cruise control speed cannot be set or if the cruise control cancels imme-
diately after being activated, there may be a malfunction in the cruise control
system. Have the vehicle inspected by your Toyota dealer.
CAUTION
■ To avoid operating the cruise control by mistake
Switch the cruise control off using the “ON-OFF” button when not in use.
■ Situations unsuitable for cruise control
Do not use cruise control in any of the following situations.
Doing so may result in loss of control and could cause an accident resulting
in death or serious injury.
● In heavy traffic
● On roads with sharp bends
● On winding roads
● On slippery roads, such as those covered with rain, ice or snow
● On steep hills
Vehicle speed may exceed the set speed when driving down a steep hill.
● When your vehicle is towing a trailer or during emergency towing
Page 242 of 588
![TOYOTA TUNDRA 2016 2.G Owners Manual 2424-5. Using the driving support systems
While driving 20 - 25 mph [35 - 40 km/h], fully apply the manual
TRAILER BRAKE OUTPUT
slider.
Adjust the gain setting, using the GAIN (+/-) selection buttons TOYOTA TUNDRA 2016 2.G Owners Manual 2424-5. Using the driving support systems
While driving 20 - 25 mph [35 - 40 km/h], fully apply the manual
TRAILER BRAKE OUTPUT
slider.
Adjust the gain setting, using the GAIN (+/-) selection buttons](/manual-img/14/6842/w960_6842-241.png)
2424-5. Using the driving support systems
While driving 20 - 25 mph [35 - 40 km/h], fully apply the manual
TRAILER BRAKE OUTPUT
slider.
Adjust the gain setting, using the GAIN (+/-) selection buttons, to
either increase or decrease to just below the point of trailer wheel
lock-up.
For confirmation, repeat steps and until desired gain setting
is reached (just below point of trailer wheel lock-up).
■ When using the trailer brake control system
Please turn off the intuitive parking assist while towing a trailer. If left on,
sonar sensors will detect the trailer being towed.
■ When setting the gain
Wheel lock-up occurs when the trailer wheel squeals or tire smoke occurs.
Trailer wheels may not lock-up while driving heavily loaded trailer. During this
case, adjust the Trailer gain to the highest allowable setting for the towing
condition.
■ When disconnecting and reco nnecting battery terminals
The gain setting data will be reset.
CAUTION
■ Trailer brake type setting
It is the responsibility of the driver to make sure the trailer brakes are func-
tioning normally and adjusted appropriately. Failure to check and maintain
trailer brakes may result in loss of vehicle control, crash, or serious injury.
Trailer brake control system will work with most electric and electric-over-
hydraulic trailer braking systems up to 3 axles (24A output to trailer brakes).
Please be sure to test compatibility with the system at low speeds and in a
safe area. When a warning message appears in the multi-information dis-
play (P. 483), the gain setting may be too high. Please use the trailer
brakes with reduced gain. If there is still a problem, have the vehicle
inspected by your Toyota dealer immediately.
Some electric-over-hydraulic trailer brakes will take some minimum output
to activate. Trailer brake control system will not work with trailer hydraulic
surge brakes.
■ When driving on slippery road surfaces
When stopping with ABS activated, output to the trailer might be reduced in
order to reduce the likelihood of trailer to sway or trailer wheels to lock. The
trailer is not equipped with ABS. Drive safely on slippery road surfaces.
6
7
867
Page 263 of 588
2635-2. Setup
5
Multimedia
Audio settings
Press the “SETUP” button.
Select “Audio” on the “Setup” screen.Select the number of radio
preset stations.
Select to display the cover
art.
Select “High”, “Mid”, “Low” or
“Off”.
■About Automatic Sou nd Leveliser (ASL)
ASL automatically adjusts the volume and tone quality according to the vehi-
cle speed.
Settings are available for adjusting the radio operation, cover
art, etc.
Screen for audio settings
1
2
1
2
3
Page 271 of 588
2715-4. Using the radio
5
Multimedia
Radio operation
“Select Audio Source” screen
appears
Preset stations
Select to display RBDS text
messages*
Scanning for receivable station
Select to display a list of receiv-
able stations
Setting the sound (P. 270)
*: FM only
Tune in to the desired station us ing one of the following methods.
■Seek tuning
Press the “” or “ ” button on “SEEK/TRACK”.
The radio will begin seeking up or down for a station of the nearest
frequency and will stop when a station is found.
■Manual tuning
Turn the “TUNE·SCROLL” knob.
■Preset stations
Select the desired preset station.
Select “AM” or “FM” on the “Select Audio Source” screen to
begin listening to the radio.
Audio control screen
1
2
3
4
5
6
Selecting a station