Page 426 of 588

4267-3. Do-it-yourself maintenance
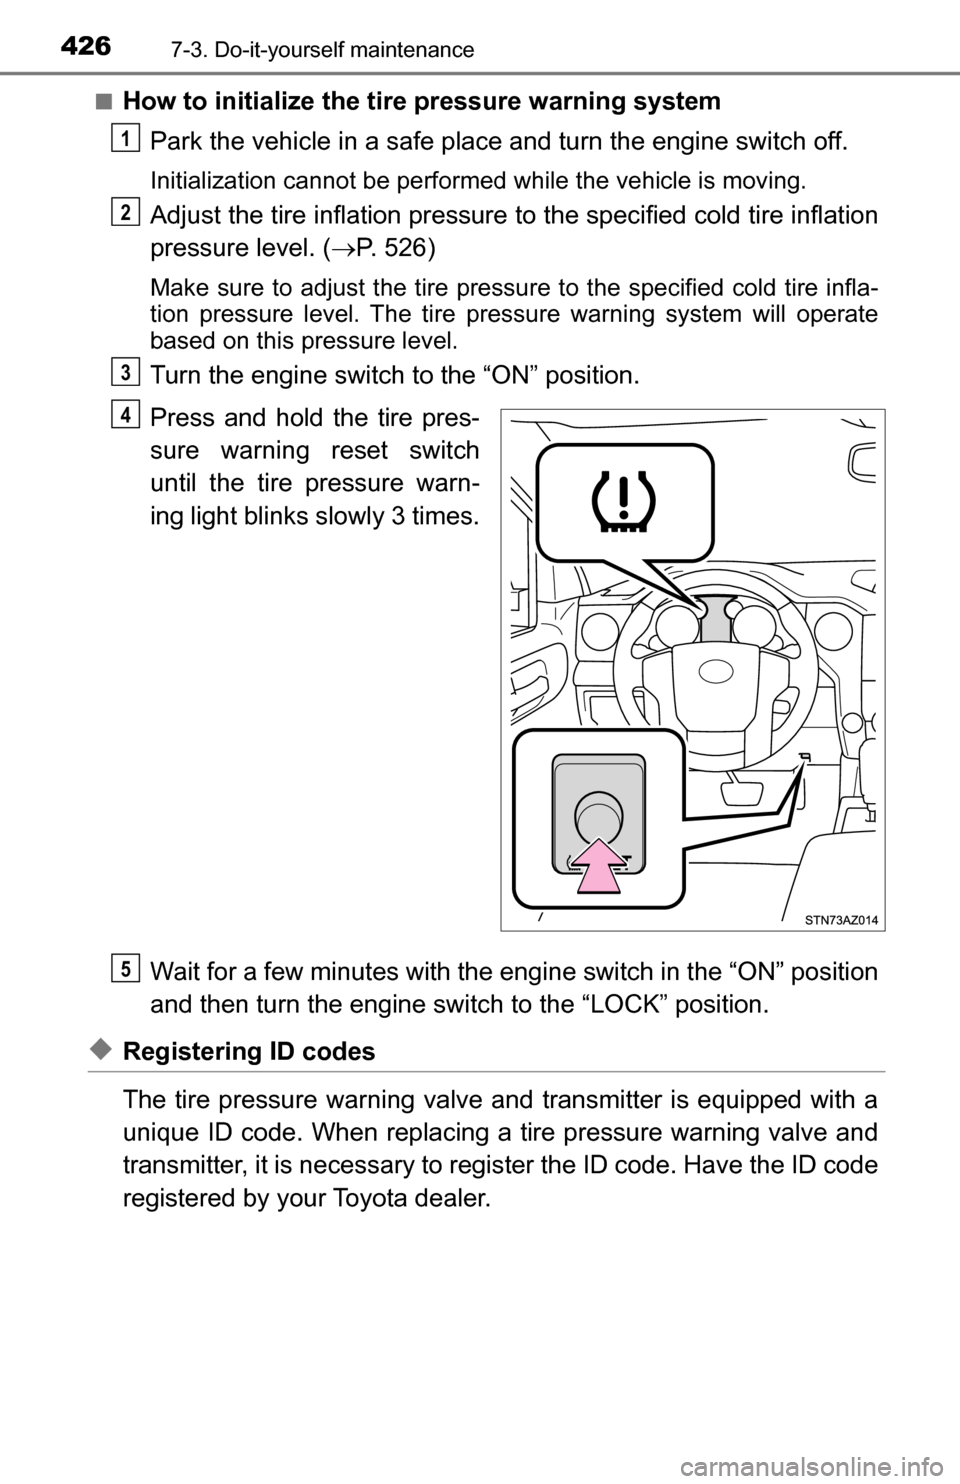
■How to initialize the tire pressure warning systemPark the vehicle in a safe place and turn the engine switch off.
Initialization cannot be performed while the vehicle is moving.
Adjust the tire inflation pressure to the specified cold tire inflation
pressure level. ( P. 526)
Make sure to adjust the tire pressu re to the specified cold tire infla-
tion pressure level. The tire pressure warning system will operate
based on this pressure level.
Turn the engine switch to the “ON” position.
Press and hold the tire pres-
sure warning reset switch
until the tire pressure warn-
ing light blinks slowly 3 times.
Wait for a few minutes with the eng ine switch in the “ON” position
and then turn the engine switch to the “LOCK” position.
◆Registering ID codes
The tire pressure warning valve and transmitter is equipped with a
unique ID code. When replacing a tire pressure warning valve and
transmitter, it is necessary to register the ID code. Have the ID code
registered by your Toyota dealer.
1
2
3
4
5
Page 451 of 588
4517-3. Do-it-yourself maintenance
7
Maintenance and care
Reinstall the fender liner and
install the screws and clips.
■Front turn signal/parking lights (bulb type)/daytime running
lights (bulb type)
Turn the bulb base counter-
clockwise.
Remove the light bulb.
10
1
2
Page 452 of 588
4527-3. Do-it-yourself maintenance
■Front side marker lightsTo allow enough working
space, turn the steering
wheel to the opposite side of
the bulb to be replaced.
Remove the screws and
fender liner clips.
Turn the steering wheel to the
left when replacing the right side
light bulb, and turn the steering
wheel to the right when replac-
ing the left side light bulb.
Open the fender liner and
turn the bulb base counter-
clockwise.
1
2
Page 454 of 588
4547-3. Do-it-yourself maintenance
■Front fog lights (if equipped)To allow enough working
space, turn the steering
wheel to the opposite side of
the bulb to be replaced.
Remove the fender liner
clips.
Turn the steering wheel to the
left when replacing the right side
light bulb, and turn the steering
wheel to the right when replac-
ing the left side light bulb.
Open the fender liner and
unplug the connector while
depressing the lock release.
1
2
Page 455 of 588
4557-3. Do-it-yourself maintenance
7
Maintenance and care
Turn the bulb counterclock-
wise.
Set the new light bulb.
Align the 3 tabs on the light bulb
with the mounting, and insert.
Turn it clockwise to set.
Install the connector.
Shake the bulb base gently to
check that it is not loose, turn
the fog lights, on once and visu-
ally confirm that no light is leak-
ing through the mounting.
3
4
5
Page 457 of 588
4577-3. Do-it-yourself maintenance
7
Maintenance and care
■Stop/tail and rear side marker lights, back-up lights and rear
turn signal lightsRemove the bolts and rear
combination assembly.
Turn the bulb bases counter-
clockwise.Rear turn signal light
Back-up light
Stop/tail and rear side
marker light
Remove the light bulb. Rear turn signal light
Back-up light
Stop/tail and rear side
marker light
1
2
1
2
3
3
1
2
3
Page 458 of 588
4587-3. Do-it-yourself maintenance
■License plate lightsTurn the bulb base counter-
clockwise.
Remove the light bulb.
1
2
Page 461 of 588

4617-3. Do-it-yourself maintenance
7
Maintenance and care
CAUTION
■Replacing light bulbs
● Turn off the lights. Do not attempt to replace the bulb immediately after
turning off the lights.
The bulbs become very hot and may cause burns.
● Do not touch the glass portion of the light bulb with bare hands. When it is
unavoidable to hold the glass portion, use and hold with a clean dry cloth
to avoid getting moisture and oils on the bulb.
Also, if the bulb is scratched or dropped, it may blow out or crack.
● Fully install light bulbs and any parts used to secure them. Failure to do so
may result in heat damage, fire, or water entering the headlight unit. This
may damage the lights or cause condensation to build up on the lens.
● Do not attempt to repair or disassemble the bulb, bulb base, electrical wir-
ing, or subcomponents.
Doing so could result in electric shock and serious injury.
■ To prevent damage or fire
● Make sure bulbs are fully seated and locked.
● Check the wattage of the bulb before installing to prevent heat damage.