Page 4 of 800
TABLE OF CONTENTS4
PRIUS_OM_OM47A29U_(U)5-1. Basic Operations
Audio system types .......... 420
Audio system .................... 421
Using the steering wheel audio switches ................ 424
AUX Port/USB Port........... 425
Basic audio operations ..... 426
5-2. Setup Setup menu ...................... 428
General settings ............... 429
Audio settings ................... 431
Display settings ................ 432
Voice settings ................... 433
5-3. Using the Multimedia system
Selecting the audio source ............................. 434
List screen operation ........ 435
Optimal use of the audio system ............................ 437 5-4. Using the radio
Radio operation................. 438
5-5. Playing an audio CD and MP3/WMA/AAC discs
CD player operation .......... 440
5-6. Using an external device iPod player operation ........ 446
USB memory device player operation .............. 451
Using the AUX .................. 456
5-7. Connecting Bluetooth
®
Preparations to use wireless
communication ................ 457
Registering a Bluetooth
®
audio player for the
first time .......................... 460
Registering a Bluetooth
®
phone for the first time .... 461
Registering a Bluetooth
® device ........... 462
Connecting a Bluetooth
® device ........... 464
Displaying a Bluetooth®
device details .................. 466
Detailed Bluetooth
®
settings ........................... 467
5-8. Bluetooth
® Audio
Listening to Bluetooth®
Audio ............................... 468
5Audio system
Page 5 of 800
5
1
9 8
7
6 4 3
2
PRIUS_OM_OM47A29U_(U)
10
5
5-9. Bluetooth® phone
Using a Bluetooth®
Phone ............................. 470
Making a call..................... 473
Receiving a call ................ 476
Speaking on the phone..... 477
Bluetooth
® phone
message function ........... 480
Using the steering wheel switches.......................... 484
Bluetooth
® phone
settings ........................... 485
Contact/Call History Settings .......................... 486
What to do if... (Troubleshooting) ........... 495
5-10. Bluetooth
®
Bluetooth®........................ 499
5-11. Using the voice command system
Voice command system ... 505 6-1. Using the air conditioning
system and defogger
Automatic air conditioning system ............................. 512
Seat heaters ...................... 523
6-2. Using the interior lights Interior lights list................. 525• Front interior light .......... 526
• Front personal lights...... 526
• Rear interior light ........... 527
6-3. Using the storage features List of storage features ...... 528• Glove box ...................... 529
• Console box .................. 529
• Cup holders/ bottle holders/
door pockets.................. 530
• Auxiliary boxes .............. 532
Luggage compartment features ........................... 533
6Interior features
Page 92 of 800
92
PRIUS_OM_OM47A29U_(U)
2. Instrument cluster
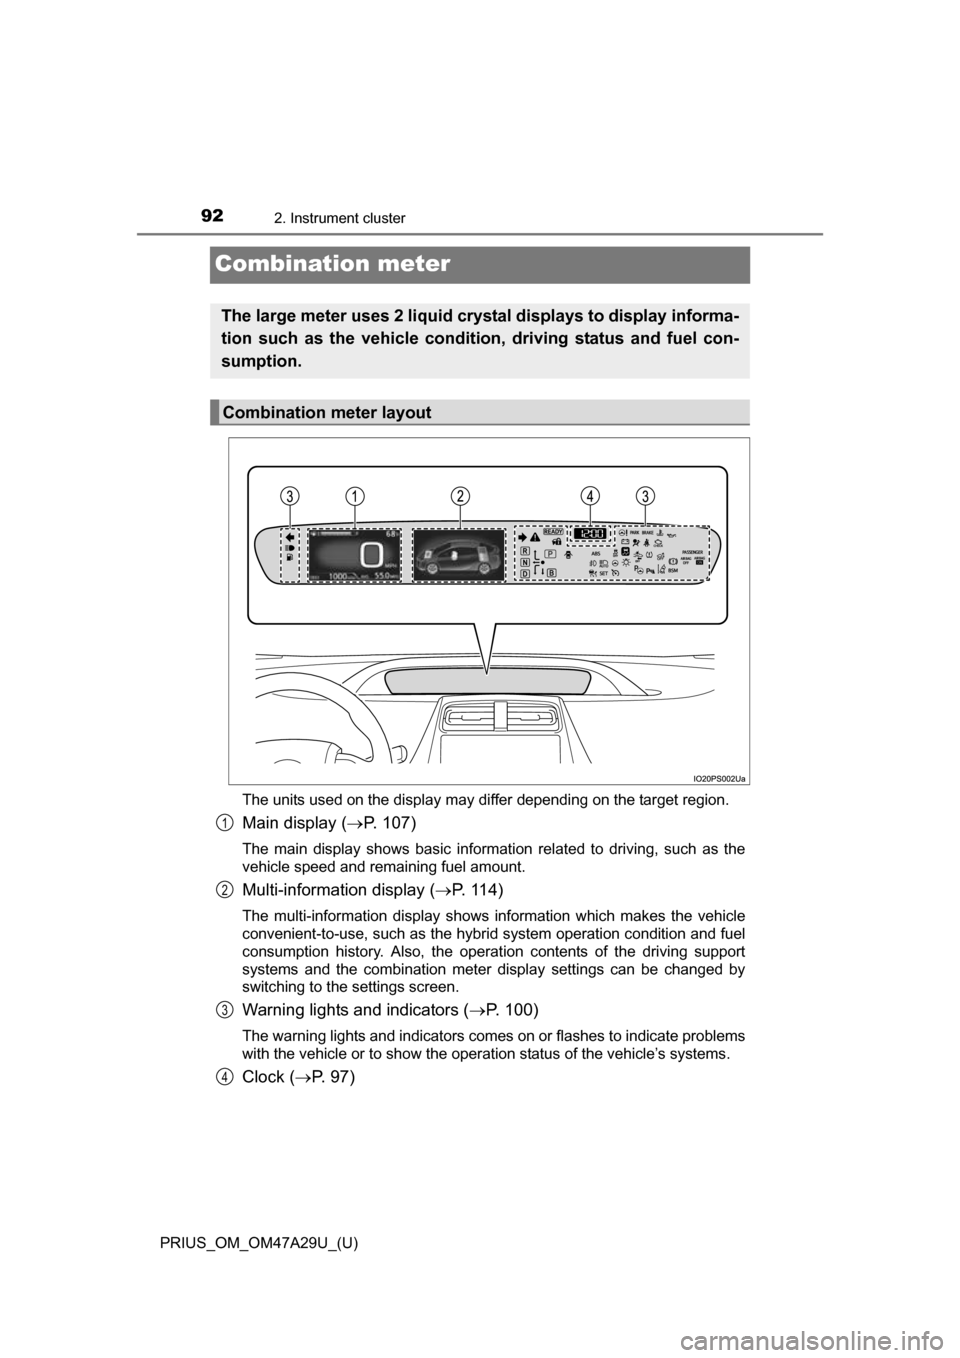
Combination meter
The units used on the display may differ depending on the target region.
Main display (P. 107)
The main display shows basic information related to driving, such as the
vehicle speed and remaining fuel amount.
Multi-information display ( P. 114)
The multi-information display shows information which makes the vehicle
convenient-to-use, such as the hybrid system operation condition and fuel
consumption history. Also, the operat ion contents of the driving support
systems and the combination meter display settings can be changed by
switching to the settings screen.
Warning lights and indicators ( P. 100)
The warning lights and indicators comes on or flashes to indicate problems
with the vehicle or to show the operation status of the vehicle’s systems.
Clock ( P. 97)
The large meter uses 2 liquid cryst al displays to display informa-
tion such as the vehicle condition, driving status and fuel con-
sumption.
Combination meter layout
1
2
3
4
Page 93 of 800
PRIUS_OM_OM47A29U_(U)
932. Instrument cluster
2
Instrument cluster
The meter control switches equipped on the steering wheel can be
used to switch the screen display and change settings related to func-
tions displayed on the screen.
Each time the button is
pressed, the mileage display
switches among odometer, trip
meters, etc., and the fuel con-
sumption information for each
distance switches as well.
( P. 109)
Pressing , , or
performs such operations as
scrolling the screen
*, switching
the contents of the display
* and
moving the cursor.
This button is used to perform such operations as selecting the cur-
rent item or switching between on and off.
When pressed, the display returns to the previous screen.
*: On screens where the screen can be scrolled and the display can be
switched, marks are displayed to indicate the method of operation (such as
and ).
Operations related to the combination meter
1
2
3
4
Page 94 of 800
94
PRIUS_OM_OM47A29U_(U)
2. Instrument cluster
When the switches are pressed, the instrument cluster light changes
as follows.
The instrument cluster brightness levels that can be selected differ
depending on whether the tail lights are on and surrounding brightness lev-
els. ( P. 98)
Darker
Brighter
When the switches are pressed,
the adjustment level check screen
(pop-up display
*) is displayed on
the main display.
When the instrument cluster light is
adjusted, the brightness of the
instrument panel light also
changes.
*: A short time after the operation is completed, the pop-up display turns off.
Furthermore, the pop-up display can be turned on and off in the “Meter
Customize” settings. ( P. 142)
Instrument cluster light control
1
2
Page 95 of 800
PRIUS_OM_OM47A29U_(U)
952. Instrument cluster
2
Instrument cluster
Some information will be displayed automatically according to power
switch operation, vehicle condition, etc.
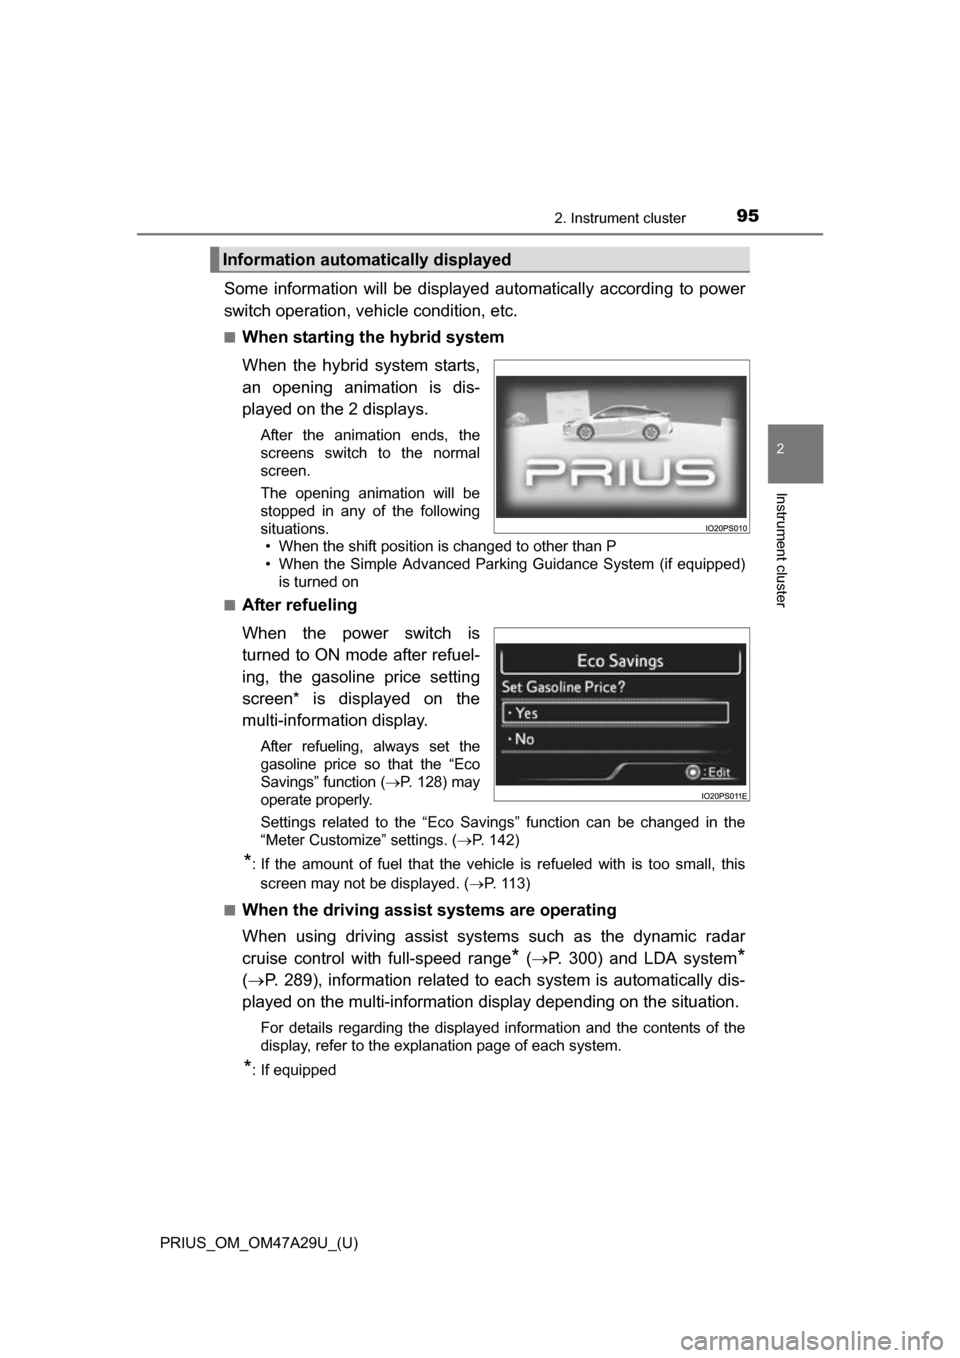
■When starting the hybrid system
When the hybrid system starts,
an opening animation is dis-
played on the 2 displays.
After the animation ends, the
screens switch to the normal
screen.
The opening animation will be
stopped in any of the following
situations. • When the shift position is changed to other than P
• When the Simple Advanced Parking Guidance System (if equipped)
is turned on
■
After refueling
When the power switch is
turned to ON mode after refuel-
ing, the gasoline price setting
screen* is displayed on the
multi-information display.
After refueling, always set the
gasoline price so that the “Eco
Savings” function ( P. 128) may
operate properly.
Settings related to the “Eco Savings” function can be changed in the
“Meter Customize” settings. ( P. 142)
*: If the amount of fuel that the vehicle is refueled with is too small, this
screen may not be displayed. ( P. 113)
■
When the driving assist systems are operating
When using driving assist systems such as the dynamic radar
cruise control with full-speed range
* ( P. 300) and LDA system*
( P. 289), information related to each system is automatically dis-
played on the multi-information display depending on the situation.
For details regarding the displayed information and the contents of the
display, refer to the explanation page of each system.
*: If equipped
Information automatically displayed
Page 97 of 800
PRIUS_OM_OM47A29U_(U)
972. Instrument cluster
2
Instrument cluster
To adjust the time, perform operations on the screen (P. 139)
of the multi-info rmation display.
■Adjusting the time
Press or of the meter control switches on the
screen and select .
Press to display the cursor.
Press or of the
meter control switches to
adjust the cursor position,
and then press or to
change the setting.
When the 12-hour display is
selected, “12H” is displayed,
and when the 24-hour display is
selected, “24H” is displayed.
When adjusting minutes, operation automatically starts from 00 sec-
onds.
After changing the settings, press to return to the previous screen.
■
Resetting the minutes display
Press or of the
meter control switches on the
screen and select.
Press .
The minutes display switches to “00”.*
*
: e.g. 1:00 to 1:29 1:00
1:30 to 1:59 2:00
Clock adjustment
1
2
3
1
2
Page 98 of 800
98
PRIUS_OM_OM47A29U_(U)
2. Instrument cluster
■The meters and display illuminate when
The power switch is in ON mode.
■ Adjusting the instrument cluster brightness (P. 94)
● The brightness levels that can be selected differ depending on whether the
tail lights are on and surrounding brightness levels, as shown in the table
below.
*: 22 levels of the brightness are displayed on the setting screen. However,
the brightness setting will be the brightest when other than 1st level (the
darkest) is selected. If other than 1st or 22nd level is selected, when the
tail lights are turned on in a dark place, the instrument cluster brightness
setting will be the selected level.
● If the taillights are illuminated in a dark environment, the instrument cluster
light dims. However, when the brightness of the instrument cluster is set to
minimum or maximum (1st or 22nd level of the instrument cluster bright-
ness), even if the taillights are illuminated, the instrument cluster light will
not dim.
■ When disconnecting and reconnect ing 12-volt battery terminals
The settings of the calendar, clock, etc. will be reset.
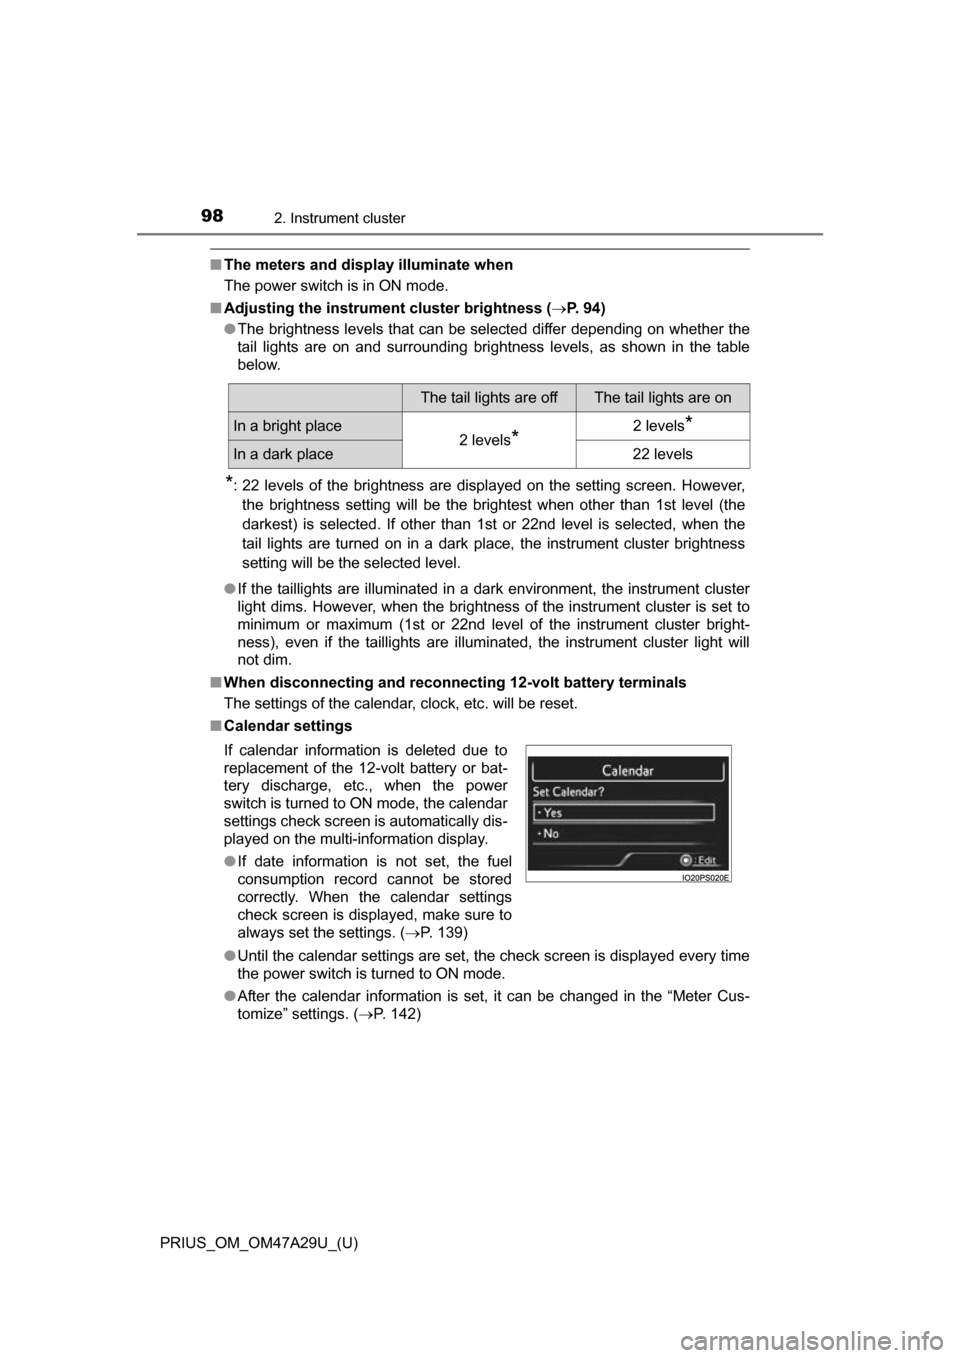
■ Calendar settings
●Until the calendar settings are set, the check screen is displayed every time
the power switch is turned to ON mode.
● After the calendar information is set, it can be changed in the “Meter Cus-
tomize” settings. ( P. 142)
The tail lights are offThe tail lights are on
In a bright place2 levels*2 levels*
In a dark place22 levels
If calendar information is deleted due to
replacement of the 12-volt battery or bat-
tery discharge, etc., when the power
switch is turned to ON mode, the calendar
settings check screen is automatically dis-
played on the multi-information display.
● If date information is not set, the fuel
consumption record cannot be stored
correctly. When the calendar settings
check screen is displayed, make sure to
always set the settings. ( P. 139)