Page 49 of 276
49
2. Bluetooth® SETTINGS
BASIC FUNCTION
2
■AUTO CONNECTION MODE
When the power switch is in ACCES -
SORY or ON mode, the system searches
f
or a nearby registered device.
The system wil
l connect with the regis -
tered device that was last connected, if it
i s nearby.
■CONNECTING MANUALLY
1Follow the steps in “CONNECTING A
Bluetooth
® DEVICE” from “STEP 2”.
(P.48 )
*: Bluetooth is a regi stere
d trademark of
Bluetooth SIG, Inc.
■RECONNECTING THE Bluetooth®
PHONE
If a Bluetooth® phone is disconnected on
purpose, such as turning it off, this does
not happen. Reconnect the Bluetooth
®
phone manually.
INFORMATION
● It may take time if the device connection
is carried out during Bluetooth® audio
playback.
● Depending on the type of Bluetooth
®
device being connected, it may be nec-
essary to perform additional steps on
the device.
● When disconnecting a Bluetooth
®
device, it is recommended to disconnect
using the navigation system.
To turn auto connection mode on, set
“Bluetooth* Power” to on. ( P.51)
Leave the Bluetooth
® device in a loca-
tion where the connection can be es-
tablished.
When the auto connection has failed or
“Bluetooth* Power” is turned off, it is
necessary to connect Bluetooth
® man-
ually.
If a Bluetooth® phone is disconnected
due to poor reception from the
Bluetooth
® network when the power
switch is in ACCESSORY or ON mode,
the system automatically reconnects
the Bluetooth
® phone.
Page 118 of 276
118
1. VOICE COMMAND SYSTEM OPERATION
1. VOICE COMMAND SYSTEM
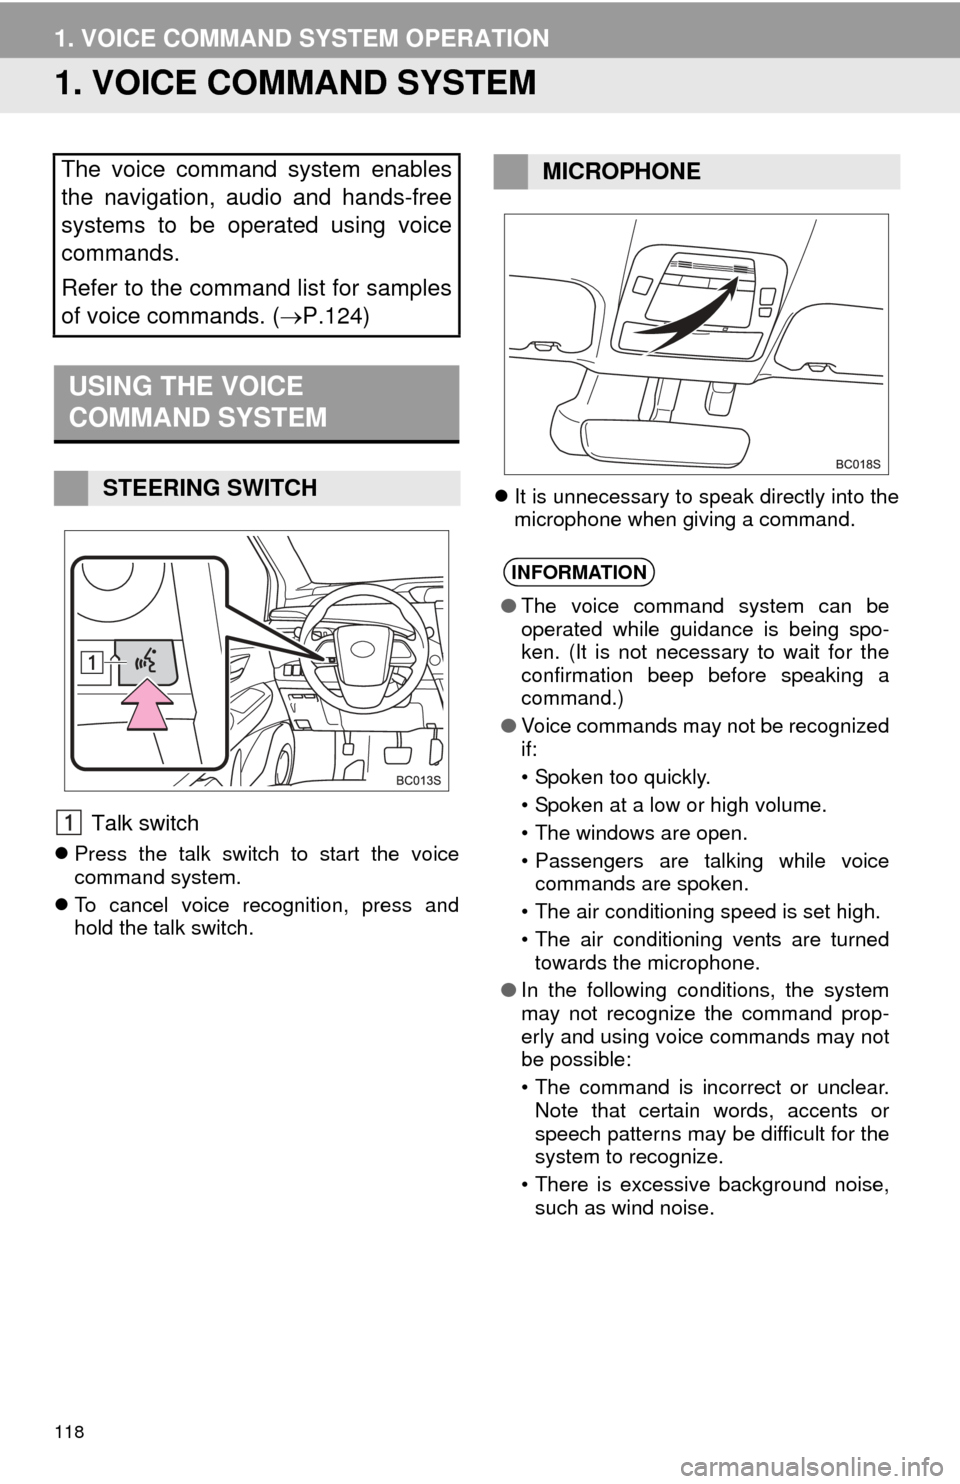
Talk switch
Press the talk switch to start the voice
command system.
T
o cancel voice recognition, press and
hold the talk switch.
It
is unnecessary to speak directly into the
microphone when giving a command.
The voice command system enables
the navigation, audio and hands-free
systems to be operated using voice
commands.
Refer to the command list for samples
of voice commands. ( P.124)
USING THE VOICE
COMMAND SYSTEM
STEERING SWITCH
MICROPHONE
INFORMATION
●The voice command system can be
operated while guidance is being spo-
ken. (It is not necessary to wait for the
confirmation beep before speaking a
command.)
● Voice commands may not be recognized
if:
• Spoken too quickly.
• Spoken at a low or high volume.
• The windows are open.
• Passengers are talking while voice
commands are spoken.
• The air conditioning speed is set high.
• The air conditioning vents are turned towards the microphone.
● In the following conditions, the system
may not recognize the command prop-
erly and using voice commands may not
be possible:
• The command is incorrect or unclear.
Note that certain words, accents or
speech patterns may be difficult for the
system to recognize.
• There is excessive background noise, such as wind noise.
Page 124 of 276
124
1. VOICE COMMAND SYSTEM OPERATION
3. COMMAND LIST
Frequently used commands are listed in the following tables.
For devi
ces that are not installed in the vehicle, the related commands will not be dis -
played in the screen. Also, according to conditions, other commands may not be dis -
played in the screen.
The fu
nctions available may vary according to the system installed.
Basic
Entune
App Suite application
When the voice recognition language is set to English.
Navigation
Recognizable voice commands and their actions are shown below.
Voice recognition language can be changed. ( P. 5 3)
CommandAction
“Help”Prompts voice guidance to offer examples of commands
or operation methods
“Go Back”Returns to the previous screen
“Number one/two/three/four/five”Selects the number on the list screen
“Next Page”Displays the next page
“Previous Page”Displays the previous page
“Go to ”Displays the command list of the selected tab
CommandAction
“Launch ”Activates the Entune App Suite application
CommandAction
“Find Nearby ”Displays a list of near the current posi-
tion
“Enter an Address”Enables setting a destina tion by saying the address
“Go Home”Displays the route to home
“Cancel Route”Stops the route guidance
*: For example; “Gas stations”, “Restaurants”, etc.
Page 134 of 276
134
1. REAR VIEW MONITOR SYSTEM
2. REAR VIEW MONITOR SYSTEM PRECAUTIONS
The image adjustment procedure for the
rear view monitor system screen is the
same as the procedure for adjusting the
navigation system screen. ( P. 4 0 )
AREA DISPLAYED ON
SCREEN
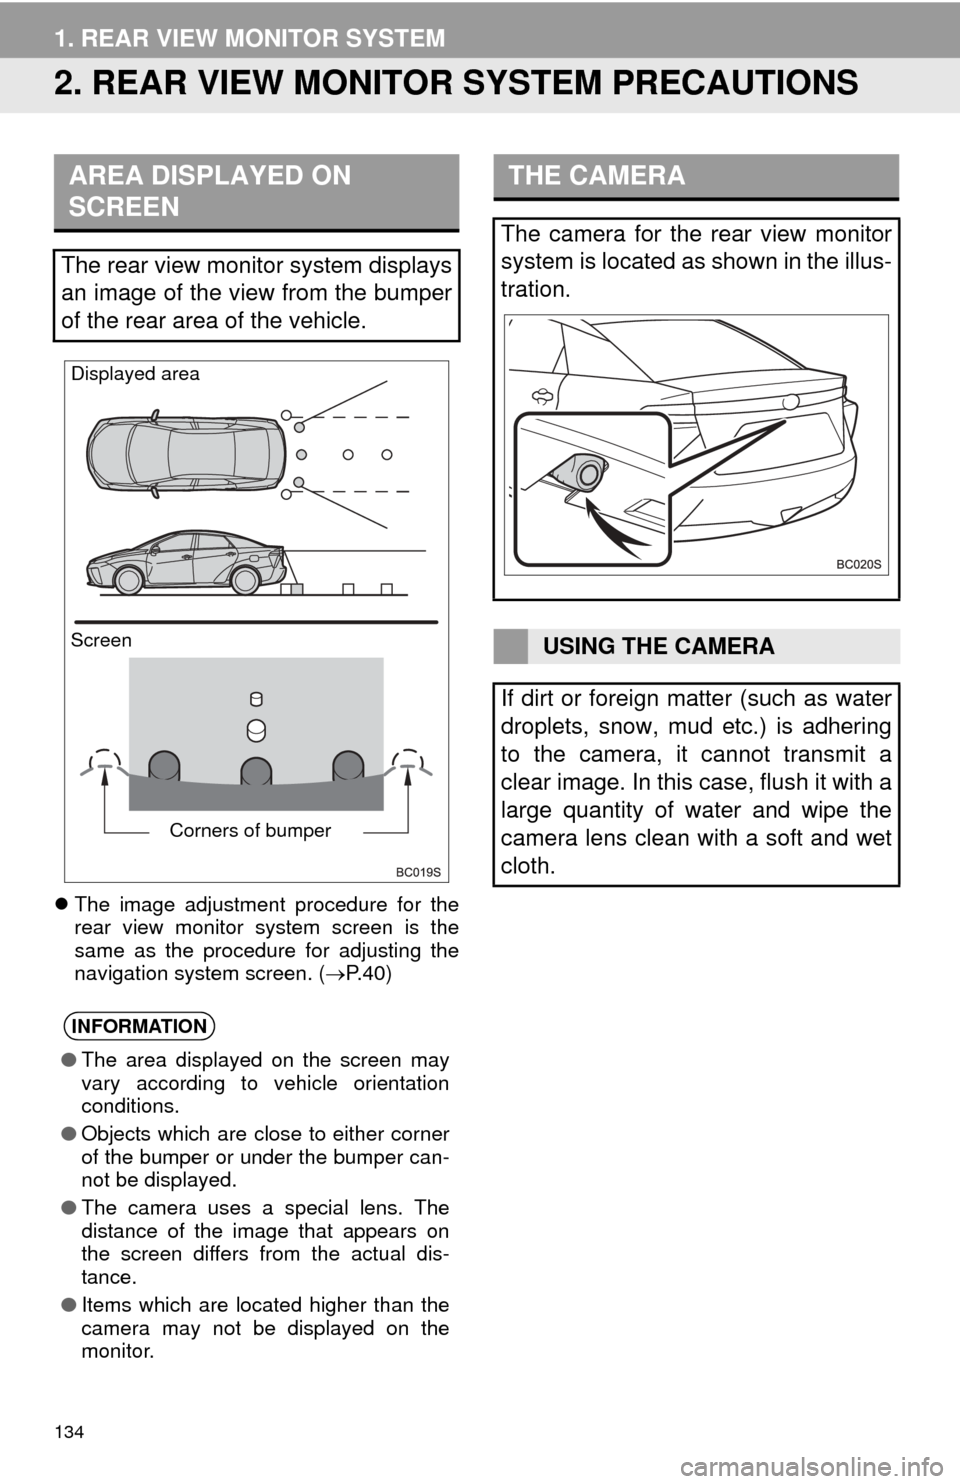
The rear view monitor system displays
an image of the view from the bumper
of the rear area of the vehicle.
INFORMATION
●The area displayed on the screen may
vary according to vehicle orientation
conditions.
● Objects which are close to either corner
of the bumper or under the bumper can-
not be displayed.
● The camera uses a special lens. The
distance of the image that appears on
the screen differs from the actual dis-
tance.
● Items which are located higher than the
camera may not be displayed on the
monitor.
Screen Displayed area
Corners of bumper
THE CAMERA
The camera for the rear view monitor
system is located as shown in the illus-
tration.
USING THE CAMERA
If dirt or foreign matter (such as water
droplets, snow, mud etc.) is adhering
to the camera, it cannot transmit a
clear image. In this case, flush it with a
large quantity of water and wipe the
camera lens clean with a soft and wet
cloth.
Page 139 of 276
139
1. REAR VIEW MONITOR SYSTEM
PERIPHERAL MONITORING SYSTEM
6
3. THINGS YOU SHOULD KNOW
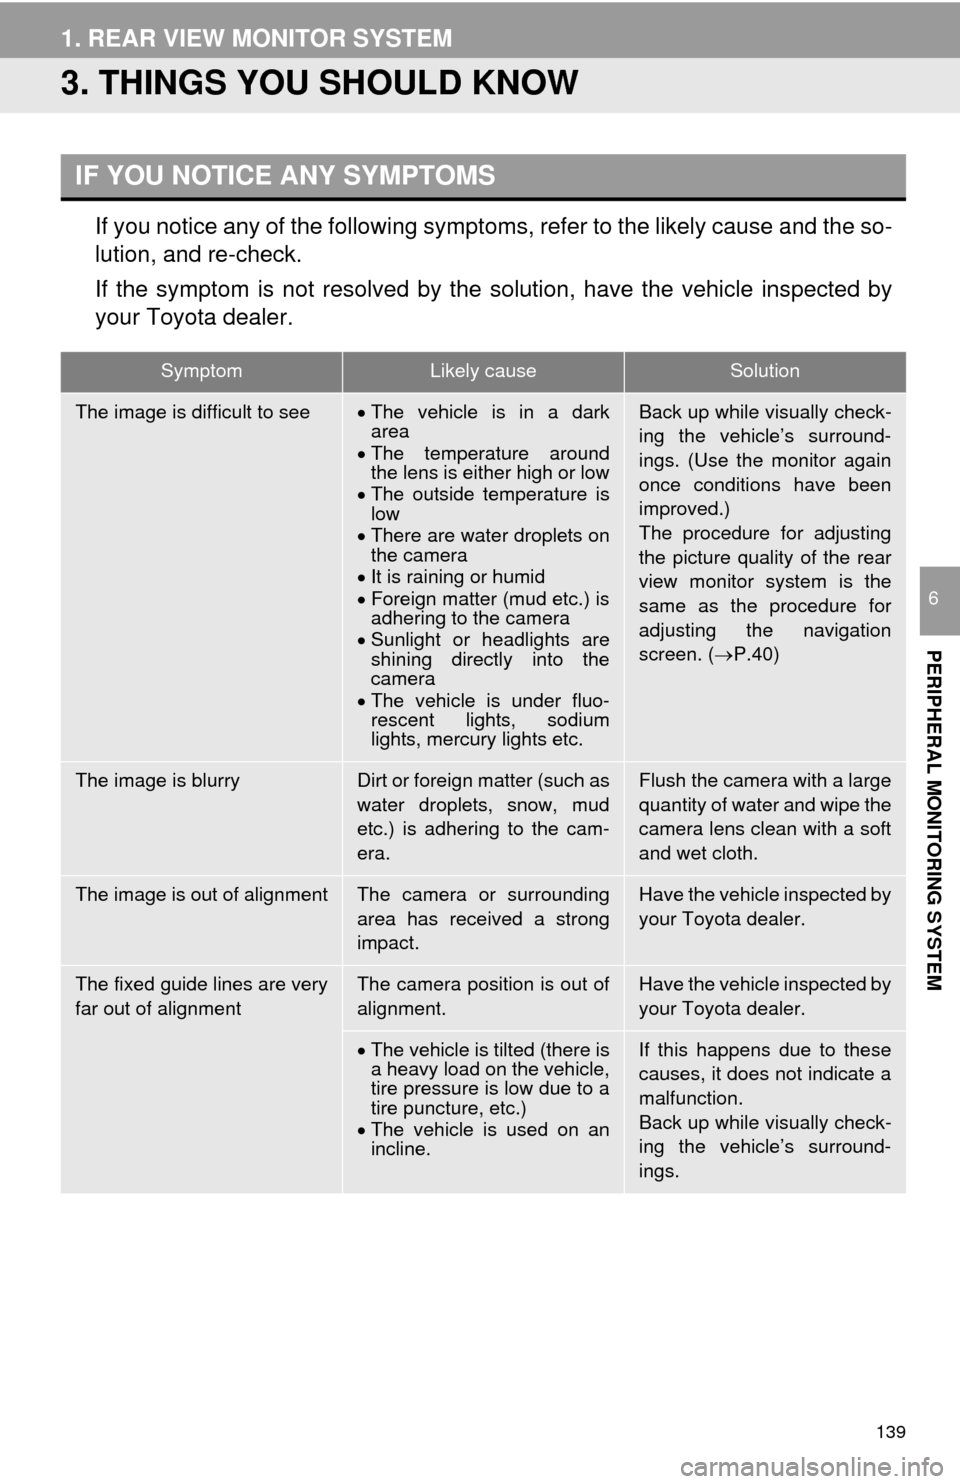
If you notice any of the following symptoms, refer to the likely cause and the so -
lution, and re-check.
If the symptom is not resolved by the solution, have the vehicle inspected by
your To
yota dealer.
IF YOU NOTICE ANY SYMPTOMS
SymptomLikely causeSolution
The image is difficult to seeThe vehicle is in a dark
area
The temper
ature around
the lens is either high or low
The out
side temperature is
low
Ther
e are water droplets on
the camera
It is raining or h
umid
Foreign matter (mud etc.) is
adhering to the camera
S
unlight or headlights are
shining directly into the
camera
The vehicle is under fluo-
rescent lights, sodium
lights, mercury lights etc.
Back up while visually check-
ing the vehicle’s surround-
ings. (Use the monitor again
once conditions have been
improved.)
The procedure for adjusting
the picture quality of the rear
view monitor system is the
same as the procedure for
adjusting the navigation
screen. ( P.40)
The image is blurryDirt or foreign matter (such as
water droplets, snow, mud
etc.) is adhering to the cam-
era.Flush the camera with a large
quantity of water and wipe the
camera lens clean with a soft
and wet cloth.
The image is out of alignmentThe camera or surrounding
area has received a strong
impact.Have the vehicle inspected by
your Toyota dealer.
The fixed guide lines are very
far out of alignmentThe camera position is out of
alignment.Have the vehicle inspected by
your Toyota dealer.
The vehicle is tilted (there is
a heavy load on the vehicle,
tire pressure is low due to a
tire puncture, etc.)
The vehicle is used on an
incline.
If this happens due to these
causes, it does not indicate a
malfunction.
Back up while visually check-
ing the vehicle’s surround-
ings.
Page 151 of 276
151
1. PHONE OPERATION (HANDS-FREE SYSTEM FOR CELLULAR PHONES)
PHONE
7
4. RECEIVING ON THE Bluetooth® PHONE
1Select or press the switch
on the steering wheel to talk on the
ph
one.
To refuse to receive the call : Select
or press the switch on the
steering wheel.
To adjust the volume of a received call :
Turn the “PWR·VOL” knob, or use the vol-
ume control switch on the steering wheel.
INCOMING CALLS
When a call is received, this screen is
displayed with a sound.
INFORMATION
●During international phone calls, the
other party’s name or number may not
be displayed correctly depending on the
type of cellular phone you have.
● The incoming call display mode can be
set. ( P.171)
● The ringtone that has been set in the
“Sound Settings” screen sounds when
there is an incoming call. Depending on
the type of Bluetooth
® phone, both the
navigation system and Bluetooth®
phone may sound simultaneously when
there is an incoming call. ( P.161)
Page 155 of 276
155
1. PHONE OPERATION (HANDS-FREE SYSTEM FOR CELLULAR PHONES)
PHONE
7
6. Bluetooth® PHONE MESSAGE FUNCTION
1Press the “APPS” button.
2Select “Messages” . : Select to change to phone mode.
Received messages can be forwarded
from the connected Bluetooth® phone,
enabling checking and replying using
the navigation system.
Depending on the type of Bluetooth
®
phone connected, received messages
may not be transferred to the message
inbox.
If the phone does not support the mes-
sage function, this function cannot be
used.
MESSAGE INBOX SCREEN
FunctionPage
Receiving a message156
Checking messages157
Replying to a message (quick re-
ply)158
Calling the message sender159
Message settings170
Page 156 of 276
156
1. PHONE OPERATION (HANDS-FREE SYSTEM FOR CELLULAR PHONES)
1Display the phone top screen.
(P.146)
2Select .
The phone top screen can be displayed by
pressing the
switch on the steering
wheel.
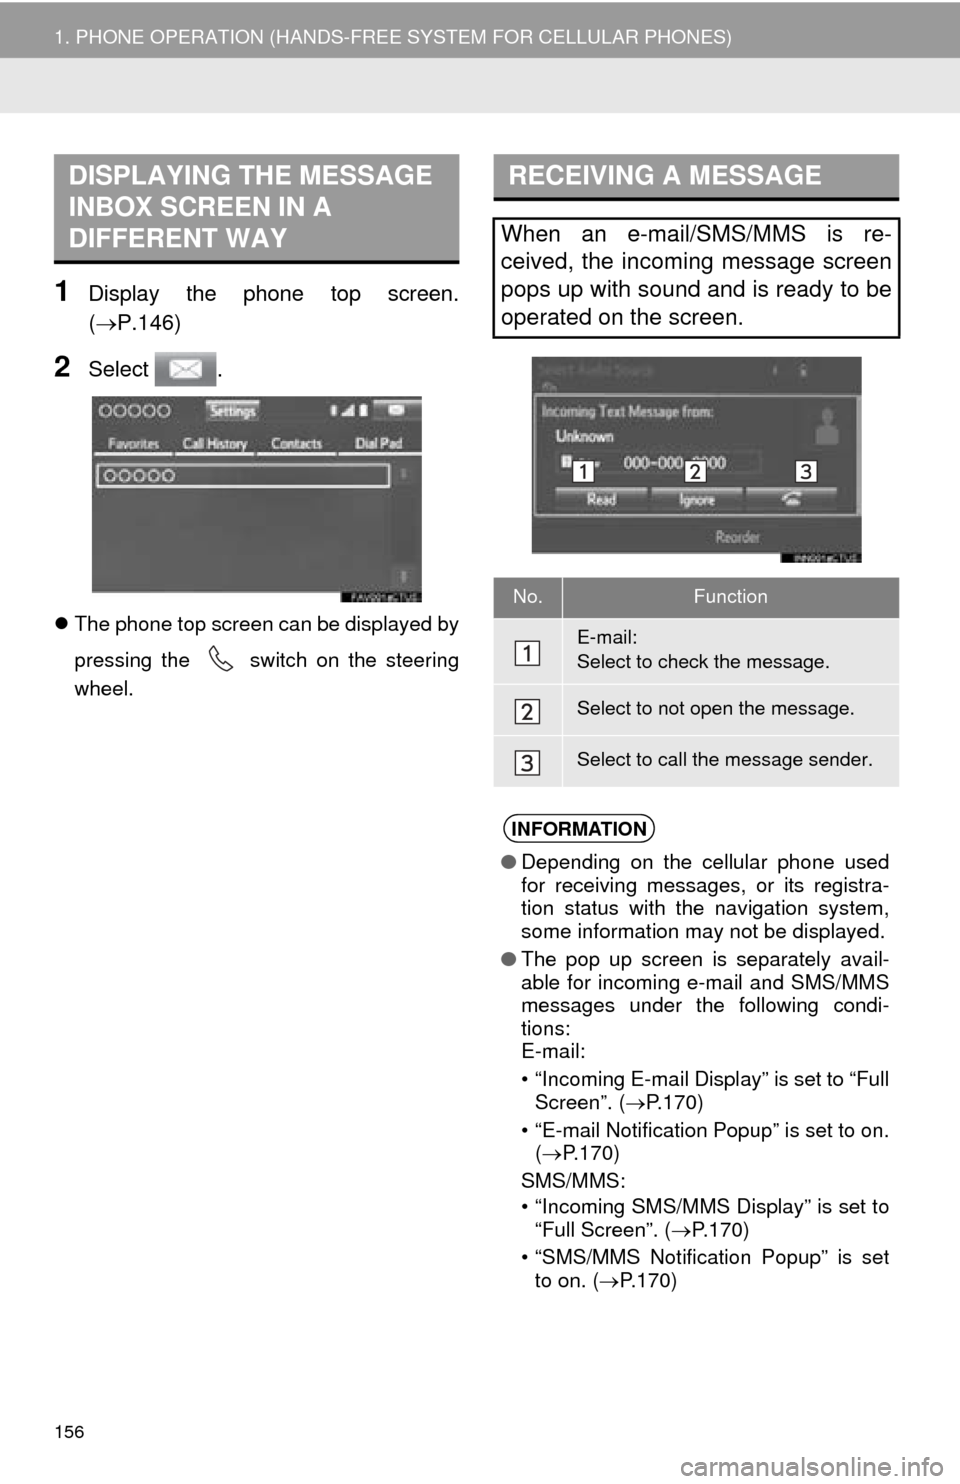
DISPLAYING THE MESSAGE
INBOX SCREEN IN A
DIFFERENT WAYRECEIVING A MESSAGE
When an e-mail/SMS/MMS is re-
ceived, the incoming message screen
pops up with sound and is ready to be
operated on the screen.
No.Function
E-mail:
Select to check the message.
Select to not open the message.
Select to call the message sender.
INFORMATION
● Depending on the cellular phone used
for receiving messages, or its registra-
tion status with the navigation system,
some information may not be displayed.
● The pop up screen is separately avail-
able for incoming e-mail and SMS/MMS
messages under the following condi-
tions:
E-mail:
• “Incoming E-mail Display” is set to “Full Screen”. ( P.170)
• “E-mail Notification Popup” is set to on. ( P.170)
SMS/MMS:
• “Incoming SMS/MMS Display” is set to “Full Screen”. ( P.170)
• “SMS/MMS Notification Popup” is set to on. ( P.170)