Page 33 of 608
331-1. For safe use
LC200_OM_OM60M88U_(U)
1
For safety and security
Push the seat belt shoulder
anchor down while pressing the
release button.
Push the seat belt shoulder
anchor up.
Move the height adjuster up and
down as needed until you hear a
click.
The pretensioners help the seat
belts to quickly restrain the occu-
pants by retracting the seat belts
when the vehicle is subjected to
certain types of severe frontal col-
lision or a vehicle rollover.
The pretensioners do not activate
in the event of a minor frontal
impact, a side impact or a rear
impact.
Adjusting the seat belt shoulder anchor height (front and second
outboard seats)
1
2
Seat belt pretensioners (front and second outboard seats)
Page 60 of 608
601-1. For safe use
LC200_OM_OM60M88U_(U)
■When installing a child restrain t system on the front passenger seat
When you have to use a child restraint system on the front passenger seat,
adjust the following:
■ Selecting an appropriate child restraint system
●Use a child restraint system appropriate for the child until the child becomes
large enough to properly wear the vehicle’s seat belt.
● If the child is too large for a child restraint system, sit the child on a rear seat
and use the vehicle’s seat belt. ( P. 30)
●
The seatback to the most upright posi-
tion
● The seat cushion to the fully rearward
and highest position
● The seat belt height to the lowest posi-
tion
Page 127 of 608
127
LC200_OM_OM60M88U_(U)
3-3. Adjusting the seats
3
Operation of each component
Front seats
Seat position control switch
Seatback angle control switch
Seat cushion (front) angle control switch
Vertical height control switch
Lumber support control switch (driver’s side only)
When the occupant’s lower back
presses against the seatback dur-
ing a rear-end collision, the head
restraint moves sl ightly forward
and upward to help reduce the
risk of whiplash on the seat occu-
pant.
Adjustment procedure
Active head restraints
1
2
3
4
5
Page 141 of 608
LC200_OM_OM60M88U_(U)
1413-3. Adjusting the seats
3
Operation of each component
To fold the head restraints, pull the
head restraint angle lever
■Adjusting the height of the head restraints
■ Removing the head restraints
Front seats
While pressing in the flathead screwdriver, pull up the head restraint.
Second seats
Third outboard seats
Make sure that the head restraints are
adjusted so that the center of the head
restraint is closest to the top of your ears.
Push a flathead screwdriver into the
slot. The slot is located on the right side
of the right head restraint anchor.
Pull the head restraint up while pressing
the lock release button.
1
2
Lock release button
Page 145 of 608
1453-4. Adjusting the steering wheel and mirrors
3
Operation of each component
LC200_OM_OM60M88U_(U)
Inside rear view mirror
The height of the rear view mirror can be adjusted to suit your driving
posture.
Adjust the height of the rear view
mirror by moving it up and down.
Responding to the level of brightness of the headlights of vehicles
behind, the reflected light is automatically reduced.
Changing automatic anti-glare
function mode
ON/OFF
When the automatic anti-glare
function is in ON mode, the indica-
tor illuminates.
The function will be set to ON
mode each time the engine switch
is turned to IGNITION ON mode.
Pressing the button turns the func-
tion to OFF mode. (The indicator
also turns off.)
The rear view mirror’s position can be adjusted to enable suffi-
cient confirmation of the rear view in accordance with the
driver’s seating posture.
Adjusting the height of rear view mirror
Anti-glare function
Indicator
Page 181 of 608

LC200_OM_OM60M88U_(U)
1814-1. Before driving
4
Driving
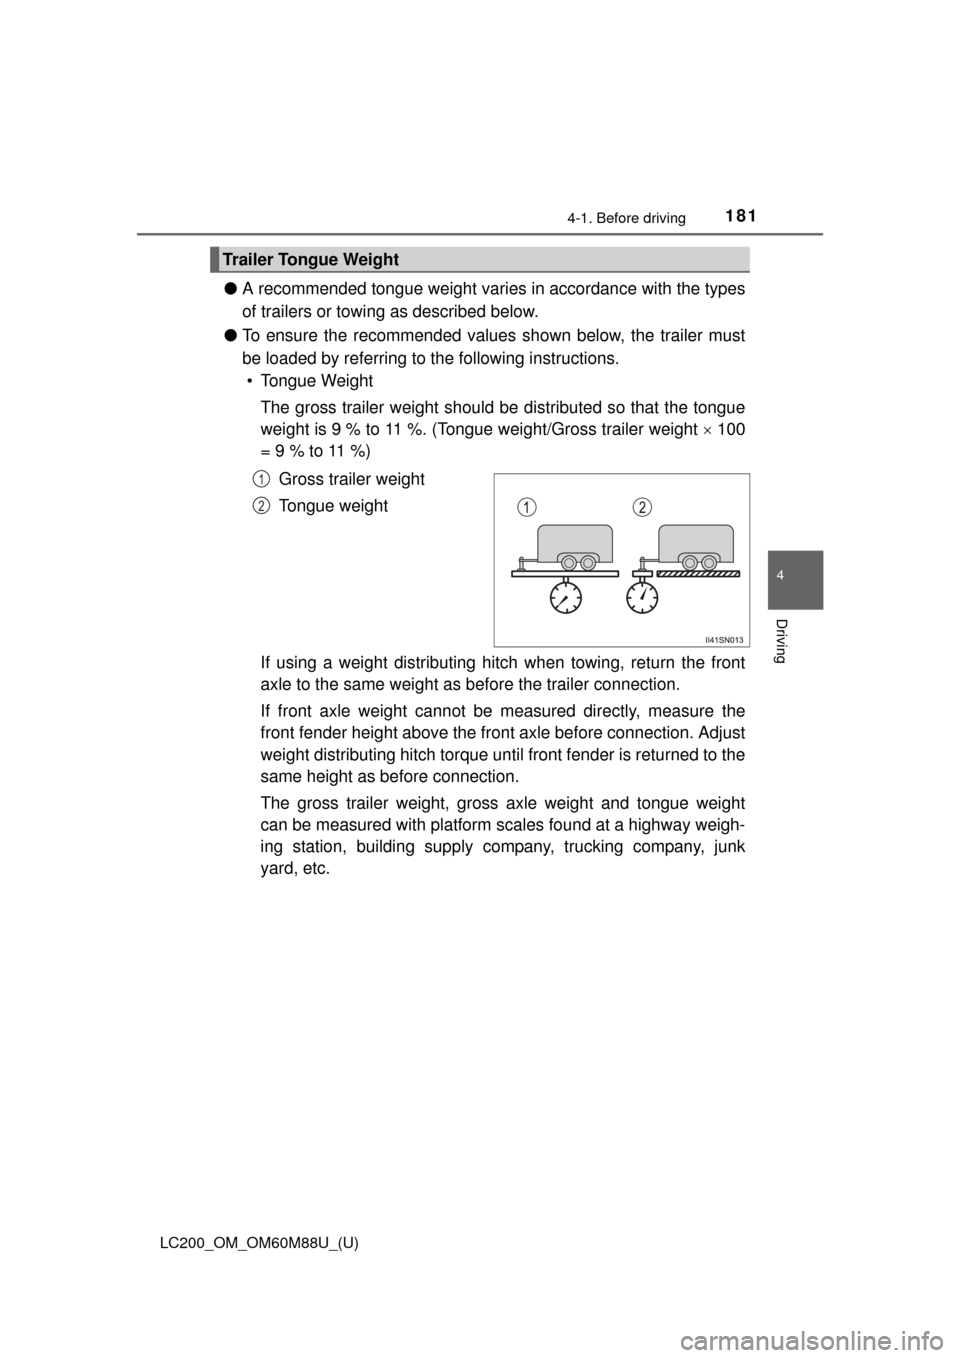
●A recommended tongue weight varies in accordance with the types
of trailers or towing as described below.
● To ensure the recommended values shown below, the trailer must
be loaded by referring to the following instructions.
• Tongue Weight
The gross trailer weight should be distributed so that the tongue
weight is 9 % to 11 %. (Tongue weight/Gross trailer weight 100
= 9 % to 11 %)
Gross trailer weight
Tongue weight
If using a weight distributing hitch when towing, return the front
axle to the same weight as before the trailer connection.
If front axle weight cannot be measured directly, measure the
front fender height above the front axle before connection. Adjust
weight distributing hitch torque until front fender is returned to the
same height as before connection.
The gross trailer weight, gross axle weight and tongue weight
can be measured with platform scales found at a highway weigh-
ing station, building supply company, trucking company, junk
yard, etc.
Trailer Tongue Weight
1
2
Page 188 of 608

188
LC200_OM_OM60M88U_(U)
4-1. Before driving
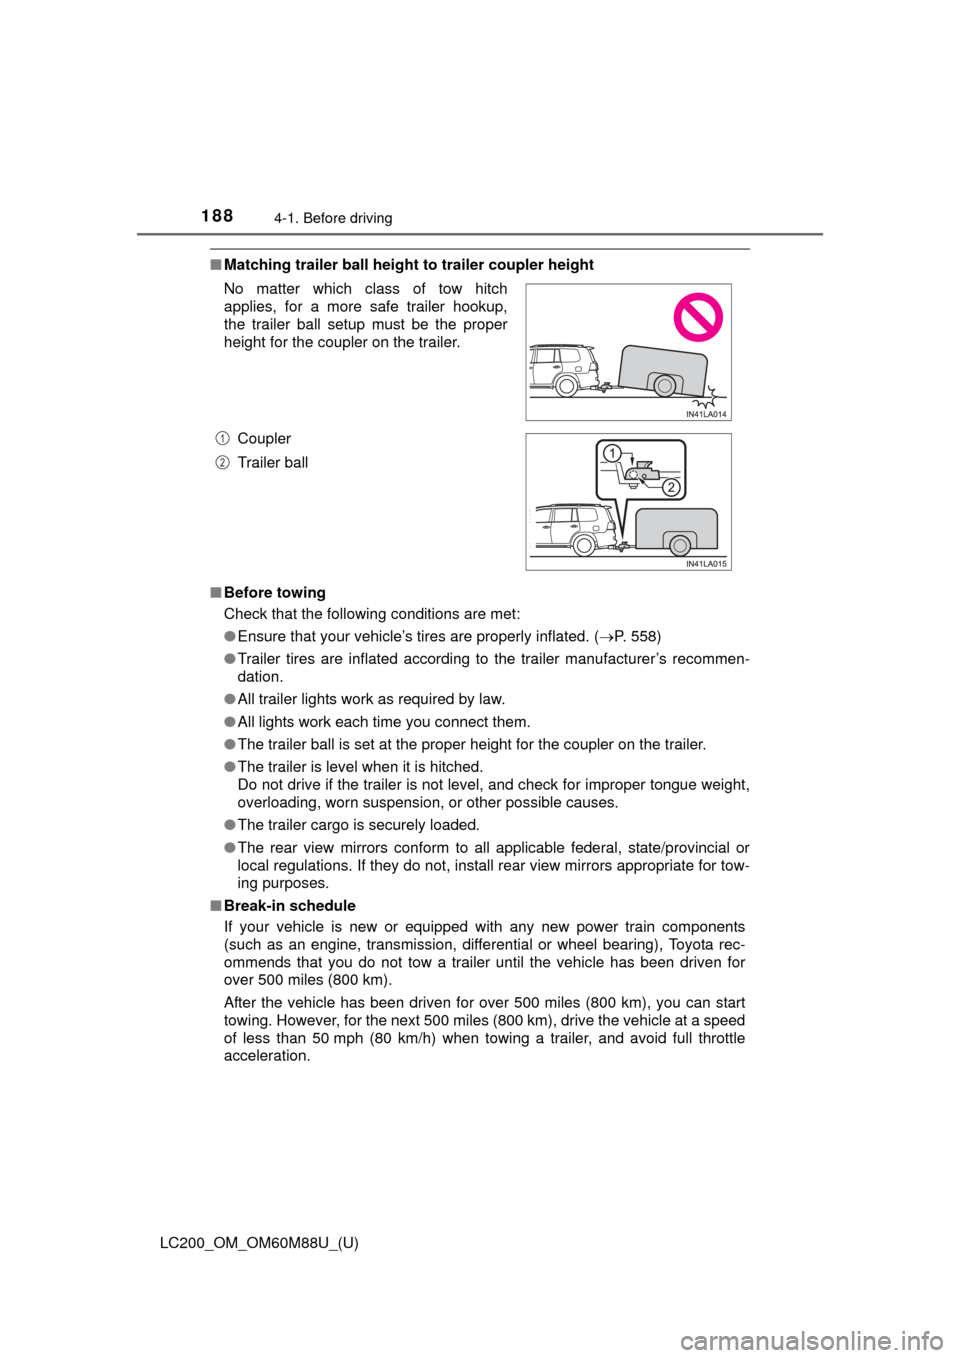
■Matching trailer ball height to trailer coupler height
■ Before towing
Check that the following conditions are met:
●Ensure that your vehicle’s tires are properly inflated. ( P. 558)
● Trailer tires are inflated according to the trailer manufacturer’s recommen-
dation.
● All trailer lights work as required by law.
● All lights work each time you connect them.
● The trailer ball is set at the proper height for the coupler on the trailer.
● The trailer is level when it is hitched.
Do not drive if the trailer is not level, and check for improper tongue weight,
overloading, worn suspension, or other possible causes.
● The trailer cargo is securely loaded.
● The rear view mirrors conform to all applicable federal, state/provincial or
local regulations. If they do not, install rear view mirrors appropriate for tow-
ing purposes.
■ Break-in schedule
If your vehicle is new or equipped with any new power train components
(such as an engine, transmission, differ ential or wheel bearing), Toyota rec-
ommends that you do not tow a trailer until the vehicle has been driven for
over 500 miles (800 km).
After the vehicle has been driven for over 500 miles (800 km), you can start
towing. However, for the next 500 miles (800 km), drive the vehicle at a speed
of less than 50 mph (80 km/h) when towing a trailer, and avoid full throttle
acceleration. No matter which class of tow hitch
applies, for a more safe trailer hookup,
the trailer ball setup must be the proper
height for the coupler on the trailer.
Coupler
Trailer ball
1
2
Page 330 of 608

330
LC200_OM_OM60M88U_(U)
4-5. Using the driving support systems
■Panoramic view display range
●In the panoramic view, the system processes and displays images acquired
form the 4 cameras under the assumption that the vehicle is on a flat road
surface. Therefore, the display may appear as follows.
• Three-dimensional objects may appear to have fallen over, and be long
and thin or bigger than they actually are
• Three-dimensional objects at a point higher than the surface of the road
may appear further away than they actually are, or may not appear
• Tall objects may appear to emerge from the image processing seams
● Inconsistencies in the brightness of images from each camera may occur
depending on lighting conditions.
● The displayed image may not be aligned when the tilt or height of the vehi-
cle changed due to the number of passengers, cargo weight or remaining
quantity of gasoline.
● Images and guide lines may not be properly displayed when the doors are
not completely closed.
● The relative distances between the vehicle icon and road surface or an
obstacle displayed in the panoramic view may differ from the actual state.
● If an illuminated license plate is used, it may appear on the screen.
● The black area around the vehicle icon is an area that is not appear in the
camera. Check these areas directly.
■ Wide front view display range
●Certain areas at the front of the vehicle have a different sense of distance,
and are masked in black so that they do not appear on the screen.
● There are limits to the range displayed on the screen. Objects at either cor-
ner of the bumper or directly below the bumper are not displayed.
● The perceived distance in images displayed on the screen differs from the
actual distance.
■ Images displayed on the screen
Cameras of the Multi-terrain Monitor system use special lenses. The distance
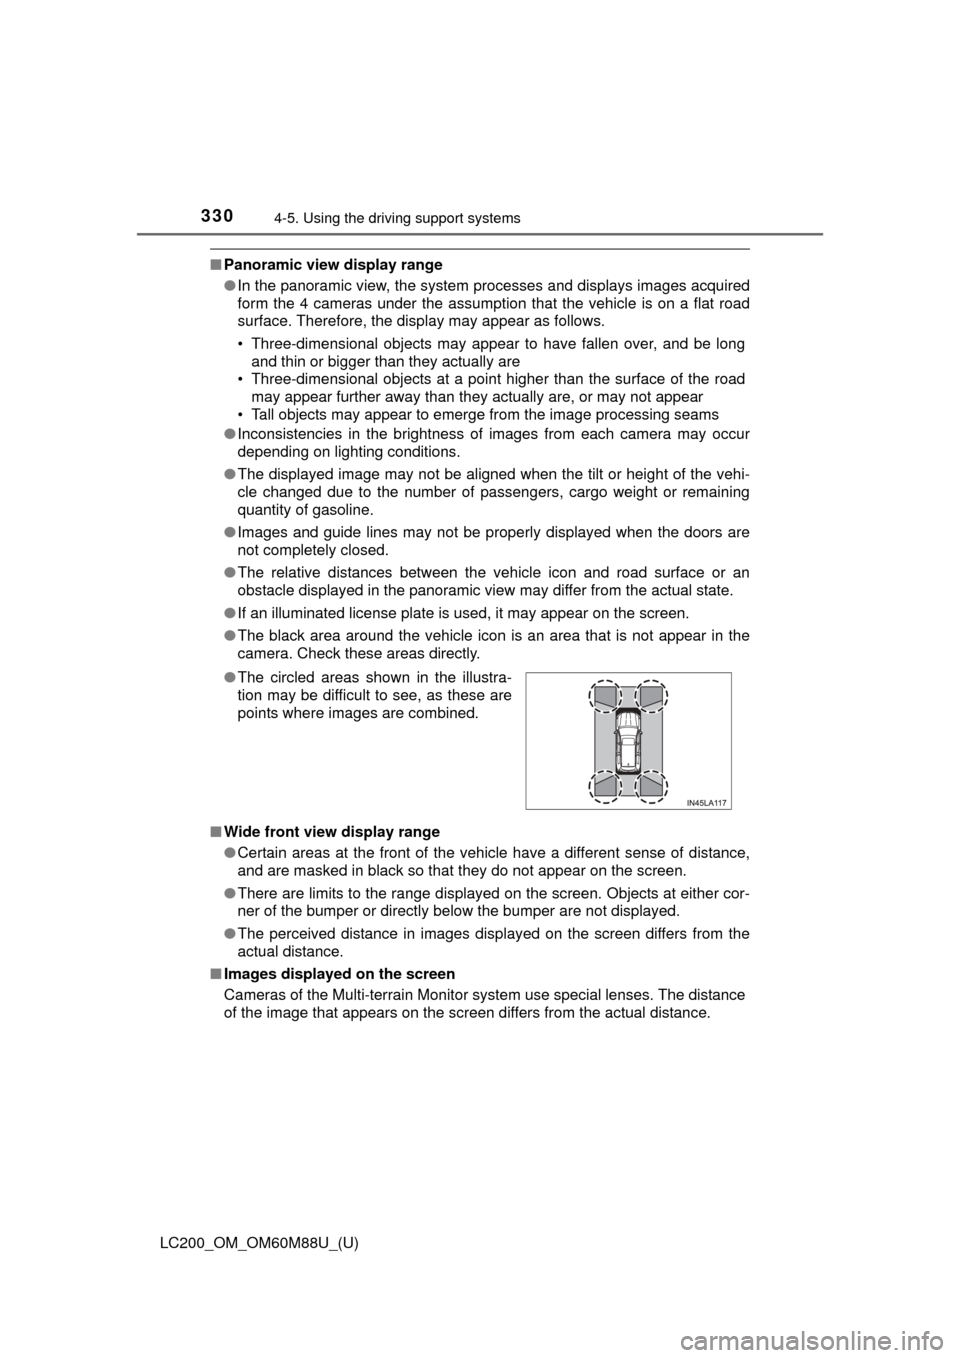
of the image that appears on the screen differs from the actual distance. ●The circled areas shown in the illustra-
tion may be difficult to see, as these are
points where images are combined.