Page 141 of 608
LC200_OM_OM60M88U_(U)
1413-3. Adjusting the seats
3
Operation of each component
To fold the head restraints, pull the
head restraint angle lever
■Adjusting the height of the head restraints
■ Removing the head restraints
Front seats
While pressing in the flathead screwdriver, pull up the head restraint.
Second seats
Third outboard seats
Make sure that the head restraints are
adjusted so that the center of the head
restraint is closest to the top of your ears.
Push a flathead screwdriver into the
slot. The slot is located on the right side
of the right head restraint anchor.
Pull the head restraint up while pressing
the lock release button.
1
2
Lock release button
Page 142 of 608

142
LC200_OM_OM60M88U_(U)
3-3. Adjusting the seats
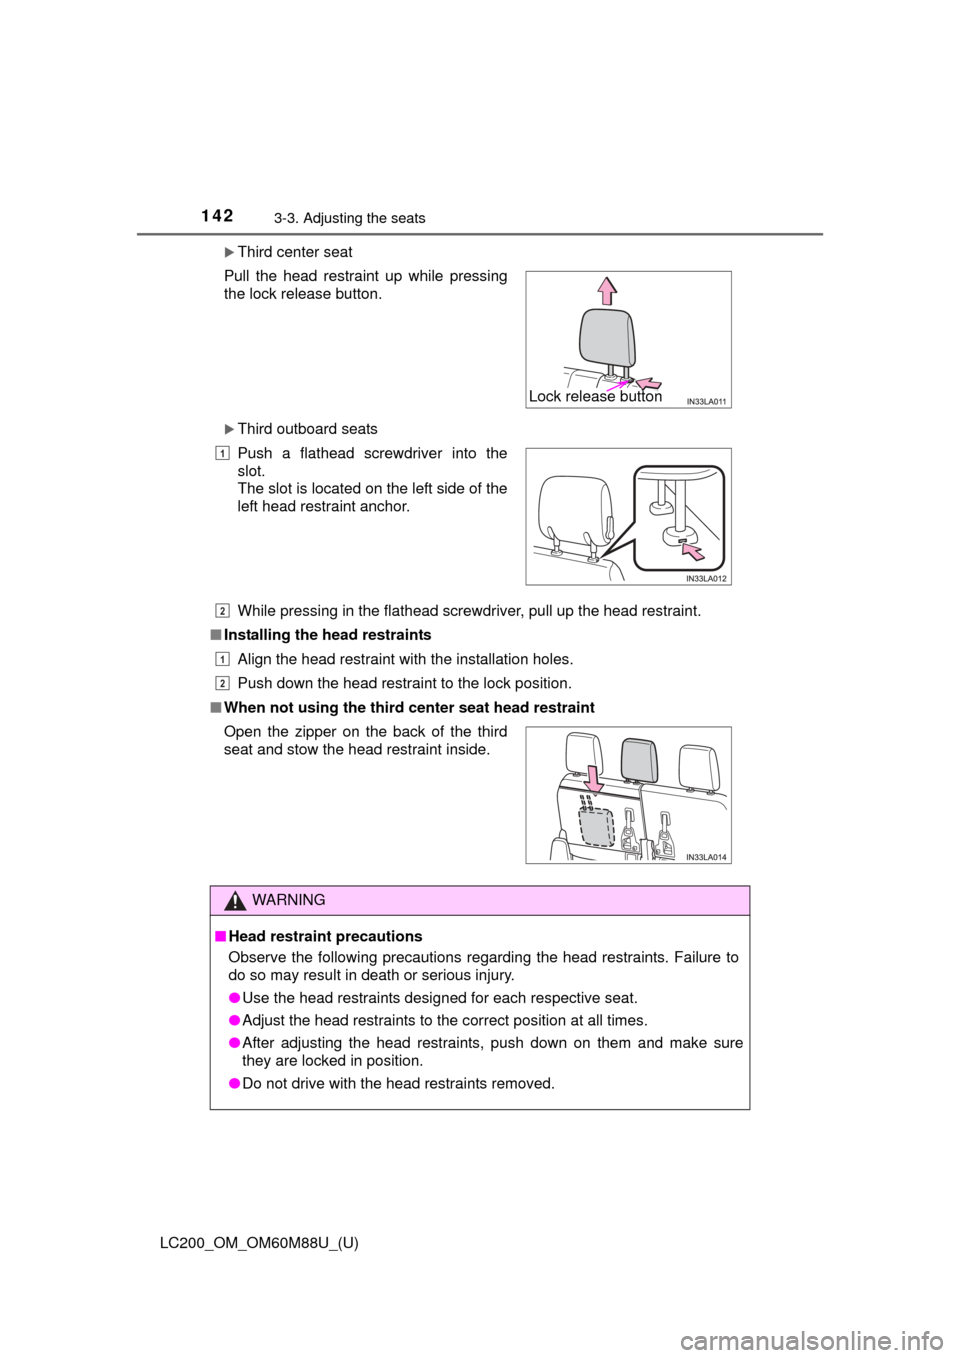
Third center seat
Third outboard seats
While pressing in the flathead screwdriver, pull up the head restraint.
■ Installing the head restraints
Align the head restraint with the installation holes.
Push down the head restraint to the lock position.
■ When not using the third center seat head restraint
Pull the head restraint up while pressing
the lock release button.
Push a flathead screwdriver into the
slot.
The slot is located on the left side of the
left head restraint anchor.
Open the zipper on the back of the third
seat and stow the head restraint inside.
WARNING
■ Head restraint precautions
Observe the following precautions regarding the head restraints. Failure to
do so may result in death or serious injury.
●Use the head restraints designed for each respective seat.
● Adjust the head restraints to the correct position at all times.
● After adjusting the head restraints, push down on them and make sure
they are locked in position.
● Do not drive with the head restraints removed.
Lock release button
1
2
1
2
Page 172 of 608

172
LC200_OM_OM60M88U_(U)
4-1. Before driving
WARNING
■Things that must not be carried in the luggage compartment
The following things may cause a fire if loaded in the luggage compartment:
●Receptacles containing gasoline
● Aerosol cans
■ Storage precautions
Observe the following precautions.
Failure to do so may prevent the pedals from being depressed properly,
may block the driver’s vision, or may result in items hitting the driver or pas-
sengers, possibly causing an accident.
●Stow cargo and luggage in the luggage compartment whenever possible.
● Do not stack cargo and luggage in the luggage compartment higher than
the seatbacks.
● Do not place cargo or luggage in or on the following locations.
• At the feet of the driver
• On the front passenger or rear seats (when stacking items)
• On the instrument panel
• On the dashboard
• On auxiliary box or tray that has no lid
● Secure all items in the occupant compartment.
● When you fold down the rear seats, long items should not be placed
directly behind the front seats.
● Never allow anyone to ride in the luggage compartment. It is not designed
for passengers. They should ride in their seats with their seat belts prop-
erly fastened. Otherwise, they are much more likely to suffer death or seri-
ous bodily injury, in the event of sudden braking, sudden swerving or an
accident.
Page 376 of 608
3765-1. Using the air conditioning system and defogger
LC200_OM_OM60M88U_(U)
Select to set cooling and dehu-
midification function on/off
Adjust the temperature for
driver, front passenger and rear
seats separately (Individual
mode) (P. 377)
Prevent ice from building up on
the windshield and wiper
blades (if equipped) ( P. 380)
Remove pollen from the air (M icro dust and pollen filter) (P. 380)
■Using the automatic mode
Press .
Adjust the temperature setting.
To stop the operation, press .
■
Automatic mode indicator
If the fan speed setting or air fl ow modes are operated, the auto-
matic mode indicator goes off. However, automatic mode for func-
tions other than that operated is maintained.
Option control screen
1
2
3
Air conditioning controls
4
1
2
Page 377 of 608
LC200_OM_OM60M88U_(U)
3775-1. Using the air conditioning system and defogger
5
Interior features
To turn on the individual mode, perform any of the following proce-
dures:
●Press “4-ZONE” on the op tion control screen.
● Adjust the passenger’s side temperature setting.
● Change the rear air conditioning setting
The indicator comes on when the individual mode is on.
To return to the simultaneous mode, press “4-ZONE”.
In the simultaneous mode, only or on the driver’s side can
be used to adjust the temperature for all seats.
Adjusting the temperature for driver and passenger seats sepa-
rately (Individual mode)
Page 385 of 608
385
LC200_OM_OM60M88U_(U)
5-1. Using the air conditioning system and defogger
5
Interior features
Rear air conditioning system
■Adjusting the temperature setting
Press “” to increase the temperature and “ ” to decrease the tem-
perature on .
The temperature for the right-hand and left-hand seats can be set sepa-
rately.
■
Adjusting the fan speed setting
Press “ ” (increase) or “ ” (decrease) on .
The fan speed is shown on the display. (7 levels)
Press to turn the fan off.
Air outlets and fan speed are automatically adjusted according
to the temperature setting.
Page 389 of 608

389
LC200_OM_OM60M88U_(U)
5-1. Using the air conditioning system and defogger
5
Interior features
Heated steering wheel/seat heaters/seat
ventilator s
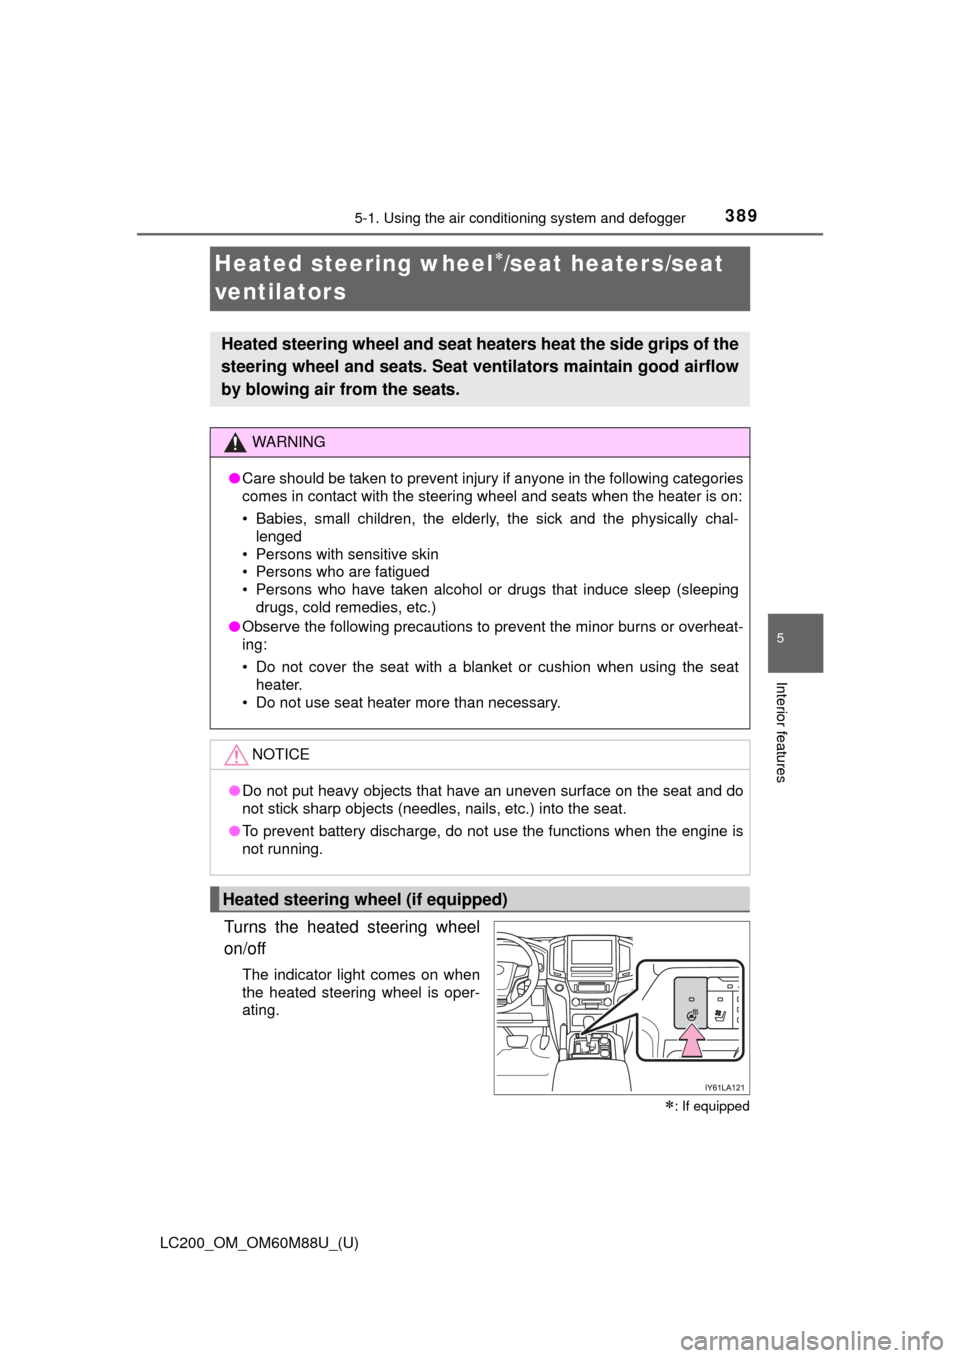
Turns the heated steering wheel
on/off
The indicator light comes on when
the heated steering wheel is oper-
ating.
: If equipped
Heated steering wheel and seat heaters heat the side grips of the
steering wheel and seats. Seat ve ntilators maintain good airflow
by blowing air from the seats.
WARNING
● Care should be taken to prevent injury if anyone in the following categories
comes in contact with the steering wheel and seats when the heater is on:
• Babies, small children, the elderly, the sick and the physically chal-
lenged
• Persons with sensitive skin
• Persons who are fatigued
• Persons who have taken alcohol or drugs that induce sleep (sleeping drugs, cold remedies, etc.)
● Observe the following precautions to prevent the minor burns or overheat-
ing:
• Do not cover the seat with a blanket or cushion when using the seat
heater.
• Do not use seat heater more than necessary.
NOTICE
● Do not put heavy objects that have an uneven surface on the seat and do
not stick sharp objects (needles, nails, etc.) into the seat.
● To prevent battery discharge, do not use the functions when the engine is
not running.
Heated steering wheel (if equipped)
Page 390 of 608
3905-1. Using the air conditioning system and defogger
LC200_OM_OM60M88U_(U)
●The heated steering wheel can be used when the engine switch is in IGNI-
TION ON mode.
● The heated steering wheel will automatically turn off after about 30 minutes.
● If the indicator light flashes, press the switch to turn the heated steering
wheel off and then press the switch again. If the indicator light still flashes, a
malfunction may be occurring. Turn the heated steering wheel off and have
the vehicle inspected by your Toyota dealer.
Seat heater switches
The indicator light (yellow) on the
switch comes on when the seat
heater is operating.
Seat ventilator switches
The indicator light (green) on the
switch comes on when the seat
ventilator is operating.
Level indicator lights
The seat heater temperature level
or the seat ventilator fan speed
level (for front seats only) is dis-
played.
“AUTO” indicator lights
Front seat heaters and ventilators
1
2
3
4