Page 50 of 352

50
2. Bluetooth® SETTINGS
HIGHLANDER_Navi_U
Canada (Entune Premium Audio) Mexico
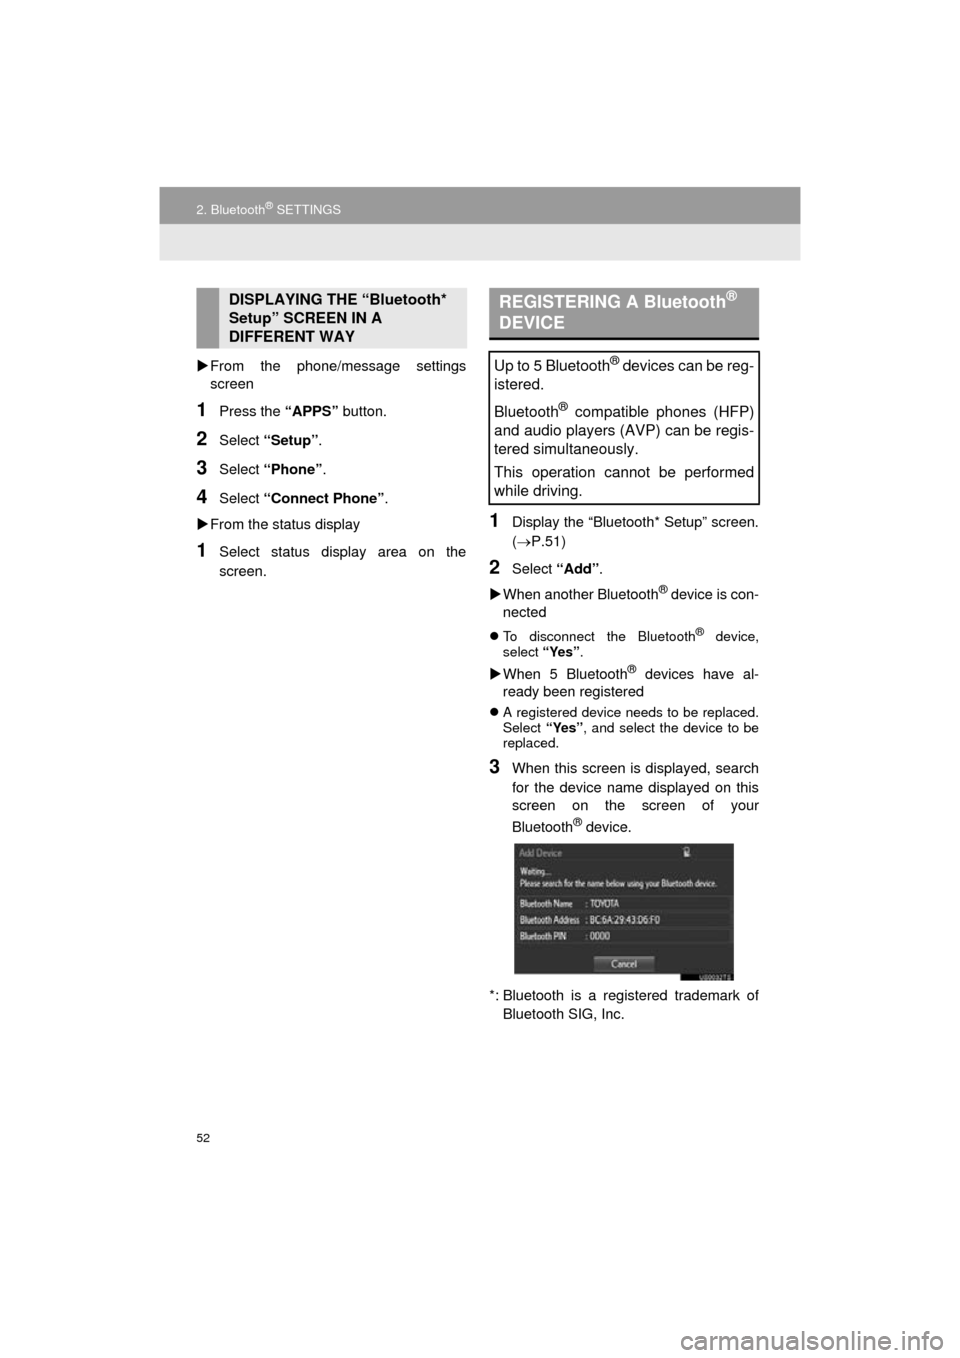
This device complies with Industry
Canada license-exempt RSS stan-
dard(s). Operation is subject to the fol-
lowing two conditions: (1) this device
may not cause interference, and (2)this
device must accept any interference,
including interference that may cause
undesired operation of the device.
Le présent appareil est conforme aux
CNR d'Industrie Canada applicables
aux appareils radio exempts de licence.
L'exploitation est autorisée aux deux
conditions suivantes: (1)l'appareil ne
doit pas produire de brouillage, et (2)
l'utilisateur de l'appareil doit accepter
tout brouillage radioélectrique subi,
même si le brouillage est susceptible
d'en compromettre le fonctionnement.
This radio transmitter (identify the
device by certification number, or model
number if Category II) has been
approved by Industry Canada to oper-
ate with the antenna types listed below
with the maximum permissible gain and
required antenna impedance for each
antenna type indicated. Antenna types
not included in this list, having a gain
greater than the maximum gain indi-
cated for that type, are strictly prohibited
for use with this device.
Le présent émetteur radio (identifier le
dispositif par son numéro de certifica-
tion ou son numéro de modèle s'il fait
partie du matériel de catégorie II) a été
approuvé par Industrie Canada pour
fonctionner avec les types d'antenne
énumérés ci-dessous et ayant un gain
admissible maximal et l'impédance req-
uise pour chaque type d'antenne. Les
types d'antenne non inclus dans cette
liste, ou dont le gain est supérieur au
gain maximal indiqué, sont strictement
interdits pour l'exploitation de l'émetteur.La operación de está equipo esta sujeta
a las siguientes dos condiciones:
(1) es posible que este equipo o dispos-
itivo no cause interferencia peljudicial y
(2) este equipo o dispositivo debe
aceptar cualquier interferencia, incluy-
endo Ia que pueda causar su operación
no deseada.
Page 51 of 352
51
2. Bluetooth® SETTINGS
HIGHLANDER_Navi_U
BASIC FUNCTION
2
2. SETTING Bluetooth® DETAILS
1Press the “APPS” button.
2Select “Setup” .
3Select “Bluetooth*” .
4Select the desired item to be set.
*: Bluetooth is a registered trademark of
Bluetooth SIG, Inc.
“Bluetooth* Setup” SCREEN
FunctionPage
Registering a Bluetooth® device52
Deleting a Bluetooth® device53
Connecting a Bluetooth® device54
Editing the Bluetooth® device infor-
mation56
Bluetooth® system settings57
Page 52 of 352

52
2. Bluetooth® SETTINGS
HIGHLANDER_Navi_U
From the phone/message settings
screen
1Press the “APPS” button.
2Select “Setup” .
3Select “Phone” .
4Select “Connect Phone” .
From the status display
1Select status display area on the
screen.
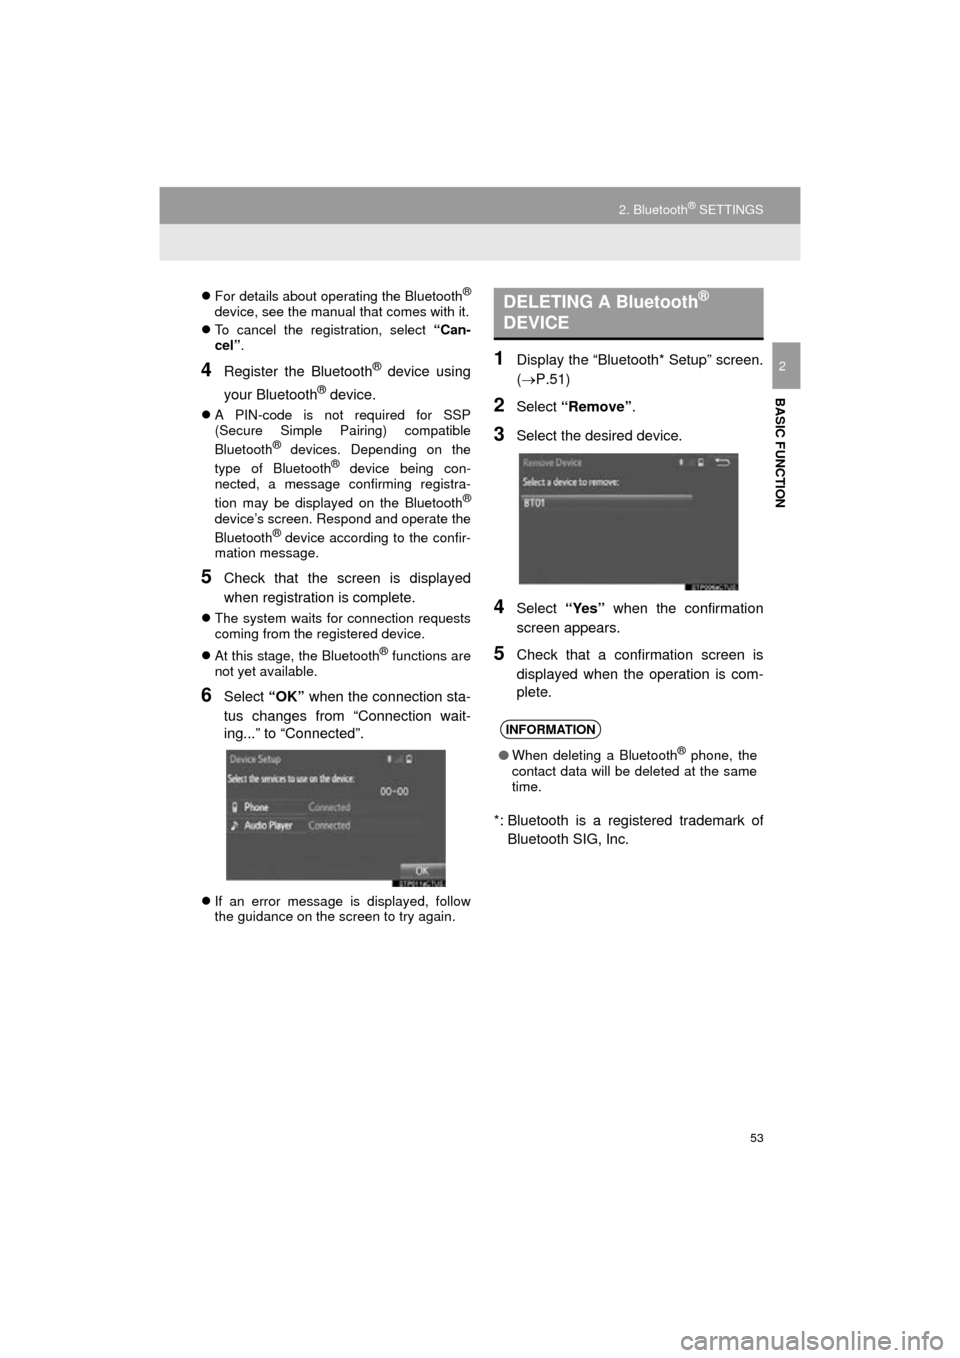
1Display the “Bluetooth* Setup” screen.
(P.51)
2Select “Add”.
When another Bluetooth
® device is con-
nected
To disconnect the Bluetooth® device,
select “Yes”.
When 5 Bluetooth® devices have al-
ready been registered
A registered device needs to be replaced.
Select “Yes”, and select the device to be
replaced.
3When this screen is displayed, search
for the device name displayed on this
screen on the screen of your
Bluetooth
® device.
*: Bluetooth is a registered trademark of Bluetooth SIG, Inc.
DISPLAYING THE “Bluetooth*
Setup” SCREEN IN A
DIFFERENT WAY REGISTERING A Bluetooth®
DEVICE
Up to 5 Bluetooth® devices can be reg-
istered.
Bluetooth
® compatible phones (HFP)
and audio players (AVP) can be regis-
tered simultaneously.
This operation cannot be performed
while driving.
Page 53 of 352

53
2. Bluetooth® SETTINGS
HIGHLANDER_Navi_U
BASIC FUNCTION
2
For details about operating the Bluetooth®
device, see the manual that comes with it.
To cancel the registration, select “Can-
cel” .
4Register the Bluetooth® device using
your Bluetooth
® device.
A PIN-code is not required for SSP
(Secure Simple Pairing) compatible
Bluetooth
® devices. Depending on the
type of Bluetooth® device being con-
nected, a message confirming registra-
tion may be displayed on the Bluetooth
®
device’s screen. Respond and operate the
Bluetooth® device according to the confir-
mation message.
5Check that the screen is displayed
when registration is complete.
The system waits for connection requests
coming from the registered device.
At this stage, the Bluetooth
® functions are
not yet available.
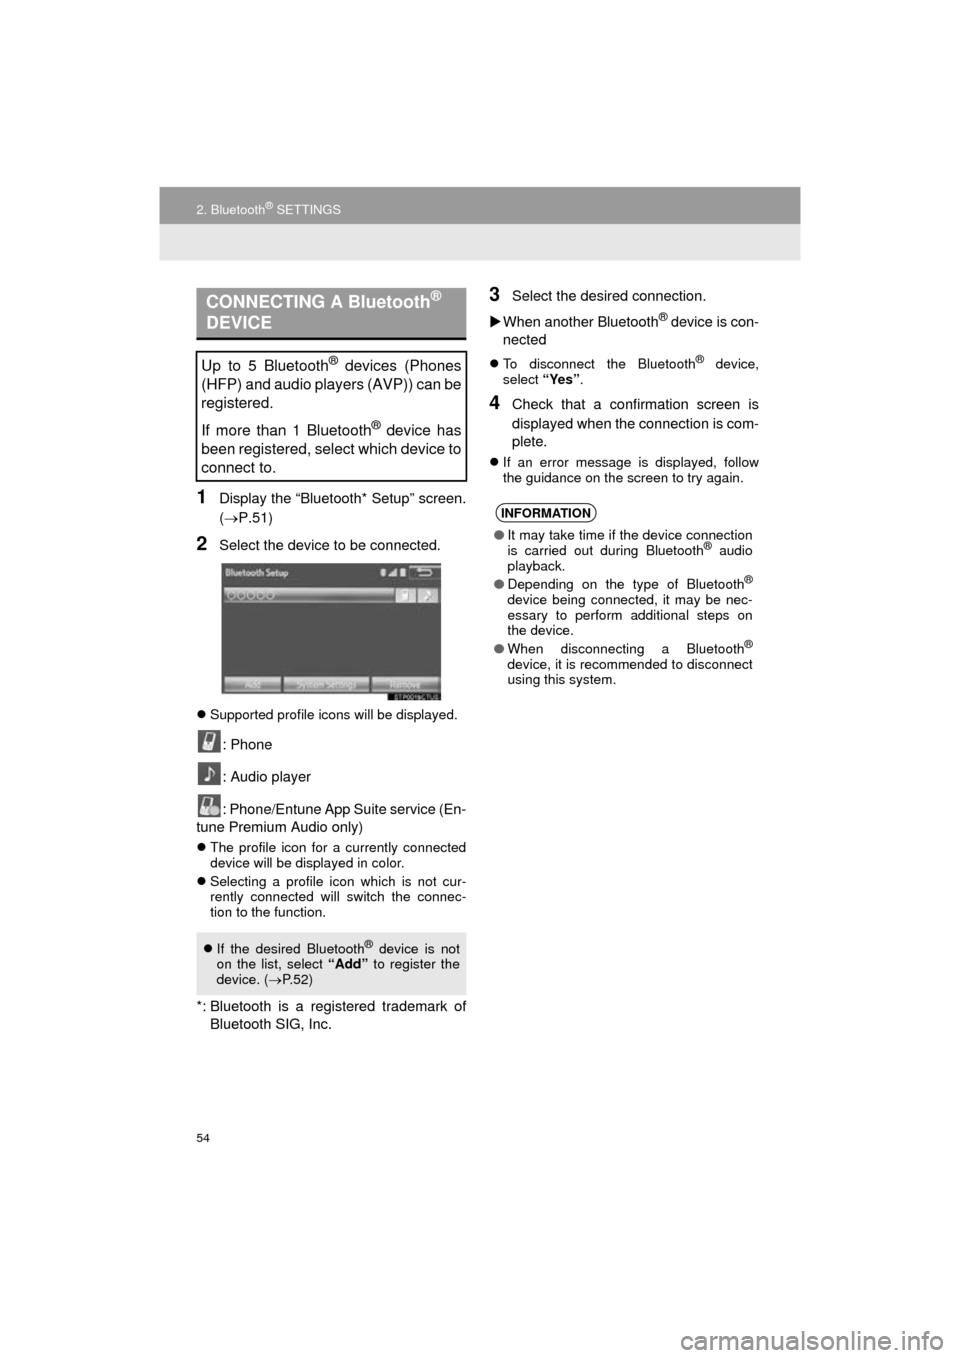
6Select “OK” when the connection sta-
tus changes from “Connection wait-
ing...” to “Connected”.
If an error message is displayed, follow
the guidance on the screen to try again.
1Display the “Bluetooth* Setup” screen.
(P.51)
2Select “Remove” .
3Select the desired device.
4Select “Yes” when the confirmation
screen appears.
5Check that a confirmation screen is
displayed when the operation is com-
plete.
*: Bluetooth is a regi stered trademark of
Bluetooth SIG, Inc.
DELETING A Bluetooth®
DEVICE
INFORMATION
● When deleting a Bluetooth® phone, the
contact data will be deleted at the same
time.
Page 54 of 352

54
2. Bluetooth® SETTINGS
HIGHLANDER_Navi_U
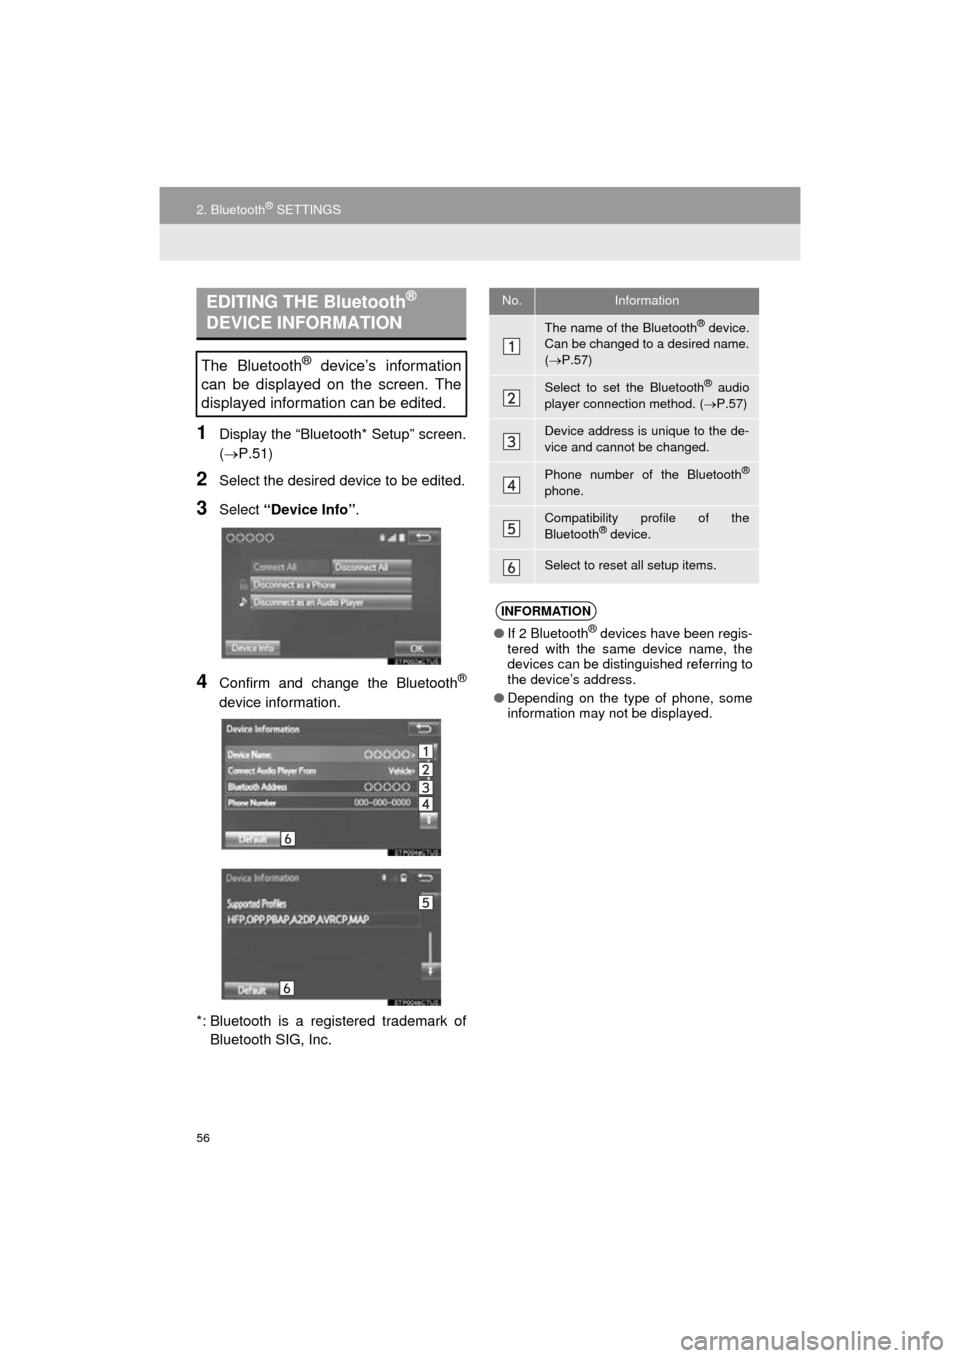
1Display the “Bluetooth* Setup” screen.
(P.51)
2Select the device to be connected.
Supported profile icons will be displayed.
: Phone
: Audio player
: Phone/Entune App Suite service (En-
tune Premium Audio only)
The profile icon for a currently connected
device will be displayed in color.
Selecting a profile icon which is not cur-
rently connected will switch the connec-
tion to the function.
*: Bluetooth is a regi stered trademark of
Bluetooth SIG, Inc.
3Select the desired connection.
When another Bluetooth
® device is con-
nected
To disconnect the Bluetooth® device,
select “Yes”.
4Check that a confirmation screen is
displayed when the connection is com-
plete.
If an error message is displayed, follow
the guidance on the screen to try again.
CONNECTING A Bluetooth®
DEVICE
Up to 5 Bluetooth® devices (Phones
(HFP) and audio players (AVP)) can be
registered.
If more than 1 Bluetooth
® device has
been registered, select which device to
connect to.
If the desired Bluetooth® device is not
on the list, select “Add” to register the
device. ( P. 5 2 )
INFORMATION
● It may take time if the device connection
is carried out during Bluetooth® audio
playback.
● Depending on the type of Bluetooth
®
device being connected, it may be nec-
essary to perform additional steps on
the device.
● When disconnecting a Bluetooth
®
device, it is recommended to disconnect
using this system.
Page 55 of 352

55
2. Bluetooth® SETTINGS
HIGHLANDER_Navi_U
BASIC FUNCTION
2
■AUTO CONNECTION MODE
Vehicles without a smart key system
When the engine switch is turned to the
“ACC” or “ON” position, the system
searches for a nearby registered device.
The system will connect with the regis-
tered device that was last connected, if it
is nearby.
Vehicles with a smart key system
When the engine switch is
turned to ACCESSORY or IGNITION ON
mode, the system searches for a
nearby registered device.
The system will connect with the regis-
tered device that was last connected, if it
is nearby.
■CONNECTING MANUALLY
1Press the “APPS” button and select
“Setup” .
2Select “Bluetooth*” .
3Follow the steps in “CONNECTING A
Bluetooth
® DEVICE” from “STEP 2”.
( P.54)
*: Bluetooth is a registered trademark of Bluetooth SIG, Inc.
■RECONNECTING THE Bluetooth®
PHONE
To turn auto connection mode on, set
“Bluetooth* Power” to on. ( P.57)
Leave the Bluetooth
® device in a loca-
tion where the connection can be es-
tablished.
When the auto connection has failed or
“Bluetooth* Power” is turned off, it is
necessary to connect Bluetooth
® man-
ually.
If a Bluetooth® phone is disconnected
due to poor reception from the
Bluetooth
® network when the engine
switch is in the following, the
system automatically reconnects the
Bluetooth
® phone.
Vehicles without a smart key system
The engine switch is in the “ACC” or
“ON” position.
Vehicles with a smart key system
The engine switch is in AC-
CESSORY or IGNITION ON
mode.
Page 56 of 352

56
2. Bluetooth® SETTINGS
HIGHLANDER_Navi_U
1Display the “Bluetooth* Setup” screen.
(P.51)
2Select the desired device to be edited.
3Select “Device Info” .
4Confirm and change the Bluetooth®
device information.
*: Bluetooth is a regi stered trademark of
Bluetooth SIG, Inc.
EDITING THE Bluetooth®
DEVICE INFORMATION
The Bluetooth® device’s information
can be displayed on the screen. The
displayed information can be edited.
No.Information
The name of the Bluetooth® device.
Can be changed to a desired name.
( P.57)
Select to set the Bluetooth® audio
player connection method. ( P.57)
Device address is unique to the de-
vice and cannot be changed.
Phone number of the Bluetooth®
phone.
Compatibility profile of the
Bluetooth® device.
Select to reset all setup items.
INFORMATION
● If 2 Bluetooth® devices have been regis-
tered with the same device name, the
devices can be distinguished referring to
the device’s address.
● Depending on the type of phone, some
information may not be displayed.
Page 57 of 352
57
2. Bluetooth® SETTINGS
HIGHLANDER_Navi_U
BASIC FUNCTION
2
1Select “Device Name” .
2Enter the name and select “OK”.
1Select “Connect Audio Player
From” .
2Select the desired connection method.
“Vehicle” : Select to connect the audio
system to the audio player.
“Device” : Select to connect the audio
player to the audio system.
Depending on the audio player, the “Vehi-
cle” or “Device” connection method may
be best. As such, refer to the manual that
comes with the audio player.
To reset the connection method, select
“Default” .
1Display the “Bluetooth* Setup” screen.
(P.51)
2Select “System Settings” .
3Select the desired item to be set.
*: Bluetooth is a regi stered trademark of
Bluetooth SIG, Inc.
CHANGING A DEVICE NAME
INFORMATION
● Even if the device name is changed, the
name registered in your Bluetooth®
device does not change.
SETTING AUDIO PLAYER
CONNECTION METHOD
“System Settings” SCREEN
The Bluetooth® settings can be con-
firmed and changed.