Page 29 of 620
291-1. For safe use
1
For safety and security
COROLLA_TMMMS_TMMC_U (OM12J84U)
Push the seat belt shoulder
anchor down while pressing the
release button.
Push the seat belt shoulder
anchor up.
Move the height adjuster up and
down as needed until you hear a
click.
The pretensioners help the seat
belts to quickly restrain the occu-
pants by retracting the seat belts
when the vehicle is subjected to
certain types of severe frontal or
side collision.
The pretensioners do not activate
in the event of a minor frontal
impact, a minor side impact, a rear
impact or a vehicle rollover.
Adjusting the seat belt shoulder anchor height (front seats)
1
2
Seat belt pretensioners (front seats)
Page 124 of 620
124
COROLLA_TMMMS_TMMC_U (OM12J84U)
3-3. Adjusting the seats
Manual seat
Power seat (driver’s side only)
Front seats
Adjustment procedure
Seat position adjustment lever
Seatback angle adjustment
lever Vertical height adjustment
lever (driver’s side only)1
2
3
Seat position adjustment
switch
Seatback angle adjustment
switchSeat cushion (front) angle
adjustment switch
Vertical height adjustment
switch1
2
3
4
Page 129 of 620

1293-3. Adjusting the seats
3
Operation of each component
COROLLA_TMMMS_TMMC_U (OM12J84U)
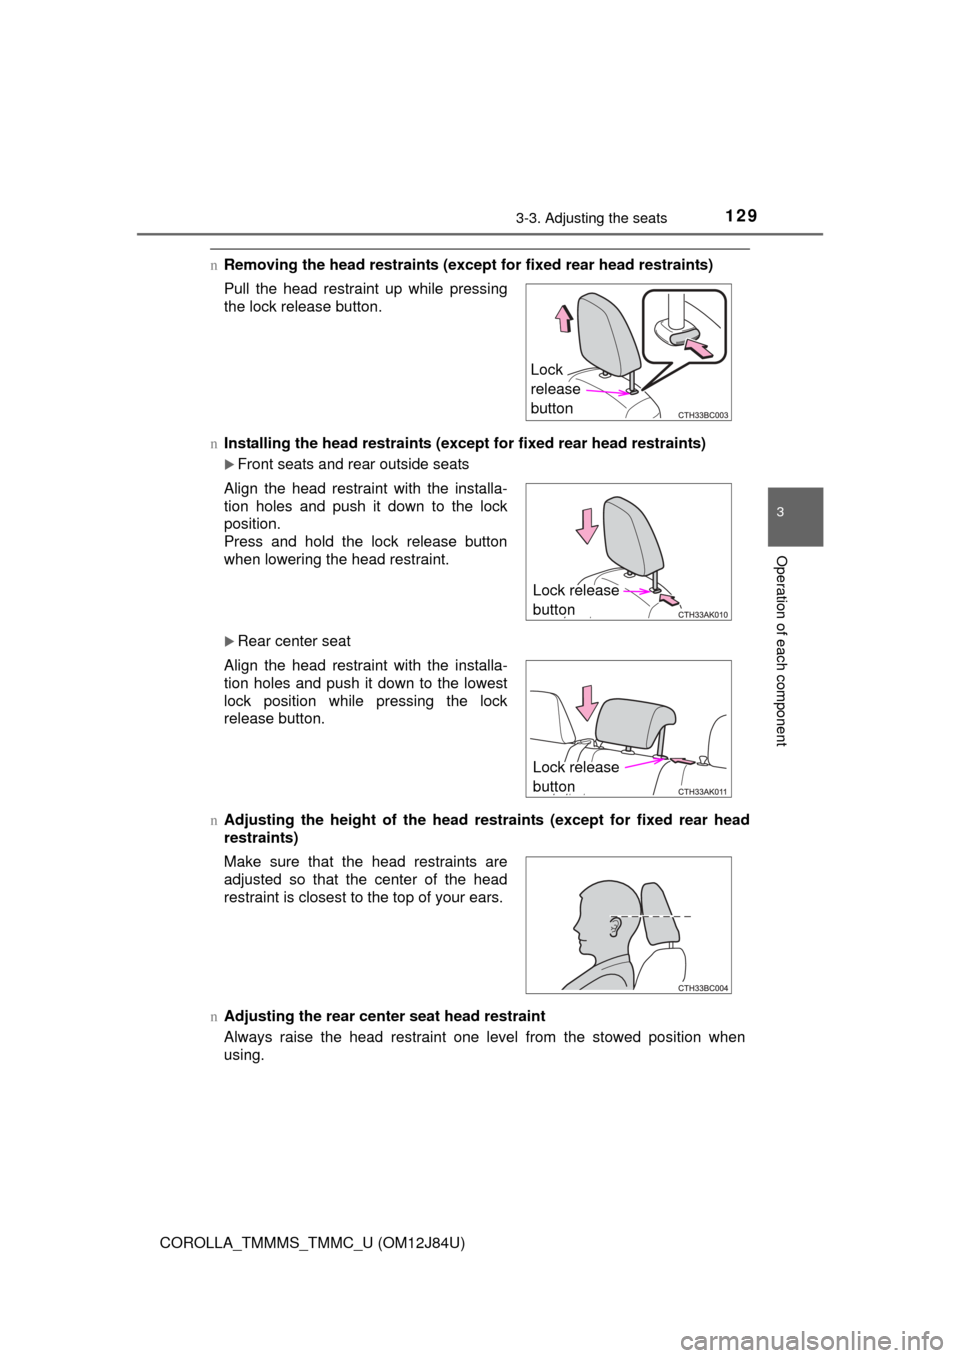
nRemoving the head restraints (excep t for fixed rear head restraints)
n Installing the head restraints (excep t for fixed rear head restraints)
Front seats and rear outside seats
Rear center seat
n Adjusting the height of the head r estraints (except for fixed rear head
restraints)
n Adjusting the rear center seat head restraint
Always raise the head restraint one level from the stowed position when
using. Pull the head restraint up while pressing
the lock release button.
Align the head restraint with the installa-
tion holes and push it down to the lock
position.
Press and hold the lock release button
when lowering the head restraint.
Align the head restraint with the installa-
tion holes and push it down to the lowest
lock position while pressing the lock
release button.
Make sure that the head restraints are
adjusted so that the center of the head
restraint is closest to the top of your ears.
Lock
release
button
Lock release
button
Lock release
button
Page 133 of 620
1333-4. Adjusting the steering wheel and mirrors
3
Operation of each component
COROLLA_TMMMS_TMMC_U (OM12J84U)
The height of the rear view mirror can be adjusted to suit your driving
posture.
Adjust the height of the rear view
mirror by moving it up and down.
Manual anti-glare inside rear view mirror
Reflected light from the headlights of vehicles behind can be reduced
by operating the lever.
Normal position
Anti-glare position
Inside rear view mirror
The rear view mirror’s position can be adjusted to enable suffi-
cient confirmation of the rear view.
Adjusting the height of rear view mirror
Anti-glare function
1
2
Page 522 of 620

5228-2. Steps to take in an emergency
COROLLA_TMMMS_TMMC_U (OM12J84U)
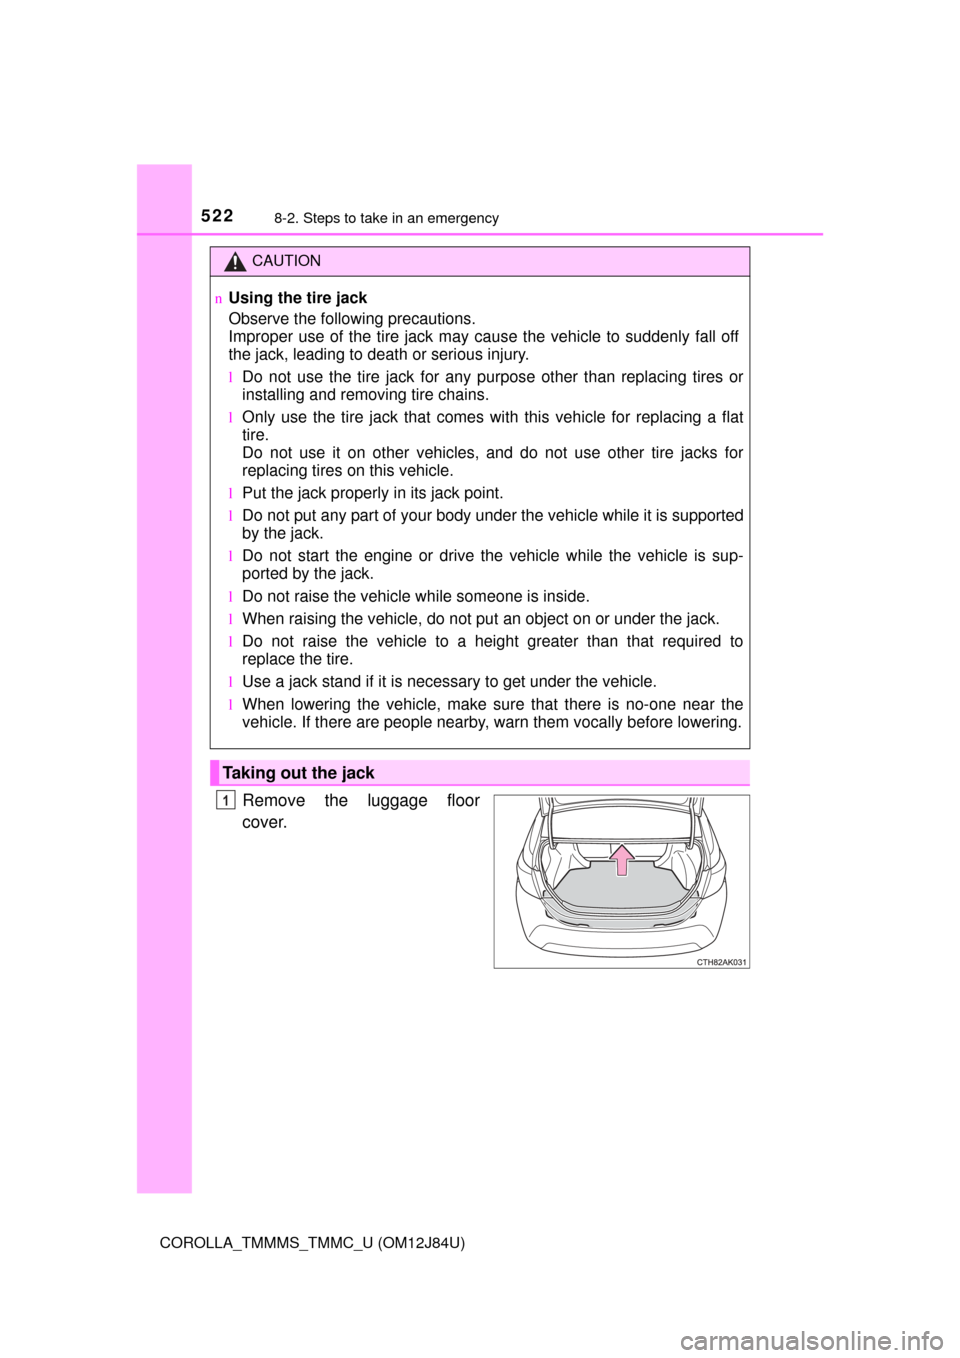
Remove the luggage floor
cover.
CAUTION
nUsing the tire jack
Observe the following precautions.
Improper use of the tire jack may cause the vehicle to suddenly fall off
the jack, leading to death or serious injury.
lDo not use the tire jack for any purpose other than replacing tires or
installing and removing tire chains.
lOnly use the tire jack that comes with this vehicle for replacing a flat
tire.
Do not use it on other vehicles, and do not use other tire jacks for
replacing tires on this vehicle.
lPut the jack properly in its jack point.
lDo not put any part of your body und er the vehicle while it is supported
by the jack.
lDo not start the engine or drive the vehicle while the vehicle is sup-
ported by the jack.
lDo not raise the vehicle while someone is inside.
lWhen raising the vehicle, do not put an object on or under the jack.
lDo not raise the vehicle to a height greater than that required to
replace the tire.
lUse a jack stand if it is necessary to get under the vehicle.
lWhen lowering the vehicle, make su re that there is no-one near the
vehicle. If there are people nearby, warn them vocally before lowering.
Taking out the jack
1
Page 550 of 620
550
COROLLA_TMMMS_TMMC_U (OM12J84U)
9-1.Specifications
*1: Unladen vehicles
*2: 195/65R15 tires
*3: P205/55R16 and P215/45R17 tires
n
Vehicle identification number
The vehicle identification number (VIN) is the legal identifier for
your vehicle. This is the primar y identification number for your
Toyota. It is used in registering the ownership of your vehicle.
This number is stamped on the
top left of the instrument panel.
Maintenance data (fuel, oil level, etc.)
Dimensions and weights
Overall length 182.6 in. (4639 mm)
Overall width 69.9 in. (1776 mm)
Overall height*157.3 in. (1455 mm)
Wheelbase106.3 in. (2700 mm)
Tread
Front60.3 in. (1531 mm)*2
59.8 in. (1519 mm)*3
Rear60.4 in. (1534 mm)*2
59.9 in. (1522 mm)*3
Vehicle capacity weight
(occupants + luggage) 865 lb. (390 kg)
Vehicle identification
Page 566 of 620
5669-1. Specifications
COROLLA_TMMMS_TMMC_U (OM12J84U)n
Typical tire size information
The illustration in
dicates typical
tire size.
Tire use (P = Passenger car,
T = Temporary use)
Section width (millimeters)
Aspect ratio
(tire height to section width)
Tire construction code
(R = Radial, D = Diagonal)
Wheel diameter (inches)
Load index
(2 digits or 3 digits)
Speed symbol
(alphabet with one letter)
nTire dimensions
Section width
Tire height
Wheel diameter
Tire size
1
2
3
4
5
6
7
1
2
3