2016 SUBARU WRX turn signal
[x] Cancel search: turn signalPage 164 of 594

& Turn signal indicator
lightsThese lights show the operation of the turn
signal or lane change signal.
If the indicator lights do not blink or blink
rapidly, the turn signal bulb may be burned
out. Replace the bulb as soon as possible.
Refer to “ Replacing bulbs ” F 11-44.
& High beam indicator
lightThis light shows that the headlights are in
the high beam mode.
This indicator light also illuminates when
the headlight flasher is operated.
& Cruise control indica-
torThis indicator appears when the cruise
control main button is pressed to activate
the cruise control function. For details,
refer to “ To set cruise control ” F 7-53.
CAUTION
If the CHECK ENGINE warning light/
malfunction indicator light illumi-
nates, the cruise control indicator
flashes at the same time. At this
time, avoid driving at high speed and have your vehicle inspected at a
SUBARU dealer as soon as possi-
ble.
& Cruise control set in-
dicator This indicator appears when vehicle
speed has been set to use the cruise
control function. Refer to “ To set cruise
control ” F 7-53.
& Automatic headlight
beam leveler warning
light (models with LED
headlights) This light illuminates when the automatic
headlight beam leveler does not operate
normally.
If this light illuminates while driving or does
not turn off approximately 3 seconds after
turning the ignition switch to the “ ON ”
position, have your vehicle inspected at
your SUBARU dealer.
& Front fog light indicator
light (if equipped)
This indicator light illuminates while the
front fog lights are illuminated. & Headlight indicator
light This indicator light illuminates under the
following conditions.
. when the light switch is turned to the
“
” or “ ” position
. when the light control switch is in the
“ AUTO ” position and the headlights illumi-
nate automatically
& Driver ’ s control center differ-
ential auto indicator (STI)
This indicator functions while the ignition
switch is “ ON ” . When it appears, it
indicates that the driver ’ s control center
differential is set to the auto mode. It
disappears when the driver ’ s control
center differential is set to the manualInstruments and controls/Warning and indicator lights
– CONTINUED –3-35
Page 189 of 594

Instruments and controls/Multi function display
Top menu Menu option Description Initial setting Page
Mainte-
nance Engine Oil Set and adjust the oil maintenance notification date.
The default va-
lues for the main-
tenance settings
vary depending
on individual
countries. 3-79
Oil Filter Set and adjust the oil filter maintenance notification date. 3-80
Tires Set and adjust the tire maintenance notification date. 3-80
Maintenance Schedule Set and adjust the vehicle maintenance notification date. 3-80
On/Off Turn on or off the self-check screen that is
activated when the ignition switch is turned to
the “ ON ” position. On or Off Off 3-80
Clear All Settings Clear all items to the factory default settings. Yes or No — 3-81
Go Back Return to the top menu. ——
Driving
History Set Register and overwrite the driving record. — 3-82
Go Back Return to the top menu. ——
Car
Setting Keyless Buzzer Vo-
lume Set the audible signal volume. 0 (OFF) to 7 On 3-84
Hazard Warning
Flasher Set the hazard warning flasher. On or Off On 3-84
Defogger Set and customize the operation of the
defogger. 15 minutes or Continuous 15 minutes 3-85
Interior Light Set and customize the interior light off delay
timer. 10, 20, 30 seconds or Off 30 seconds 3-87
Auto Light Sensor (if
equipped) Set and customize the sensitivity of the auto
light sensor. Low, Mid, High or Max Mid 3-88
Keyless Access
Setting Driver ’ s Door
Unlock (if equipped) Set and customize the keyless access func-
tion. Driver ’ s Door Only, All Driver ’ s Door
Only 3-89
Welcome Lighting Set the leaving time and approaching time. 30, 60, 90 seconds or Off 30 seconds 3-90
Go Back Return to top menu. ——3-60
Page 224 of 594

turned off when the key is removed from
the ignition switch.
NOTE The light control switch can be oper-
ated (except auto on/off headlights),
even under the following conditions.
. when the key is not inserted into the
ignition switch (models without “ key-
less access with push-button start
system ” )
. when the push-button ignition
switch is turned off (models with “ key-
less access with push-button start
system ” )
If the driver ’ s door is opened while the
headlights are illuminated under such
conditions, the chirp sound will inform
the driver that the lights are illumi-
nated. & Headlights
To turn on the headlights, turn the knob on
the end of the turn signal lever.
“ ” position
Headlights, parking lights, front side mar-
ker lights, rear side marker lights, tail lights
and license plate lights are on.
“
” position
Parking lights, front side marker lights,
rear side marker lights, tail lights and
license plate lights are on. “
” position: auto on/off headlights (if
equipped)
When the ignition switch is in the “ ON ”
position, headlights, parking lights, front
side marker lights, rear side marker lights,
tail lights and license plate lights are
automatically on or off depending on the
level of the ambient light.
“
” position
The headlights are all off.
NOTE The sensitivity of the auto on/off head-
lights can be changed by a SUBARU
dealer. Consult your SUBARU dealer
for details. Also, for models with a multi
function display, the setting can be
changed using the display. For details,
refer to “ Auto light sensor sensitivity
setting ” F 3-88.Instruments and controls/Light control switch
– CONTINUED –3-95
Page 225 of 594

Instruments and controls/Light control switch
! Sensor for the auto on/off head-
lights (if equipped)
The sensor is on the instrument panel as
shown in the illustration.
CAUTION
If any object is placed on or near the
sensor, the sensor may not detect
the level of the ambient light cor-
rectly and the auto on/off headlights
may not operate properly. & High/low beam change
(dimmer)
To change from low beam to high beam,
push the turn signal lever forward. When
the headlights are on high beam, the high
beam indicator light “
” on the combina-
tion meter is also on.
To switch back to low beam, pull the lever
back to the center position. & Headlight flasher
CAUTIONDo not hold the lever in the flashing
position for more than just a few
seconds.
To flash the headlights, pull the lever
toward you and then release it. The high
beam will stay on for as long as you hold
the lever. The headlight flasher works
even though the lighting switch is in the
“
” (off) position.
When the headlights are on high beam,
the high beam indicator light “
” on the
combination meter is also on.3-96
Page 226 of 594

& Daytime running light system WARNINGThe brightness of the illumination of
the high beam headlights is reduced
by the daytime running light system.
The light switch must always be
turned to the “
” position when it
is dark outside.
The high beam headlights will automati-
cally illuminate at reduced brightness
when the following conditions are fulfilled.
. The engine is running.
. The parking brake is fully released.
. The light control switch is in the
“ AUTO ” (if equipped), “
” or off position.
. For CVT models, the select lever is in a
position other than the “ P ” position.
NOTE . When the light switch is in the “ ”
position, the instrument panel illumina-
tion, front side marker lights, tail lights
and license plate lights are also illumi-
nated.
. For models with the auto on/off
headlights, while the light control
switch is in the “ AUTO ” position and
the system is activated to the auto-on
mode depending on the ambient light level, the high beam headlights that
have illuminated at reduced brightness
turn off, and the low beam headlights
turn on alternatively. At this time, the
instrument panel illumination, front
side marker lights, tail lights and
license plate lights are also illuminated.
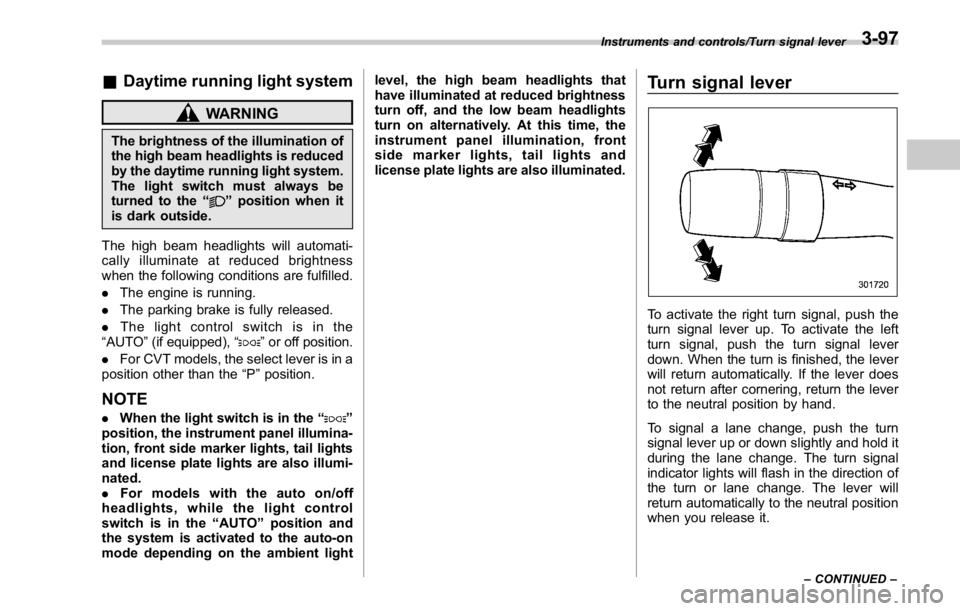
Turn signal lever
To activate the right turn signal, push the
turn signal lever up. To activate the left
turn signal, push the turn signal lever
down. When the turn is finished, the lever
will return automatically. If the lever does
not return after cornering, return the lever
to the neutral position by hand.
To signal a lane change, push the turn
signal lever up or down slightly and hold it
during the lane change. The turn signal
indicator lights will flash in the direction of
the turn or lane change. The lever will
return automatically to the neutral position
when you release it. Instruments and controls/Turn signal lever
– CONTINUED –3-97
Page 227 of 594

Instruments and controls/Illumination brightness control
& One-touch lane changerTo flash the turn signal and turn signal
indicator light three times, push the turn
signal lever up or down slightly and
immediately release it.
The operational/non-operational setting of
the one-touch lane changer ’ s can be
changed by a SUBARU dealer. Contact
the nearest SUBARU dealer for details. Illumination brightness con-
trol
You can adjust the illumination brightness
of the combination meter, the climate
control panel, etc. by turning the control
dial.
. To brighten, turn the control dial up-
ward.
. To darken, turn the control dial down-
ward.
The multi function display automatically
adjusts its brightness together with the
brightness level of the instrument panel.
To adjust the display ’ s contrast, refer to
“ Contrast setting ” F 3-69. NOTE . When the control dial is turned fully
upward, the illumination brightness
becomes the maximum and the auto-
matic dimming function does not work
at all.
. The brightness setting is not can-
celed even when the ignition switch is
turned to the “ LOCK ” / “ OFF ” position.3-98
Page 229 of 594

Instruments and controls/Fog light switch
are met.
. The light control switch is in the “
”
position
. The light control switch is in the
“ AUTO ” position and the low beam head-
lights turn on automatically
. The fog light switch is in the “
”
position
. The low beam mode is selected (the
turn signal lever is in the center position)
. The select lever is in a position other
than the “ R ” position
. The steering responsive fog lights
system has not been deactivated
. The operating conditions such as the
steering angle and vehicle speed are met
The front fog lights on both sides will turn
on as usual if all of the following conditions
are met.
. The light control switch is in the “
”
position
. The light control switch is in the
“ AUTO ” position and the low beam head-
lights turn on automatically
. The fog light switch is in the “
”
position
. The low beam mode is selected (the
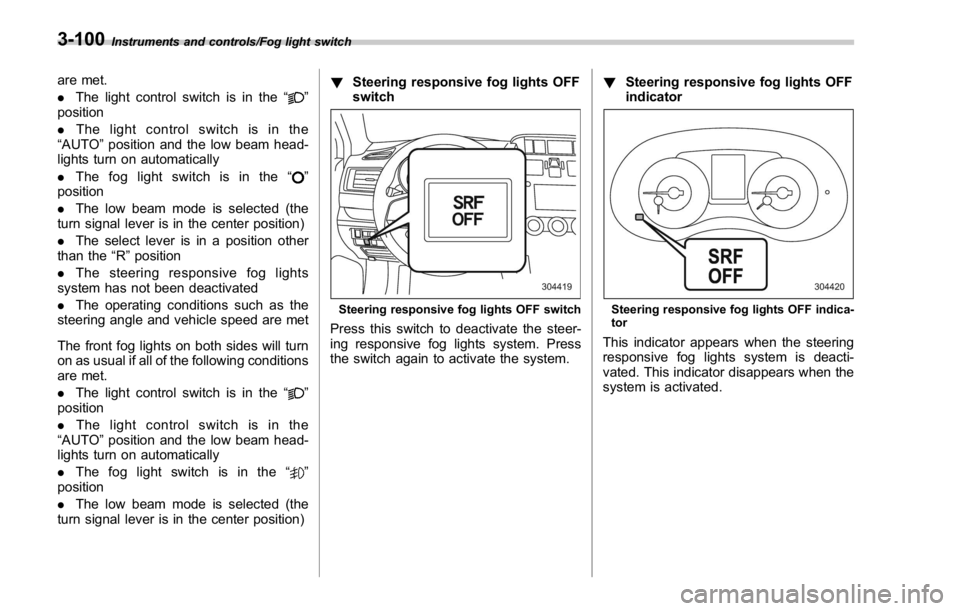
turn signal lever is in the center position) ! Steering responsive fog lights OFF
switch
Steering responsive fog lights OFF switch
Press this switch to deactivate the steer-
ing responsive fog lights system. Press
the switch again to activate the system. ! Steering responsive fog lights OFF
indicator
Steering responsive fog lights OFF indica-
tor
This indicator appears when the steering
responsive fog lights system is deacti-
vated. This indicator disappears when the
system is activated.3-100
Page 267 of 594

Audio/Basic operation
Item Function
Vocal Im-
age Con-
trol Select to pick-up vocal sound
signal from the sound data, and
adjust it to right/left or front/rear.
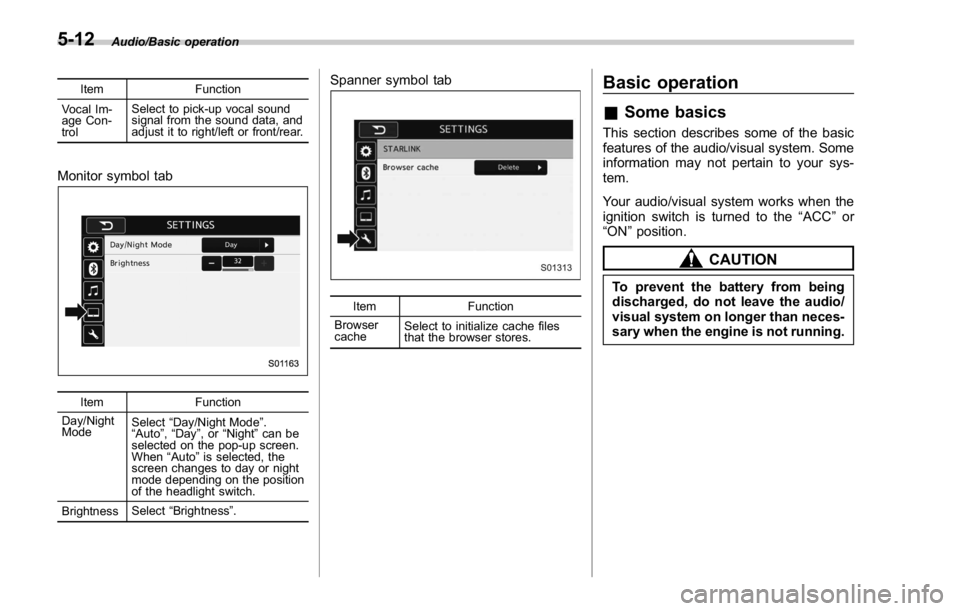
Monitor symbol tab
Item Function
Day/Night
Mode Select “ Day/Night Mode ” .
“ Auto ” , “ Day ” ,or “ Night ” can be
selected on the pop-up screen.
When “ Auto ” is selected, the
screen changes to day or night
mode depending on the position
of the headlight switch.
Brightness Select “ Brightness ” . Spanner symbol tab
Item Function
Browser
cache Select to initialize cache files
that the browser stores.Basic operation & Some basics This section describes some of the basic
features of the audio/visual system. Some
information may not pertain to your sys-
tem.
Your audio/visual system works when the
ignition switch is turned to the “ ACC ” or
“ ON ” position.
CAUTIONTo prevent the battery from being
discharged, do not leave the audio/
visual system on longer than neces-
sary when the engine is not running.5-12