Page 210 of 328

3.20
ELECTRIC SUNROOF (2/3)Closing the sunroof by
remote control
(depending on the vehicle)
If you press the locking button on
the card twice in quick succession
RENAULT,, the windows and the elec-
tric sunroof will close automatically.
It is recommended that the user only
operates the system when the vehi-
cle can be seen clearly and no one is
inside.
Special features
Your vehicle is fitted with an anti-pinch
facility: when the sunroof encounters
resistance whilst closing (branch of
a tree, etc.), it stops and then moves
back a few centimetres.
After closing the sunroof by remote
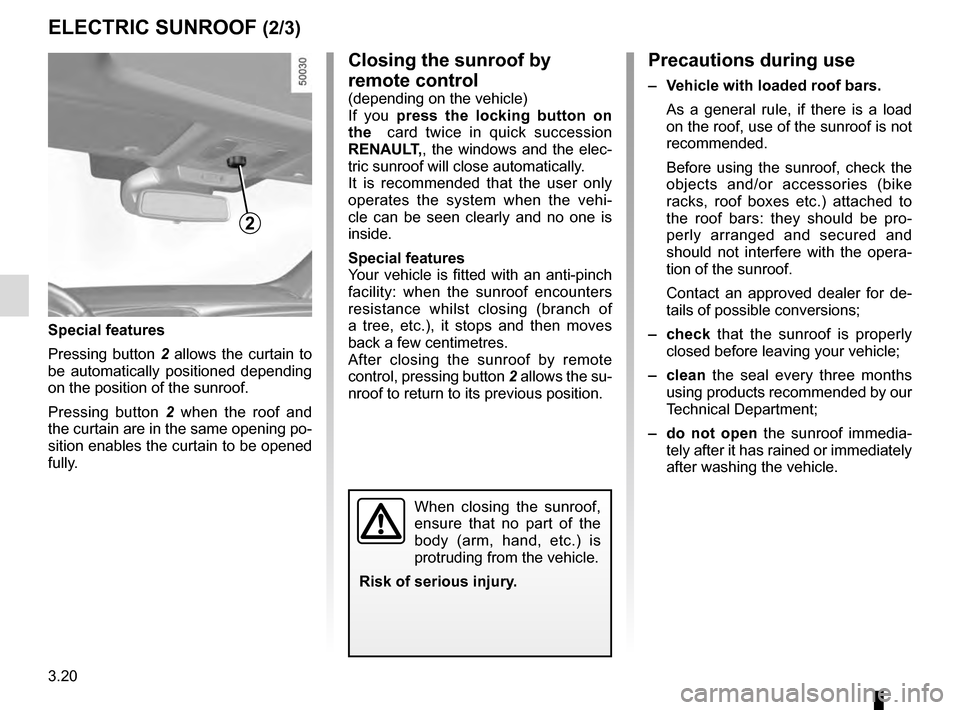
control, pressing button 2 allows the su-
nroof to return to its previous position.
Precautions during use
– Vehicle with loaded roof bars.
As a general rule, if there is a load
on the roof, use of the sunroof is not
recommended.
Before using the sunroof, check the
objects and/or accessories (bike
racks, roof boxes etc.) attached to
the roof bars: they should be pro-
perly arranged and secured and
should not interfere with the opera-
tion of the sunroof.
Contact an approved dealer for de-
tails of possible conversions;
– check that the sunroof is properly
closed before leaving your vehicle;
– clean the seal every three months using products recommended by our
Technical Department;
– do not open the sunroof immedia-
tely after it has rained or immediately
after washing the vehicle.
2
Special features
Pressing button 2 allows the curtain to
be automatically positioned depending
on the position of the sunroof.
Pressing button 2 when the roof and
the curtain are in the same opening po-
sition enables the curtain to be opened
fully.
When closing the sunroof,
ensure that no part of the
body (arm, hand, etc.) is
protruding from the vehicle.
Risk of serious injury.
Page 219 of 328
3.29
Centre seat headrest C
storage position
Press tab 2 and lower the headrest
completely.
When the headrest is set at the
lowest position, this is for storage
only. It should not be in this position
when a seat is occupied.
REAR HEADRESTS
Position for use A
Raise the headrest as far as possible to
use it in the high position. Check that it
is correctly locked.
Storage position B
Press the button 1 and lower the head-
rest completely.
When the headrest is set at the
lowest position, this is for storage
only. It should not be in this position
when a seat is occupied.
The headrest is a safety
component; check that it is
fitted and in the correct po-
sition. The top of the head-
rest should be as close as possible
to the top of the head.
1
2
C
A
B
Page 220 of 328

3.30
To manually fold down the
seatbacks
Ensure that the front seats are far
enough forward.
Raise the side headrests to the highest
position and lower the central headrest
fully.
Pull the control 1 and lower the seat-
back A.
REAR BENCH SEAT (1/2)
1
To raise the seatback
To replace the seatback, proceed in the
reverse order to removal.
Refit the seatback and click it back into
place.
A
For safety reasons, carry
out any adjustments when
the vehicle is not being
driven.
The configuration of the
two-seat bench with the
small seatback A pulled
down, does not allow the
central seat to be used as it would
be impossible to buckle the seat belt
(belt buckles inaccessible).
When refitting the seat-
back, make sure it is cor-
rectly locked in place.
If seat covers are fitted ,
make sure these do not prevent the
seatback latch from locking in.
Make sure that the seat belts are
positioned correctly.
Reposition the headrests.
When moving the rear
seats, ensure that nothing
obstructs the anchorage
points (passenger’s arm or
leg, a pet, gravel, cloth, toys, etc.).
Before folding down any side rear seat,
fasten the seat belt buckle from the seat
concerned into its corresponding catch.
This will prevent the seat belt becoming
trapped when the seat is returned to its
position for use.
In all cases, check that the seat belts
are operating correctly.
Page 239 of 328

3.49
ROOF BARS
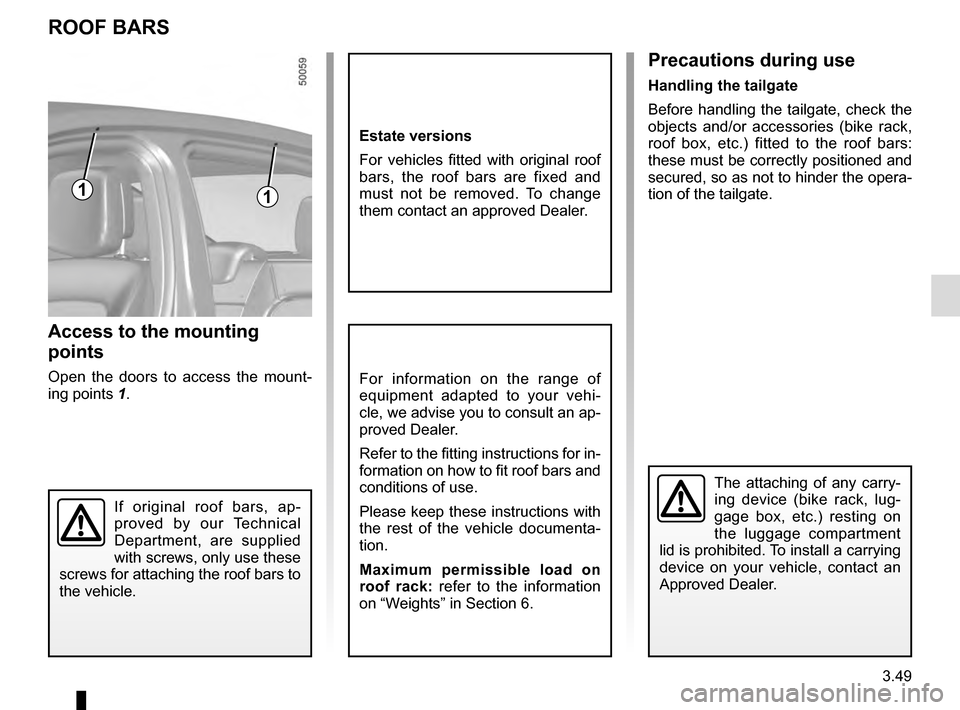
Access to the mounting
points
Open the doors to access the mount-
ing points 1.For information on the range of
equipment adapted to your vehi-
cle, we advise you to consult an ap-
proved Dealer.
Refer to the fitting instructions for in-
formation on how to fit roof bars and
conditions of use.
Please keep these instructions with
the rest of the vehicle documenta-
tion.
Maximum permissible load on
roof rack: refer to the information
on “Weights” in Section 6.
11
If original roof bars, ap-
proved by our Technical
Department, are supplied
with screws, only use these
screws for attaching the roof bars to
the vehicle.
The attaching of any carry-
ing device (bike rack, lug-
gage box, etc.) resting on
the luggage compartment
lid is prohibited. To install a carrying
device on your vehicle, contact an
Approved Dealer.
Precautions during use
Handling the tailgate
Before handling the tailgate, check the
objects and/or accessories (bike rack,
roof box, etc.) fitted to the roof bars:
these must be correctly positioned and
secured, so as not to hinder the opera-
tion of the tailgate.
Estate versions
For vehicles fitted with original roof
bars, the roof bars are fixed and
must not be removed. To change
them contact an approved Dealer.
Page 245 of 328
4.3
BONNET (2/2)
Closing the bonnet
Check that nothing has been left in the
engine compartment.
To close the bonnet again, hold the
bonnet in the middle and guide it down,
allowing a 30 cm gap before it is closed,
then release it. It will latch automatically
under its own weight.
Ensure that the bonnet is
properly locked.
Check that nothing is pre-
venting the catch from loc-
king (gravel, cloth, etc.).
After carrying out any work
in the engine compart-
ment, check that nothing
has been left behind (cloth,
tools, etc.).
These may damage the engine or
cause a fire.
In the event of even a slight
impact involving the radia-
tor grille or bonnet, have the
bonnet lock checked by an
authorised dealer as soon as pos-
sible.
Page 246 of 328

4.4
ENGINE OIL LEVEL: general information
It is normal for an engine to use oil for
lubrication and cooling of moving parts
and it is normal to top up the level be-
tween oil changes.
However, contact your approved
Dealer if more than 0.5 litres is being
consumed every 600 miles (1,000 km)
after the running in period.
Oil change frequency: check the oil
level from time to time and certainly
before any long journey to avoid the
risk of damaging your engine.
Reading the oil level
The oil level should be read with the ve-
hicle on level ground, after the engine
has been switched off for some time.
The dipstick must be used to read
the exact oil level and make sure
that the maximum level has not been
exceeded (risk of engine damage).
Refer to the following pages.
The instrument panel display only
alerts the driver when the oil level is at
its minimum. – remove the dipstick and wipe with a
clean, lint-free cloth;
– push the dipstick in as far as it will go (for vehicles equipped with a cap-
type dipstick C, screw the cap in as
far as it will go);
– take out the dipstick again;
– read the level: it should never fall below minimum mark A or exceed
maximum mark B.
Once the operation has been com-
pleted, ensure that the dipstick is
pushed in as far as it will go or that
the “cap-type dipstick” is completely
screwed in.
C
A
B
A
B
In order to prevent splashing, it is
recommended that a funnel be used
when topping up/filling the oil.
Before performing any
action in the engine com-
partment, the ignition must
be switched off (please see
the information on “Starting, stop-
ping the engine” in Section 2).
Exceeding the maximum
engine oil level
Under no circumstances
must the maximum fill
level B be exceeded: risk of damage
to the engine and catalytic con-
verter.
If the oil level exceeds the maximum
level, do not start your vehicle and
contact an approved Dealer.
Page 247 of 328

4.5
ENGINE OIL LEVEL: topping up, filling (1/2)
Topping up/Filling
The vehicle must be parked on level
ground and the engine should be cold
(for instance, before the engine is
started up for the first time in the day).– Unscrew cap
1;
– top up the level (as a guide, the ca- pacity between the minimum and
maximum reading on the dipstick 2
is between 1.5 and 2 litres, depend-
ing on the engine);
– wait for approximately 20 minutes to allow the oil to flow into the engine;
– check the level using the dipstick 2
(as described above).
Once the operation has been com-
pleted, ensure that the dipstick is
pushed in as far as it will go or that
the “cap-type dipstick” is completely
screwed in.
Do not exceed the max level and
do not forget to refit cap 1 and dip-
stick 2.
1
21
21
2
Before performing any
action in the engine com-
partment, the ignition must
be switched off (please see
the information on “Starting, stop-
ping the engine” in Section 2).
In order to prevent splashing, it is
recommended that a funnel be used
when topping up/filling the oil.
Page 248 of 328

4.6
Engine oil grade
Refer to the Maintenance Service
Booklet for your vehicle.
Never run the engine in an
enclosed space as exhaust
gases are poisonous.
Engine oil change: if you
are changing the oil when
the engine is hot, be careful
not to scald yourself if the
oil overflows.
Filling: take care when
topping up the oil that
no oil drips onto engine
components - risk of fire.
Remember to refit the cap securely
as there is a risk of fire if oil splashes
onto hot engine components.
Consult your approved Dealer at
once if you notice an abnormal or
repeated drop in any of the fluid
levels.
ENGINE OIL LEVEL: topping up, filling (2/2) / OIL CHANGE
Exceeding the maximum
engine oil level
Under no circumstances
must the maximum fill level
be exceeded: risk of damage to the
engine and catalytic converter.
If the oil level exceeds the maximum
level, do not start your vehicle and
contact an approved Dealer.
Oil change
Service interval: refer to the
Maintenance Service Booklet for your
vehicle.
Oil change capacity
Please refer to the maintenance docu-
ment for your vehicle, or contact an au-
thorised dealer.
Always check the engine oil level using
the dipstick, as explained previously (it
should never fall below the minimum
level, or be over the maximum level on
the dipstick).
When working in the engine
compartment, ensure that
the windscreen wiper stalk
is in the park position.
Risk of injury.
The engine may be hot
when carrying out opera-
tions in close proximity. In
addition, the engine cooling
fan can come on at any moment.
Risk of injury.