2016 RENAULT KADJAR warning light
[x] Cancel search: warning lightPage 143 of 300

2.39
Mode selector
Depending on the road conditions, turn-
ing the selector 1 enables the following
modes to be selected:
– AUTO ;
– 2WD ;
– 4WD Lock.
“AUTO" mode
To activate this mode, turn selector 1 to
the “AUTO” position.
Operating principle
“AUTO” mode automatically distributes
the engine torque between the front and
rear axles according to the road condi-
tions and the vehicle speed. This po-
sition optimises roadholding. Use this
mode on any type of road (dry, snow-
covered, slippery, etc.) or when towing
(trailer or caravan).
The warning light
\f on the instru-
ment panel will come on.
TRANSMISSION: 4-wheel drive (4WD) (1/4)
“2WD" mode
To activate this mode, turn the selec-
tor 1 to the “2WD” position. The warn-
ing light
‘ on the instrument panel
will come on.
Operating principle
The “2WD” mode uses the front wheels
only. Use this mode on dry roads with
good grip.
To deactivate this mode, turn the selec-
tor 1 to the “AUTO” position. Warning
light
‘ goes out on the instrument
panel.
Remember that driving a vehicle off-
road is very different to driving it on
the road.
To make the most of your vehicle
in an off-road situation, we recom-
mend that you are trained to drive a
4x4 (4WD) vehicle.
The safety of both you and your
passengers is your responsibility,
and depends on your skill and the
care you take when driving off-road.
1
Page 144 of 300

2.40
TRANSMISSION: 4-wheel drive (4WD) (2/4)
This problem may be resolved by
changing the tyres. Always use four
identical tyres (same brand, profile,
etc.) and with similar wear.
In the event of excessive wheelspin, the
mechanical components may overheat.
If this happens:
– at first, the
’ warning light
comes on. “4WD Lock” mode is still
active – however, we recommend
that you stop as soon as possible to
allow the system to cool down (until
the warning light goes out);
– if the wheels still spin, the system au- tomatically switches to “2WD” mode
to protect the mechanical compo-
nents.
The message “4WD overheating” is
displayed on the instrument panel.
The mode cannot be changed while
the message is displayed.
Note: If the vehicle speed exceeds
approximately 24.8 mph (40 km/h) in
“4WD Lock” mode, the system auto-
matically switches back to “AUTO”
mode.
The
’ warning light goes out and
the
\f warning light comes on.
Special features of the
4-wheel drive transmission
The vehicle may make more noise when
the “AUTO" or "4WD Lock" modes are
activated. This is normal. If the system
detects a difference in the dimensions
of the front and rear wheels (eg. un-
derinflation, severe wear on an axle),
the system automatically switches to
"2WD" mode.
The message “4WD unavailable unsuit-
able tyres” is displayed on the instru-
ment panel. Drive as soon as possible
at a moderate speed to an approved
dealer.
“4WD Lock" mode
To activate this mode, turn selector 1 to
the “4WD Lock” position. The selector
the returns to the “AUTO” position. The
’ indicator light will light up on the
instrument panel.
Operating principle
“4WD Lock” mode distributes the
engine torque between the front and
rear axles in order to optimise the per-
formance capacity of the vehicle in off-
road situations. This mode should only
be used in extreme driving conditions
(mud, steep slopes, sand).
To deactivate this mode, turn selector 1
to the “4WD Lock” position again. The
warning light goes out on the instru-
ment panel.
Page 145 of 300

2.41
TRANSMISSION: 4-wheel drive (4WD) (3/4)
Electronic stability program and
traction control when driving off-
road
When driving on soft ground (sand,
mud, deep snow), we recommend that
you deactivate the ESC function by
pressing the “ESC” switch.
In this case, only individual wheel brak-
ing remains active. This function ap-
plies the brake to any wheel that is slip-
ping, allowing the engine torque to be
transferred to the wheels with the most
grip. This is particularly useful when
crossing a bridge.
All the ESC functions will be reacti-
vated when the vehicle speed reaches
approximately 31 mph (50 km/h) (24.8
mph [40 km/h] in 4WD Lock mode),
when the engine is restarted or when
the “ESC” switch is pressed again.Operating faults
If the system detects an operating fault,
it automatically switches to “2WD”
mode. The message “Check 4WD” is
displayed on the instrument panel, and
the
‘ and © warning lights
come on.
Drive as soon as possible at a moder-
ate speed to an approved dealer.
For certain operating faults, the system
may not be able to switch to “2WD" or
"4WD Lock" mode. "AUTO" mode re-
mains active.
Contact an approved dealer as soon as
possible.
After stopping the engine, the system
may take up to five minutes to cool
down.
If the system detects excessive wheel-
spin on the front wheels, it adapts the
engine to run in a way that reduces
wheelspin.
Anti-lock braking in
LOCK mode
When “4WD Lock" mode is active, the
ABS switches to off-road mode. In this
case, the wheels may lock intermit-
tently to achieve better grip, thus reduc-
ing braking distances on soft ground.
When this mode is active:
– the vehicle’s manoeuvrability is lim- ited during braking. This operating
mode is therefore not recommended
in very low-grip conditions (eg. ice).
– there may be some noise. This is normal, and does not indicate an op-
erating fault.
Page 149 of 300
2.45
265
Adjustment
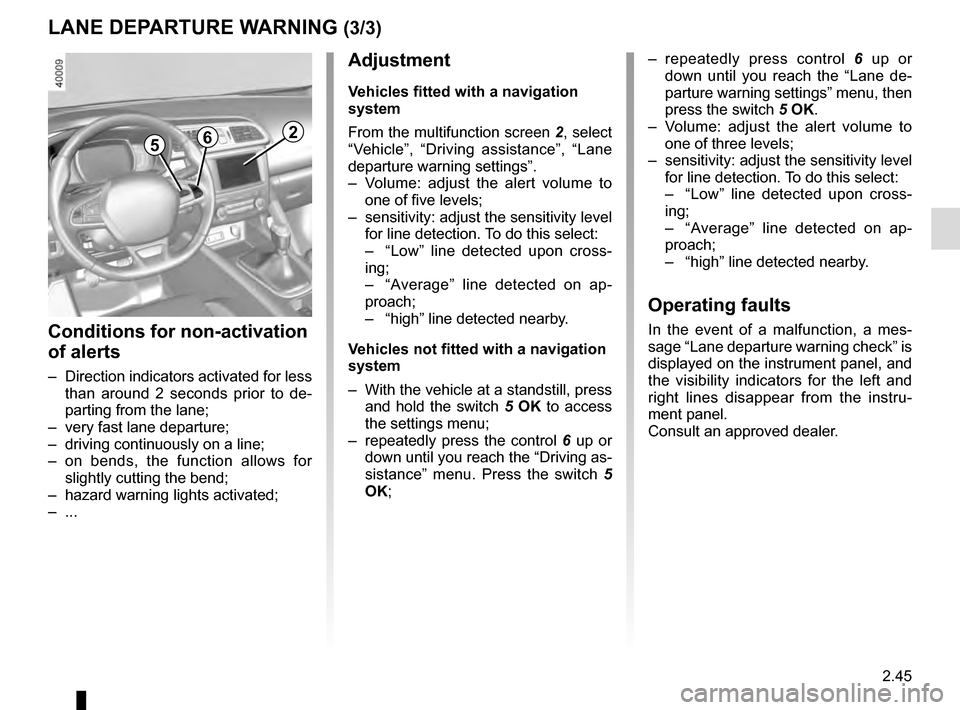
Vehicles fitted with a navigation
system
From the multifunction screen 2, select
“Vehicle”, “Driving assistance”, “Lane
departure warning settings”.
– Volume: adjust the alert volume to one of five levels;
– sensitivity: adjust the sensitivity level for line detection. To do this select:
– “Low” line detected upon cross-
ing;
– “Average” line detected on ap-
proach;
– “high” line detected nearby.
Vehicles not fitted with a navigation
system
– With the vehicle at a standstill, press and hold the switch 5 OK to access
the settings menu;
– repeatedly press the control 6 up or
down until you reach the “Driving as-
sistance” menu. Press the switch 5
OK;
– repeatedly press control 6 up or
down until you reach the “Lane de-
parture warning settings” menu, then
press the switch 5 OK.
– Volume: adjust the alert volume to one of three levels;
– sensitivity: adjust the sensitivity level for line detection. To do this select:
– “Low” line detected upon cross-
ing;
– “Average” line detected on ap-
proach;
– “high” line detected nearby.
Operating faults
In the event of a malfunction, a mes-
sage “Lane departure warning check” is
displayed on the instrument panel, and
the visibility indicators for the left and
right lines disappear from the instru-
ment panel.
Consult an approved dealer.
LANE DEPARTURE WARNING (3/3)
Conditions for non-activation
of alerts
– Direction indicators activated for less than around 2 seconds prior to de-
parting from the lane;
– very fast lane departure;
– driving continuously on a line;
– on bends, the function allows for slightly cutting the bend;
– hazard warning lights activated;
– ...
Page 152 of 300
2.48
1
BLIND SPOT WARNING (3/4)
Operation
This function will indicate:
– when the vehicle speed is between approximately 30 km/h (19 mph) and
140 km/h (87 mph);
– when another vehicle is in the blind spot area and travelling in the same
direction as your vehicle.
If another vehicle is being overtaken,
the indicator 4 will be activated only if
that vehicle remains in the blind spot for
more than one second.
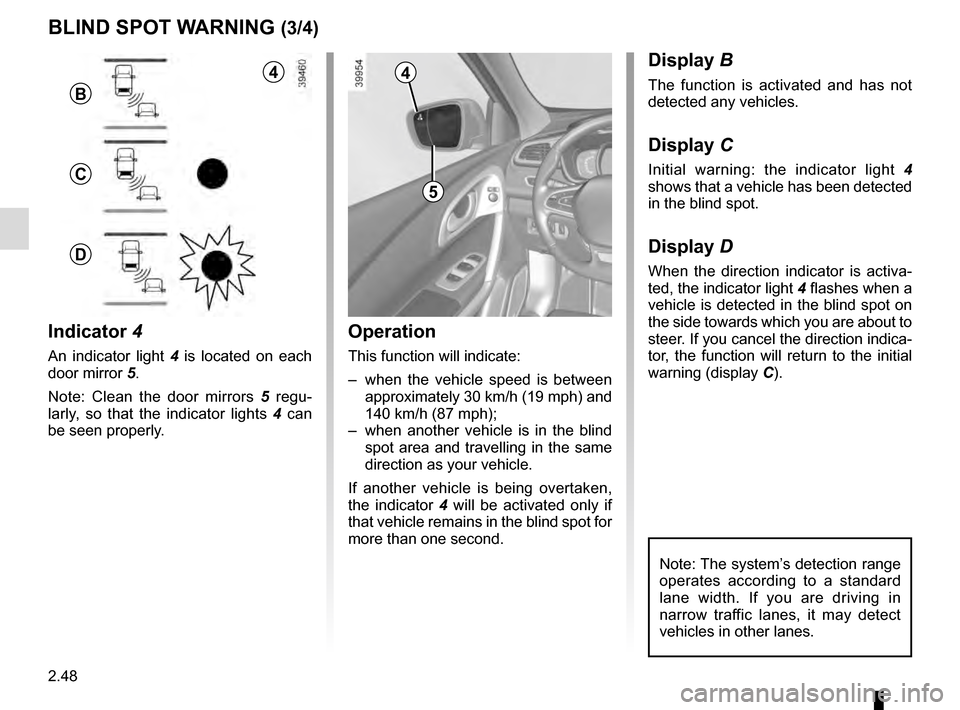
Indicator 4
An indicator light 4 is located on each
door mirror 5.
Note: Clean the door mirrors 5 regu-
larly, so that the indicator lights 4 can
be seen properly.
Display B
The function is activated and has not
detected any vehicles.
Display C
Initial warning: the indicator light 4
shows that a vehicle has been detected
in the blind spot.
Display D
When the direction indicator is activa-
ted, the indicator light 4 flashes when a
vehicle is detected in the blind spot on
the side towards which you are about to
steer. If you cancel the direction indica-
tor, the function will return to the initial
warning (display C).
5
4
B
C
D
Note: The system’s detection range
operates according to a standard
lane width. If you are driving in
narrow traffic lanes, it may detect
vehicles in other lanes.
4
Page 153 of 300
2.49
Operating faults
If the system detects a fault, the mes-
sage “Check blind spot alert” is dis-
played on the instrument panel. Consult
an authorised dealer.
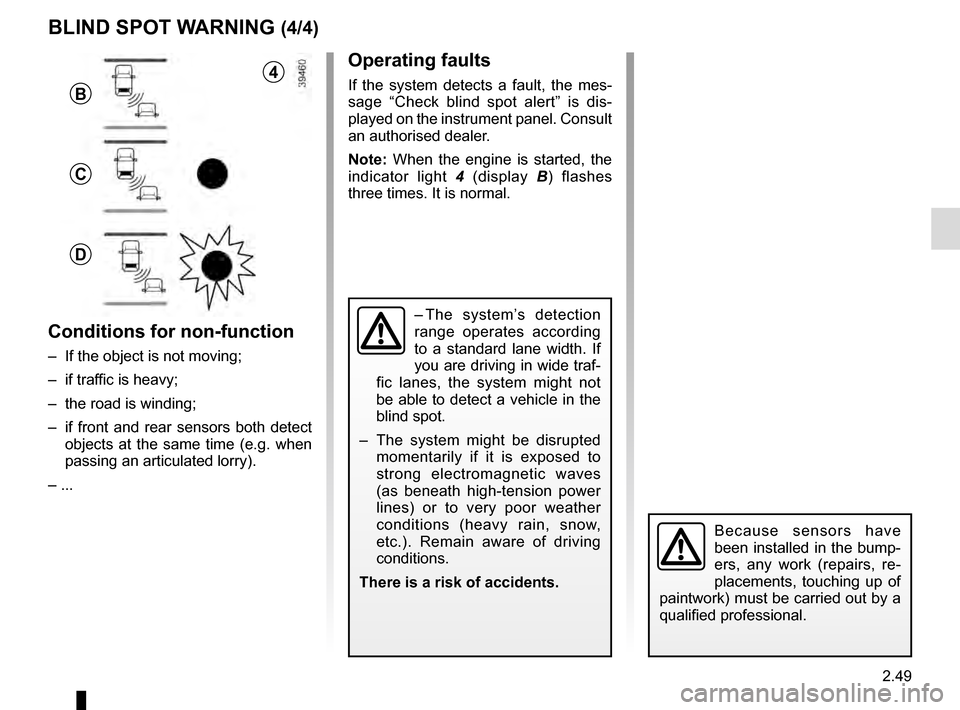
Note: When the engine is started, the
indicator light 4 (display B) flashes
three times. It is normal.
– The system’s detection
range operates according
to a standard lane width. If
you are driving in wide traf-
fic lanes, the system might not
be able to detect a vehicle in the
blind spot.
– The system might be disrupted momentarily if it is exposed to
strong electromagnetic waves
(as beneath high-tension power
lines) or to very poor weather
conditions (heavy rain, snow,
etc.). Remain aware of driving
conditions.
There is a risk of accidents.
BLIND SPOT WARNING (4/4)
Because sensors have
been installed in the bump-
ers, any work (repairs, re-
placements, touching up of
paintwork) must be carried out by a
qualified professional.
4
B
C
D
Conditions for non-function
– If the object is not moving;
– if traffic is heavy;
– the road is winding;
– if front and rear sensors both detect objects at the same time (e.g. when
passing an articulated lorry).
– ...
Page 156 of 300
2.52
CRUISE CONTROL/SPEED LIMITER: speed limiter function (3/3)
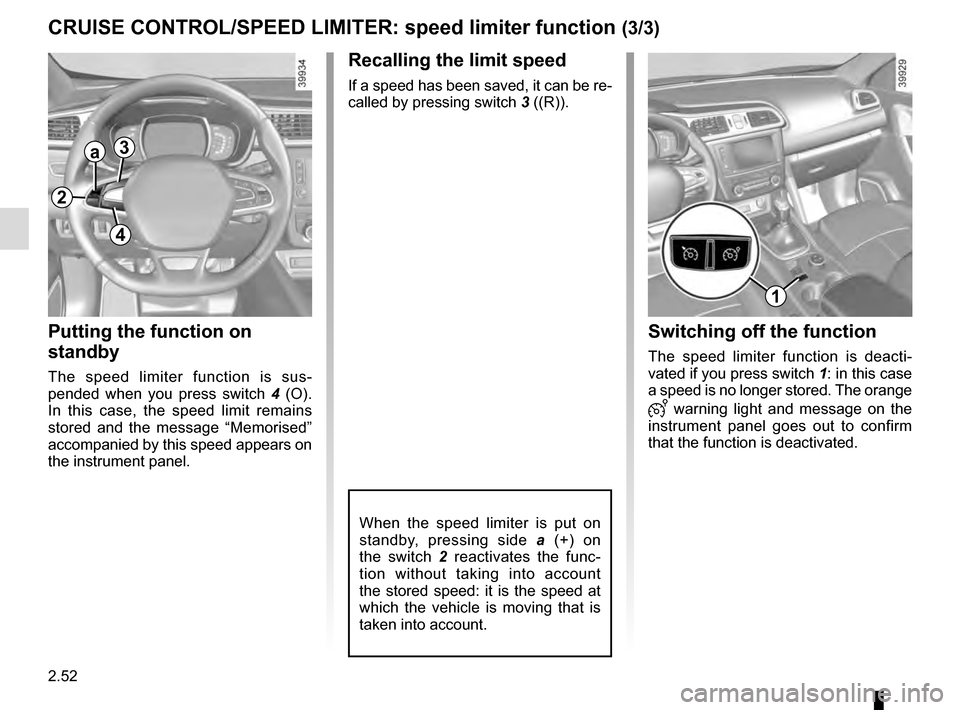
Recalling the limit speed
If a speed has been saved, it can be re-
called by pressing switch 3 ((R)).
Putting the function on
standby
The speed limiter function is sus-
pended when you press switch 4 (O).
In this case, the speed limit remains
stored and the message “Memorised”
accompanied by this speed appears on
the instrument panel.
Switching off the function
The speed limiter function is deacti-
vated if you press switch 1: in this case
a speed is no longer stored. The orange
warning light and message on the
instrument panel goes out to confirm
that the function is deactivated.
When the speed limiter is put on
standby, pressing side a (+) on
the switch 2 reactivates the func-
tion without taking into account
the stored speed: it is the speed at
which the vehicle is moving that is
taken into account.
2
a3
4
1
Page 161 of 300
2.57
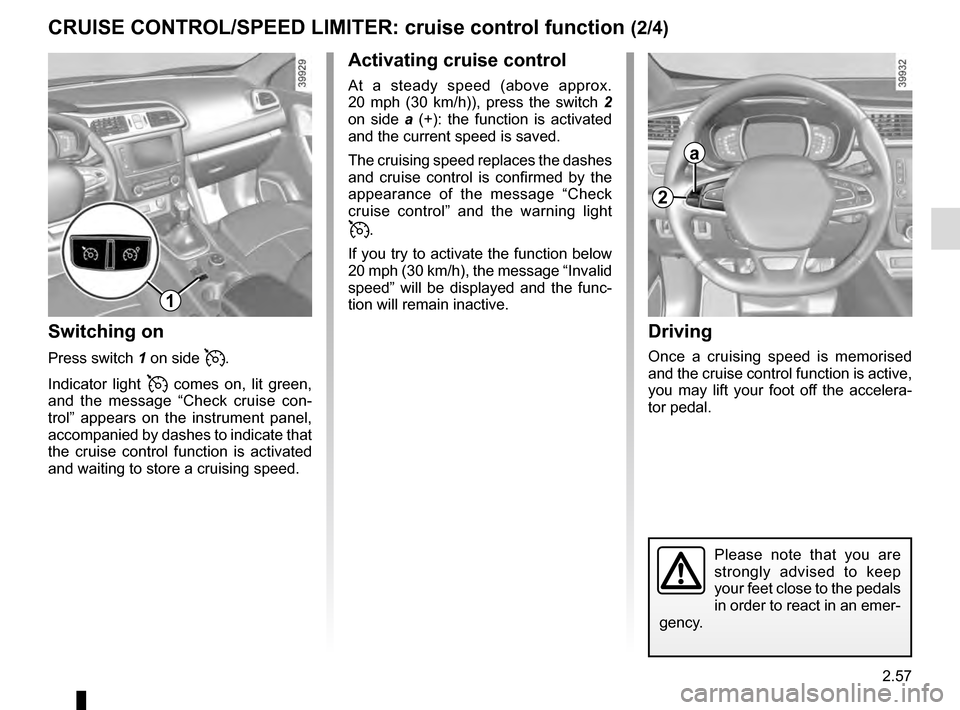
CRUISE CONTROL/SPEED LIMITER: cruise control function (2/4)Driving
Once a cruising speed is memorised
and the cruise control function is active,
you may lift your foot off the accelera-
tor pedal.
Please note that you are
strongly advised to keep
your feet close to the pedals
in order to react in an emer-
gency.
Activating cruise control
At a steady speed (above approx.
20 mph (30 km/h)), press the switch 2
on side a (+): the function is activated
and the current speed is saved.
The cruising speed replaces the dashes
and cruise control is confirmed by the
appearance of the message “Check
cruise control” and the warning light
.
If you try to activate the function below
20 mph (30 km/h), the message “Invalid
speed” will be displayed and the func-
tion will remain inactive.
Switching on
Press switch 1 on side .
Indicator light
comes on, lit green,
and the message “Check cruise con-
trol” appears on the instrument panel,
accompanied by dashes to indicate that
the cruise control function is activated
and waiting to store a cruising speed.
2
a
1